
Revise the Elements
Published copy elements arrive in a project as Approved, and their content is read-only — whether a revision brought them in, or you added them to the copy sheet from other components. To change one, put it back into an editable state, make the change, and submit it for approval again.
This article covers that work inside the copy sheet, including the merged rows you see when the same element is identical across several components. To start a revision, refer to Revise a Published Copy.
Revise the Elements You Need to Change
Put an element back into an editable state before you change it.
| Note: Revise icon is displayed only on elements that came from published copy — an element you add during the project is new copy, so there is nothing published for it to go back to. |

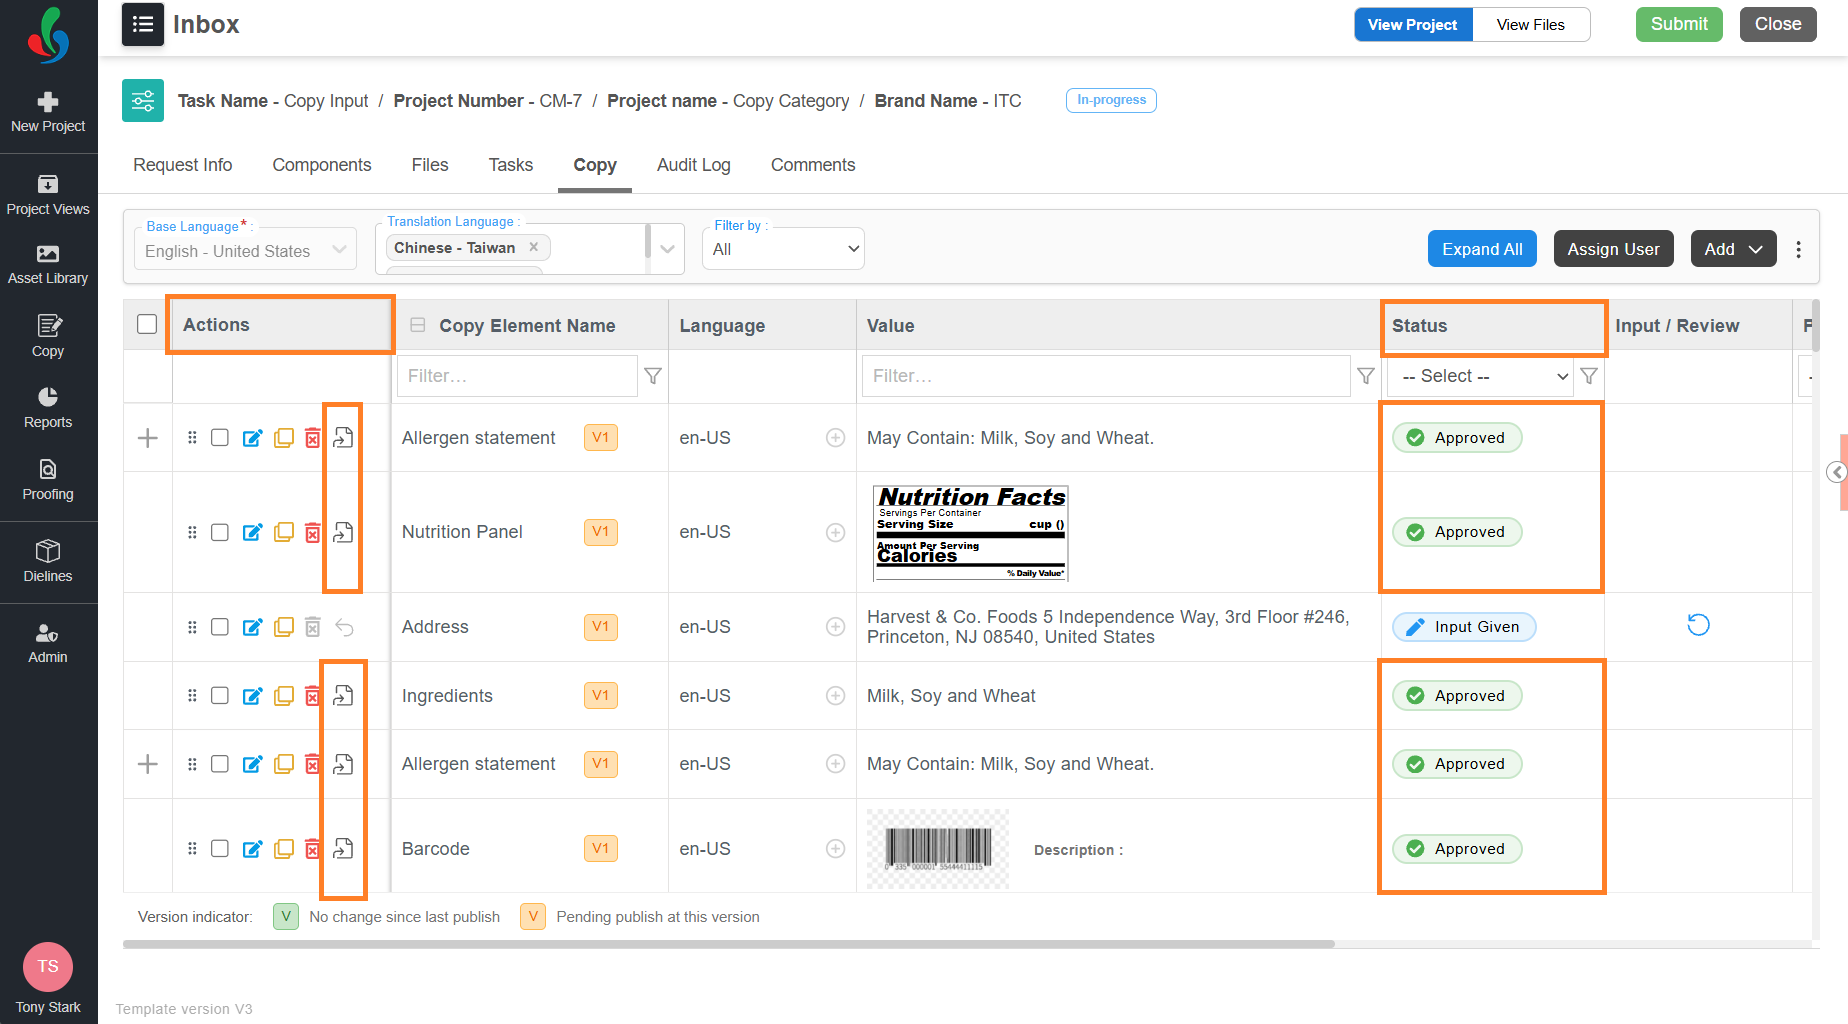
- Locate the required element on the copy sheet.
- Select the Revise icon in the Actions column.
- In the confirmation dialog, select Yes. The element becomes editable and its status returns to Pending for Input, so it must be submitted and approved again.
- How you enter it depends on the element's data type — text, image, or nutrition panel. For more information, refer to Enter Values for Elements.
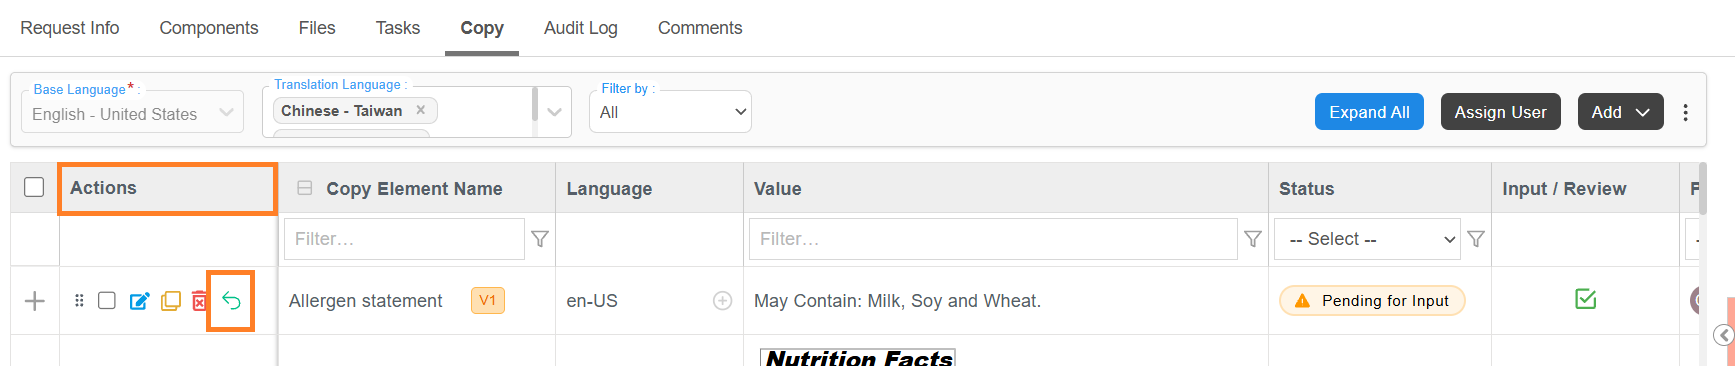
- If required, undo the revision and restore the element's published content.
- Select the Revert icon in the Actions column.
- In the confirmation dialog, select Yes.
- Reverting restores the element as it was published — its content, its published version, the languages it was published in, and the users who were assigned to it. Anything the revision added to the element, including a translation language and the element's history for this revision, is discarded.
- Select the Revert icon in the Actions column.
- To revise or revert several elements in one action, use Bulk Revise and Bulk Revert.

Work with Merged Copy Elements
In a project with more than one component, the same copy element can apply to more than one component. For example, with a 100 ml and a 200 ml component, the Net Content differs between them, but the Address and the Allergen statement apply to both. Where the content is identical, ManageArtworks folds those copies into a single row, so that you edit the content once instead of once per component.
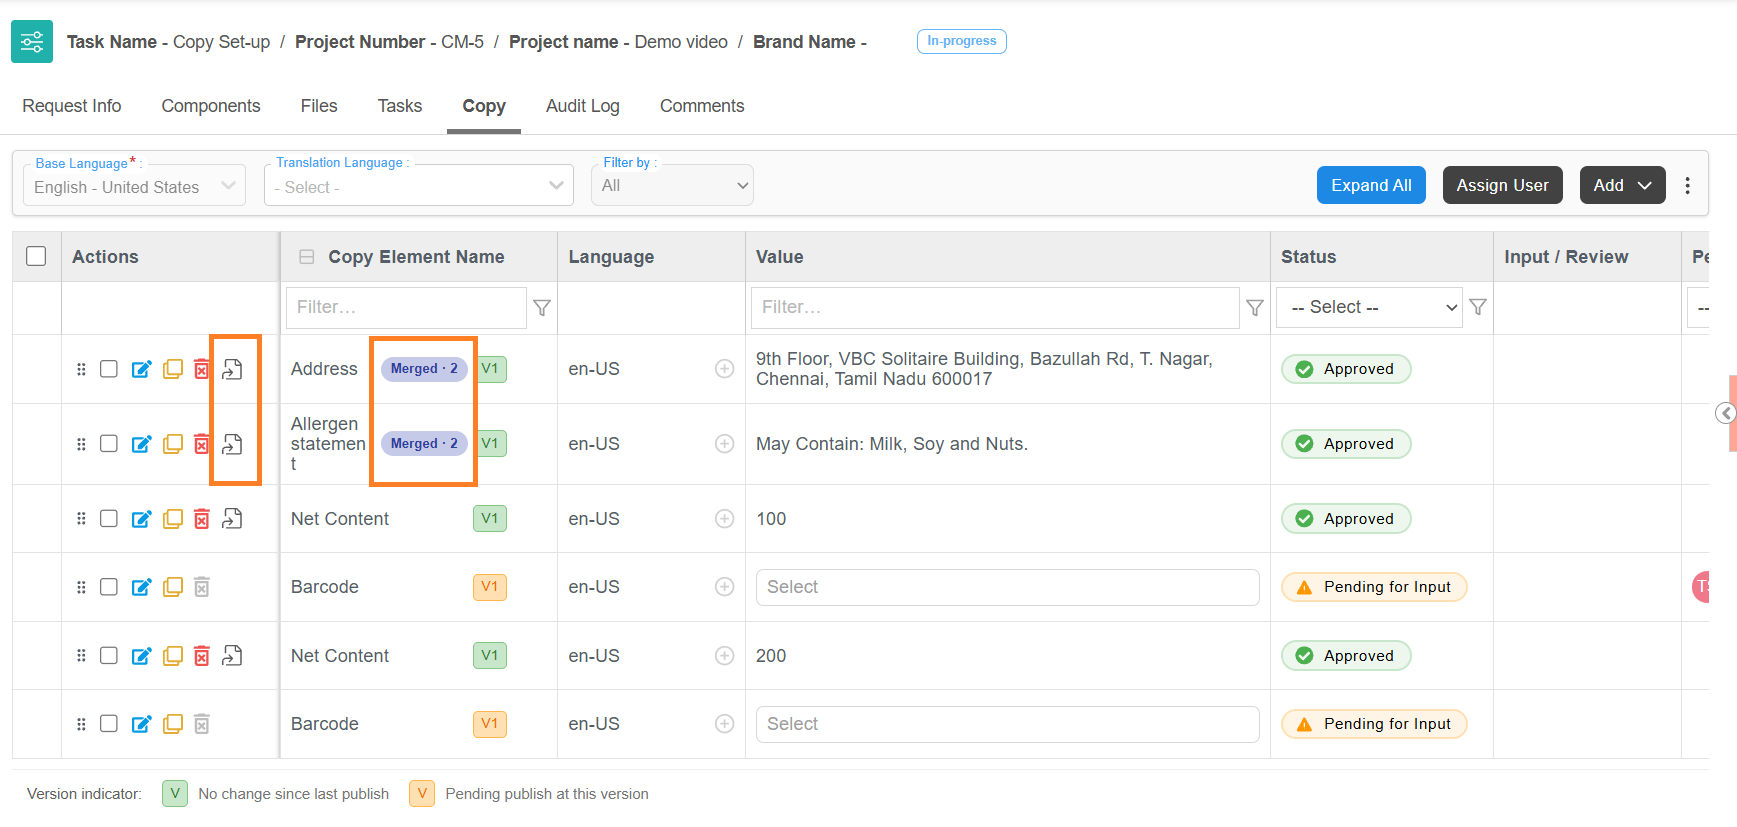
When you revise several components together — 100 ml and 200 ml, in this example — all of their copy elements are added to the Copy tab. Merged elements are identified automatically, and a Merged · 2 badge next to the element name shows how many components are linked to that content.
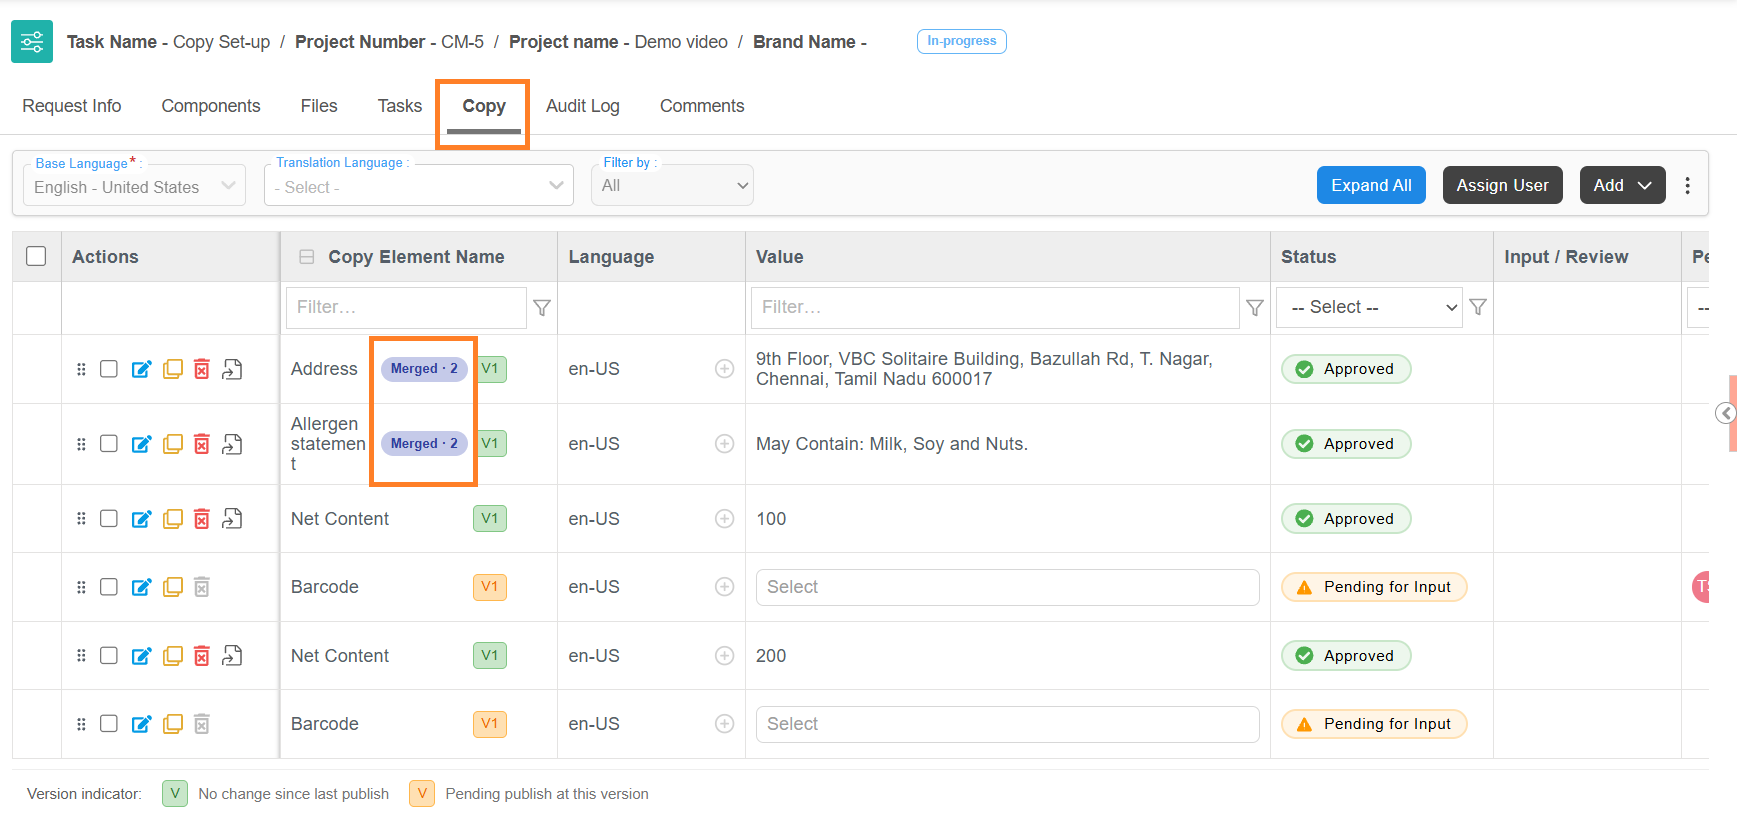
Elements are merged only when all of the following match:
- Element name.
- Element type — text, image, or Nutrition Panel.
- Copy element version.
- Content — the values in every language, the Copy Category, the Priority, the Instruction, and the languages the element is translated into.
- State. Elements that are all revised are merged, and elements that are all still approved are merged. If one matching element is revised while another is still approved, they stay separate.
| Note: At least two matching elements are needed for a merged row. Editing a merged element applies the change to every linked component. |
Revise a Merged Copy Element
Revising a merged copy element is the same as revising any other approved copy element, as described in Revise the Elements You Need to Change. The only difference is that the change affects every linked component.
Important ConsiderationsIf the project splits by component, each component's copy element is listed on its own row and the merged row is no longer displayed. But changes still carry across — editing the element in one component updates it in the others. For example, you revise two components, Cartons and Labels. Both have a Claims element that reads Low Sugar, and you change it to No Sugar. If the template is configured to split by component, each component then has its own Copy tab, and both show No Sugar. If you then change No Sugar to No Added Sugar on the Carton, the Label's Claims element also changes to No Added Sugar. Note: Only the content carries across, not the status. If you select Revise on the Carton element, that element becomes editable and its status changes on the Carton alone — the Label element is unchanged. As soon as you change the content, the updated content appears on the Label too. |