
Change Fonts in an Artwork
Designers often need to change the fonts in an artwork: a font may be missing on their computer, a reviewer may ask for a different font, or an older artwork may need to move to the approved brand fonts. Changing each text frame by hand is slow and easy to get wrong, especially when the artwork uses several fonts.
With Font Map, designers can replace the fonts in an artwork in Adobe Illustrator in one action. For each font they want to change, they choose a source font (a font used in the artwork) and a destination font (a font installed in Illustrator that replaces it). Each pair is a mapping. They can add several mappings and apply them together.
When the mappings are applied, all the live text in each source font changes to its destination font. If the new font needs more space, the plugin reduces the font size so the text still fits its frame. After each mapping, the plugin shows a summary of what changed, including any font size changes, so designers can check the artwork.
 | Note:
|
01. Open Font Map
- Make sure that the artwork you want to change is open and active in Illustrator. If several artworks are open, only the active one is changed.
Note: If you switch to another artwork while Font Map is open, the Source Font drop-down list does not refresh. Close Font Map and open it again to load the fonts of the active artwork. - Open Font Map:
- If you are not signed in to the plugin:
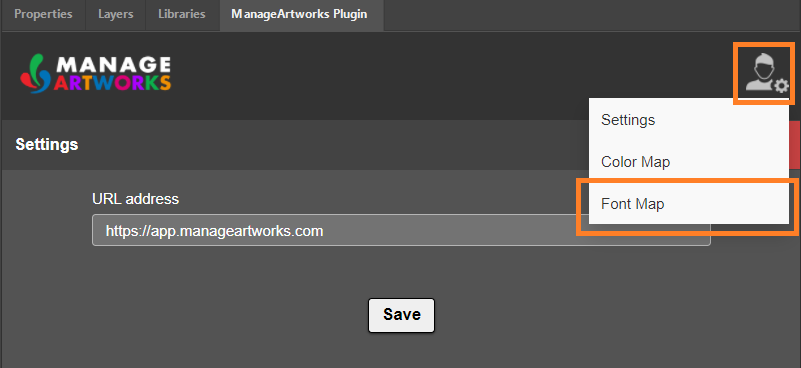
- On the welcome page, select the Settings icon in the upper-right corner of the panel. The Settings page opens.
- Hover over the Settings icon again, then select Font Map.
- On the welcome page, select the Settings icon in the upper-right corner of the panel. The Settings page opens.
- If you are signed in, hover over the Settings icon in the upper-right corner of the panel, then select Font Map.
- If you are not signed in to the plugin:
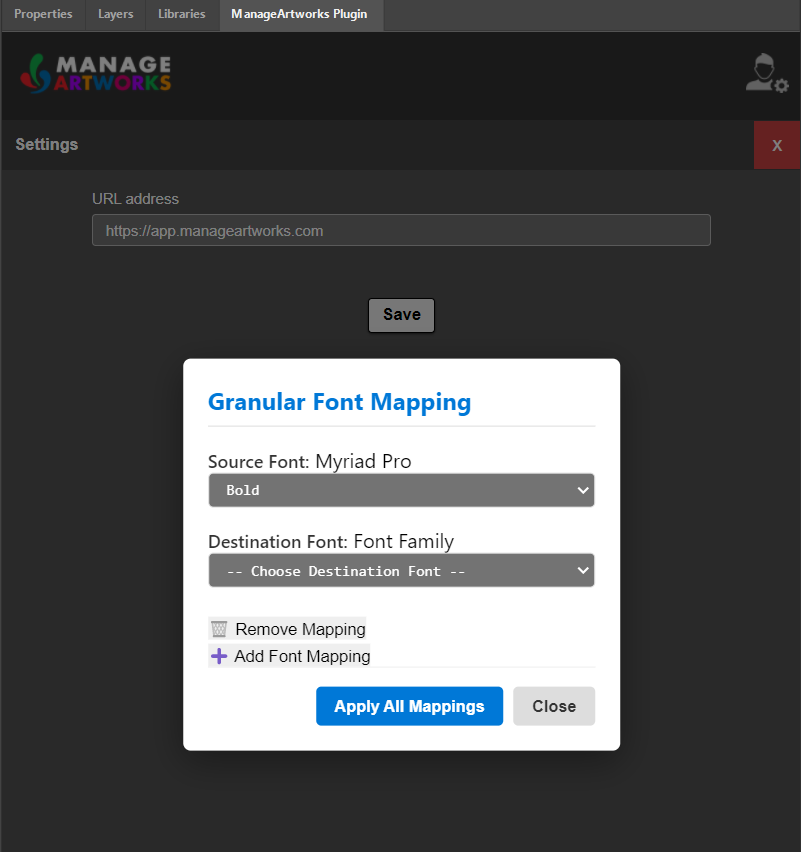
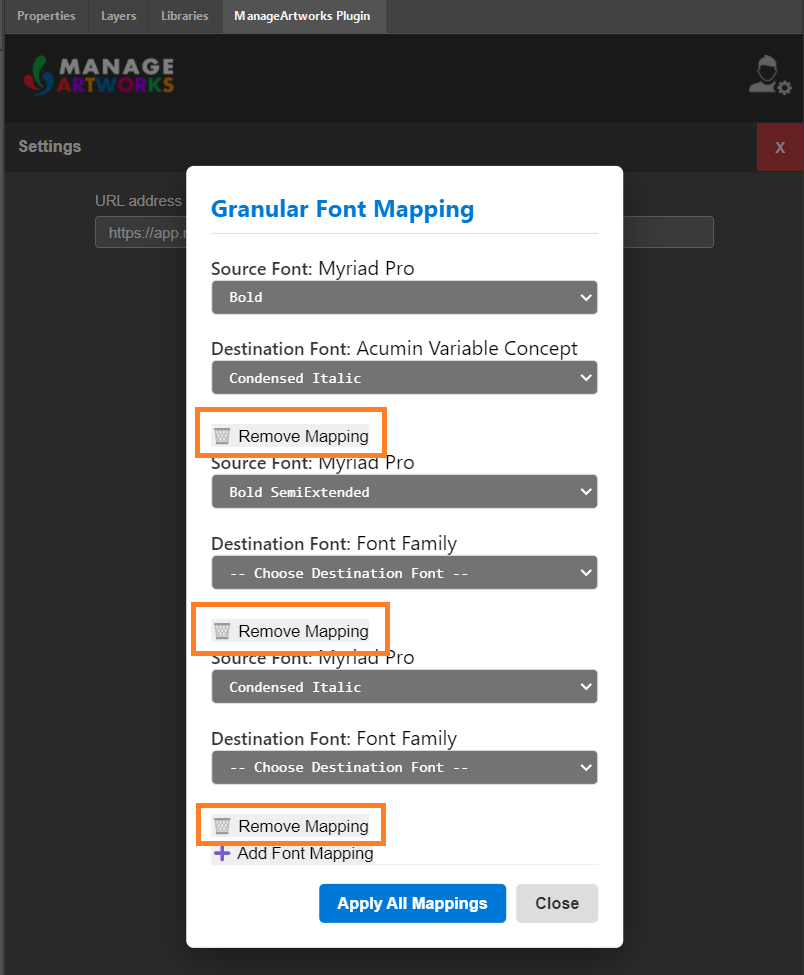
- The Granular Font Mapping dialog box opens, with one mapping already added. The Source Font drop-down list shows the fonts available in the artwork, in alphabetical order.

02. Map the Fonts
1. Set Up a Font Mapping
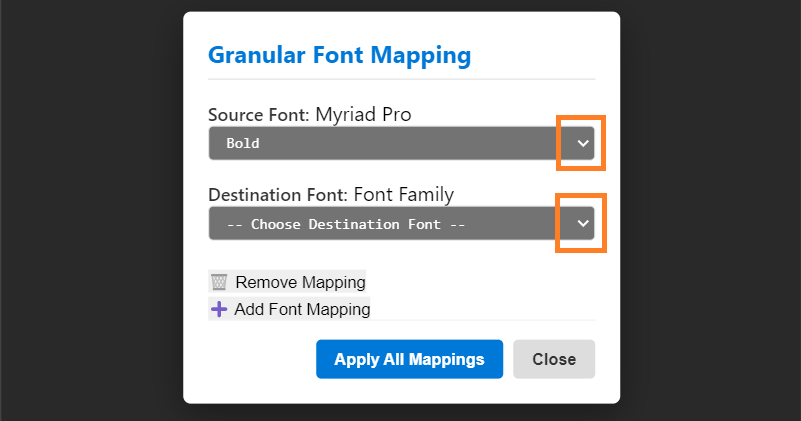
- In the Source Font drop-down list, select the font you want to replace. The list shows the fonts used in live text in the artwork, in alphabetical order.
- In the Destination Font drop-down list, select the replacement font. The list shows all the fonts available in Illustrator.
2. Add More Font Mappings (If Required)
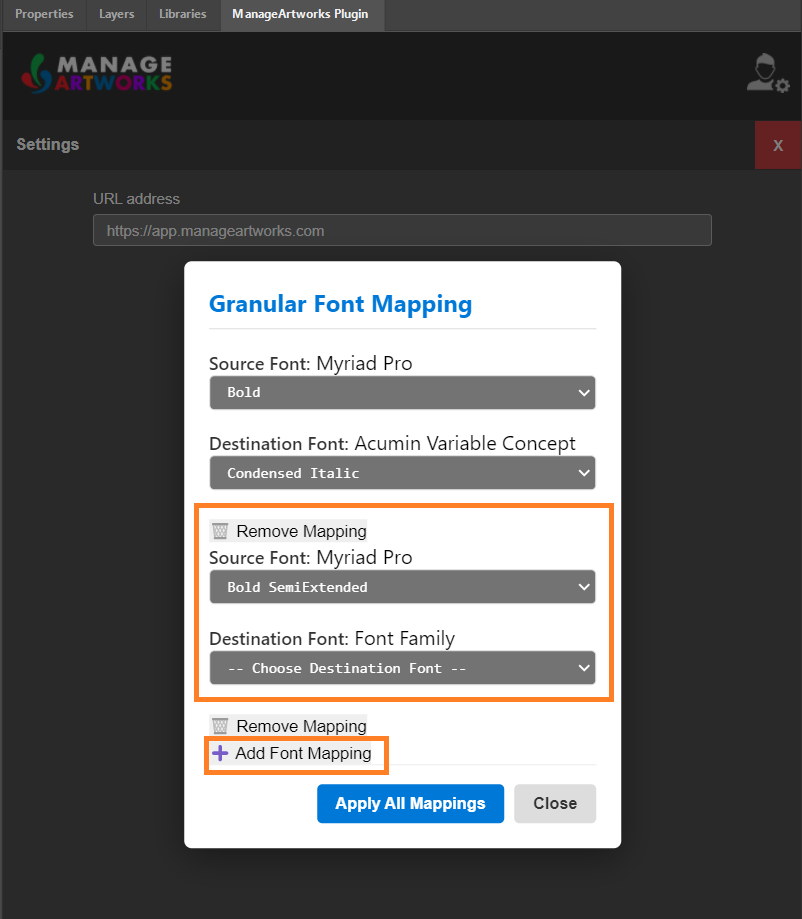
- Select Add Font Mapping. A new mapping is added below the existing ones.
- In the Source Font drop-down list, select the font you want to replace.
Note: A source font that is selected in one mapping cannot be selected in another mapping. - In the Destination Font drop-down list, select the replacement font.
- Repeat steps 1 to 3 for each font you want to replace.
Note: You can add one mapping for each font and style in the artwork, and each one can be used as a source font only once. For example, an artwork that uses Arial Regular, Arial Bold and Roboto Italic can have up to three mappings.
3. Remove a Mapping (If Required)
- To remove a specific mapping, select Remove Mapping above that mapping.
- To remove the most recently added mapping, select Remove Mapping below the last mapping, just above Add Font Mapping.
 | Note: You can also remove the mapping that is added when the dialog box opens. If you remove every mapping, select Add Font Mapping to add one. |
03. Apply the Mappings
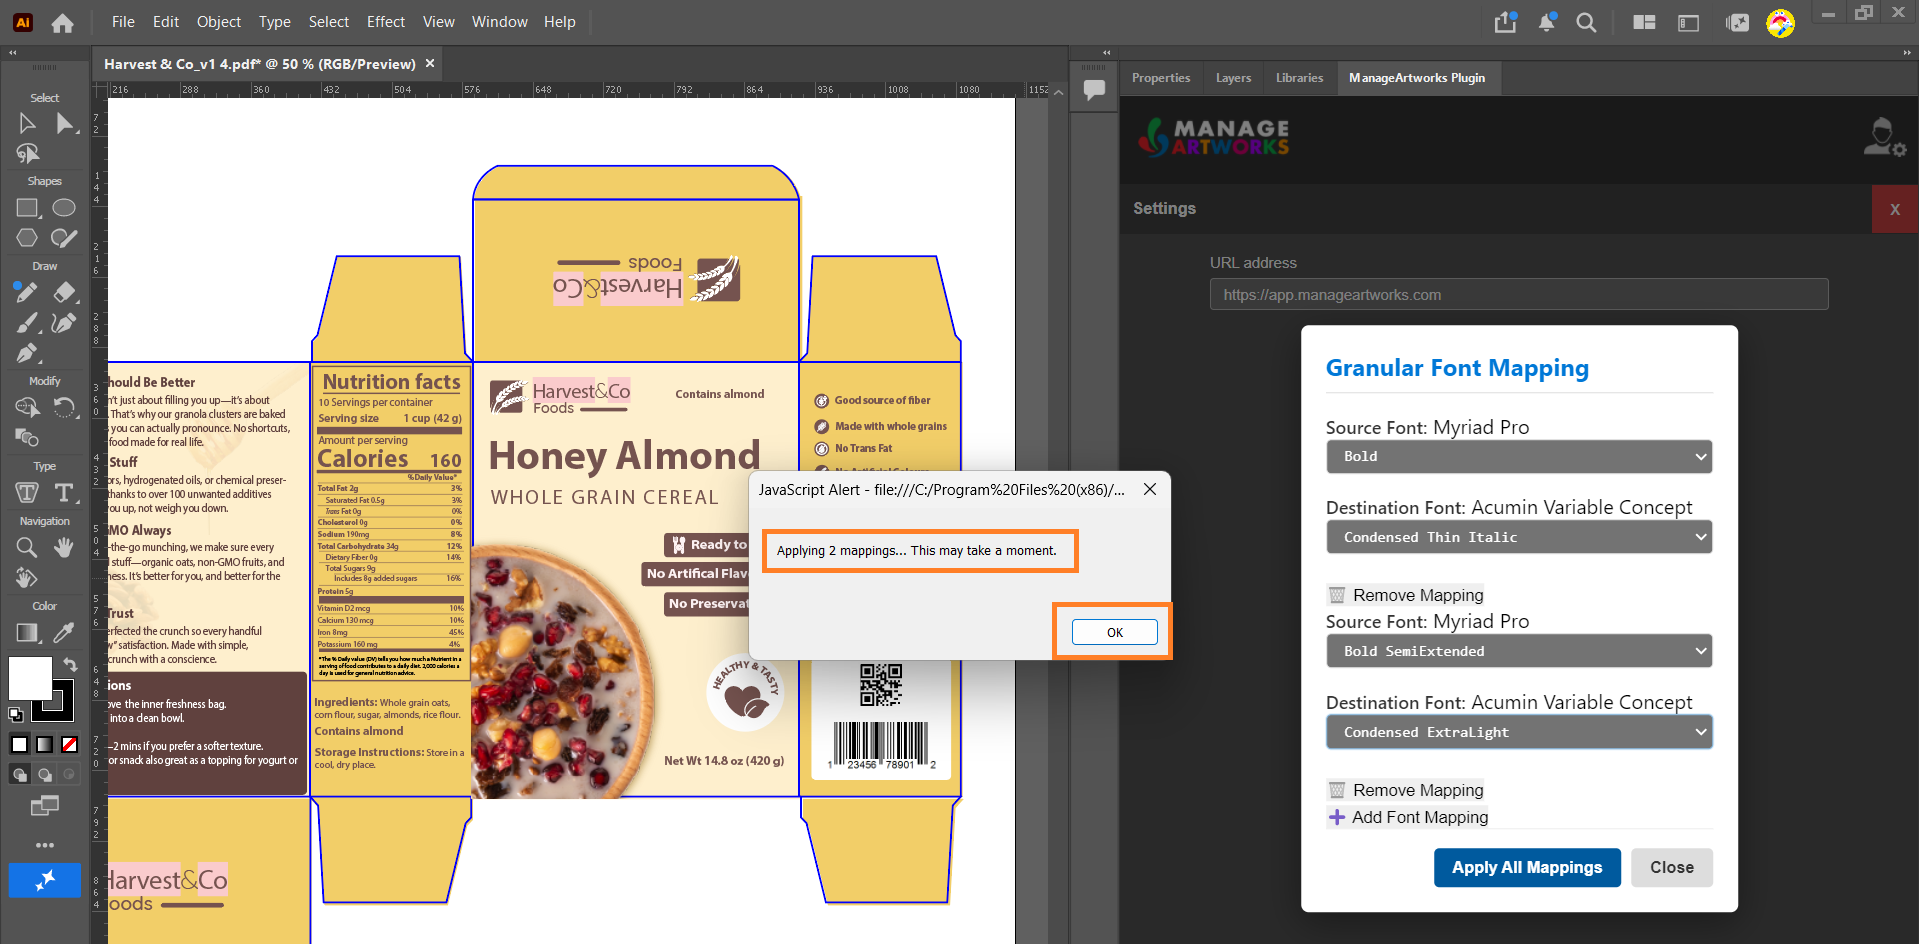
- Select Apply All Mappings. A message shows the number of mappings to be applied.
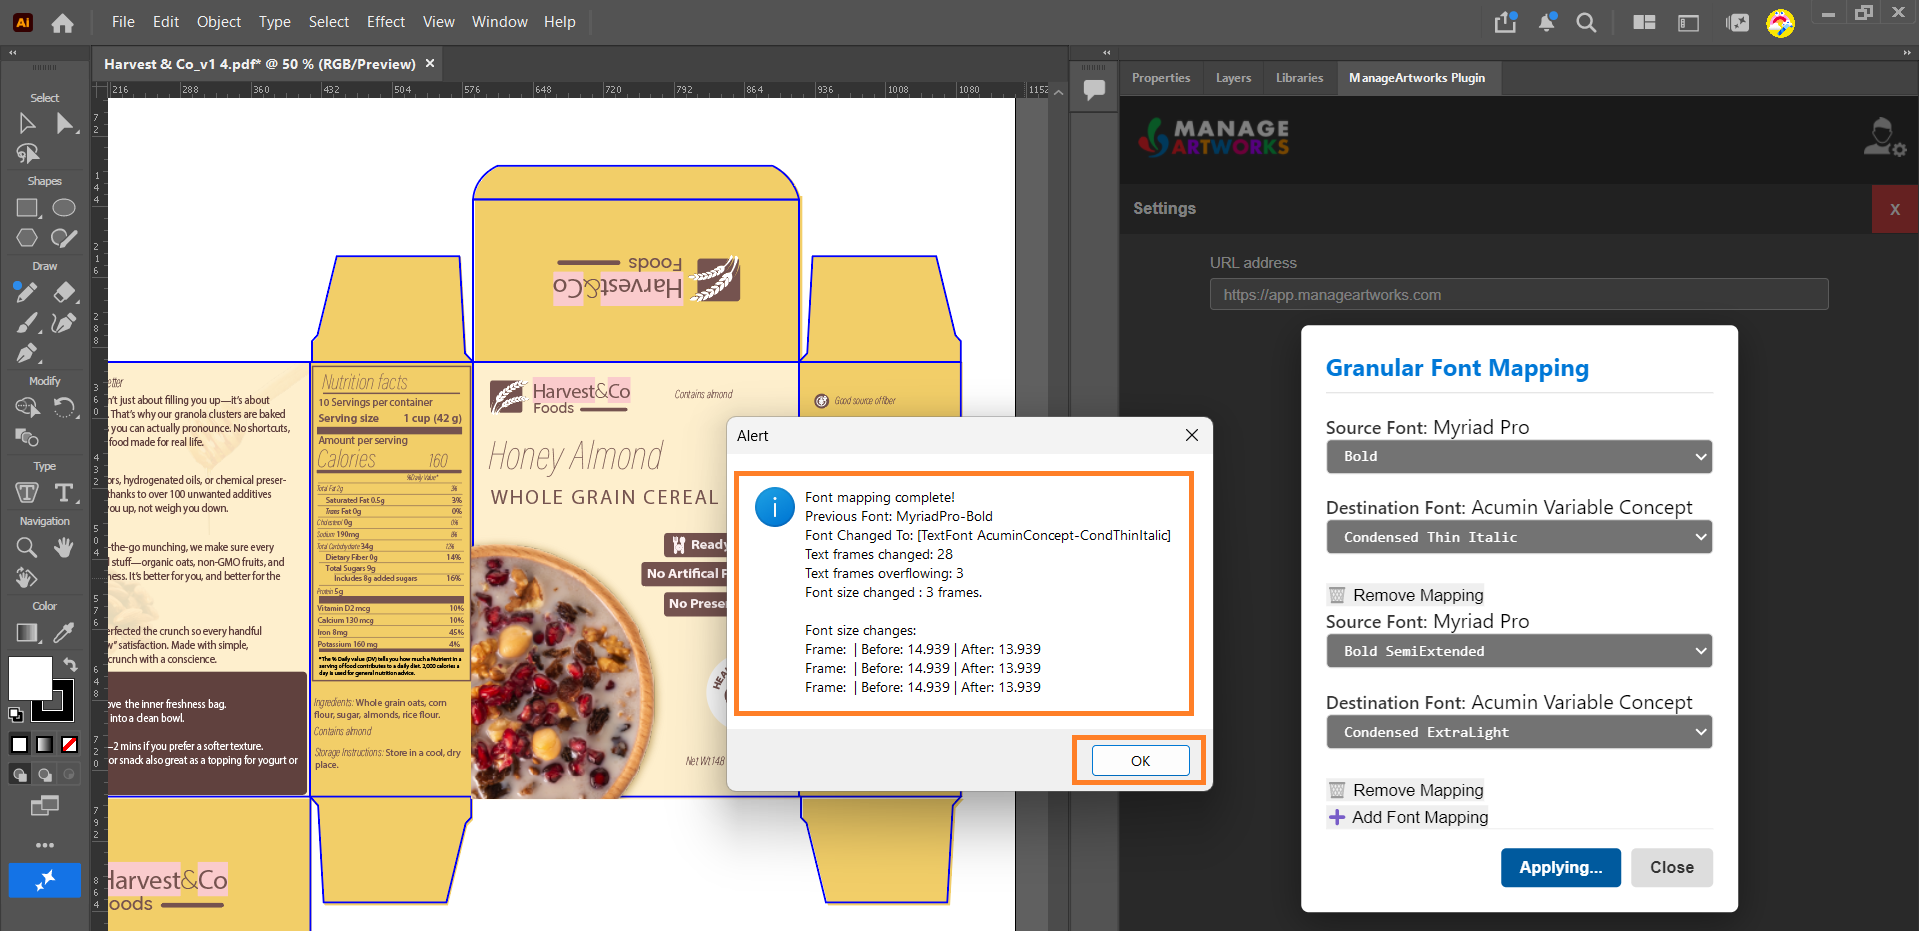
- Select OK. The plugin changes the fonts. When it finishes a mapping, it shows a summary of that mapping.
- Review the summary, then select OK. Each mapping has its own summary. Select OK on each one. For example, if you apply four mappings, four summaries appear one after another, and you select OK four times.
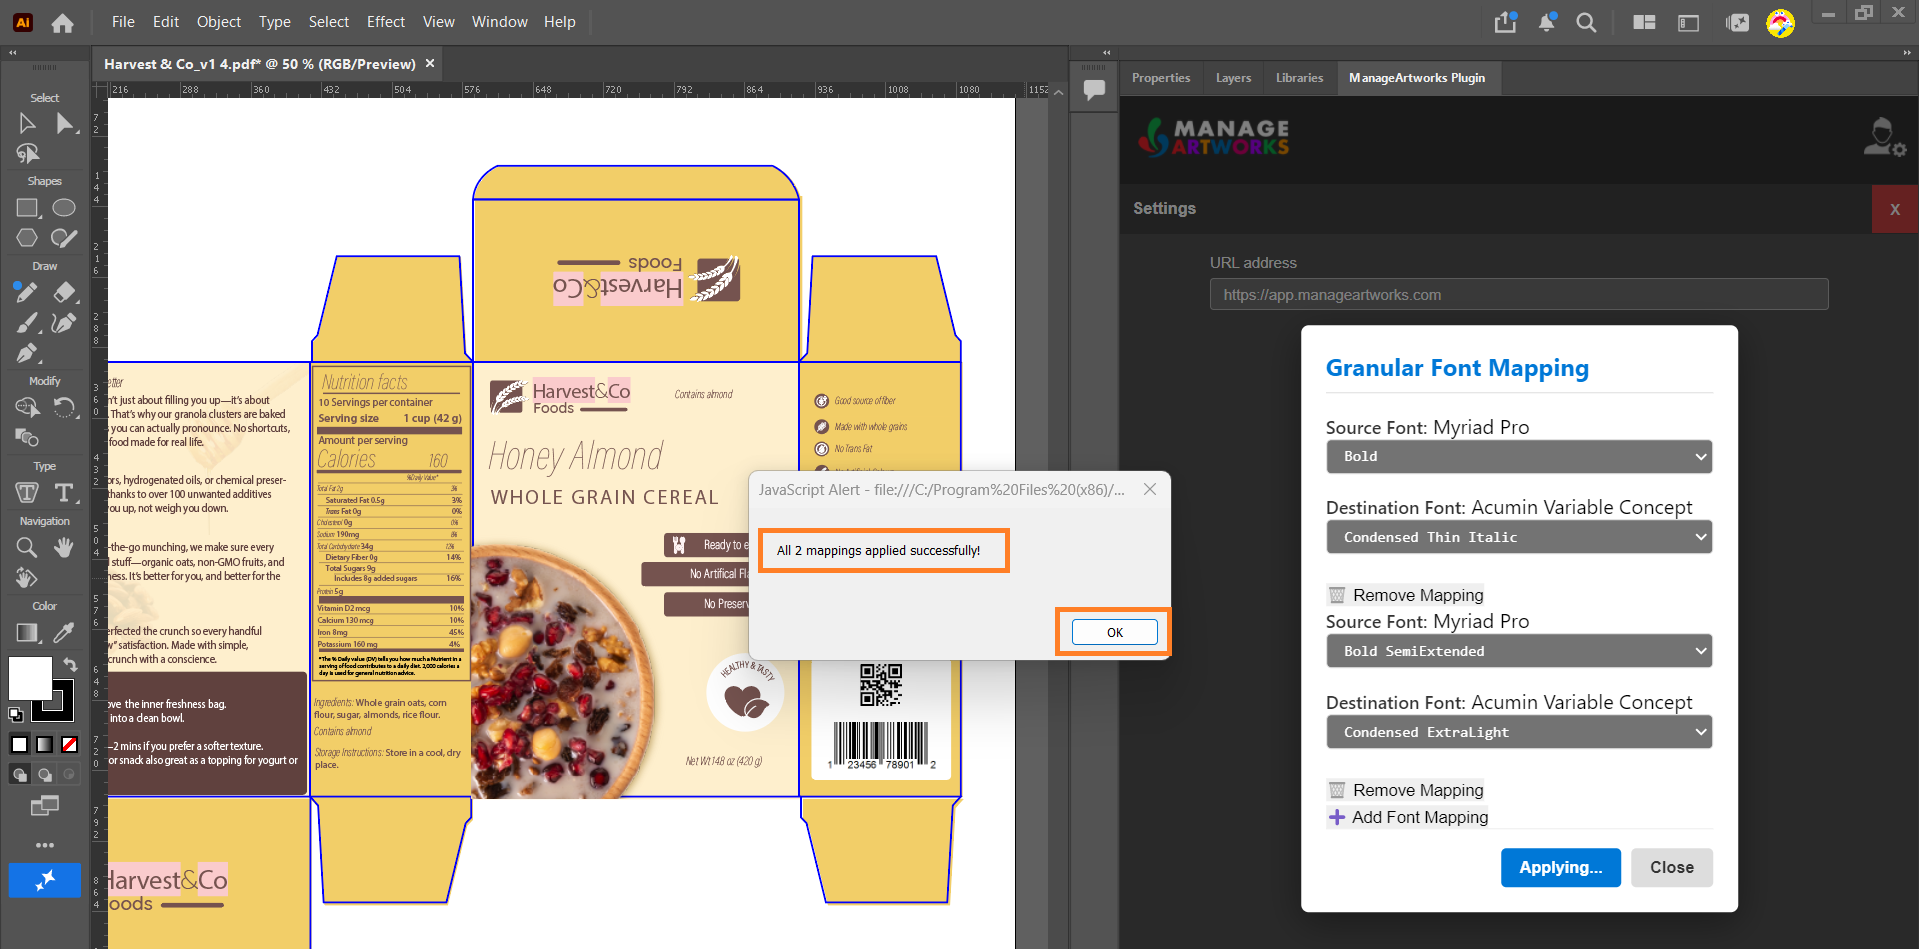
- In the message that shows the number of mappings applied, select OK. The font changes appear in the artwork.
| Note: If you still see the source font in the Source Font drop-down list or in the artwork after the mappings are applied, the destination font does not support some characters in the text. Illustrator keeps the source font for those characters.
|
Mapping Summary
| Field | Shows |
|---|---|
| Previous Font | The font that was replaced. |
| Font Changed To | The new font. |
| Text Frames Changed | The number of text frames where the font was changed. |
| Text Frames Overflowing | The number of text frames where the text no longer fit with the new font. |
| Font Size Changed | The number of text frames where the plugin reduced the font size so the text fits its frame. The summary also lists each font size before and after the change. |