Create New Artwork Report Template
 | Note: Artwork Report is an enterprise feature available exclusively to users on the Enterprise plan. For more information on all ManageArtworks plans, click here. |
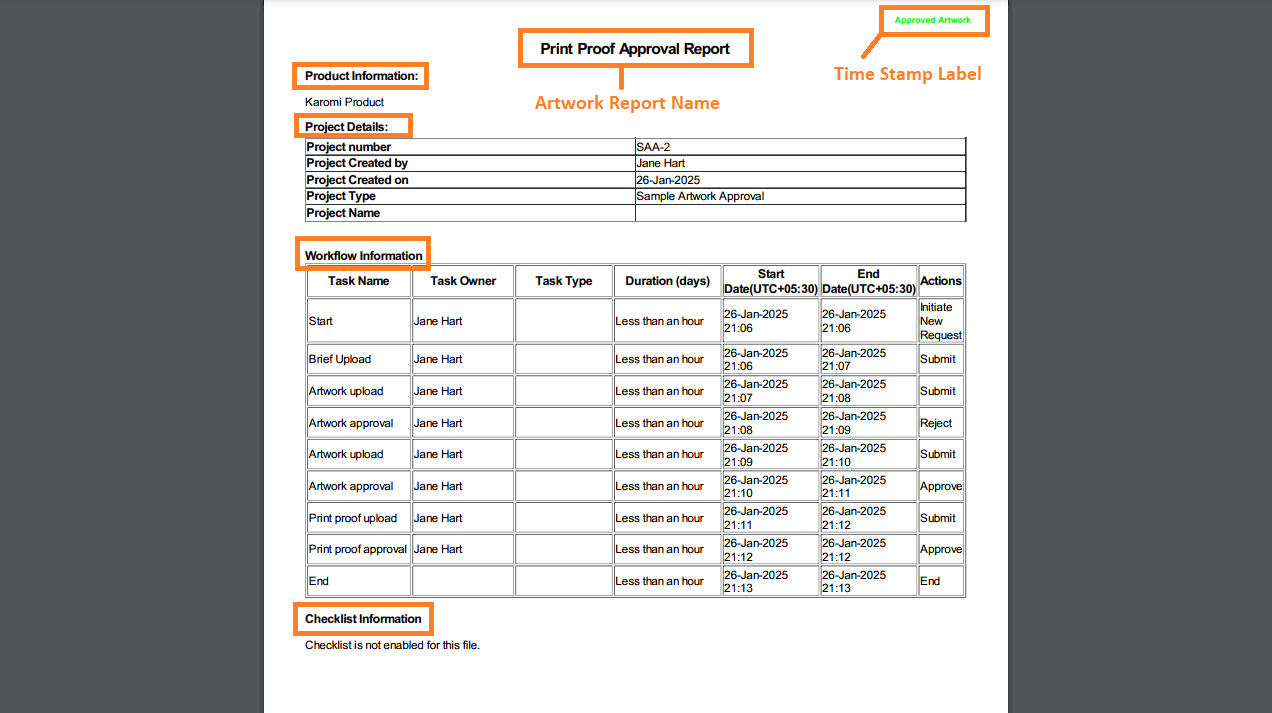
The Artwork Report enables you to generate detailed reports on files attached to a project at specific tasks within the workflow. This report provides comprehensive information, including:
- Product Information: Key details about the product.
- Project and Component Fields: Relevant fields associated with the project or its components.
- Workflow Details: Insights into the workflow, such as the tasks where files were submitted or rejected.
- Checklist Information: Details of checklist items associated with the project.
This report offers a clear and organized view of file-related activity within the workflow.
How do I create a new artwork report template?
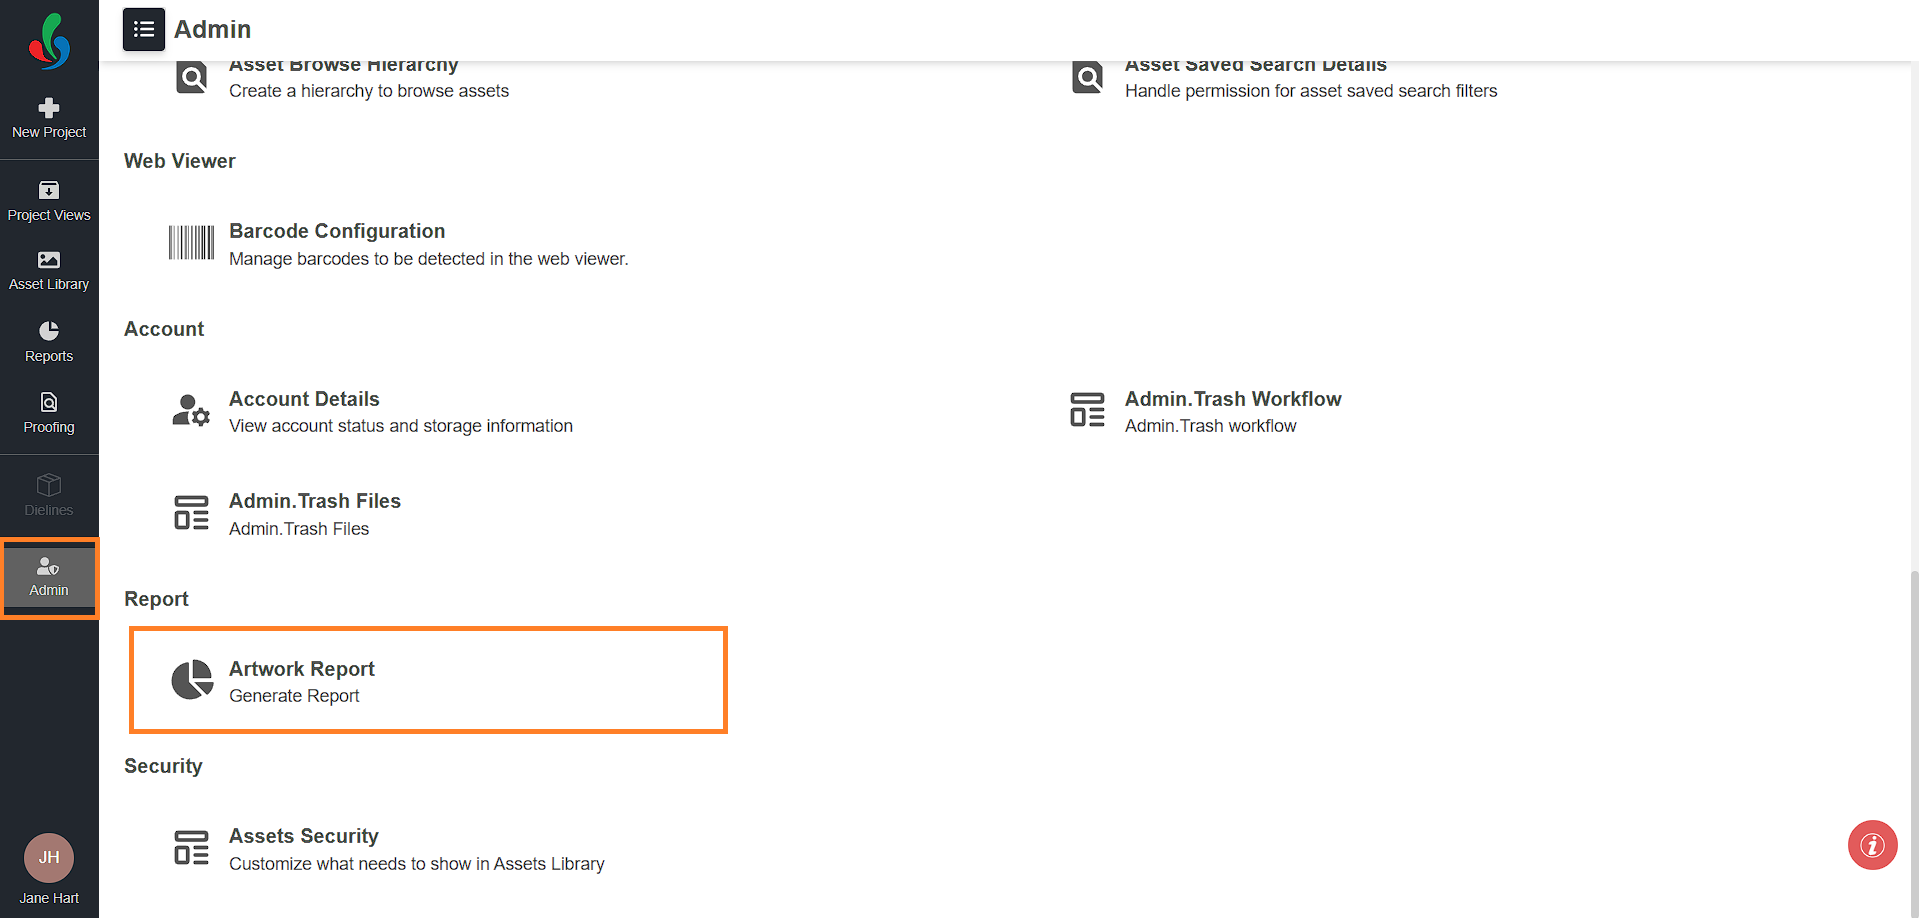
01. Access Artwork Report
- Log in to your ManageArtworks account.
- Select the Admin module.
- Click the Artwork Report tab.
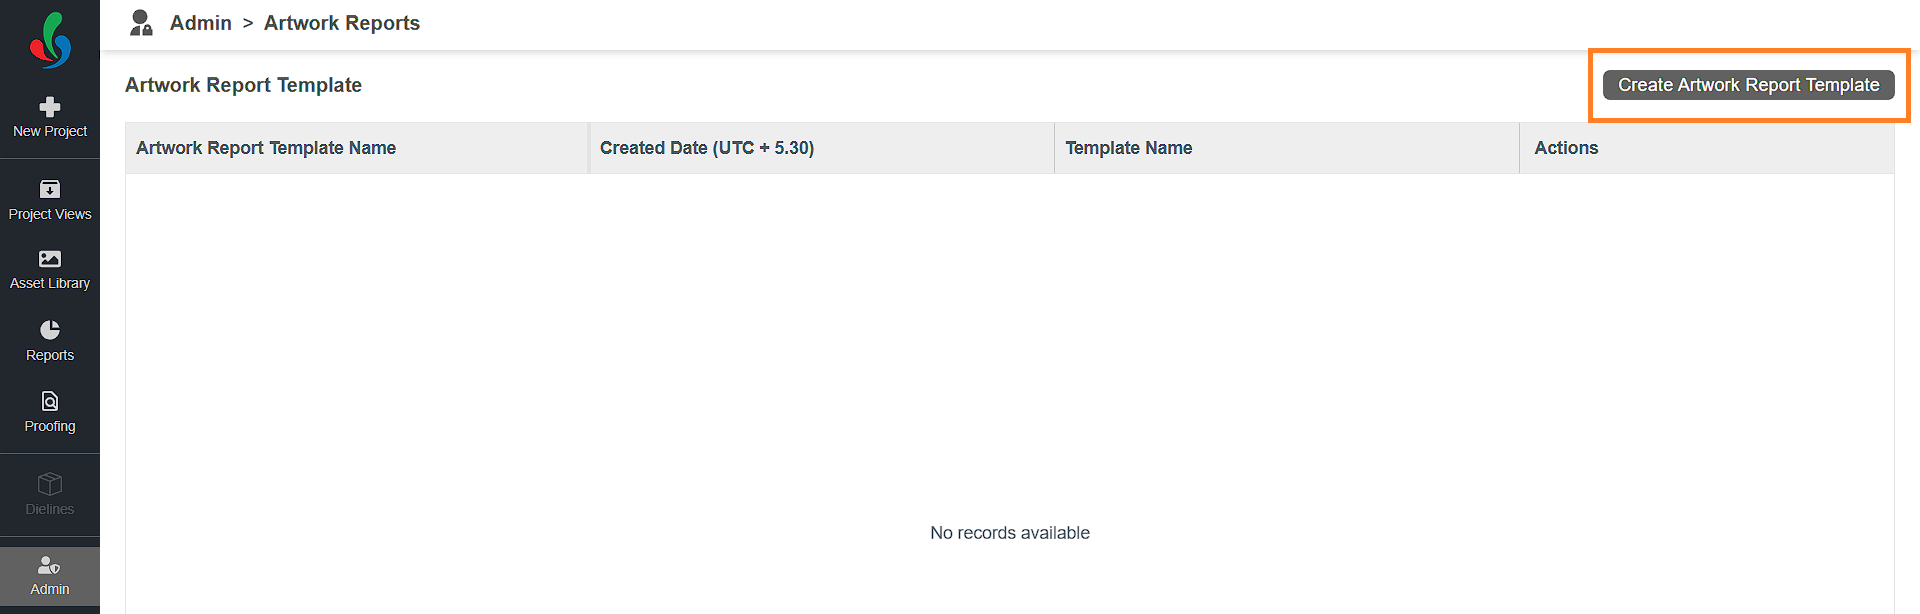
02. Create a New Artwork Report Template
- Click the Create Artwork Report Template button in the upper-right corner.
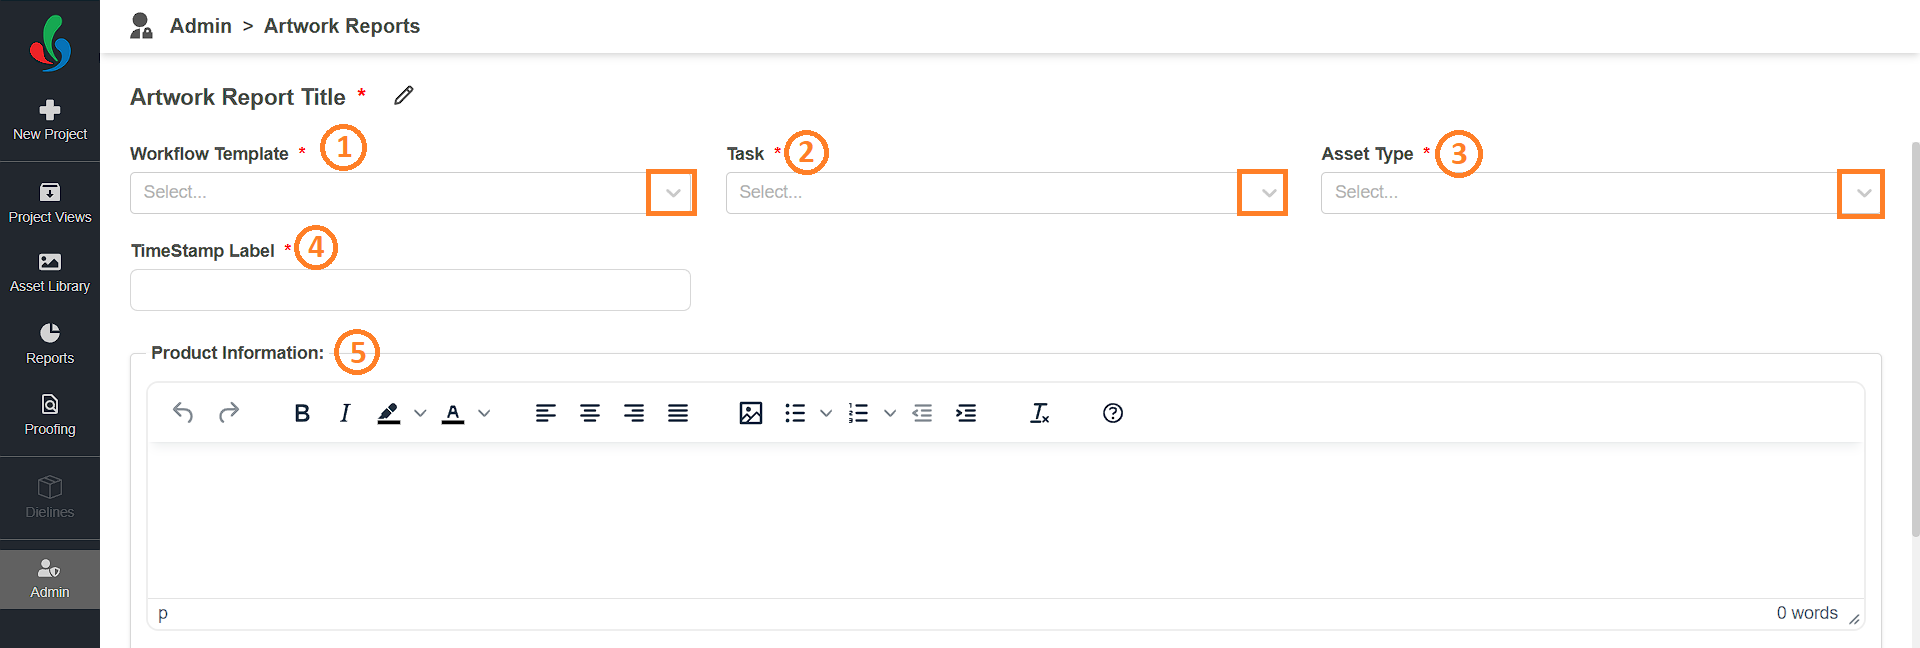
- Click the edit icon next to the report template placeholder name and enter a descriptive name for your report template (e.g., Artwork Approval Report ).

03. Configure the Artwork Report Template
- Workflow Template:
- Click the Workflow Template drop-down menu and select the desired workflow template where the artwork report will be generated.
Note: Only active workflow templates will be listed.
- Click the Workflow Template drop-down menu and select the desired workflow template where the artwork report will be generated.
- Task:
- Click the Task drop-down menu and select the task within the workflow where the artwork report will be generated.
Note: Tasks associated with the selected workflow template will be listed. Reports are generated only after the selected task is completed. For example, if you select the final task of the workflow, the report will be generated only after the project is completed.
You can create multiple artwork reports with the same asset type but not for the same task within a workflow.
For example, if a workflow has four tasks and you have created an artwork report template at Task Four with the asset type "Packaging Artwork," you can create another artwork report for the same workflow and asset type, but not for Task Four. Instead, you must select a different task, such as Task One, Two, or Three.
Once an artwork report template has been created for a specific workflow, task, and asset type combination, that task cannot be selected again for the same workflow and asset type.
- Click the Task drop-down menu and select the task within the workflow where the artwork report will be generated.
- Asset Type:
- Click the Asset Type drop-down menu and select the asset type(s) (e.g., Packaging Artwork) for which the report will be generated.
Note: Multiple asset types can be selected.
- Click the Asset Type drop-down menu and select the asset type(s) (e.g., Packaging Artwork) for which the report will be generated.
- Timestamp Label:
- Enter a label to display as the timestamp in the generated report.
- Product Information:
- Specify the product information to include in the report.
- Specify the product information to include in the report.
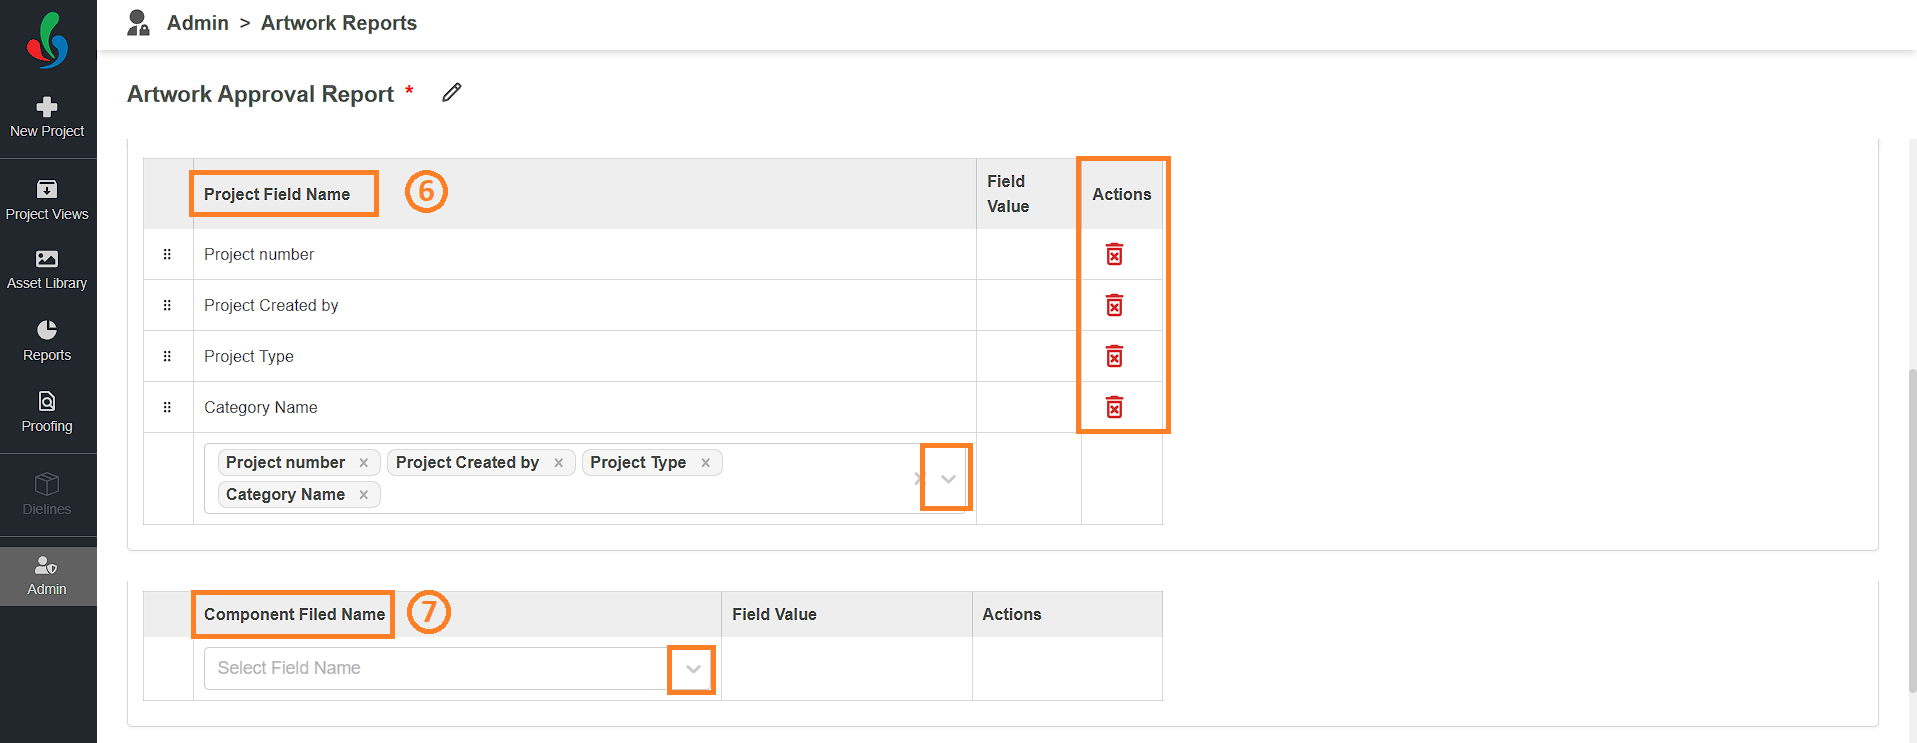
- Project Fields:
- Click the Project Field Name drop-down menu and choose the fields you want displayed in the generated report.
Note: Only the project fields linked to the selected workflow template will appear in the list. The artwork report will include only the latest version of each project field; previous iterations will not be displayed. The field values at the time of report generation will be captured in the artwork report. - To remove a selected project field, click the Delete button located in the action column next to the field name.
- Click the Project Field Name drop-down menu and choose the fields you want displayed in the generated report.
- Component Fields:
- Click the Component Field Name drop-down menu and select the fields you want included in the report.
Note: Only the component fields associated with the selected workflow template will be displayed. If no component fields are linked to the selected workflow template, no options will appear in the drop-down menu. The artwork report will include only the latest version of each component field; previous iterations will not be displayed. The field values at the time of report generation will be captured in the artwork report. - To remove a selected component field, click the Delete button in the action column next to the field name
- Click the Component Field Name drop-down menu and select the fields you want included in the report.
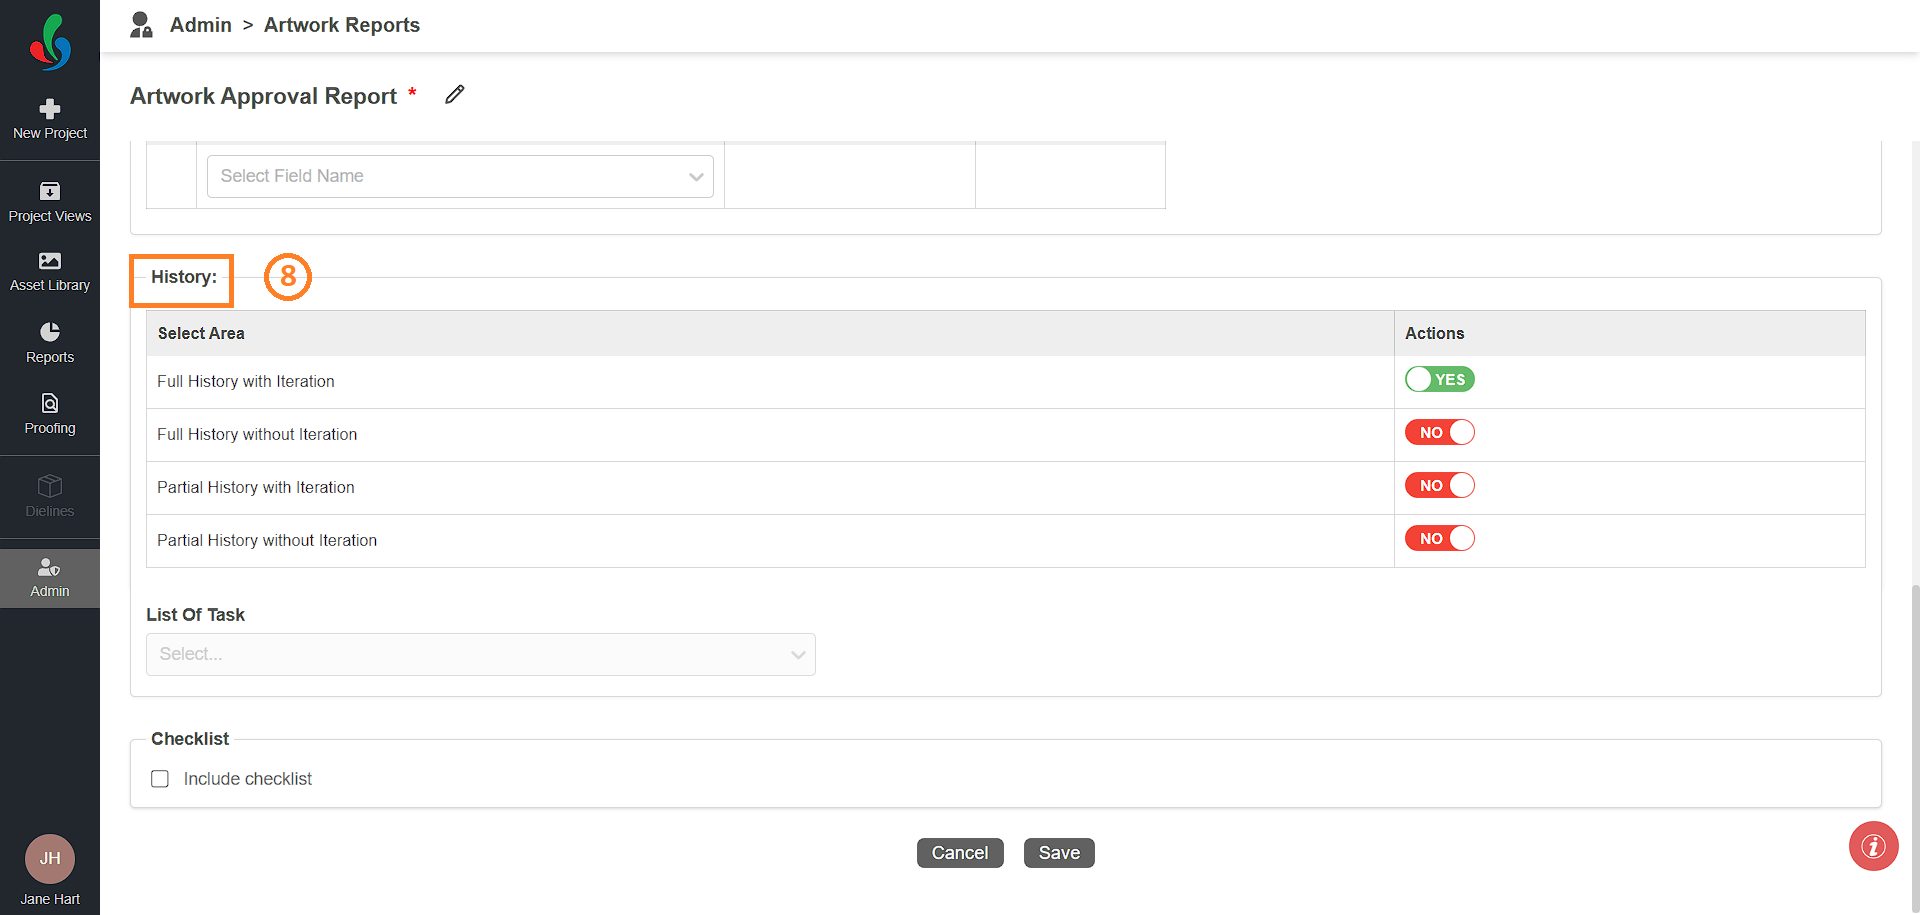
- History Options:
- Configure the level of task history to include in the report:
- Full History with Iteration: Displays the entire workflow history, including tasks where files were rejected.
- Full History without Iteration: Shows the entire workflow history but excludes any rejection scenarios.
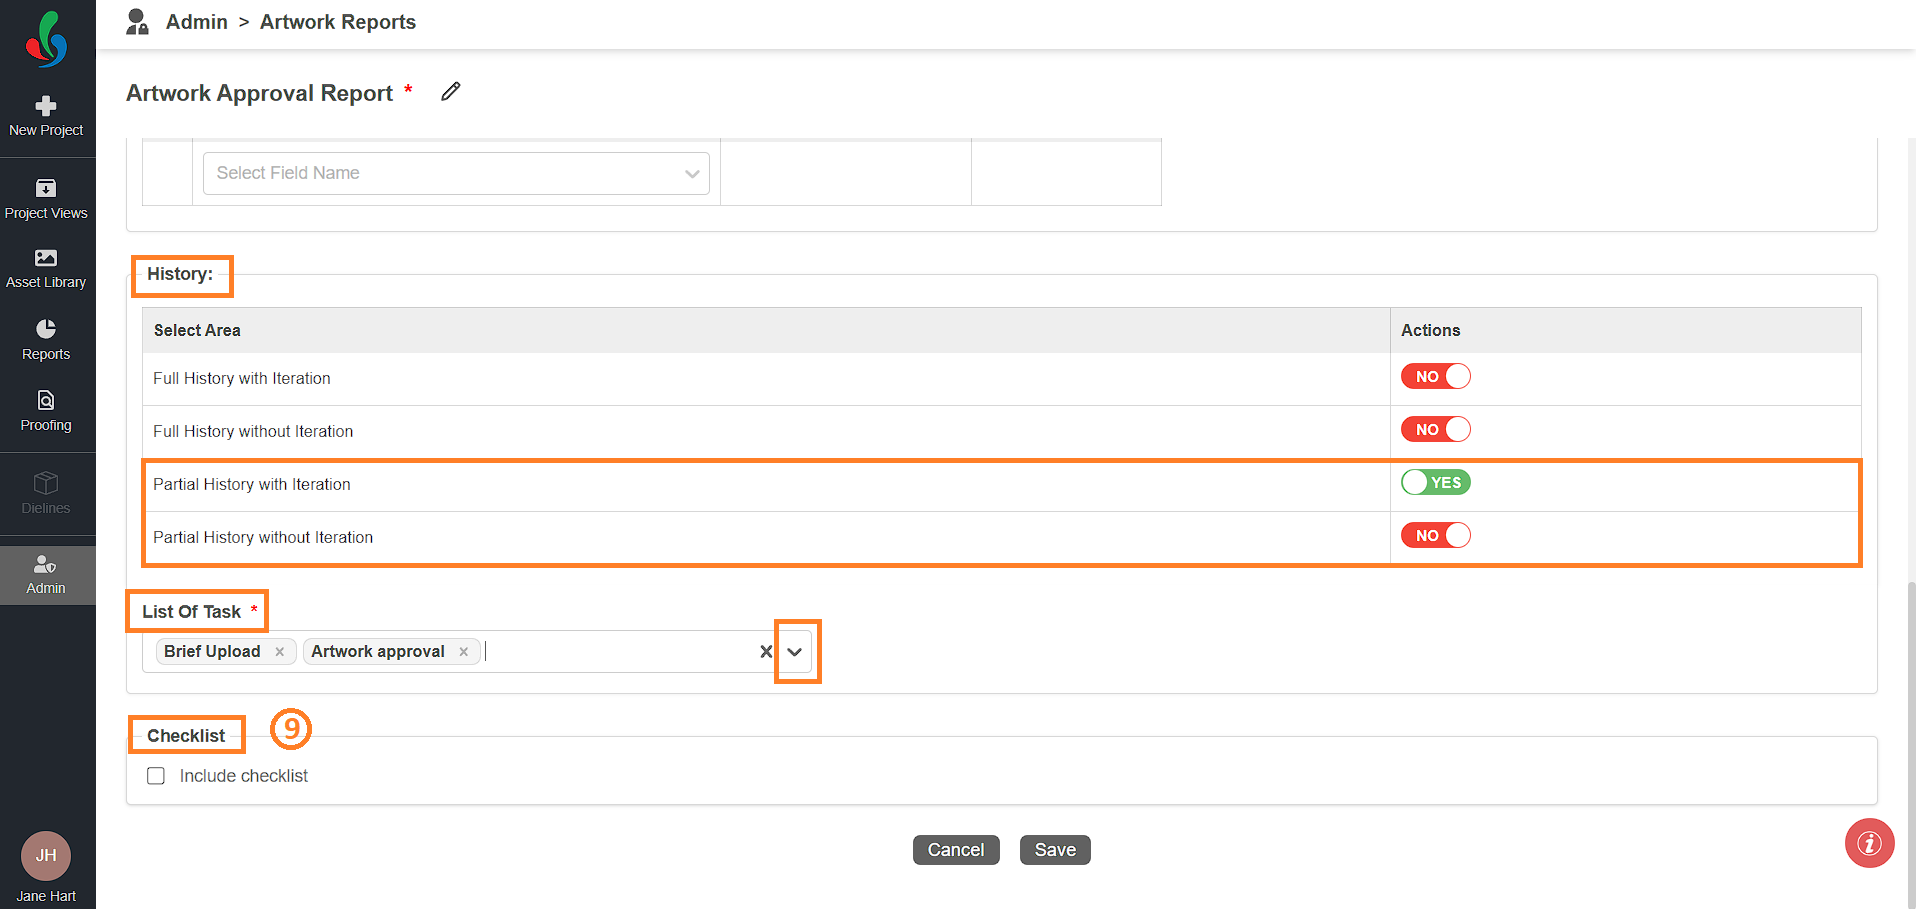
- Partial History with Iteration: Displays history only for the selected tasks and includes rejection details for those tasks.
- Partial History without Iteration: Shows history only for the selected tasks but excludes any rejection details.
- To configure history option:
- Toggle Yes next to the desired history option to enable it.
Note: Only one history option can be selected at a time. - If you choose either of the Partial History options, you must specify the tasks to include in the report:
- Click the List of Tasks drop-down menu.
- Select the tasks you want to include in the report.
Note: The List of Tasks option is only enabled when a partial history option is selected. - To remove the selected tasks, click the close icon next to the task name.
- Toggle Yes next to the desired history option to enable it.
- By configuring the history section, you can decide how detailed and task-specific the report's historical data will be.
- Configure the level of task history to include in the report:
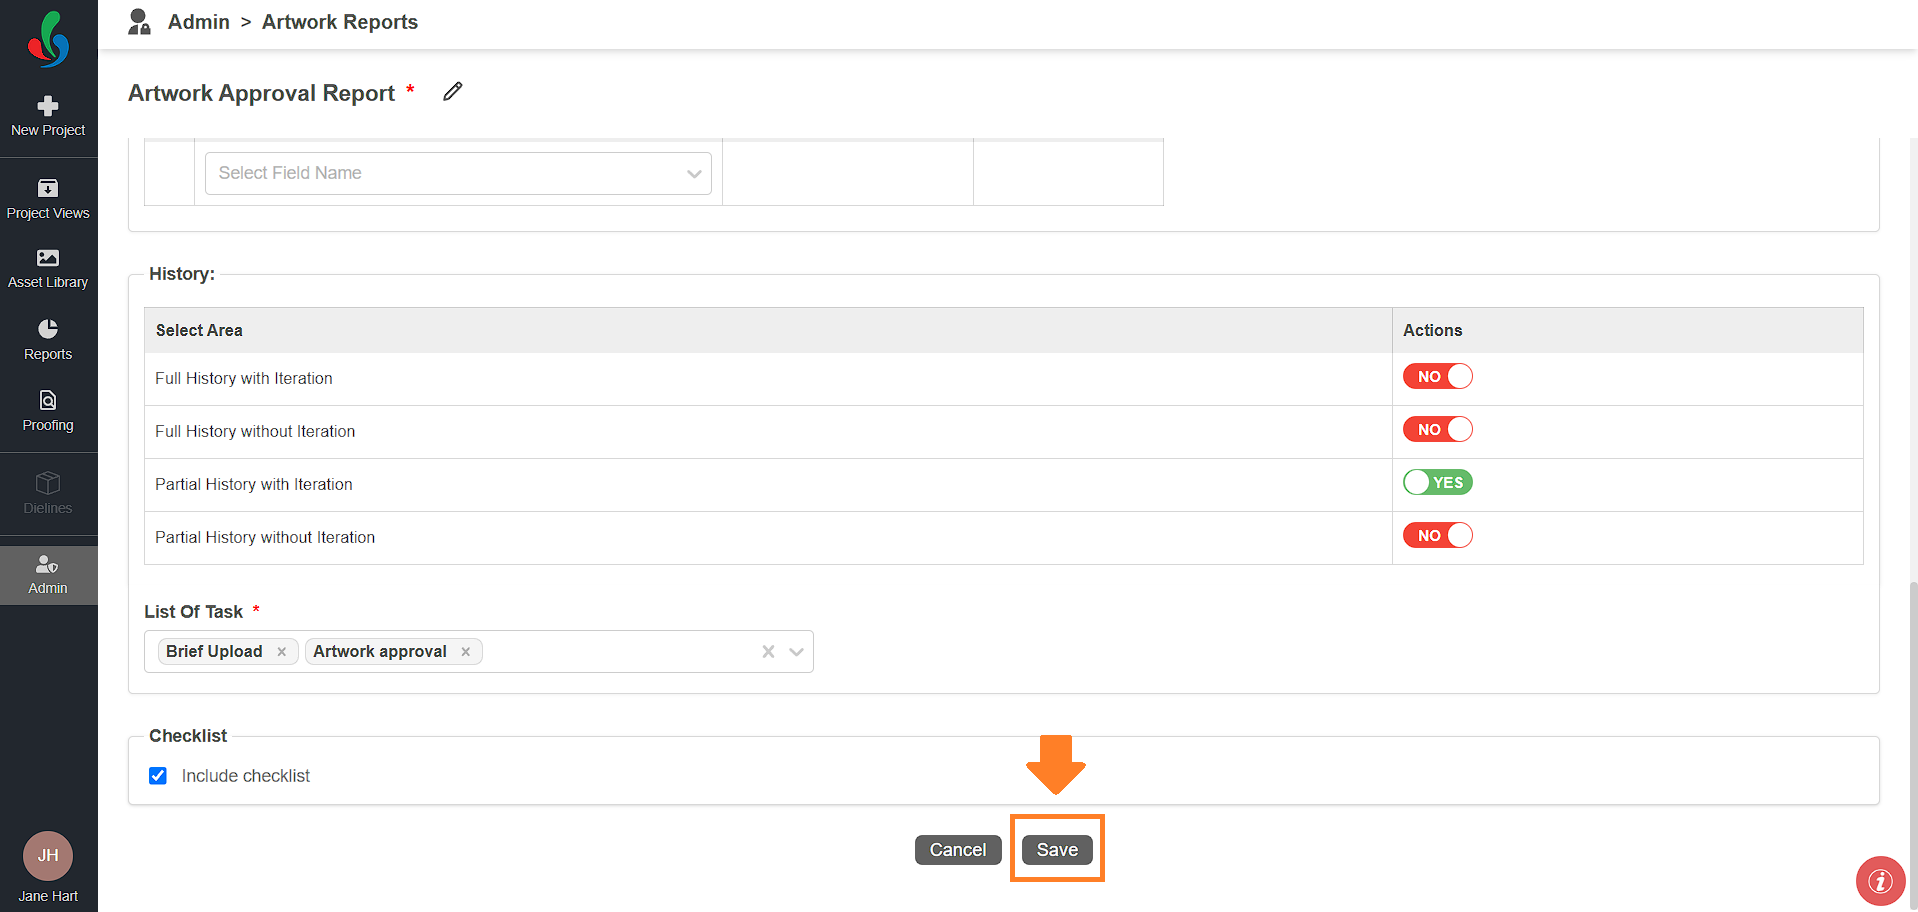
- Checklist Information:
- To include checklist details, enable the Include Checklist option.
Note: If no checklist exists for the workflow, the report will display "Checklist is not enabled for this file." Only the latest checklist version will be included in the report; iterations will not be displayed.
- To include checklist details, enable the Include Checklist option.
04. Save the Template
- Once you've configured all the settings, click the Save button to finalize and create the artwork report template.
How do I access the generated artwork report?
Access the Generated Artwork Report
To view the generated artwork report:
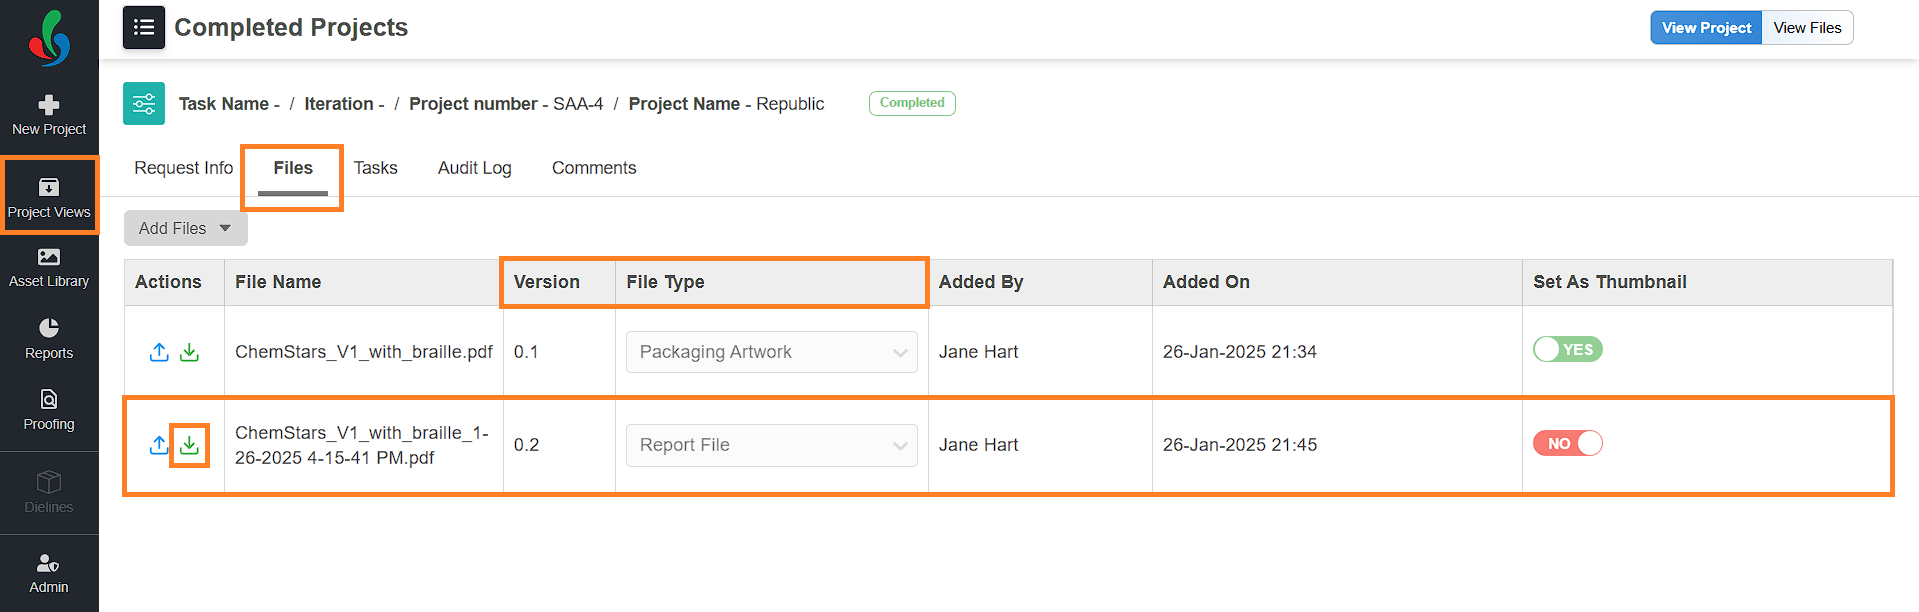
- Open the Project Views module and select the project associated with the artwork report template.
- Navigate to the Files tab.
- Once the report is generated, it will appear in the Files tab as a separate file with the file type "Report File."
- Click the file to open it in the Web Viewer.
- To download the report, click the Download icon in the Action column. The file will be saved to your system.
Note: Only the latest version of the report will be downloaded.
Download Previous Versions of the Report
- If multiple reports have been generated for a task or the report has been updated, the version number will increase.
- You can check the version number of the report file in the Version column.
- To download a previous version:
- Open the report file in the Web Viewer.
- Click the Version drop-down menu to see all available versions.
- Select the desired version.
- Click the Settings icon and choose "Without Annotation" to download the file.

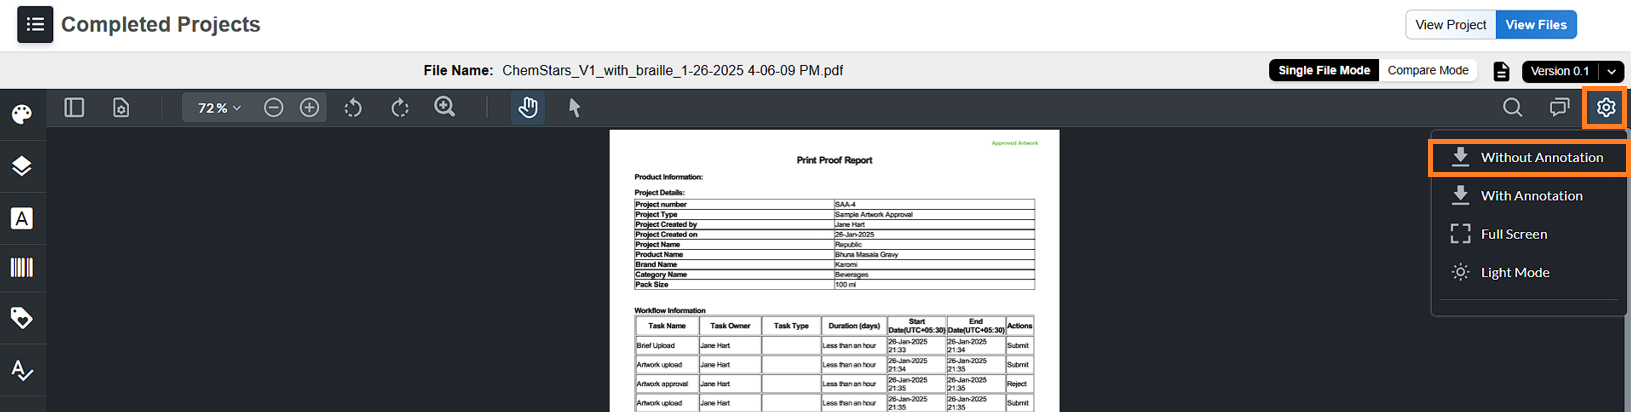
Downloaded Artwork Report