
Proofread an Artwork

Proofing Tools
Color Tool
The Color tool provides valuable information about the types of colors present, their ink coverage, and density, empowering you to ensure accurate and consistent color reproduction.
Key Concepts:
- Spot Colors: These are solid, premixed inks, often based on the Pantone Matching System (PMS), used for precise color matching.
- Process Colors: These colors are created by combining four standard inks: Cyan (C), Magenta (M), Yellow (Y), and Black (K). They offer a wider range of colors but may have slight variations in production.
- Color Densitometer: This feature measures the color density at specific points in your artwork, helping you assess ink coverage and potential printing issues.
Access Color Information
- Click the Color tool to reveal a comprehensive overview of the colors in your artwork.
- Review the details for spot colors, process colors, and their ink coverage.
- Utilize the Color Densitometer to pinpoint color density by hovering over specific areas.
- If required, Customize the Unit of Measurement (UOM) for Ink Coverage and Color Densitometer using the drop-down menu.
Note: To change or configure the default UOM, refer Viewer Parameter Configuration. - Isolate individual colors within the artwork by checking or unchecking them in the Color tool.


To know more about Color tool, click here.
Layer Tool
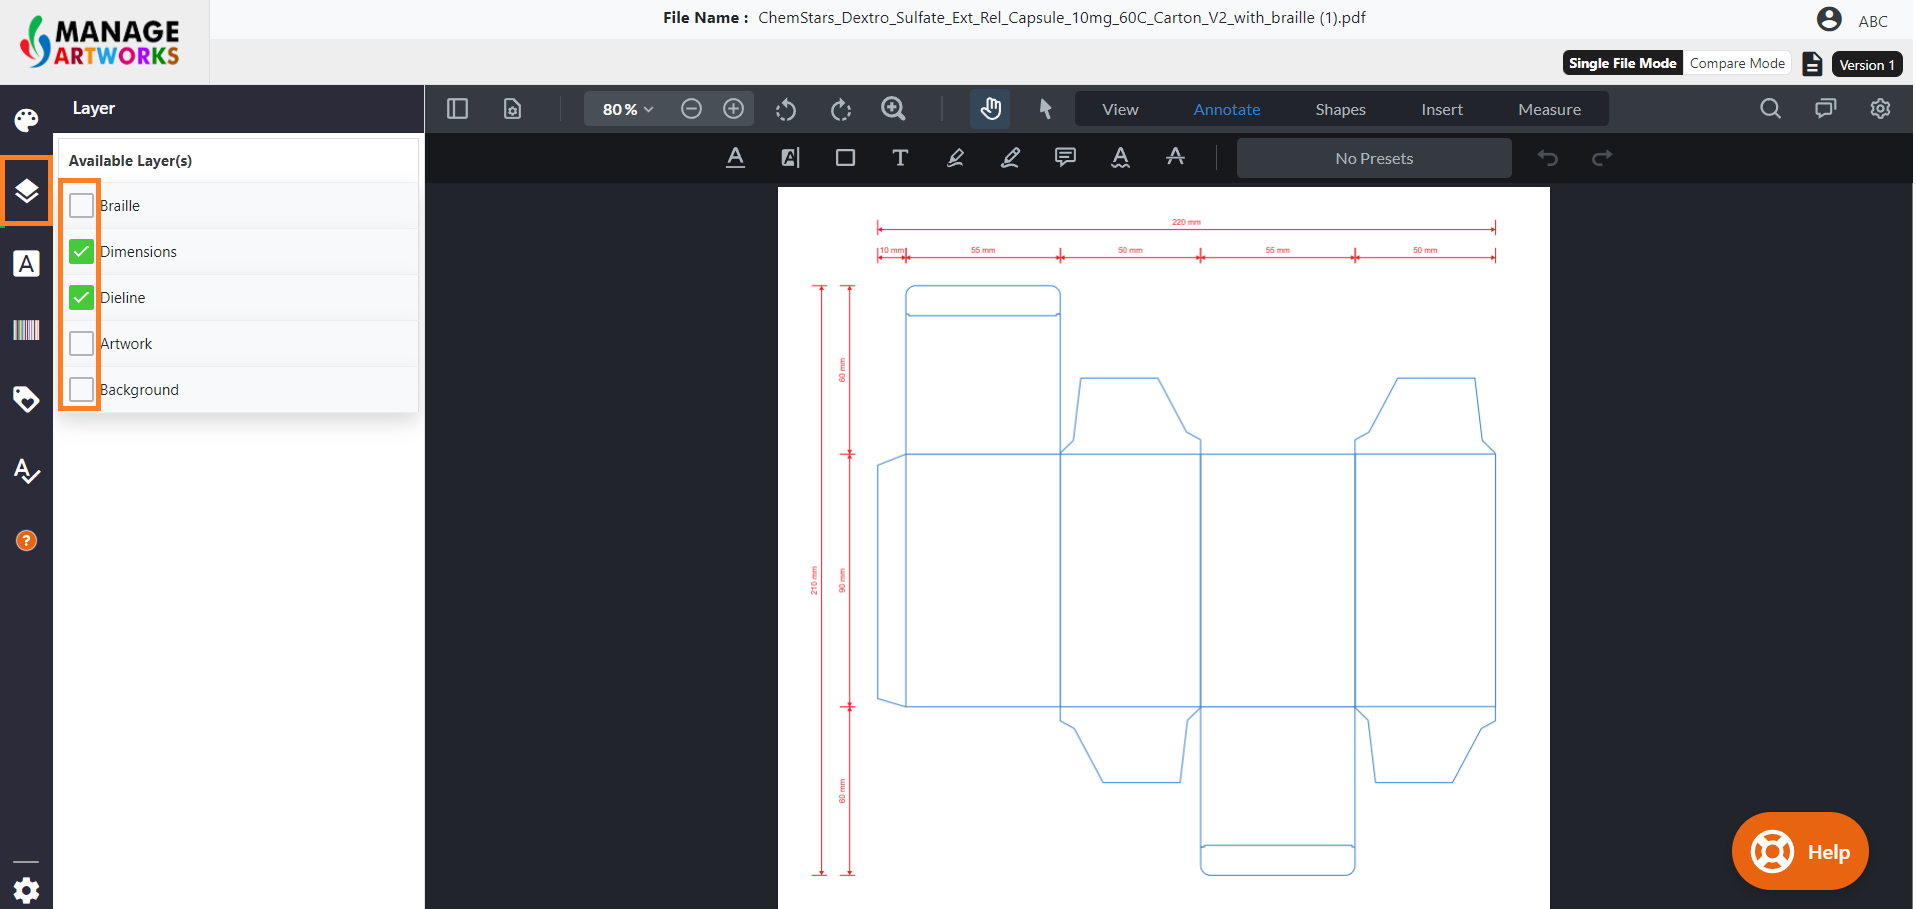
When reviewing intricate artwork files, verifying every design element can be challenging. The Layer Tool simplifies this process by allowing you to view and isolate individual layers of the artwork file, enabling a more precise and focused proofing experience.
 | Note: The Layer Tool displays only the layers already present in the artwork file. It does not generate or create new layers. For files like flattened PDFs—where all elements are merged into one—only a single “Artwork” layer will be visible. |
Access the Layer Tool
- Click the Layer icon from the toolbar on the left.
- A panel will open showing all available layers within the artwork file
- Review and Isolate Layers:
- Examine the available layers to visualize the file's structure.
- Toggle visibility by checking or unchecking each layer’s checkbox. This helps you isolate and examine specific design elements without distraction from other components.
Benefits of Layer-Based Proofing:
- Enhanced Clarity: Layers bring clarity to complex artwork, making it easier to identify and verify individual components.
- Error Detection: Isolate potential errors or inconsistencies within specific layers, ensuring a more thorough proofing process.
- Improved Collaboration: Facilitate clear communication and feedback by referencing specific layers in discussions with collaborators or reviewers.
To know more about Layer tool, click here.
Font Tool
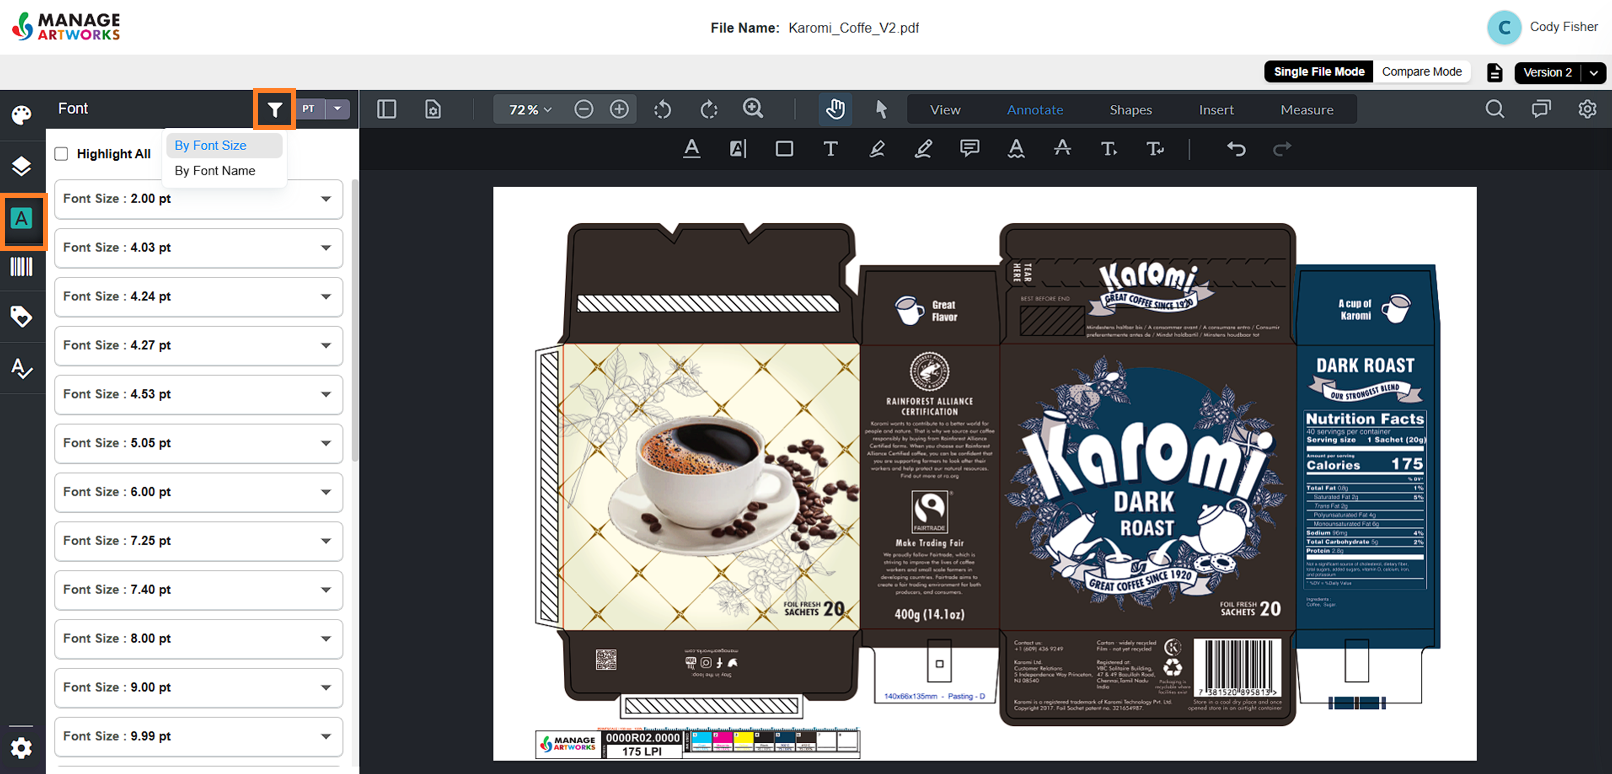
The Font tool helps you to verify the fonts used in the artwork.
Access Font Information
- Click the Font tool to reveal the fonts present in your artwork.
- By default all the fonts will be listed based on it's size. If required, filter results by font size or name using the filter icon for focused analysis.
- Hover over the text available in the artwork to view it's properties.
- Alternatively, click the dropdown icon associated with any of the font to view it's detailed font properties—such as cap height, x-height.
- Clicking the font results, visually highlight all instances of that font within the artwork.
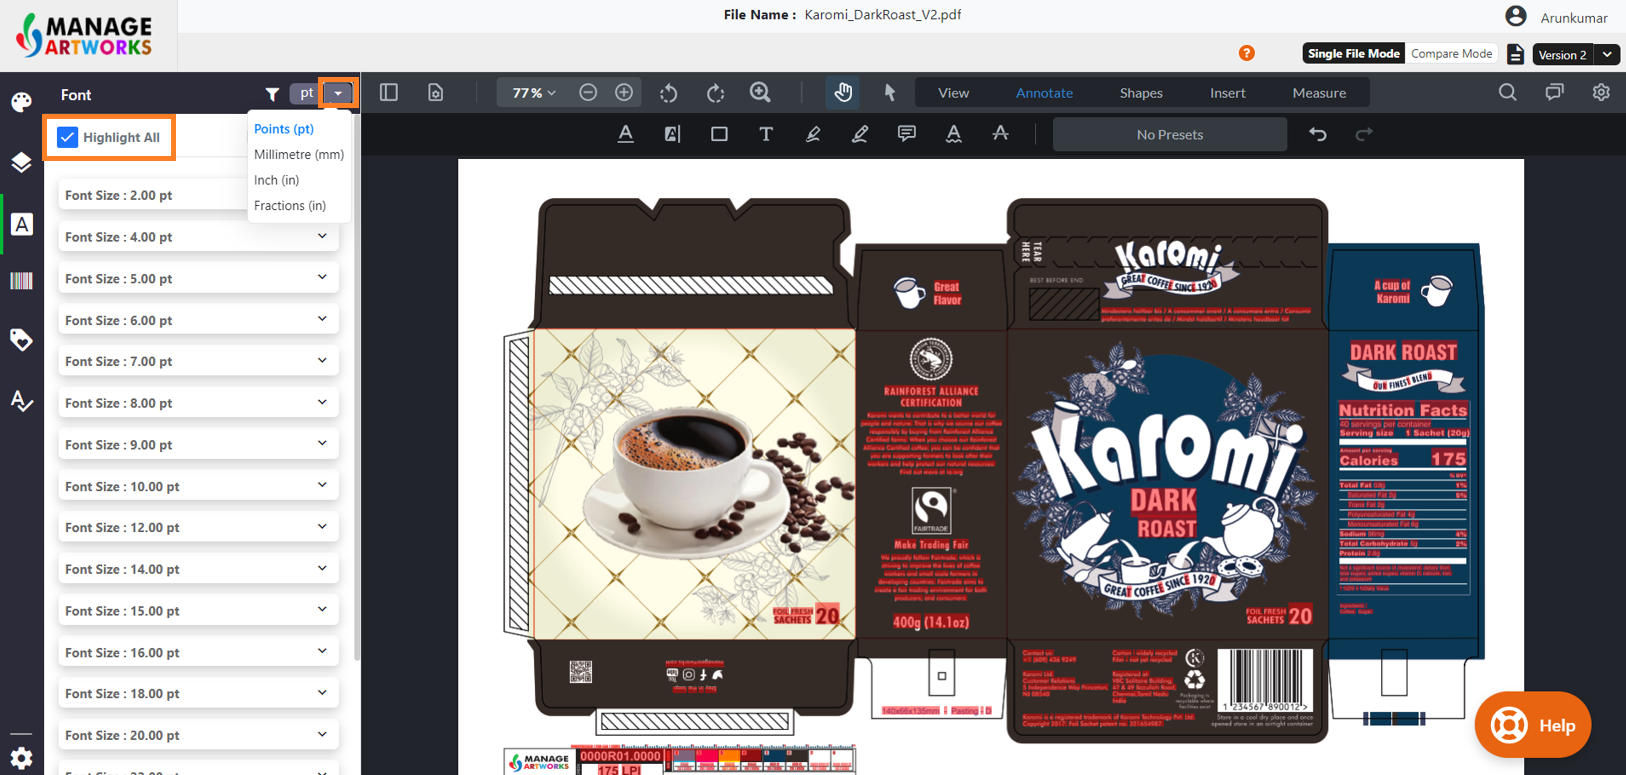
- If required, change the UOM from the drop-down menu as desired.
Note: To change or configure the default UOM, refer Viewer Parameter Configuration. - If required, utilize the "Highlight All" feature to swiftly reveal all selectable text within the file.

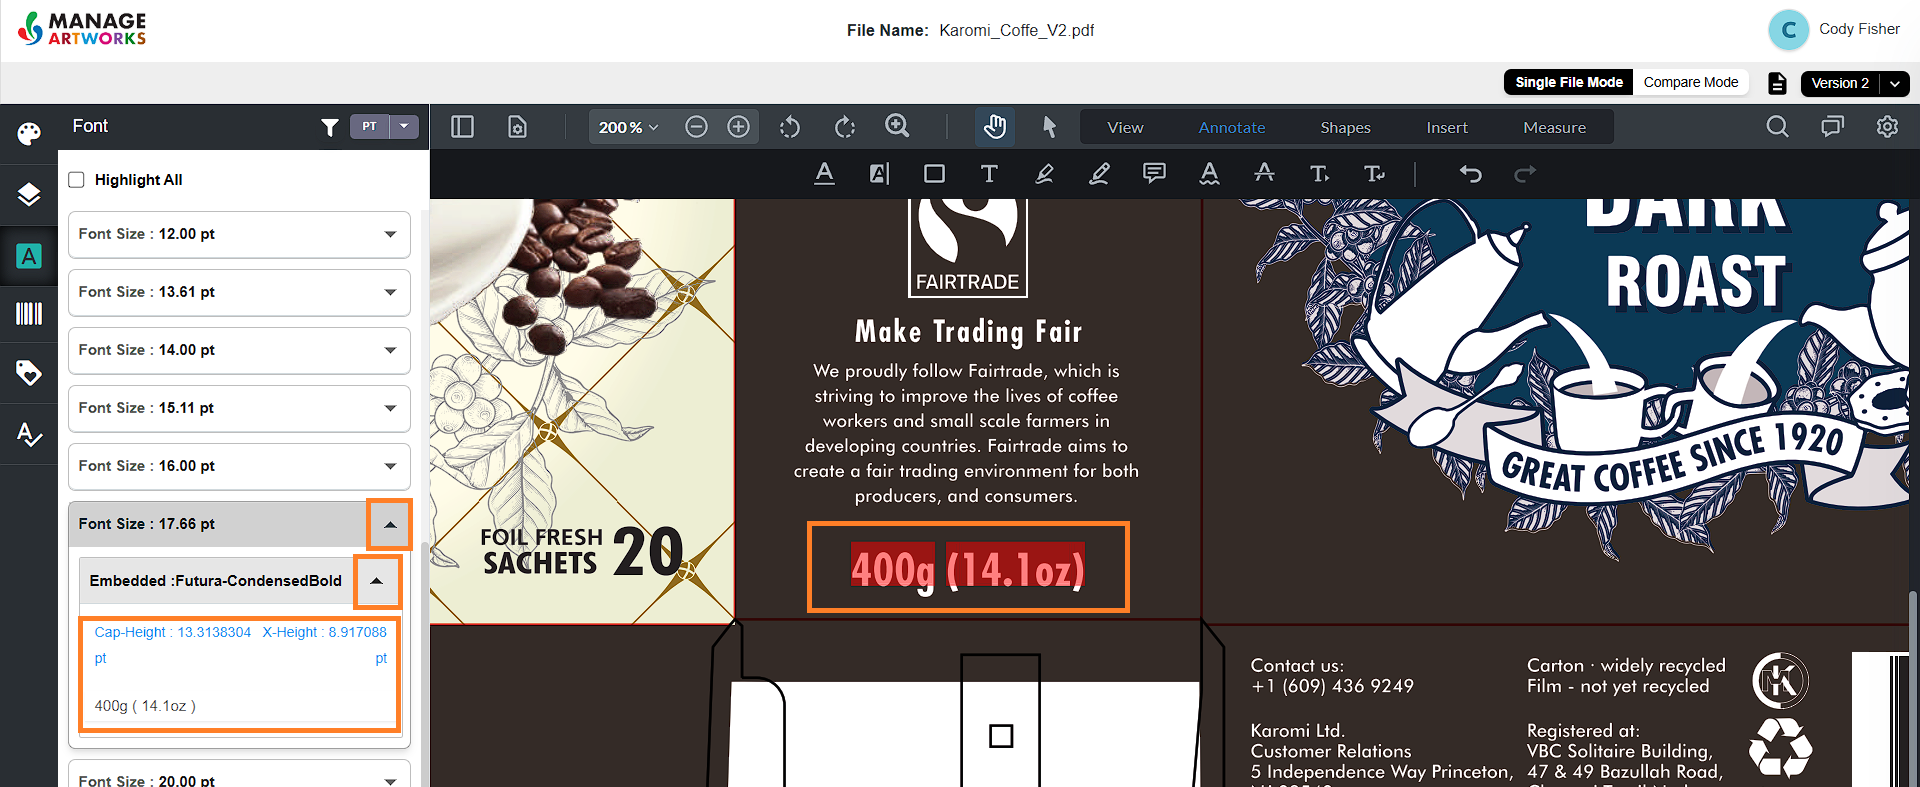
Font Terminology:
- Cap Height: The vertical height of capital letters, measured from the baseline.
- X-Height: The height of the main body of lowercase letters, excluding ascenders and descenders.
- X-Height Significance: Fonts with large x-heights are generally considered easier to read at small font sizes, whereas small x-heights require more spacing between letters and larger font size to achieve legibility.
To know more about Font tool, click here.
Barcode Tool
The Barcode tool helps you to verify the barcodes available in the artwork.
Access Barcode Information
- Click the Barcode tool to view all available barcodes in your artwork file.
- The tool lists all barcodes detected in the artwork. If not all barcodes were found or you see errors in the results, click Reprocess.
- This will re-scan the artwork and update the list and details.
- Recheck the list and details after reprocessing.
- If required, utilize the "Highlight All" option to visually identify all barcodes within the artwork.
- Click on any available barcode to access it's detailed information, including type, value, class, quality, ISO and/or GS1 specification parameters and more.
- Manual Detection:
If a barcode is not automatically detected:- Click Manual.
- On the artwork canvas, click-and-drag to draw a selection box around the barcode area. Make the box tight around the barcode.
- Click Generate. The tool will attempt to decode and display details for that selected region.
- If generation succeeds, the barcode appears in the barcode list and you can open its details like any other barcode.

To know more about Barcode tool, click here.

Braille Tool
The Braille tool helps you verify and translate Braille text available in an artwork file. Braille is a system of touch reading and writing for blind persons, where raised dots represent letters of the alphabet.
 | Note: Only Braille created using the Marburg Medium specification can be processed by the system. |
Access Braille Information
Before using the Braille tool, ensure that the Braille elements do not overlap with other artwork components such as text or graphics.
If the Braille overlaps with other elements, you must isolate it by enabling only the Braille layer. This is possible only if the Braille has been created in a separate layer.
To enable only the Braille layer:
- Click the Layer tool.
- Select only the Braille layer to make it visible.
Process and View Braille Details
- Click the Braille tool to open the Braille pane.
- From the Language drop-down menu, select the language used in the Braille text.
- Click Manual.
- On the artwork canvas, click and drag to define the area where the Braille is located.
- Click Generate Result to process.
- Once processed, the result will be available in Output Tab. Click the result to review it. The translated text appears under the Translation section.
- Hover over the translation to highlight the corresponding Braille dots on the artwork.

To know more about the Braille tool, click here.

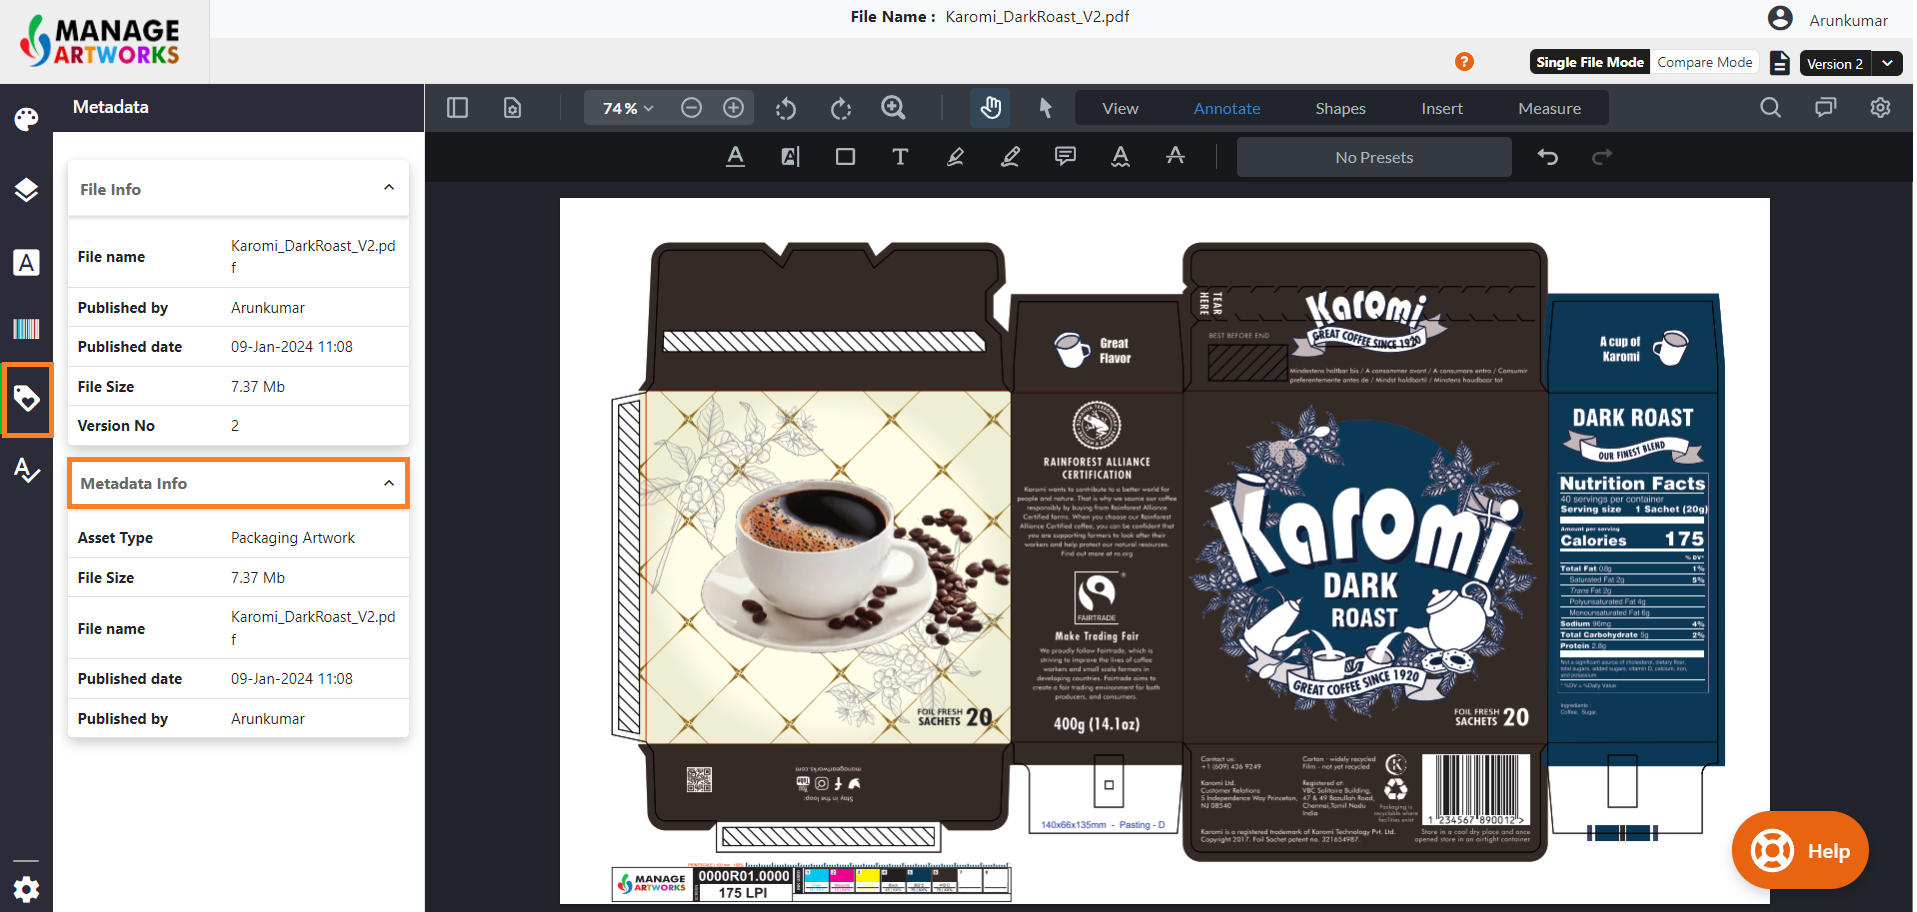
Metadata Tool
Metadata is "data about data." It provides information about a file, dataset, or resource, making it easier to find, organize, and use.
Metadata of an artwork file can also include pack size, NDC code, manufacturing location, etc.
Access Metadata Information
- Click Metadata to view the information about the artwork file.
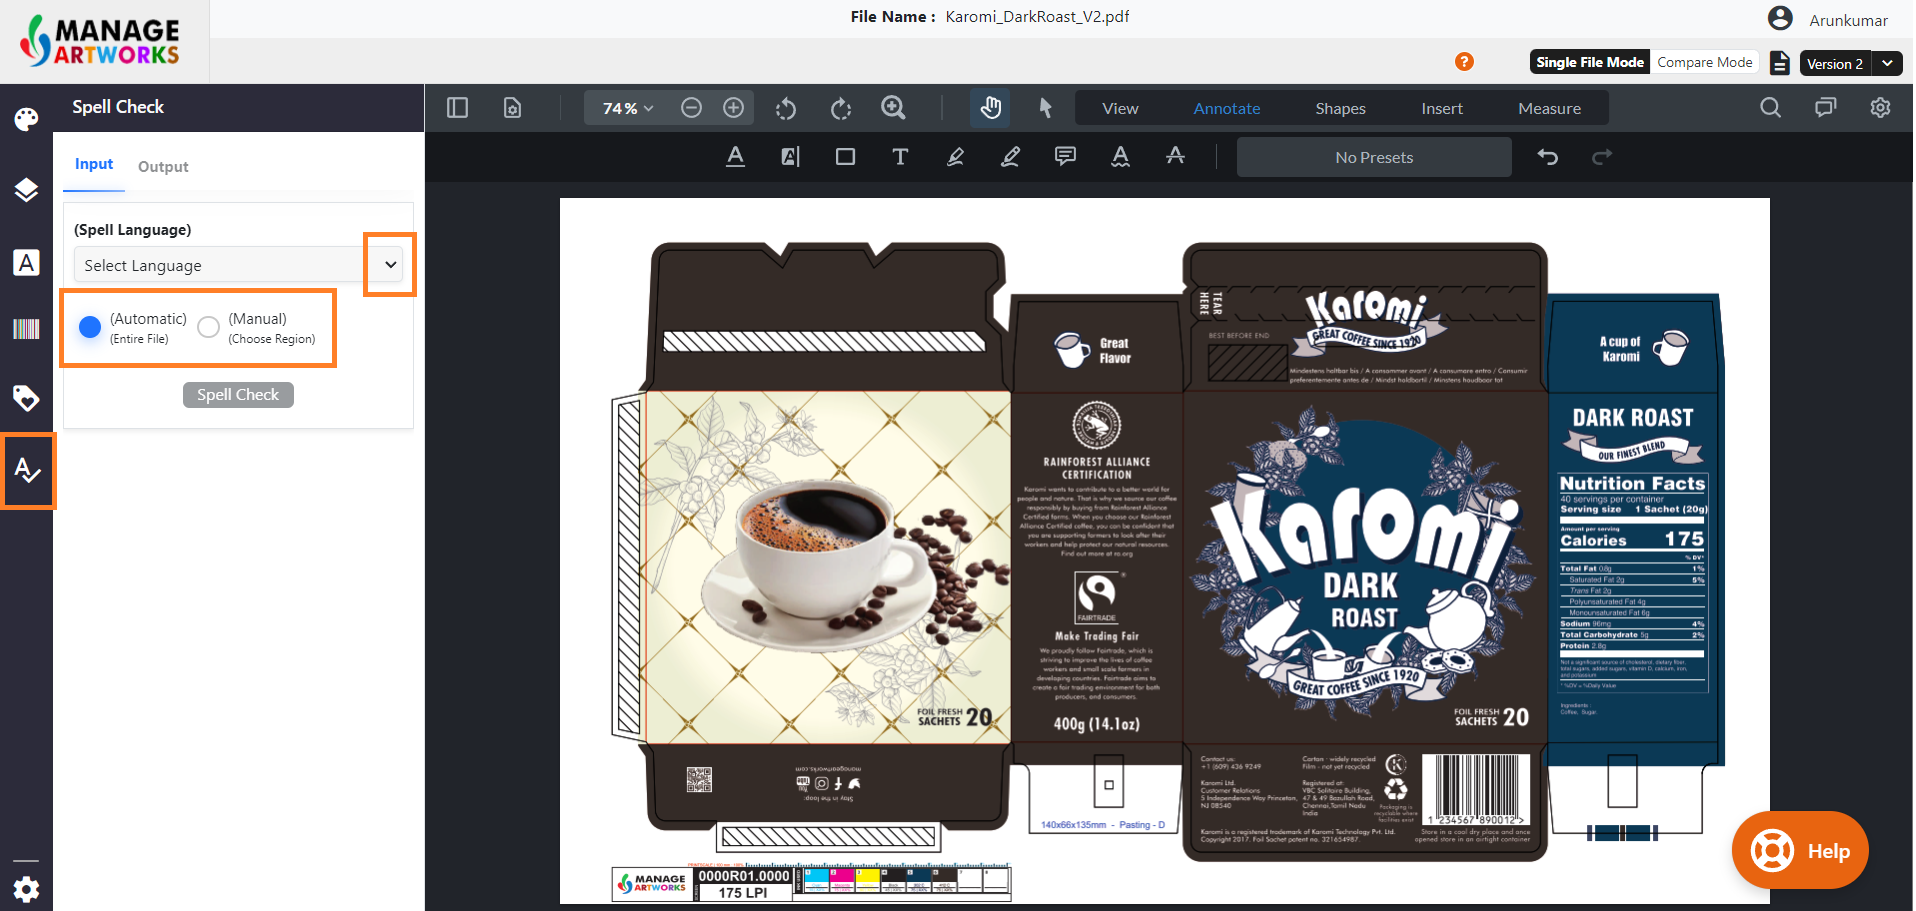
Spell Check Tool
The Spell Check helps you to verify the spellings used in the artwork. Spell Check addresses the spelling issues and simplifies the experience by building a dictionary, managing ignored words list, and correcting the misspelled words.
Access Spell Check
- Click the Spell Check tool.
- Spell Check Modes:
You can choose between Automatic and Manual modes based on your needs:- Automatic Mode: Analyzes the entire artwork file for spelling issues.
- Manual Mode: Allows you to select a specific region of the artwork for spell checking.
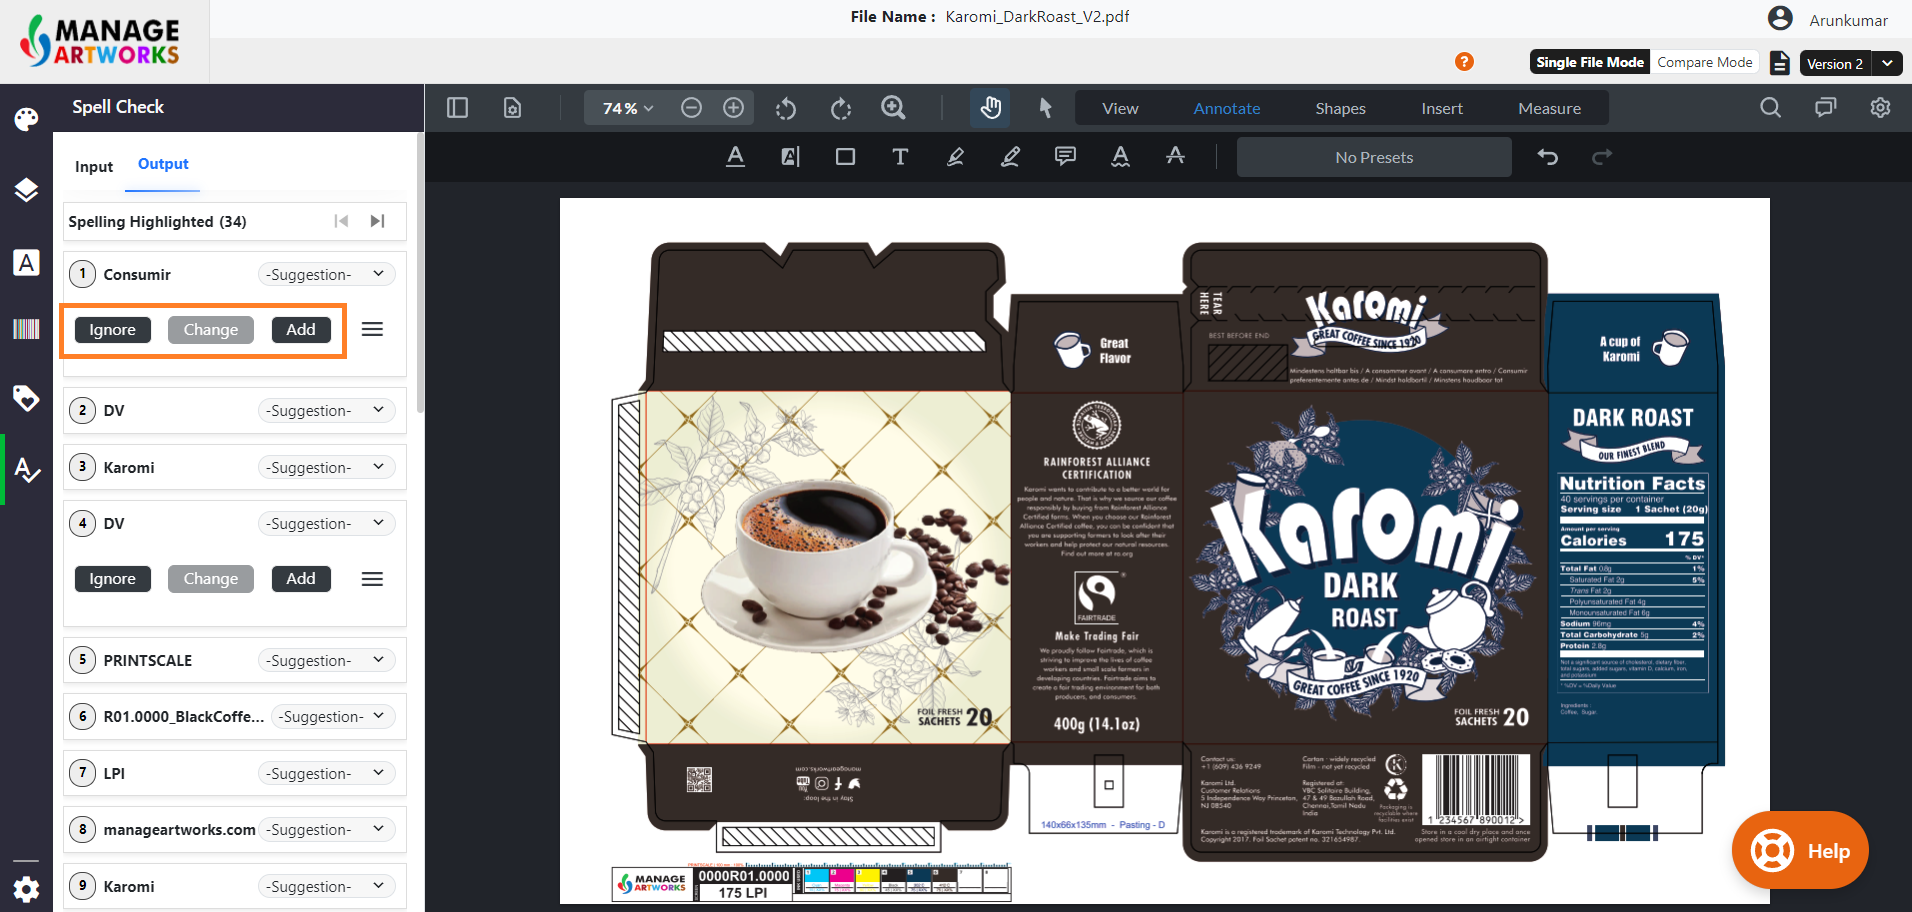
- Automatic Spell Check:
- Choose the Automatic option.
- Click the Select Language drop-down menu and choose the language used in your artwork file.
- Click the "Spell Check" button to initiate a scan of the entire artwork file.
- A list of misspelled words and those not in the dictionary will be displayed.
- You can take the following actions:
- Ignore: Skip the highlighted word without making changes.
- Change: Replace the word with a suggested correction or enter a custom replacement.
- Add: Add the word to your custom dictionary for future reference.
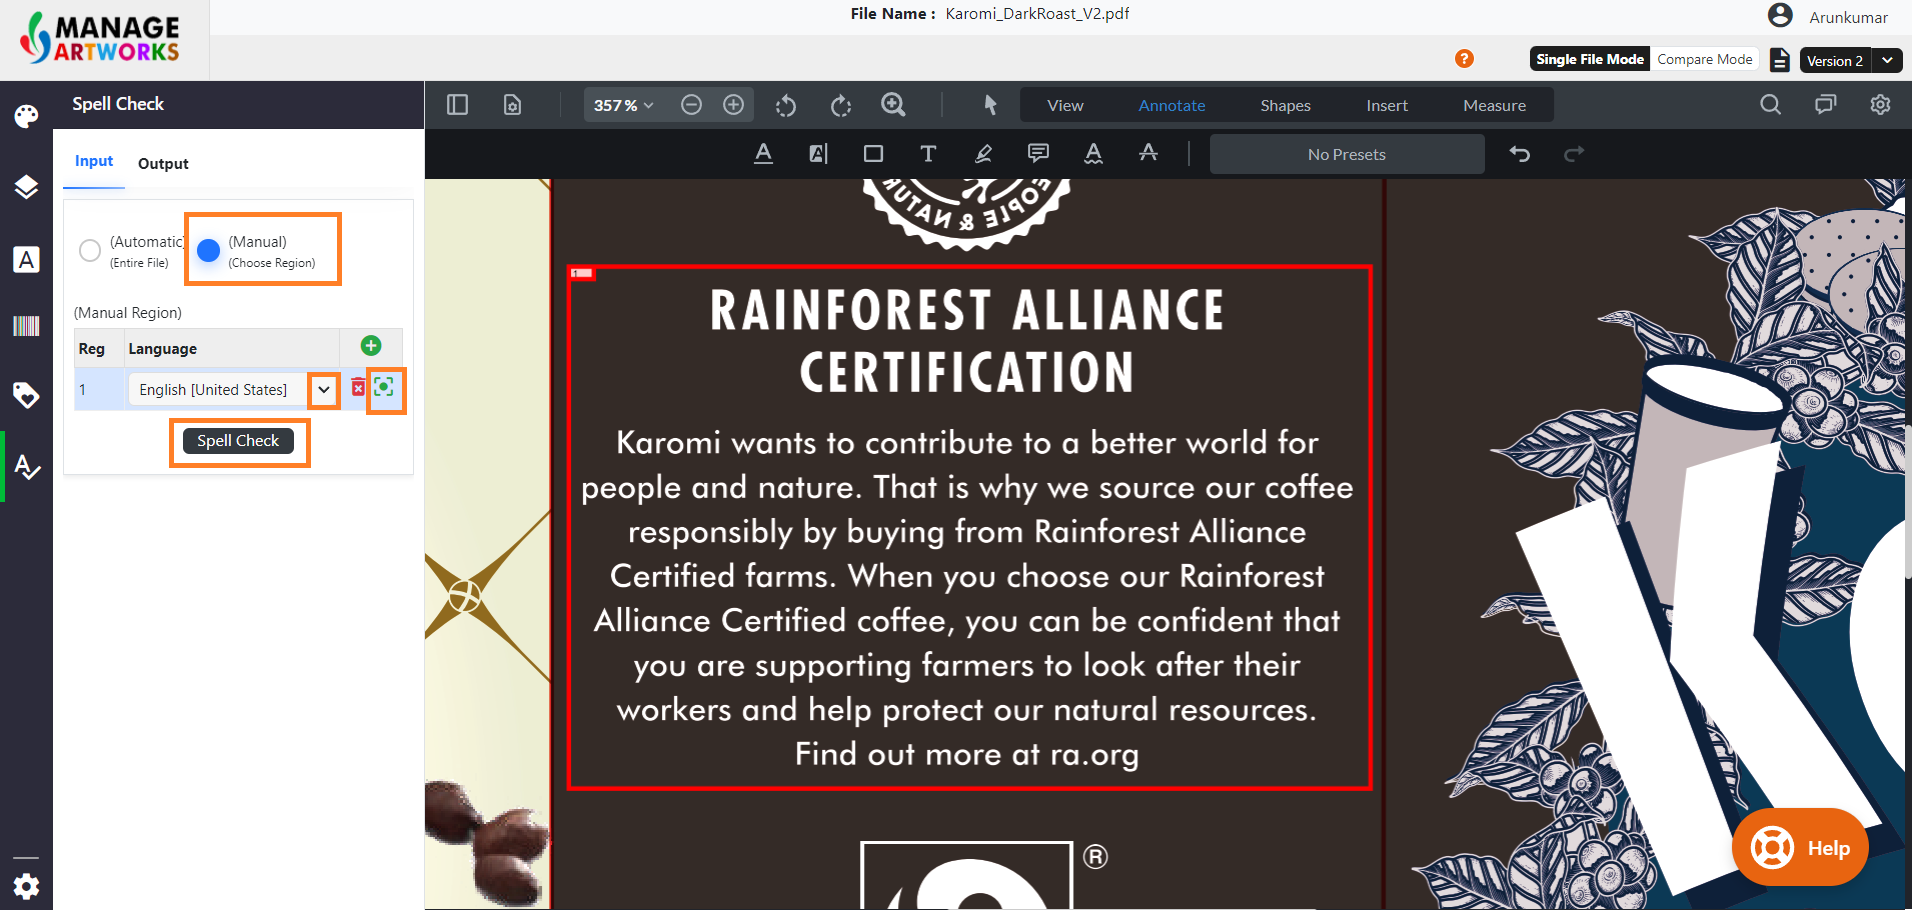
- Manual Spell Check:
Manual Spell Check is useful when your artwork contains multiple languages or when you want to check specific regions instead of the entire file.- Choose the Manual option to enable region-based spell checking.
- Click the Select Language drop-down menu and choose the language used in your artwork file.
- Click the Tooltip icon (next to the delete icon) and specify the area on the artwork that should be checked.
- Click "Spell Check" to analyze the selected region.
- A list of words which are misspelled and/or not listed in the dictionary will appear from that area.
- Like automatic spell check, you can use Ignore, Change or Add options on the highlighted misspelled word. Refer Automatic Spell Check section to know more about Ignore, Change and Add options.
- Checking Multiple Languages:
If your artwork contains multiple languages:- Click the plus (+) icon to add a new manual spell check row.
- For each new row:
- Select the appropriate language.
- Define the corresponding region using the Tooltip tool.
- Click Spell Check to analyze each region individually.
- A list of words which are misspelled and/or not listed in the dictionary will appear from that area.
- Like automatic spell check, you can use Ignore, Change or Add options on the highlighted misspelled word. Refer Automatic Spell Check section to know more about Ignore, Change and Add options.
To know more about Spell Check tool, click here.