File Revision (Enterprise Plan)
 | Note: This article explains how to revise a file in the Enterprise plan. For more information on all ManageArtworks plans, click here. |
File revision allows you to update an older file with a newer version while maintaining version history and metadata. This process can be initiated either through the Asset Library or via the New Project module.
 | Note: File revisions are only supported for files stored in the Asset Library. Files uploaded directly from your desktop cannot be revised unless first stored in the Asset Library. |
Revise a File from the New Project Module
How to Revise a File from Workflow?
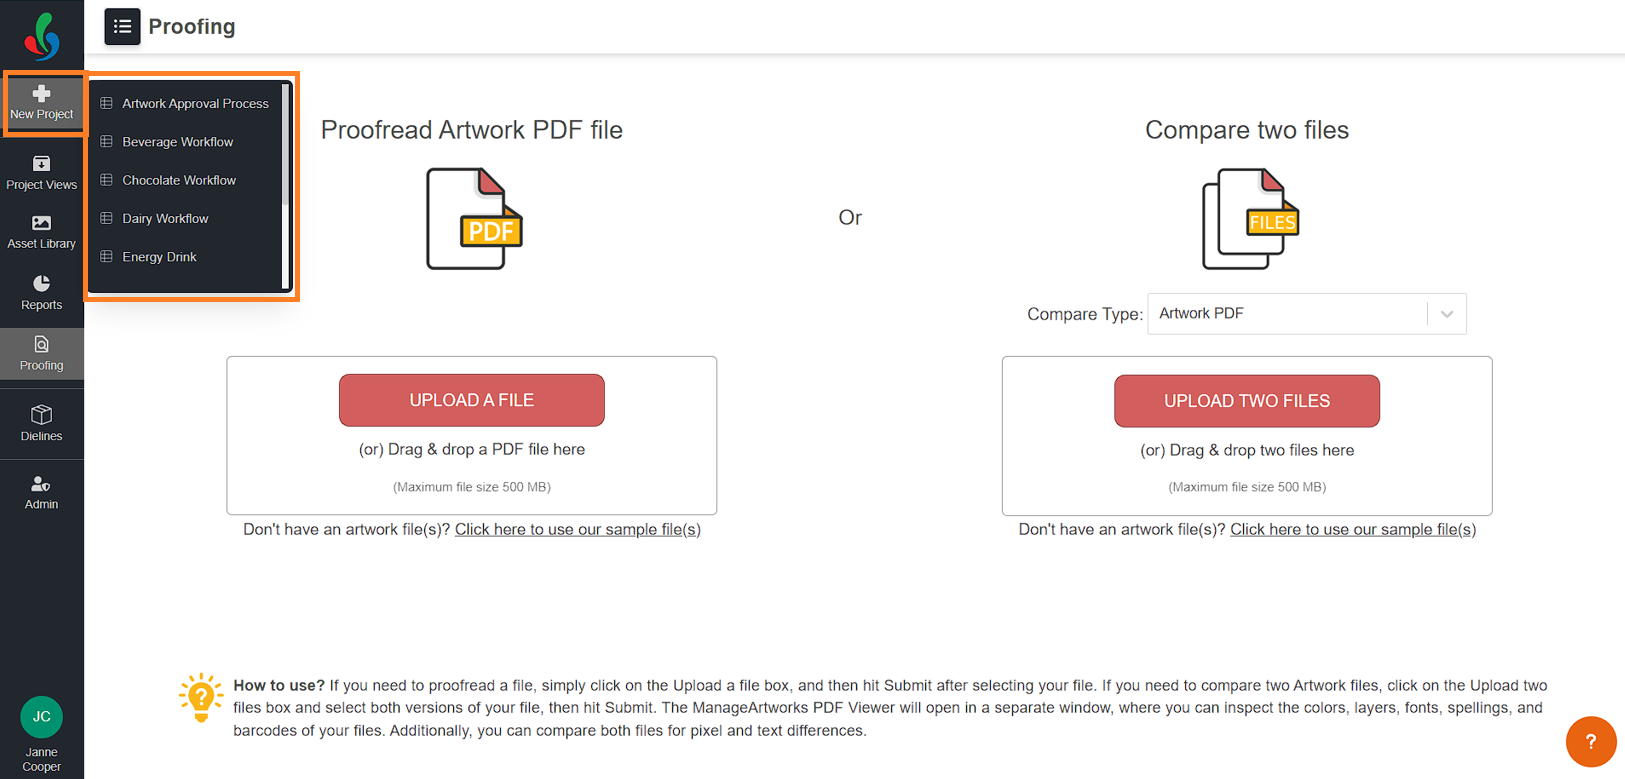
01. Access Project Templates
- Log in to your ManageArtworks account.
- Hover over the New Project button on the left pane.
- A menu will display available workflow templates.
Note: Only users assigned to the Start Activity can view and select templates. - Choose a workflow template that aligns with your project's requirements.
02. Revise the File
You can revise files either:
- Before initiating the project, or
- After the project has started.
Files can be revised at the Project level or under individual Component rows.
| Note: The Component rows become visible only after components have been added under the Components tab. The number of rows depends on the number of components added. If the selected template does not include components, only the Project Files row will appear. |
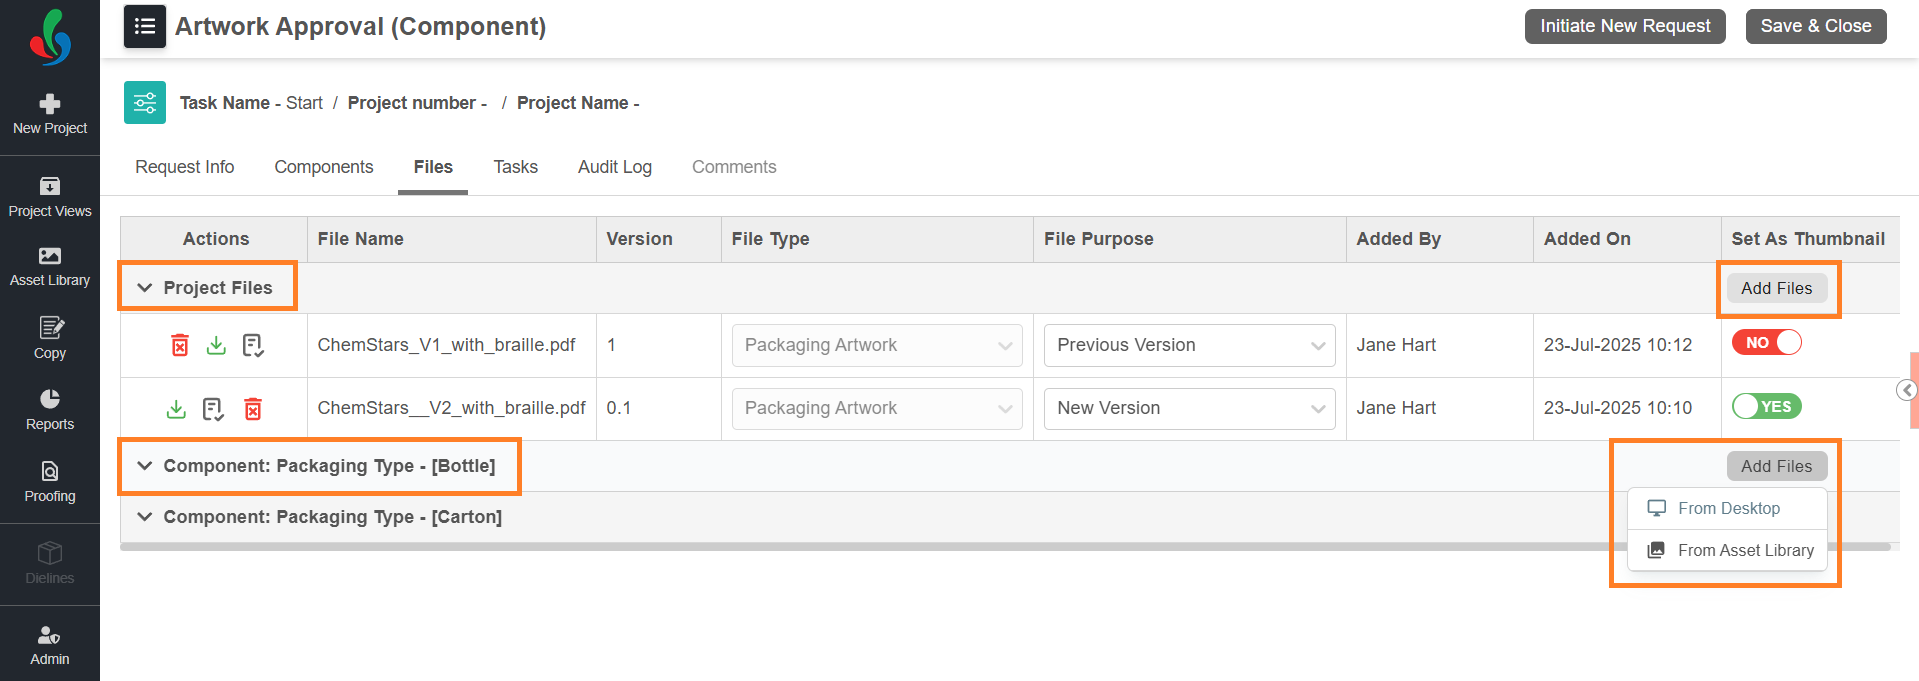
To revise a file:
- Navigate to the Files tab.
- Choose where you want to revise the file:
- For general files, use the Project Files row.
- For component-specific files, use the respective Component row.
- Click the Add Files button corresponding to the desired section.
- Select the files using one of the following method:
Note: Only files from asset library can be revised.- From Desktop: Allows you to browse and select files from your local system.
Note: Files uploaded from Desktop cannot be used for revision. Use this method only for new or reference files.- Select "From Desktop."
- Locate and select your desired files.
- Click "Open."
- Asset Library: Select existing files from the Asset Library. (required for revision)
- Select "From Asset Library."
- Choose the desired file(s) from the File Selection window.
- Click "Attach Files" to add them to your project files.
- From Desktop: Allows you to browse and select files from your local system.
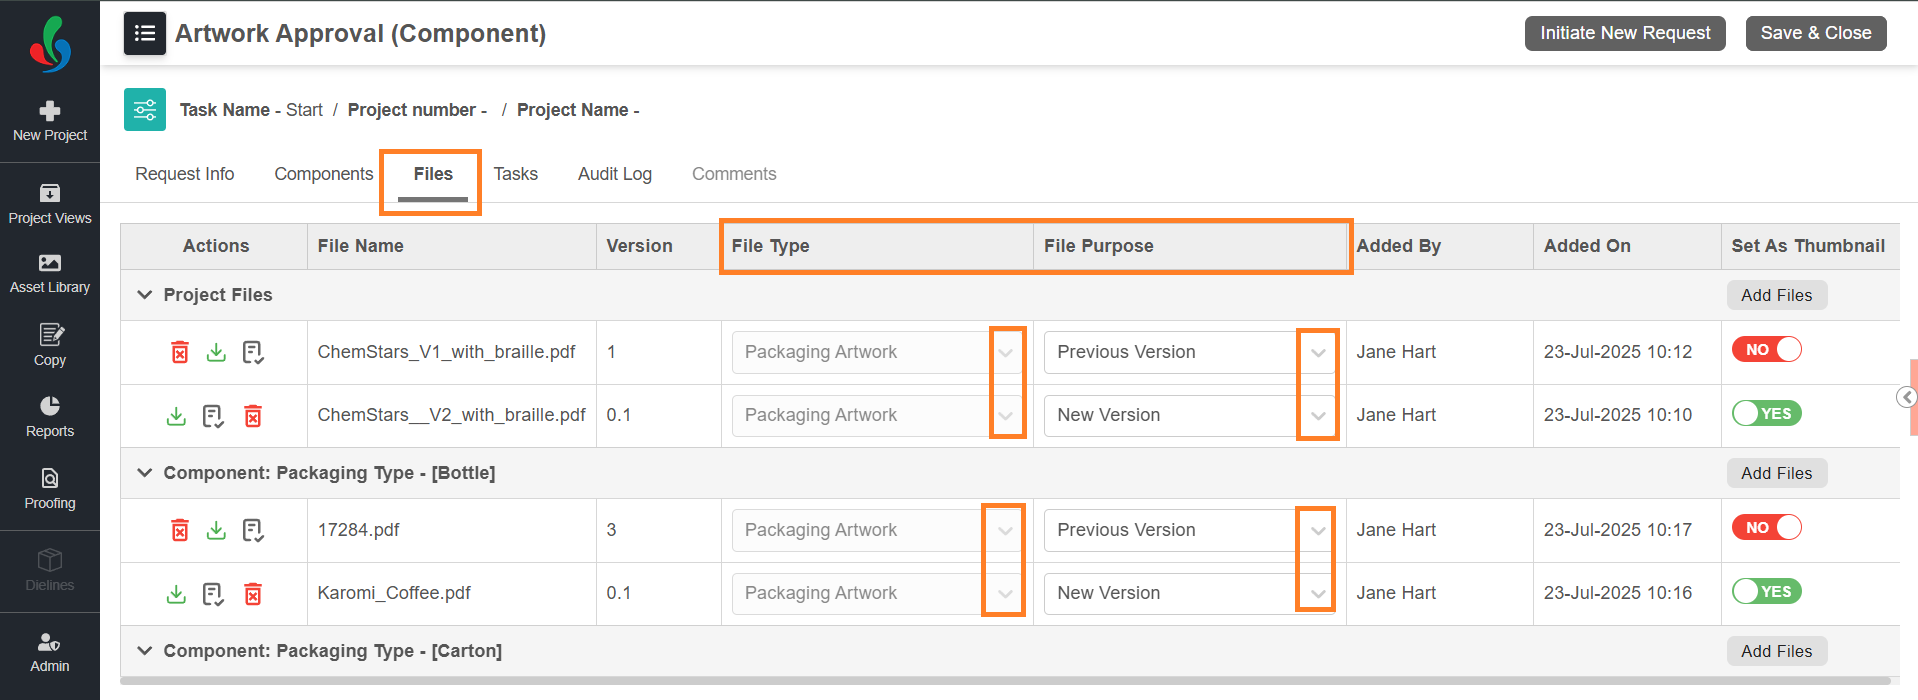
03. Configure File Revision Details
Once the files are added:
- Assign File Type
- Select the File Type for each from the drop-down menu.
Note: For files added from the Asset Library, the File Type is automatically assigned based on the Asset Library data and cannot be changed. Ensure that the File Type and File Extension of the new file matches the older file for proper revision.
- Select the File Type for each from the drop-down menu.
- Set File Purpose:
- For the older file, set the File Purpose as Previous Version.
Note: This option is only available for files sourced from the Asset Library. - For the newer file, set the File Purpose as New Version.
Note: This option is only available for files sourced from Desktop.
- For the older file, set the File Purpose as Previous Version.
| Note: In a project, only one file type can be revised at a time. However, in a component workflow, multiple revisions of the same file type are allowed. The same Asset Library file cannot be used across multiple components for revision. |
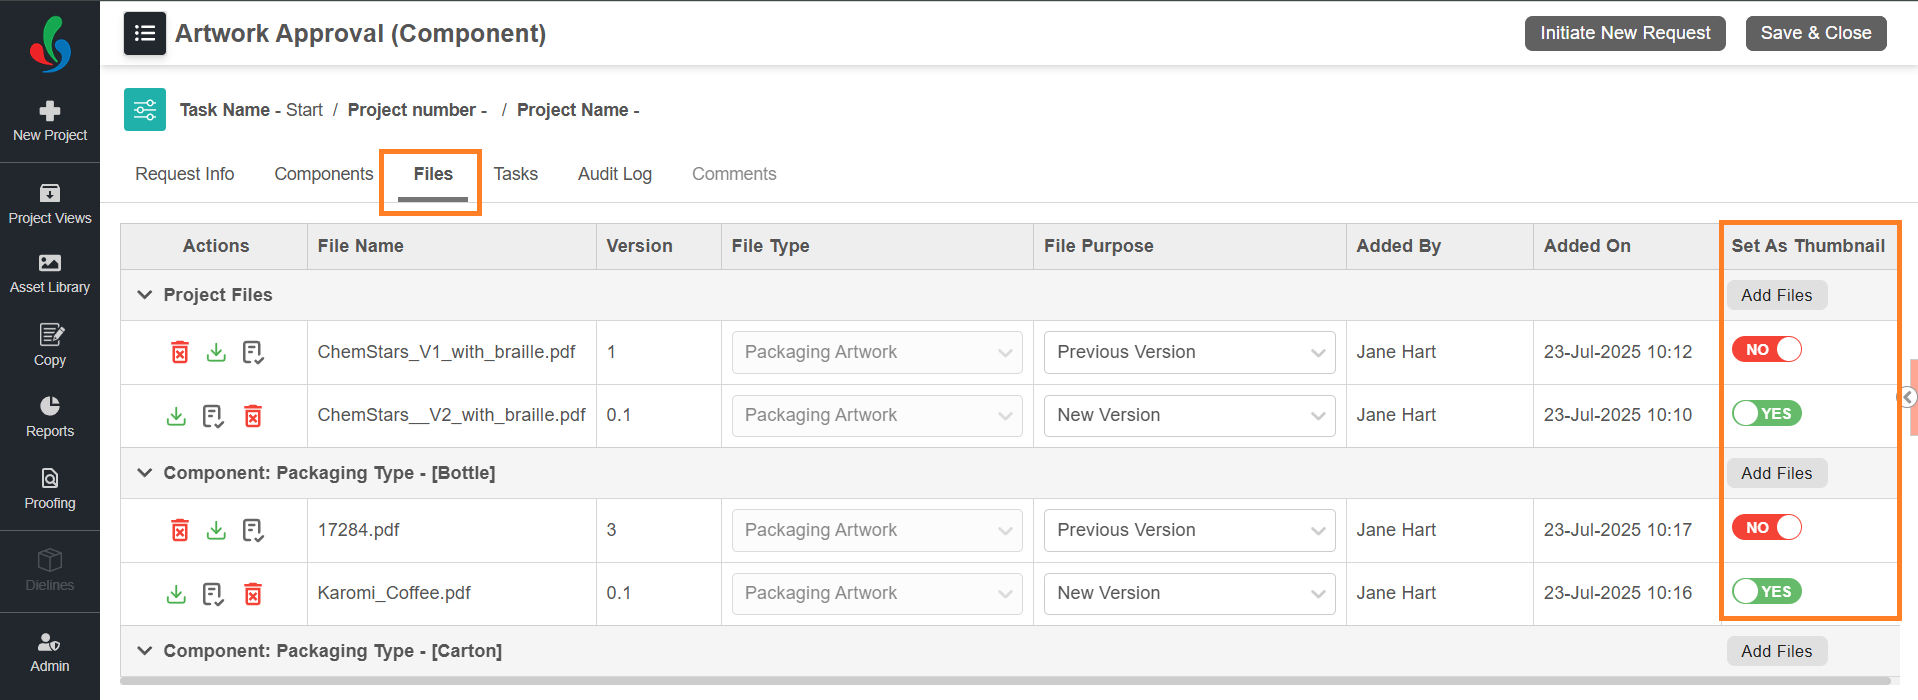
04. Set Thumbnail
You can optionally mark one file per section (Project or Component) as a thumbnail.
- Locate the file you want to mark as a thumbnail.
- In the Set As Thumbnail column, toggle the switch from NO to YES next to the desired file.
Note: Only one file can be set as a thumbnail per section (Project or Component). Selecting a new thumbnail will automatically deselect the previously set file in that section. - Project-level thumbnails appears for the entire project, while component-level thumbnails apply only to the respective component.
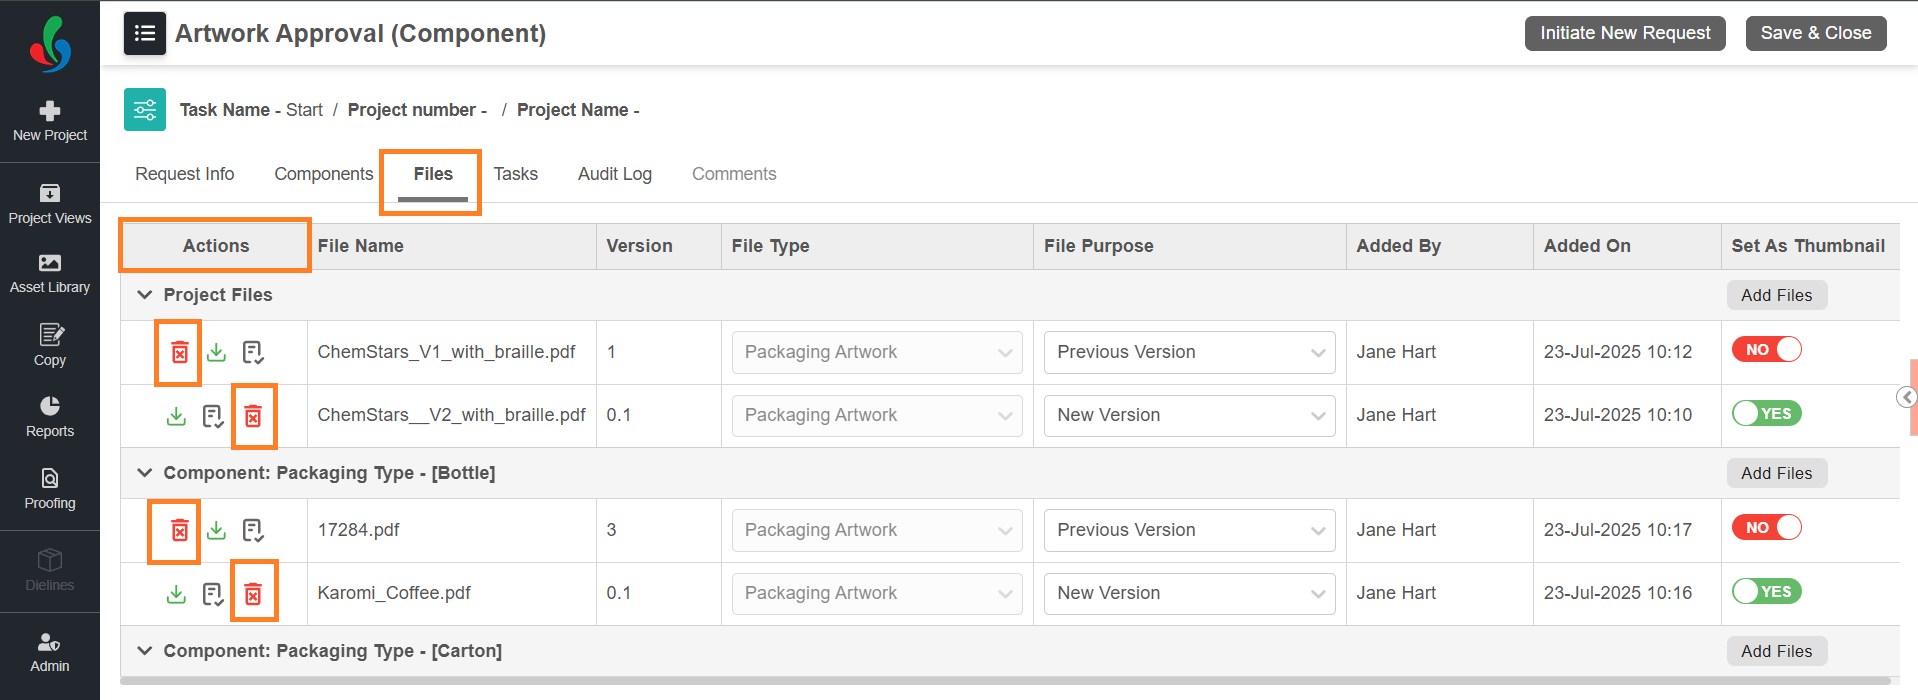
05. Delete Unwanted Files (Optional)
- If necessary, click the trash icon in the Action column associated with the desired file to delete file.
Note: Files marked with the File Purpose as Previous Version cannot be deleted.
06. Finalize Project Details
- If you’re uploading files before initiating a project, ensure all other project details are configured. For more details, refer to the Configure Project Details section.
File Publishing from Workflow
Once the workflow is complete, files marked as New Version will replace those marked as Previous Version in the Asset Library, depending on your organization’s configuration.
| Note: To configure specific file types or activity for publishing, please contact the ManageArtworks Support Team. |
 | File Publishing Behavior
|
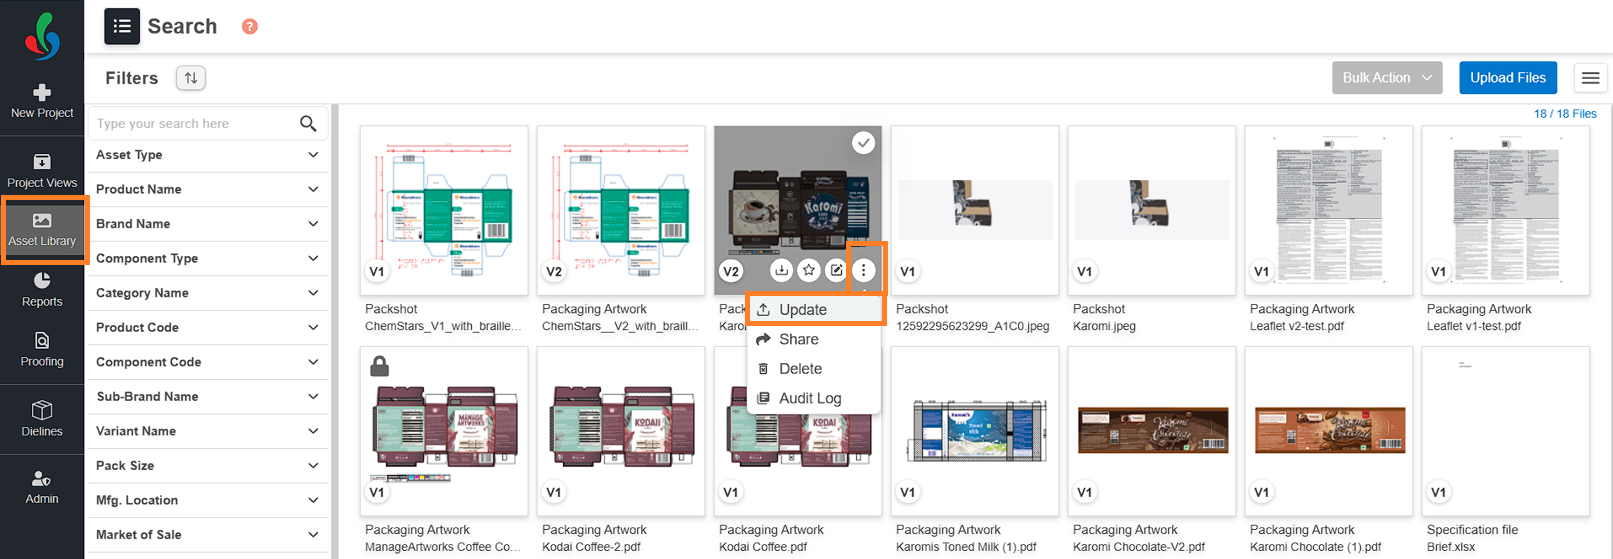
Revise a File from Asset Library
How to Revise a File from the Asset Library?
- Log in to your ManageArtworks account.
- Navigate to the Asset Library module.
- Locate the file you want to update.
- Hover over the file and click the three-dot menu (⋮).
- Select Update.
- In the pop-up window, locate and select the new version of the file from your computer.
- Click Open to upload the file.
- The existing file will be overwritten with the newly uploaded version.