Customize Views
Watch a quick video tutorial and get started
ManageArtworks provides flexible and configurable Views that allow you to tailor the project and task information displayed according to your specific needs.
Predefined Views
The system includes a set of predefined views designed to help you easily navigate and manage your projects. Each view focuses on a specific aspect of your workflow. You can further customize these views to display only the fields that matter most to you.
For example, a project may contain numerous form fields, but while tracking progress, you might only want to focus on key details such as Brand Name, Product Name, or Category. Using the Admin Views option, administrators can configure which form fields are visible in each view, ensuring that users see only relevant information.
Available Views
- Inbox: Displays all tasks currently assigned to the user.
- In-Progress Projects: Lists projects that are currently active.
- All Projects: Shows every project available in the system.
- Projects I Initiated: Displays projects that were initiated by the user.
- Projects I Participated: Lists projects where the user participated in one or more tasks, including those not initiated by them.
- Completed Projects: Displays projects that have been completed.
- Terminated Projects: Lists projects that were terminated before completion.
- Copy Published: Shows all published copy files available in the system.
- All Components: Displays all components associated with parent projects.
There is no separate view named All Components; however, when a project is split into components, each component appears under its parent project and is displayed as a child project within the view. Using the All Components configuration, you can customize this view to define which form fields should be visible for component-level projects.
Edit Views
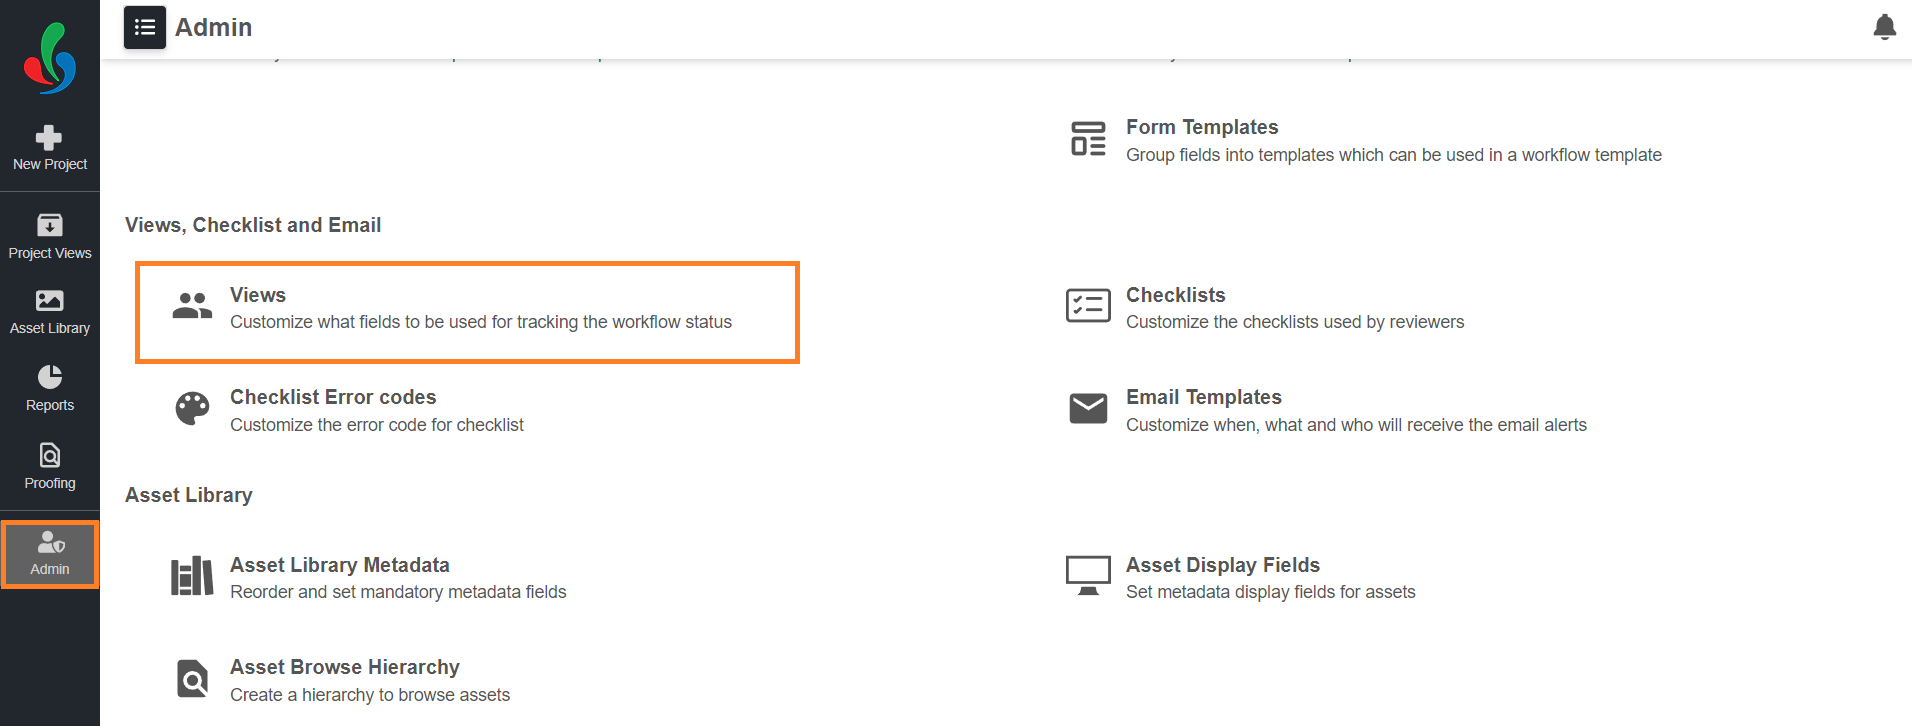
01. Access the Admin Module
- Log in to your ManageArtworks account.
- Navigate to the Admin module.
- Click the Views tab.
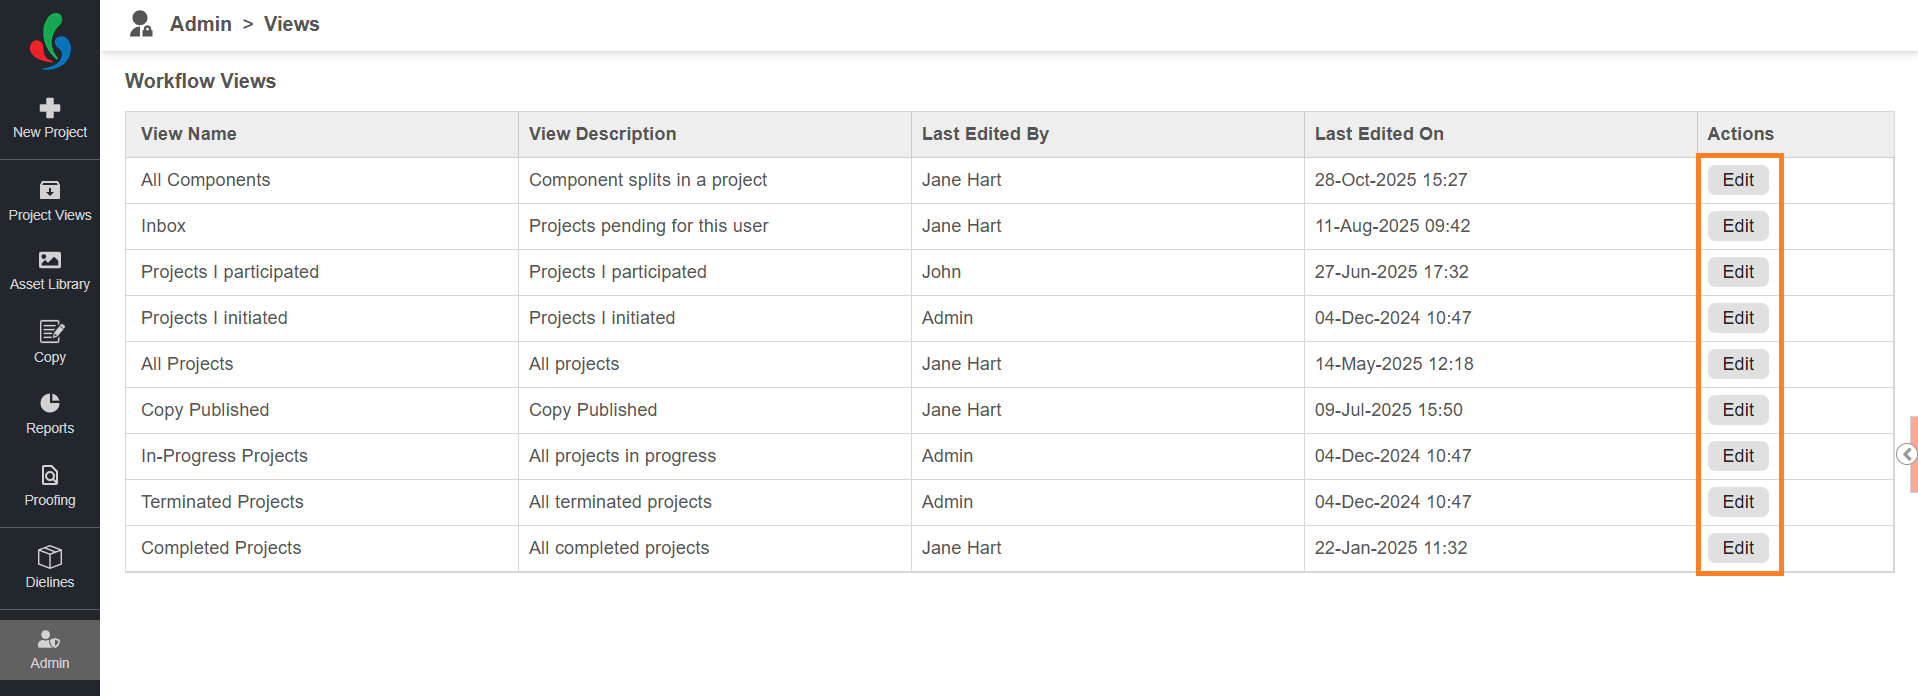
02. Customize View
- Click the "Edit" button in the Actions column associated with the desired view name.
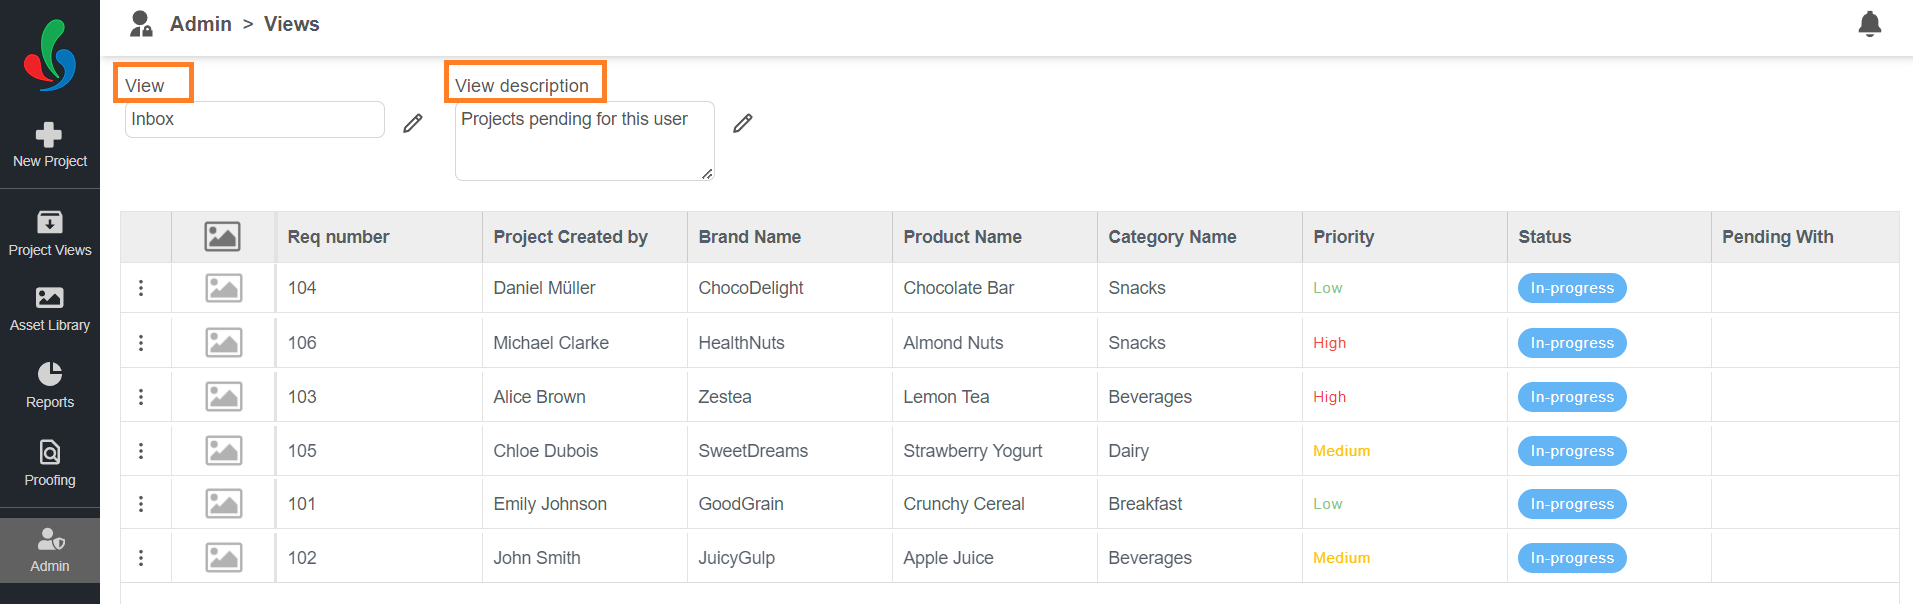
- Name and Description:
- Name (Optional): You can rename the view for better context or personalization by clicking the Edit icon next to the name.
Note: Changing the view name does not affect its underlying functionality. For example, renaming Inbox to Terminated will only update the label, not the logic behind it. - Description (Optional): You can edit or add a short description to clarify the view’s purpose and specify what kind of information it displays.
- Name (Optional): You can rename the view for better context or personalization by clicking the Edit icon next to the name.
- Manage Display Fields:
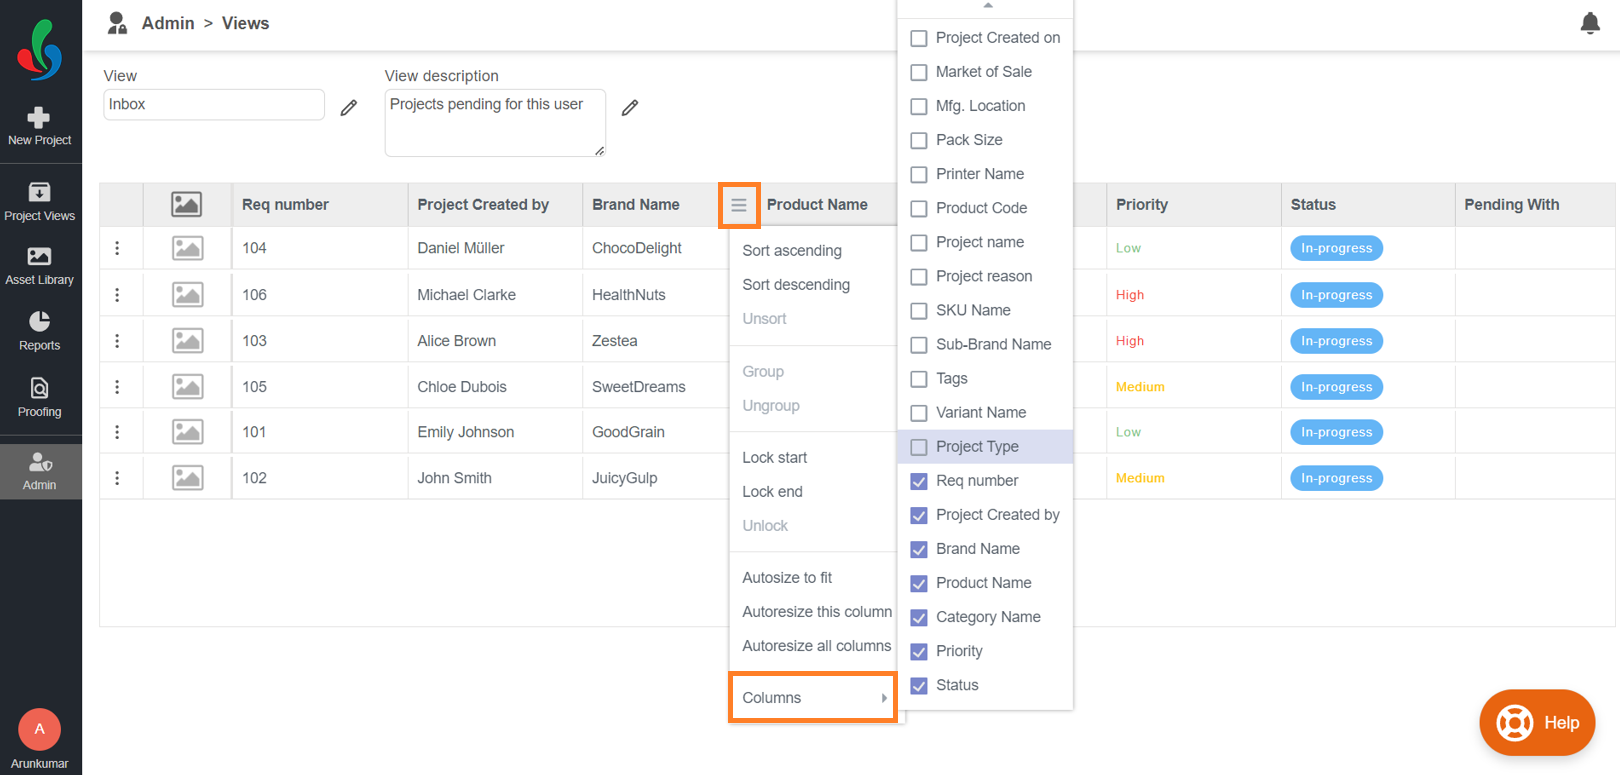
- Add Fields: Hover over existing display fields in the header row. Click the hamburger icon and hover over "Column." A list of available fields will appear. Select the ones you want to add by checking the boxes next to their names.
- Remove Fields: Uncheck the boxes next to any fields you want to remove from the view.
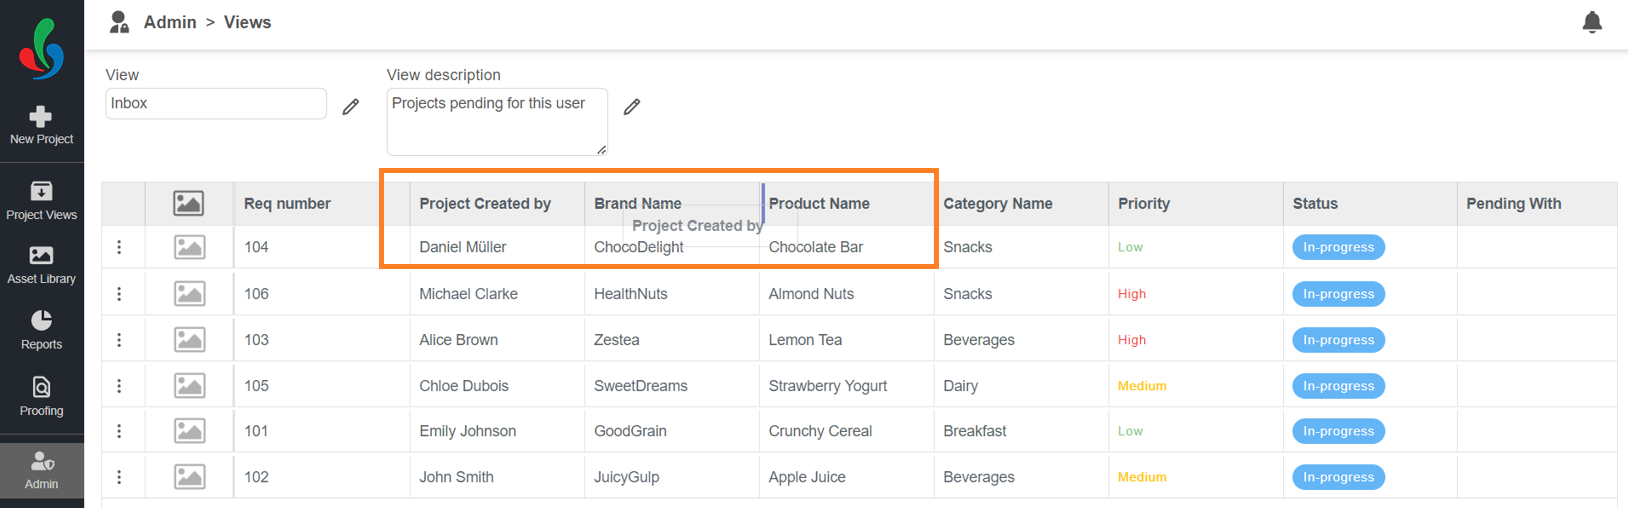
- Rearrange Columns:
- Click and drag the column headers to reposition them in the desired order. Prioritize the information you access most frequently.
- Click and drag the column headers to reposition them in the desired order. Prioritize the information you access most frequently.
- System-Generated Fields:
- Pending with: This column automatically shows users waiting for specific actions in the workflow. You can't remove it.
- Configure Workflow Actions (If Applicable):
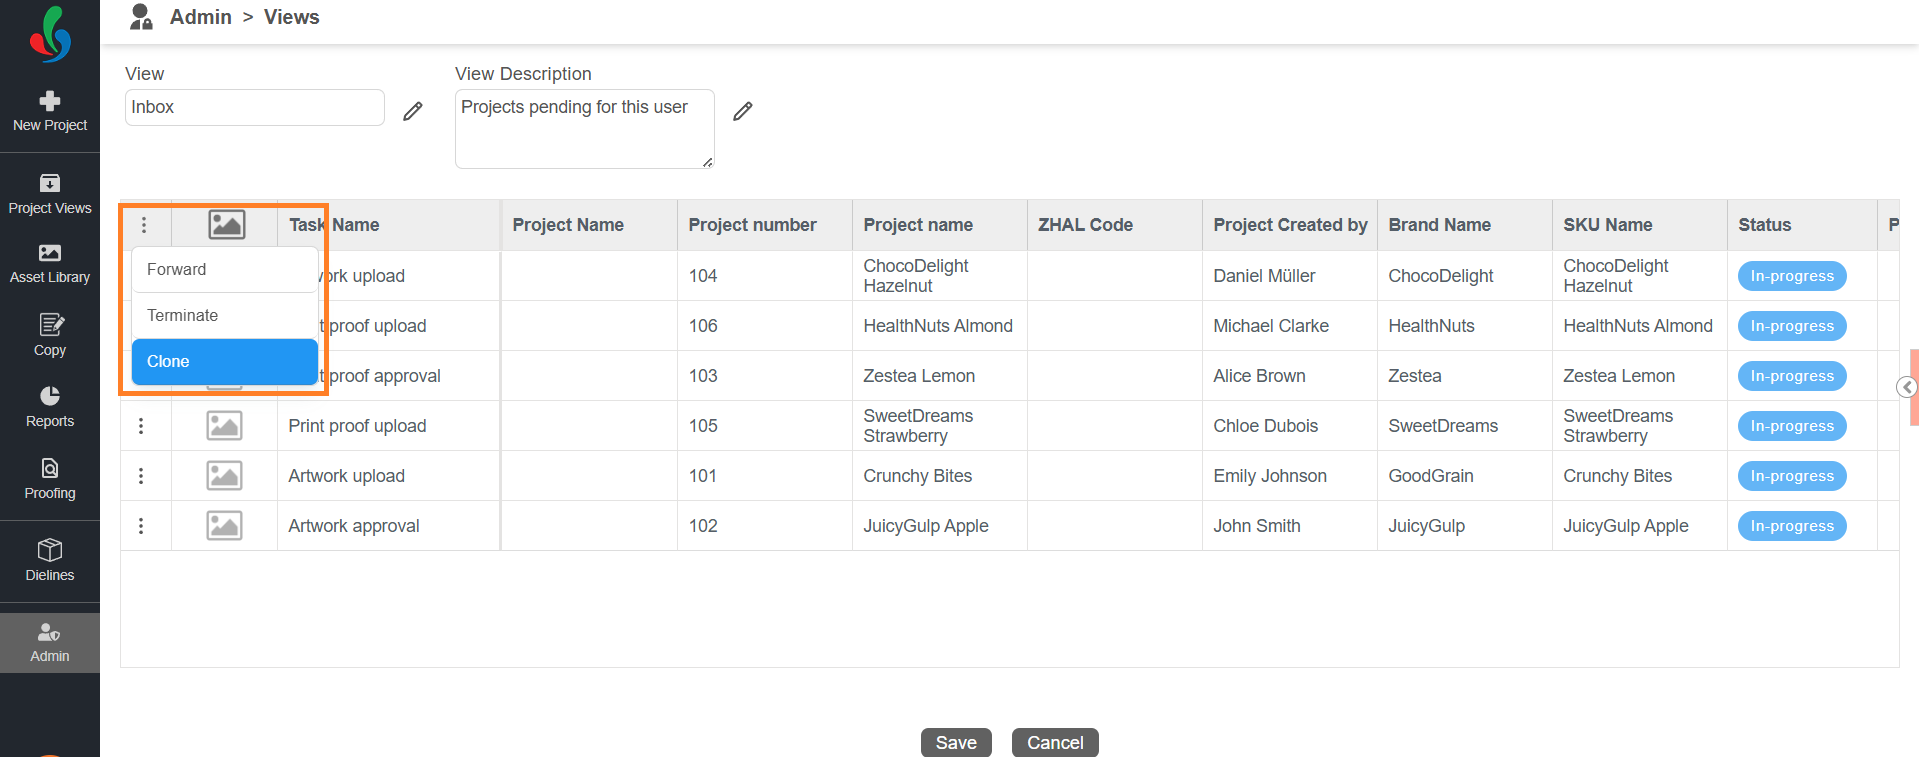
Workflow actions such as Forward, Terminate, and Clone enable users to perform key operations directly from a project view, helping streamline task management. You can configure which workflow actions are available in each view to ensure that users can access only the relevant actions in the appropriate context.
Note: The availability of workflow actions depends on the view being configured. For example, workflow actions such as Forward, Terminate, and Clone cannot be configured in the All Components view.- Hover over the three-dot icon in the header row.
- Select or unselect the desired workflow actions (Forward, Terminate, or Clone).
Note: The workflow actions available for selection will depend on the view you are editing.
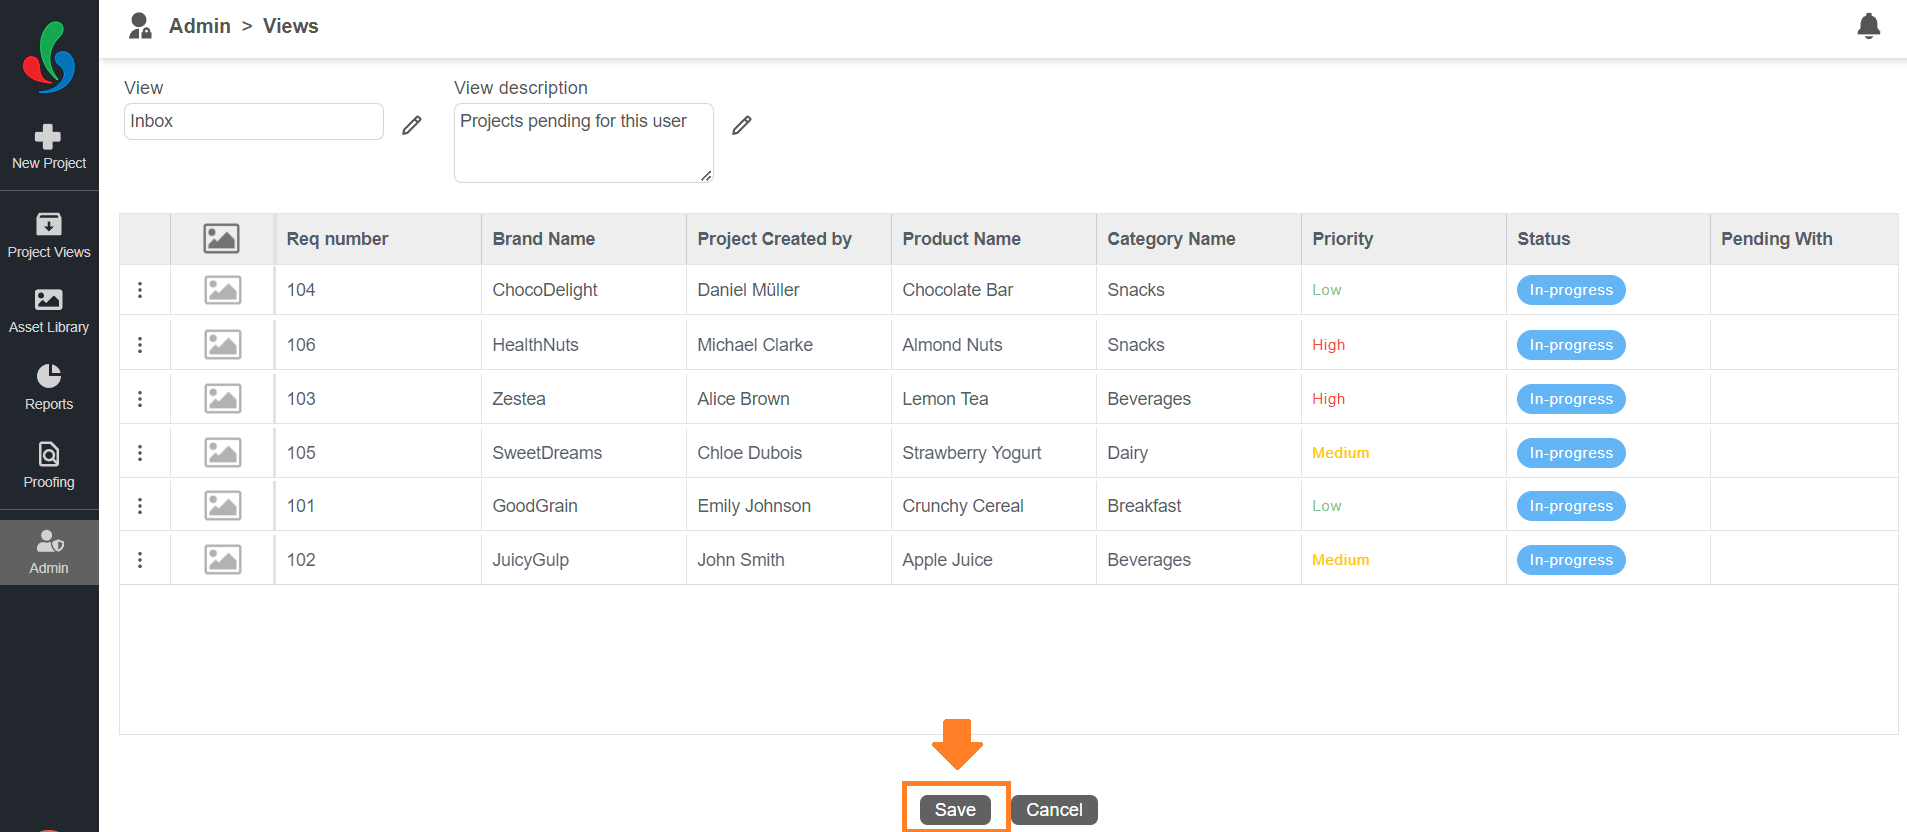
03. Save Your Changes
- Once you've customized your view to your liking, click "Save" to apply the changes. The modified view will now appear in the Project Views.