Copy Elements
The Copy Elements feature enables users to define and store master data for different content headings—referred to as "elements." An element acts as a placeholder for data entry.
For example, "Address" can be an element. When this element is added to a Copy tab, users assigned to it can input corresponding values such as: 9th Floor, VBC Solitaire Building, Bazullah Rd, T. Nagar, Chennai, Tamil Nadu 600017.
Watch a Quick Video Tutorial
Add a New Copy Element
- Log in to your ManageArtworks account.
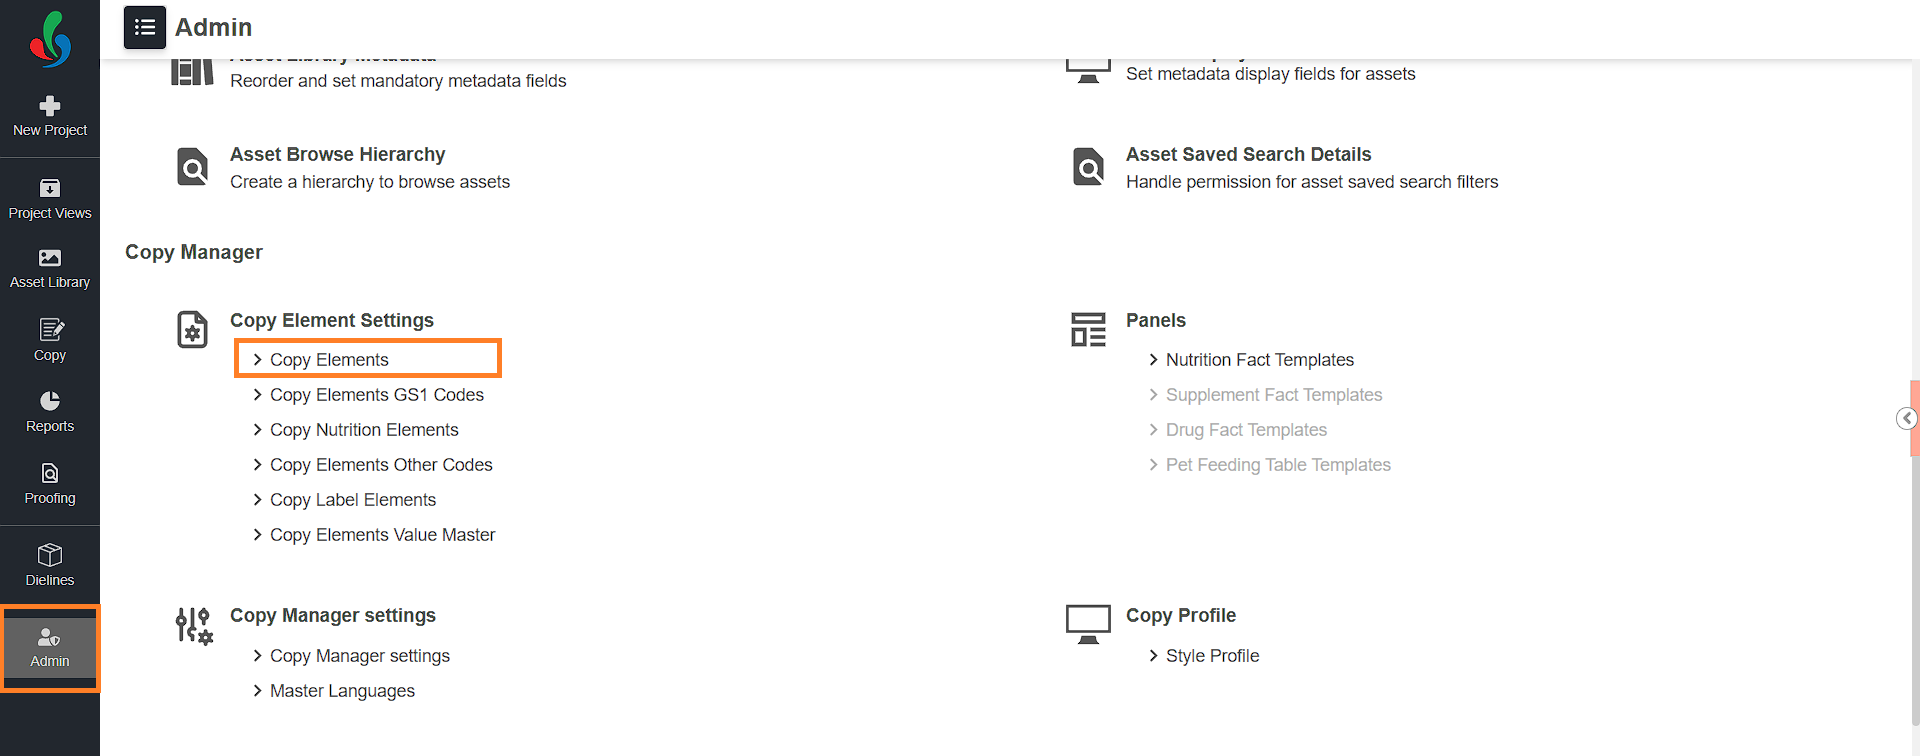
- Navigate to the Admin module.
- Under Copy Element Settings, click Copy Elements.
- A list of predefined copy elements will be displayed by default.
- If the element you need is not listed, you can create a custom one.
- To create a new Copy Element:
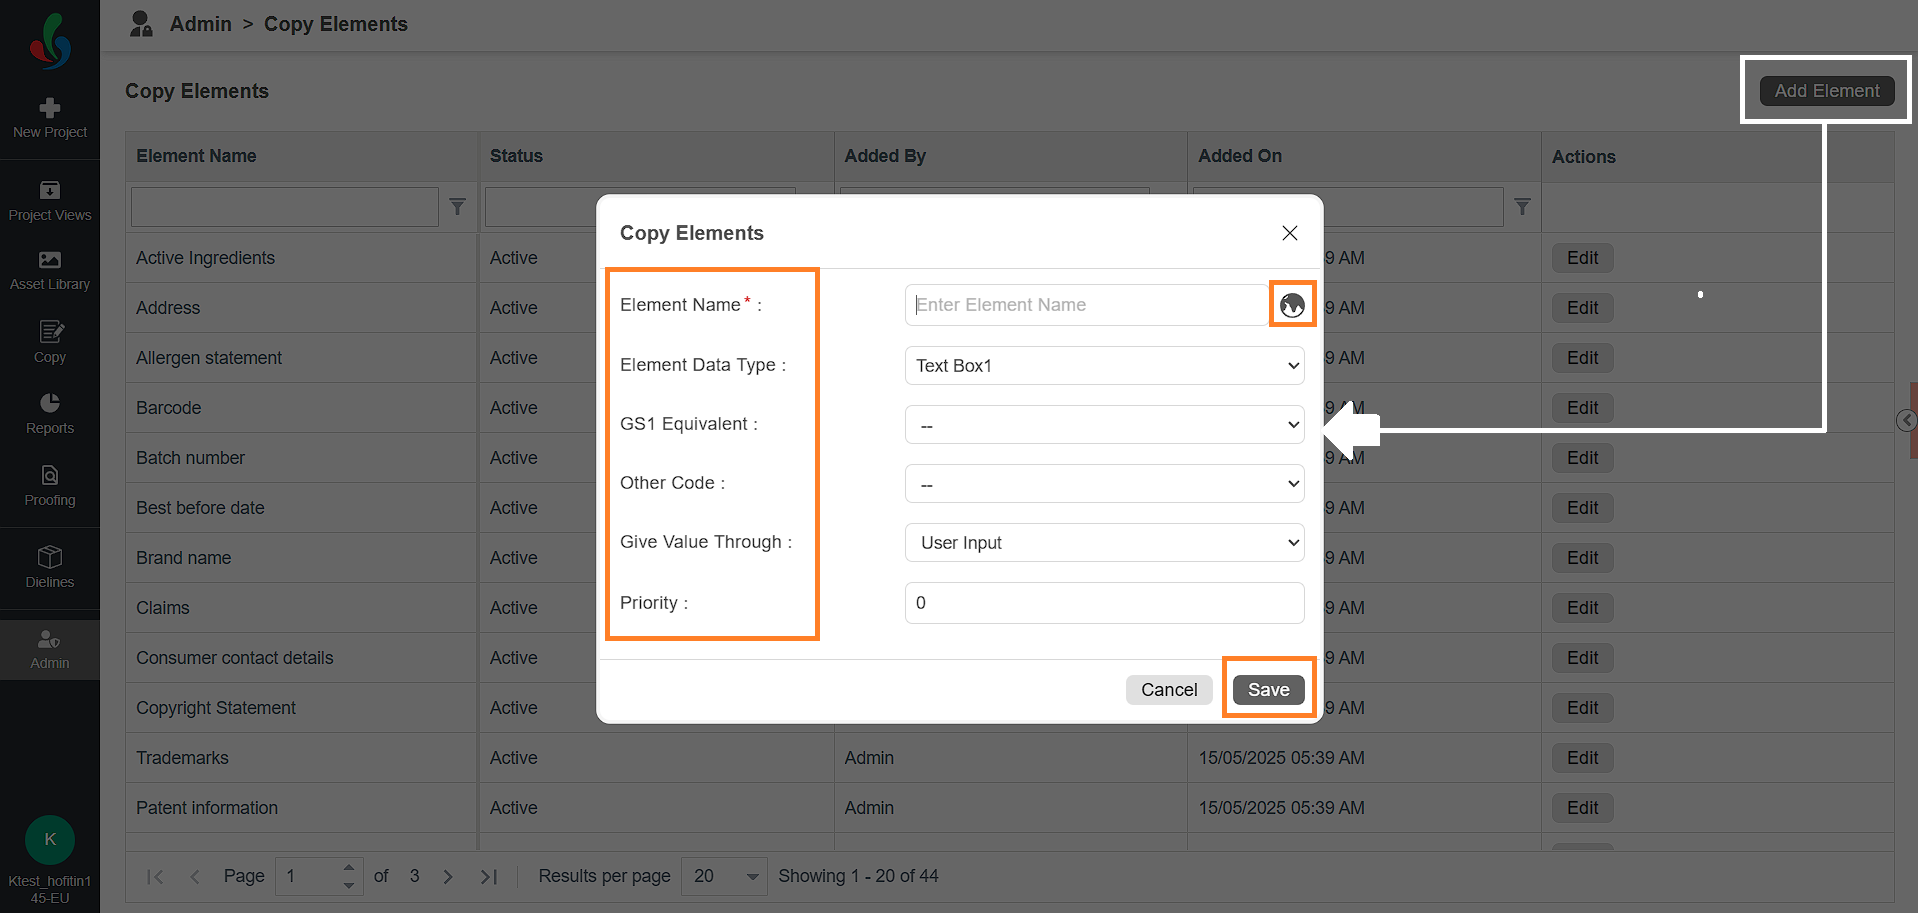
- Click the Add Element button in the upper-right corner of the screen.
- In the pop-up form, fill out the following fields:
Note: If GS1 Code, Other Code and Priority is disabled in Copy Manager Settings, then you will not see these fields in the pop-up.- Element Name: Enter the name of the copy element. To add the name in another language, click the globe icon and enter the translated name in the appropriate language box.
- Element Data Type: Choose a suitable data type from the dropdown:
- Text Box1: For alphanumeric text entries.
- Nutrition Panel: For elements related to nutrition facts table.
- Image: Use this if the element value should be an image (e.g., Barcode).
- Text Box1 + Text Box2: If you require two text inputs for the element (e.g., size with unit).
- GS1 Equivalent (optional): If applicable, select a corresponding GS1 code from the dropdown.
Note: Ensure the relevant GS1 code is already defined in the GS1 Master Data, or it won't appear in the dropdown. - Other Code (optional): If applicable, select a corresponding other code from the dropdown.
Note: Ensure the relevant Other Code is already defined in the Other Code Master Data, or it won't appear in the dropdown. - Give Value Through: Select a suitable option from the dropdown:
- User Input: Allows users to manually enter values.
- Value Master: Restricts users to select predefined values.
Note: The corresponding values must be configured under Copy Elements Value Master.
- Priority (optional): Set a numeric priority for the element.
- Click Save to add the new element to the system.
Text Box1 + Text Box2
This option allows administrators to define copy elements that require two distinct input fields, making it ideal for capturing compound data such as values with units, ranges, or related attributes.
Example Use Cases:
- Dimension: Text Box1 = 250, Text Box2 = ml
- Dosage: Text Box1 = 1, Text Box2 = tablet
- Serving Size: Text Box1 = 100, Text Box2 = g
When selecting this data type, you can further configure each text box independently:
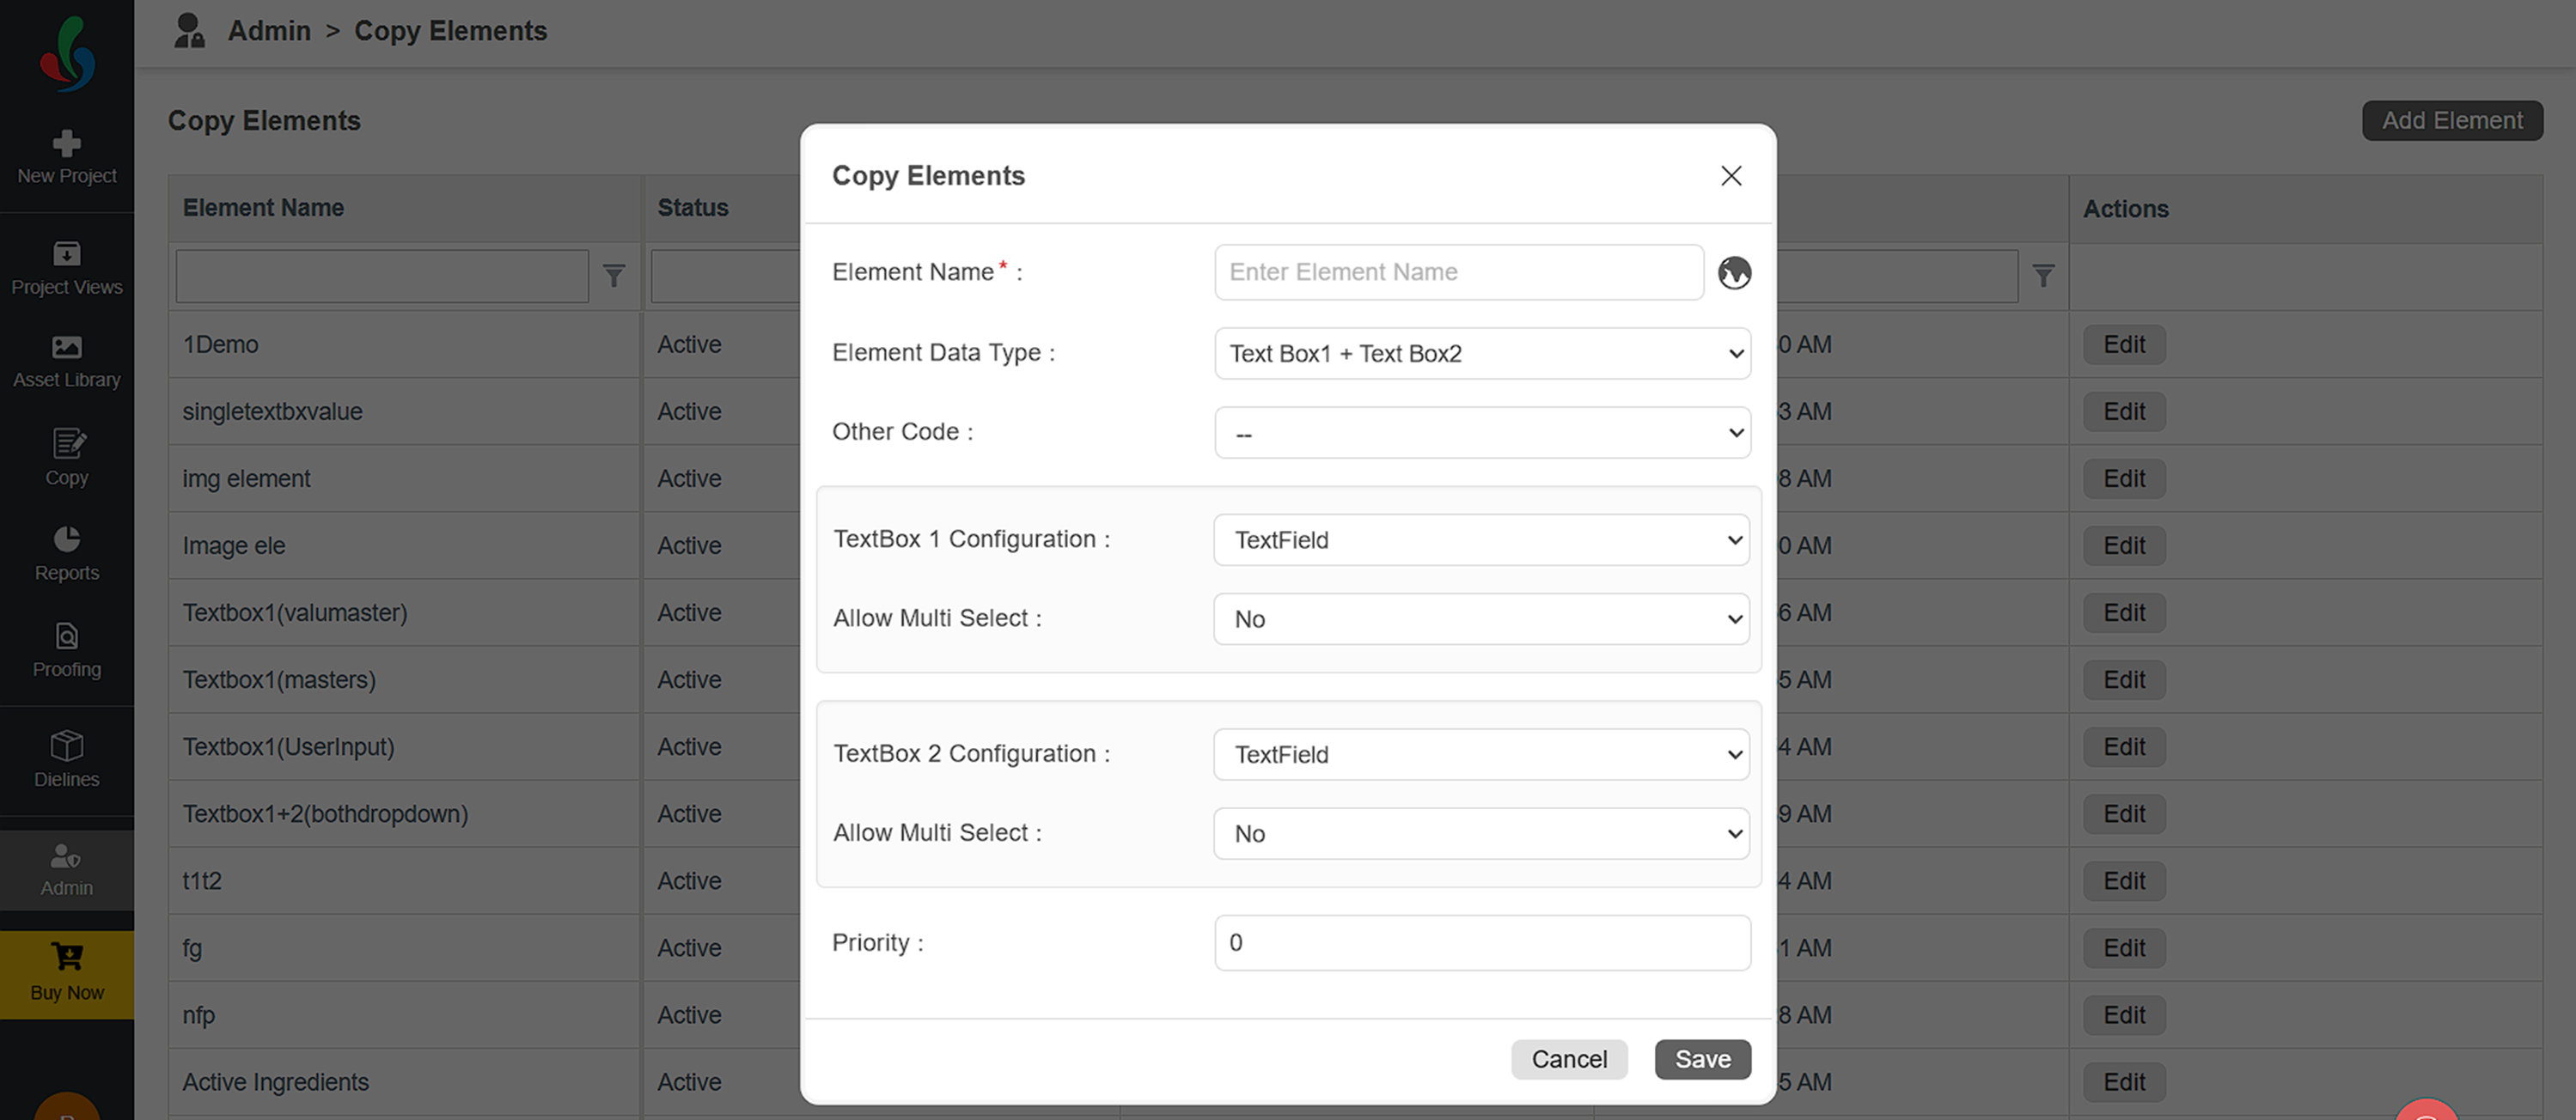
Text Box1 + Text Box2 Box Type Configuration Options
- Text Field: Users can enter free-form text.
- Dropdown: Users must select from a predefined list of values.
Note: Dropdown values are set in the Value Master section.
 | Additional Notes
|
Allow Multi-select (available only for dropdowns)
- When enabled, users can select multiple values from the dropdown list.
- Useful when multiple values apply to a single element (e.g., applicable dosage forms: Tablet, Capsule, Syrup).
Display Behavior:
- The two input boxes will appear side-by-side in the copy entry interface for better clarity and user experience.
- Values entered in both boxes are stored together and will be published along with artwork.
How do I edit a Copy Element?
Edit Copy Element
- Log in to your ManageArtworks account.
- Navigate to the Admin module.
- Under Copy Element Settings, click Copy Elements.
- A list of predefined copy elements will be displayed by default.
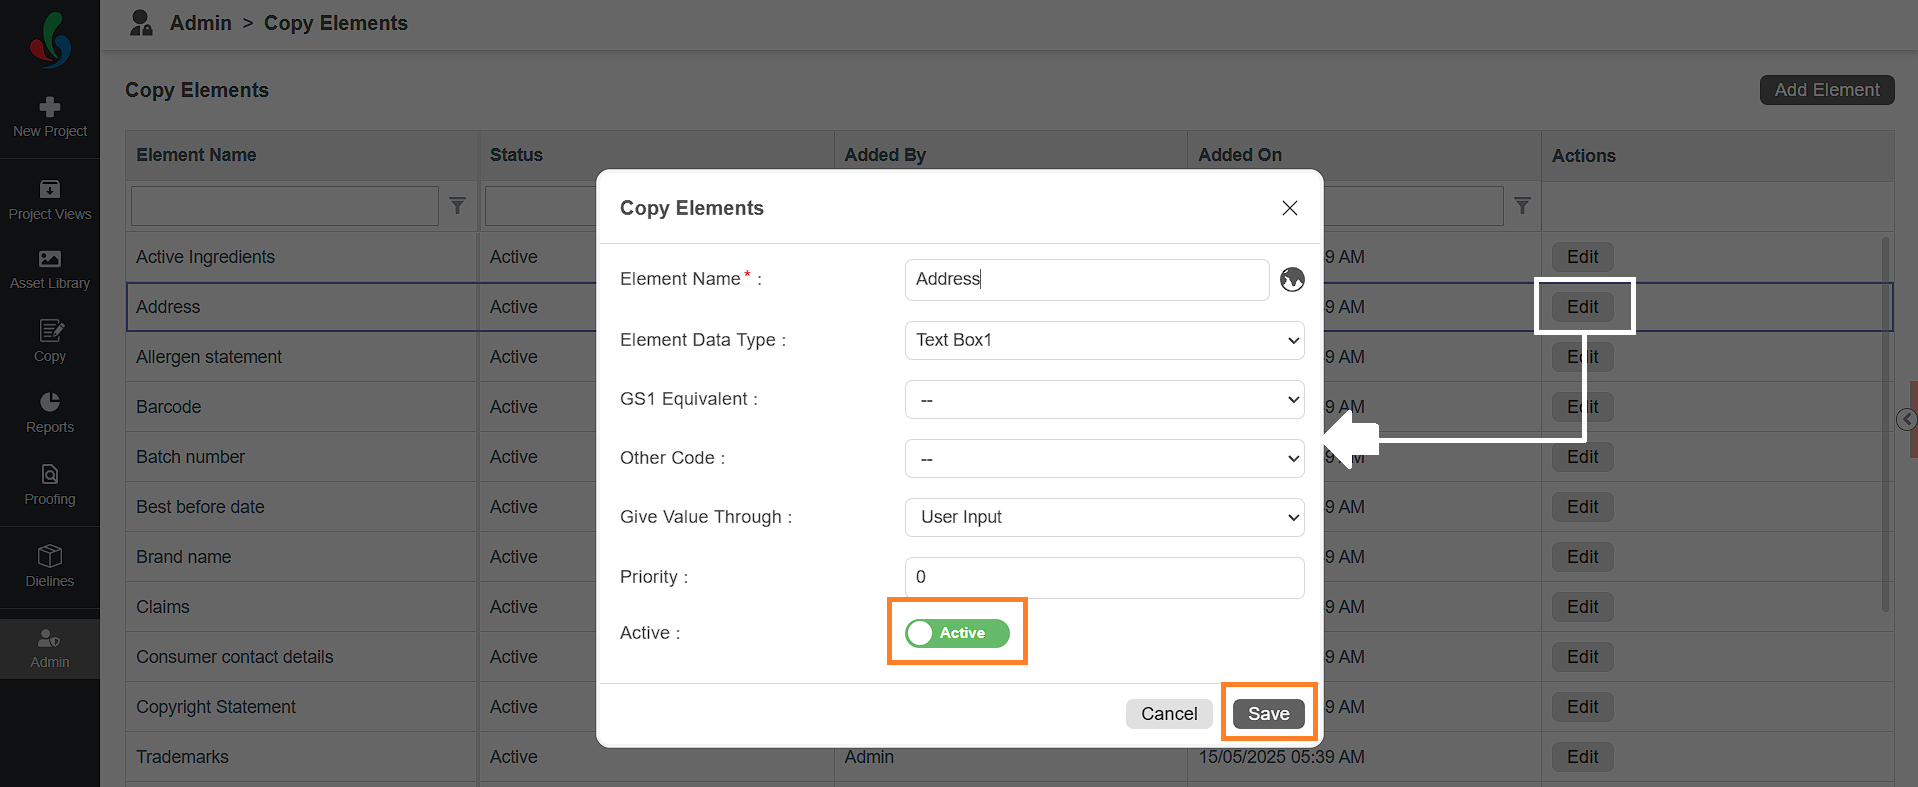
- To edit the copy element:
- Click the Edit button associated with the desired copy element.
- Update the element as desired.
Note: Elements cannot be deleted. However, you can deactivate an element by toggling the Active switch to Inactive.
- Click Save to apply your changes.