
Step 3: Link Workflow (Child) Template with Content Collection (Parent) Template
Once you've configured both the content collection (parent) and workflow process (child) templates, the next step is to link them together. This enables runtime branching based on components defined in the project.
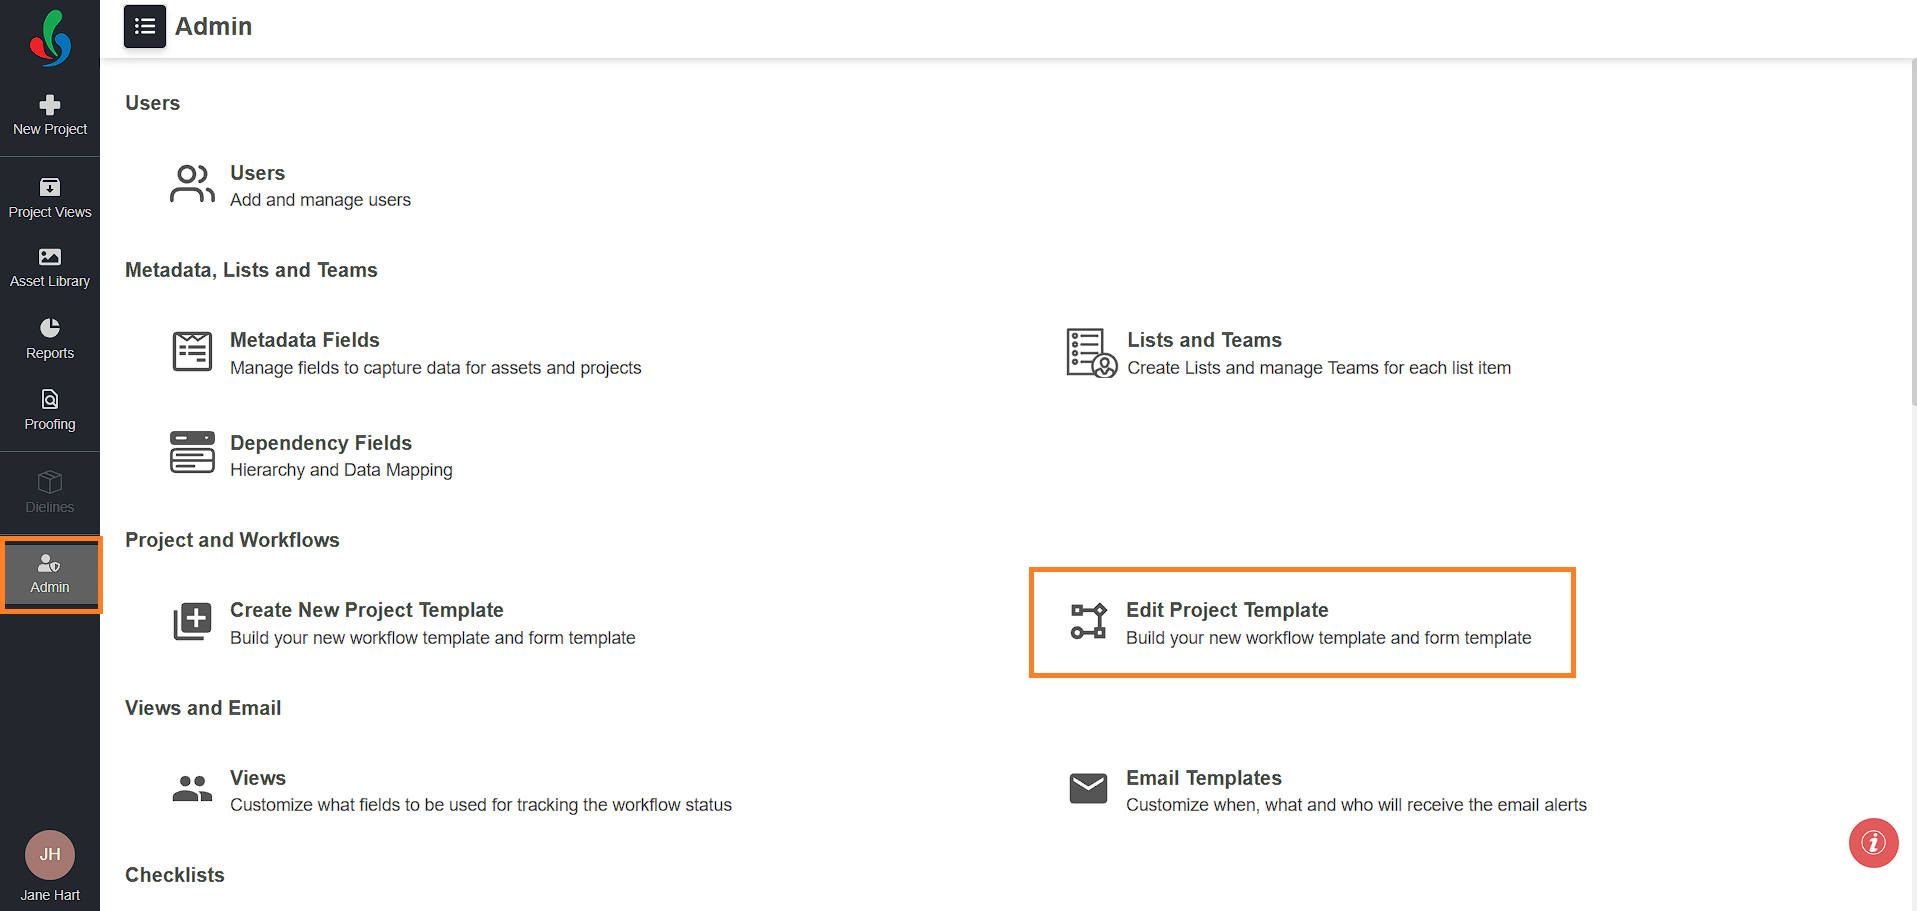
01. Access the Admin Module
- Log in to your ManageArtworks account.
- Navigate to the Admin module.
- Click the Edit Project Template tab.
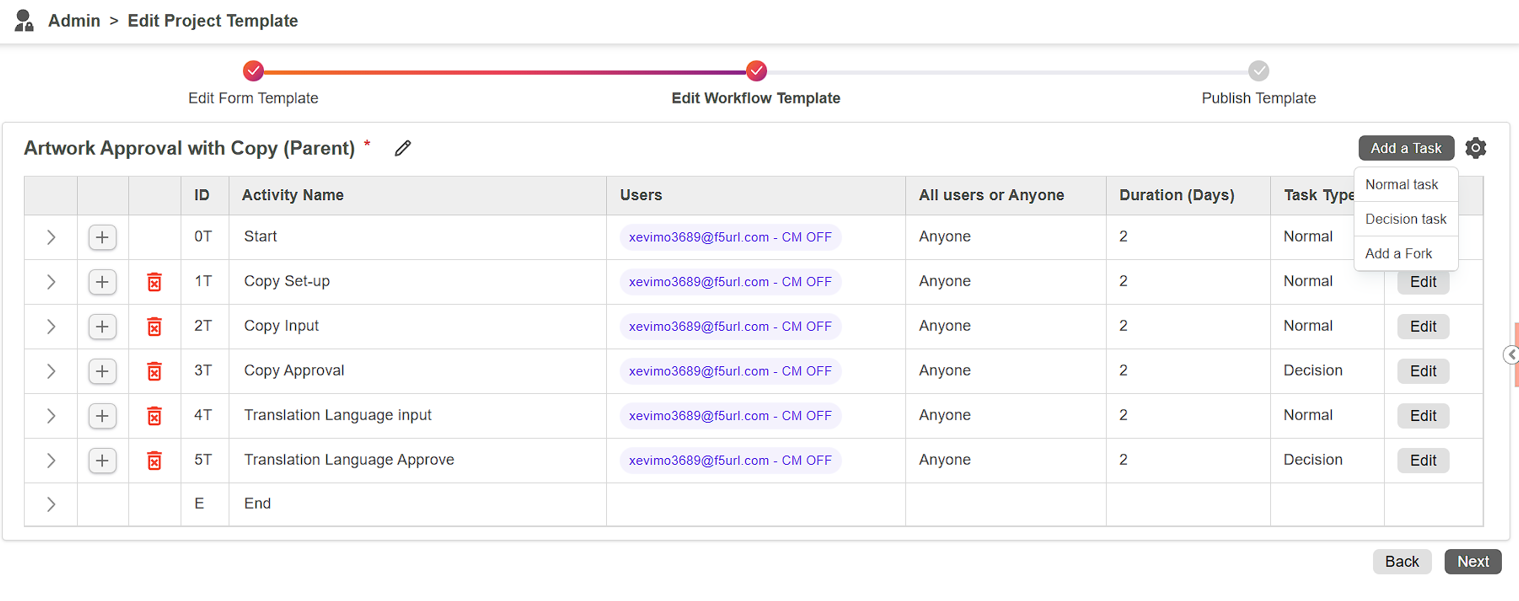
2. Open the Parent (Content Collection) Template
- In the list of project templates, click the Edit button in the Actions column corresponding to the parent template (content collection template).
- Click Next at the bottom right to proceed to the workflow configuration screen.
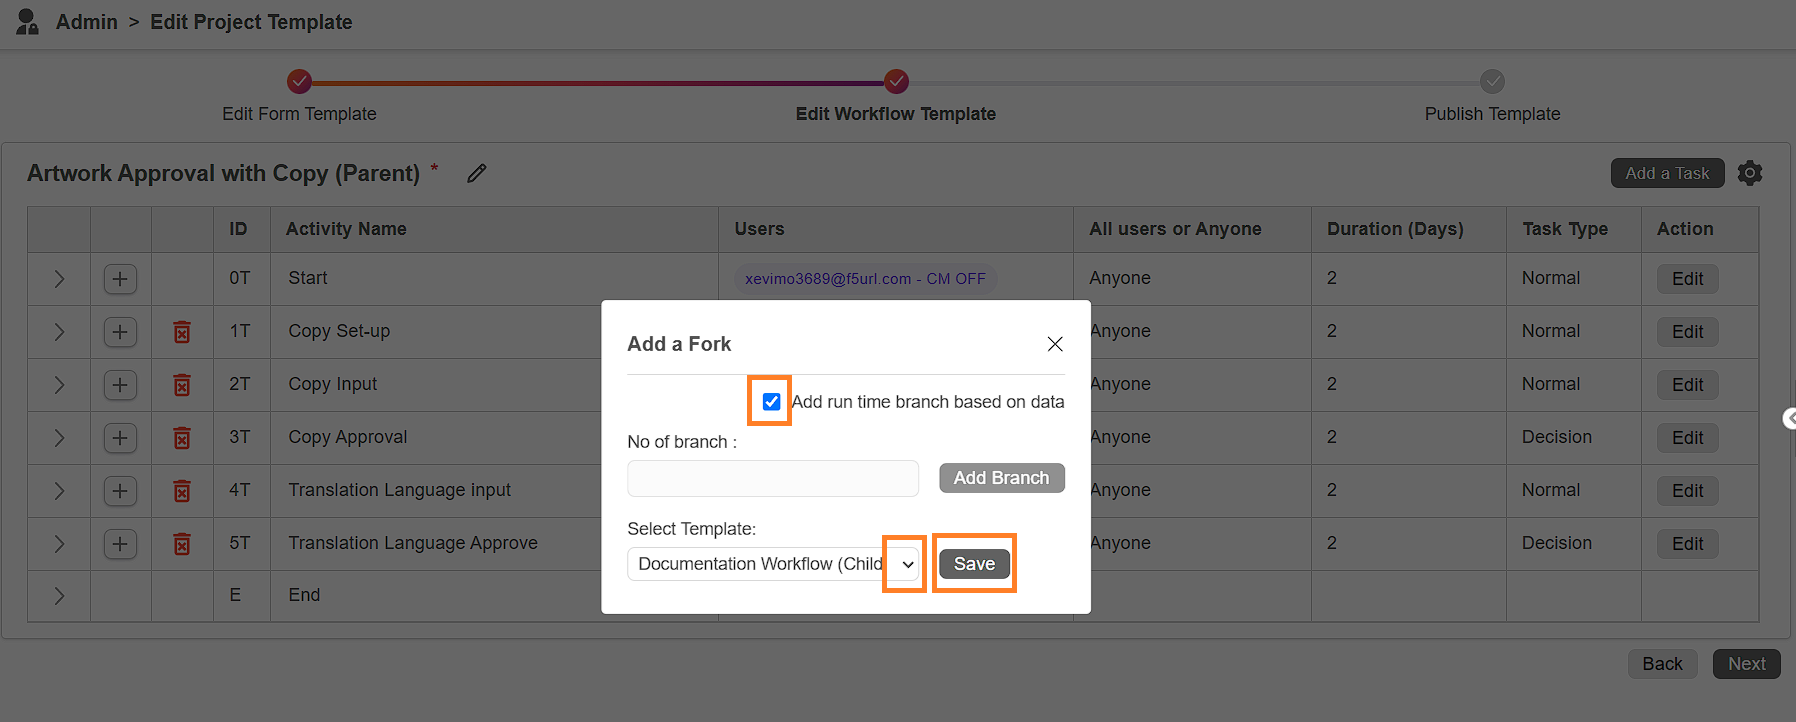
3. Add a Fork to Link the Child Template
- Click Add a Task, then choose Add a Fork from the task type options.
- In the Fork Configuration dialog:
- Enable the checkbox Add Run-Time Branch Based on Data.
- From the Select Template dropdown, choose the child workflow template (workflow process template from step 2) from the list of active templates.
- Click Save to link the child template.
 | Note: Linking a child template via a runtime fork enables the project to dynamically branch into multiple sub-projects at runtime—one for each component. Tasks placed before and after the fork remain part of the main workflow, maintaining overall project flow. |
4. Publish the Updated Parent Template
A visual preview of the linked workflow configuration is shown below for reference.
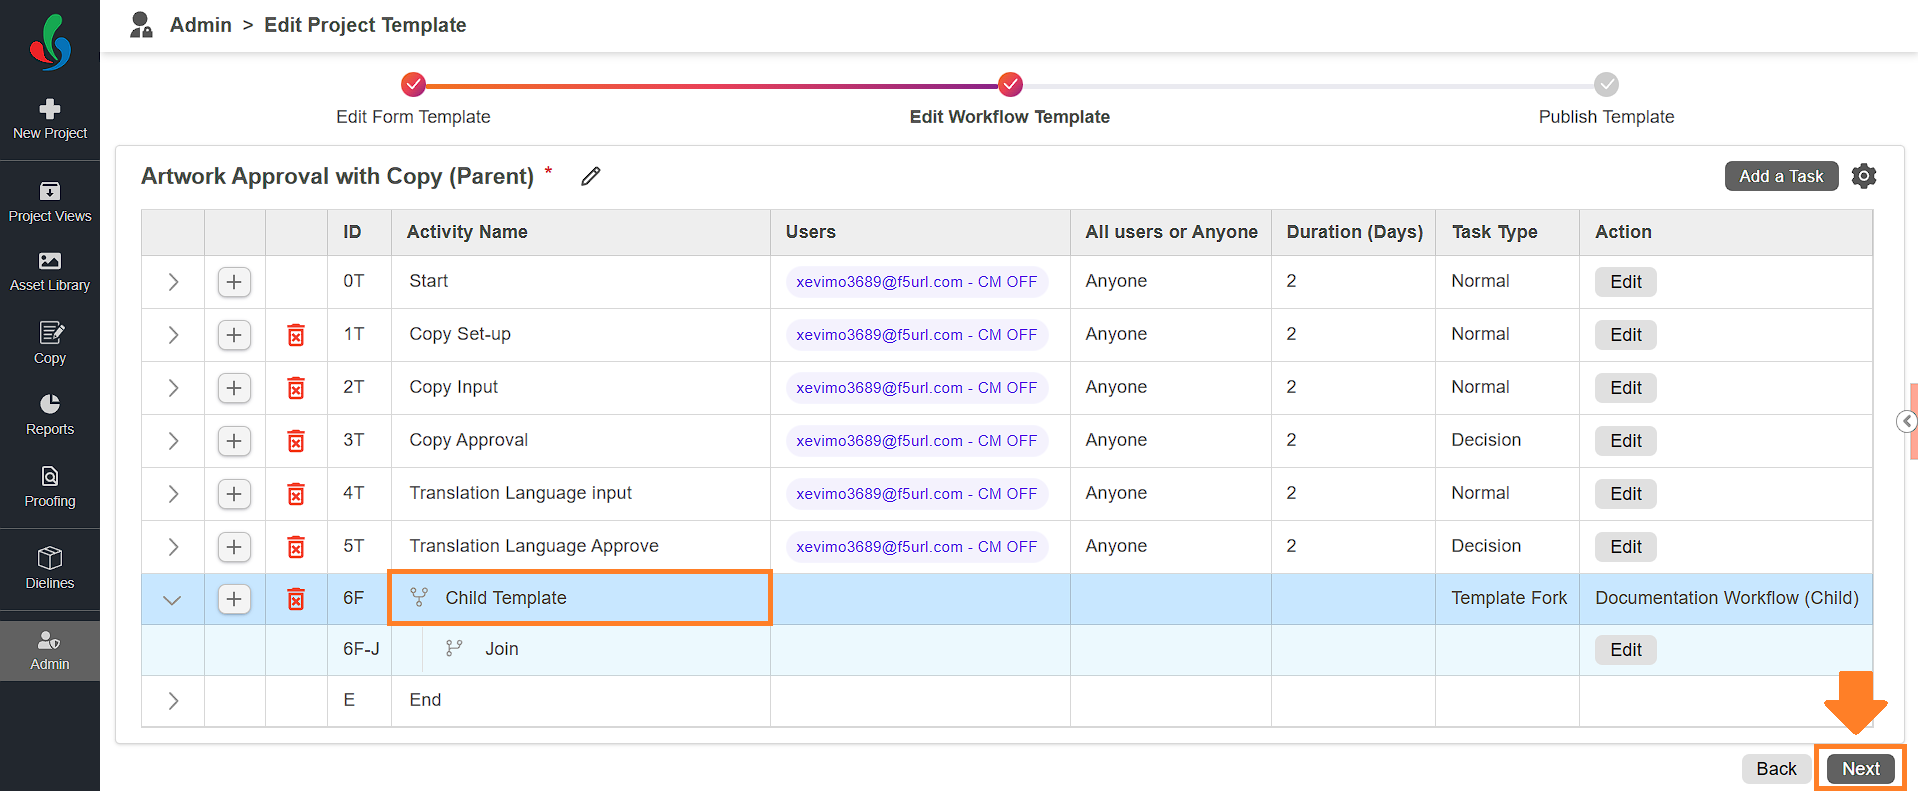
Once the templates are linked:
- Click Next to proceed to publish the template.
- Once you've built and configured your workflow and form template, double-check everything before publishing. If needed, use the Back button to make further adjustments to the workflow or form fields.
- Click "Publish" to to make the updated project template active.
Your project template is now fully configured for Copy Manager, enabling structured content collection and automated workflow processing with component-based branching.