Step 2: Create Form Template (Enterprise Plan)
 | Note: The process for creating a form template varies depending on the user’s plan. This article focuses on creating a form template in the Enterprise Plan. For details on creating a form template in the Growth Plan, refer to [Step 1: Create Form Template (Growth Plan)]. If you're creating a new project template with Copy Manager, refer to the guide: Configure Project Template with Copy Manager. This article covers the steps to create a project template without Copy Manager. |
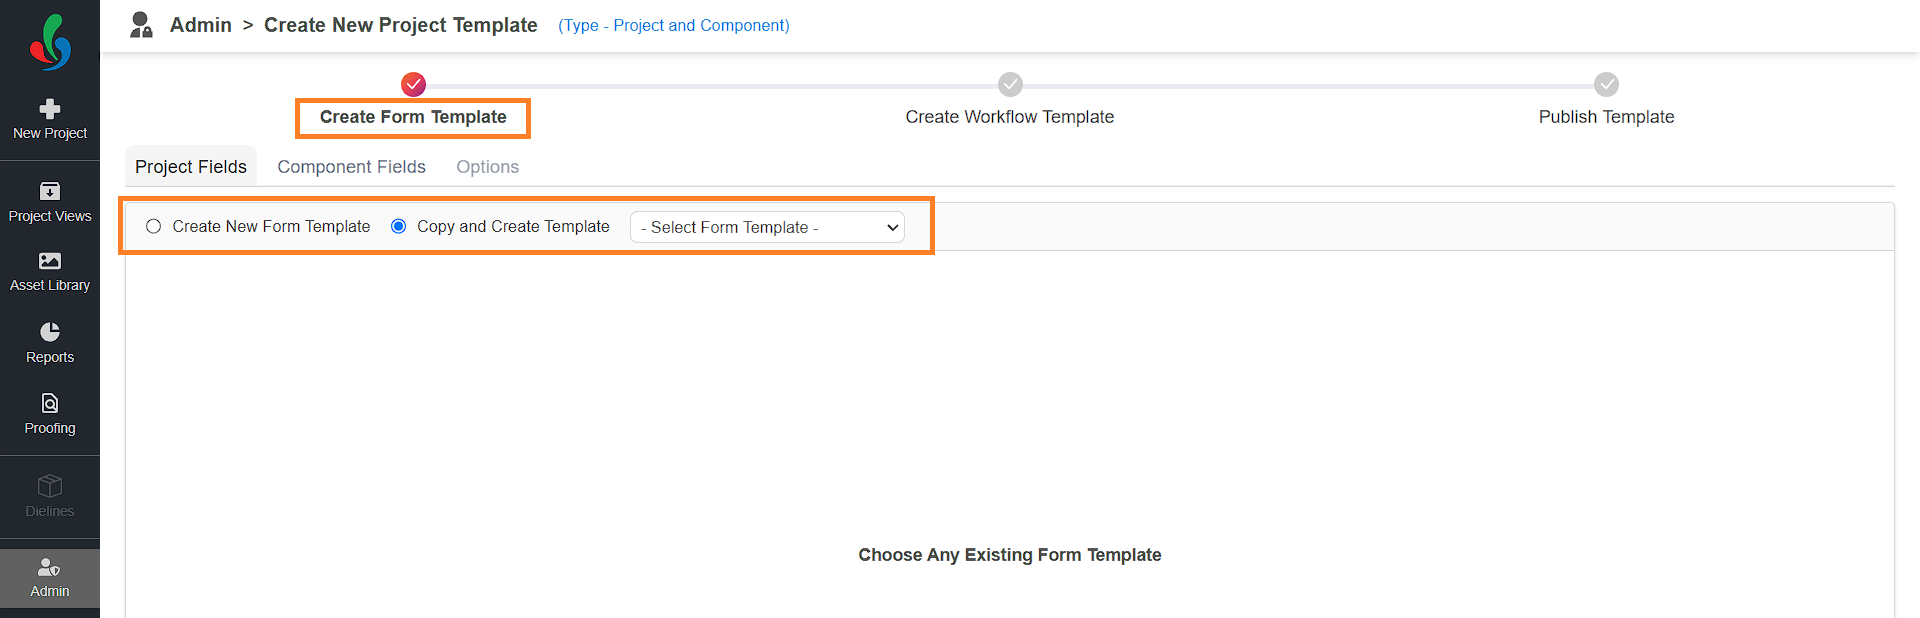
01. Form Template Selection - Choose Your Form Template Creation Method
ManageArtworks offers two convenient ways to build your form template:
- Create New Form Template: Select this option to design a form from scratch for unique project types, tailoring it specifically to your process.
- Copy and Create Template: Select this option to save time by modifying an existing form template. This is ideal for leveraging familiar structures for similar workflows.
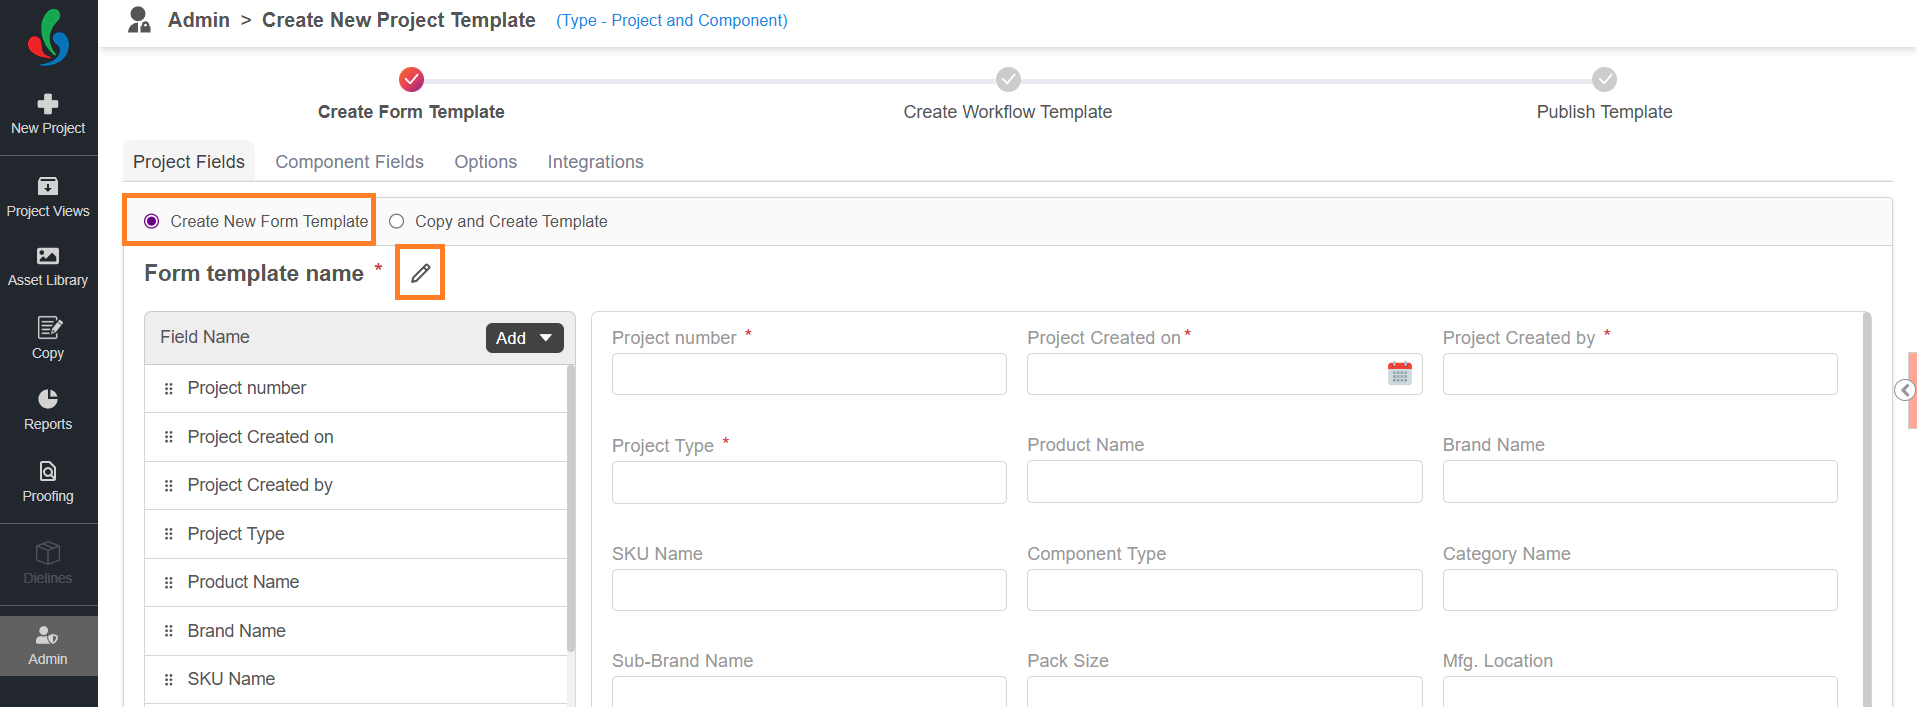
02. Build Your Form Template (Create New Form Template Method)
- Click Create New Form Template.
- Click the edit icon located next to the form template name placeholder and enter a descriptive name that reflects the template's purpose (e.g., "Artwork Approval Form").
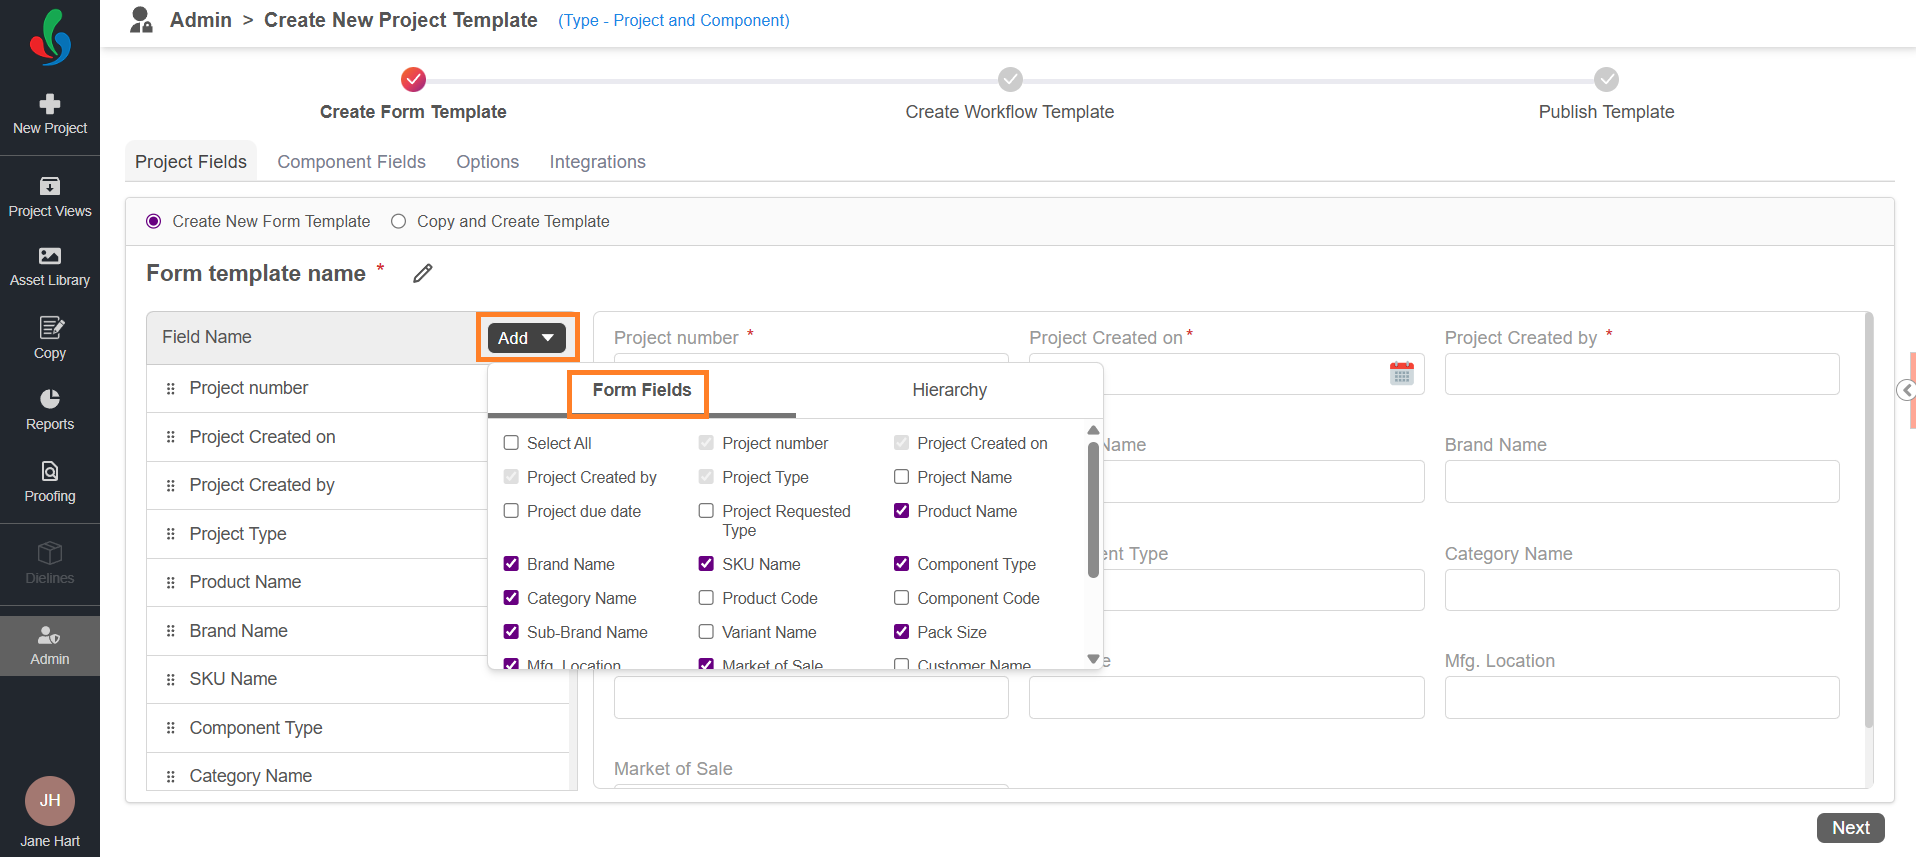
- Add Fields to the Project:
- Some default fields are pre-included in the form.
- Click Add.
- Select the desired fields from the list by clicking the checkboxes.
- Selected fields will automatically appear in your form.
- To remove fields, uncheck the corresponding checkboxes.
Note: Fields such as Project Number, Project Created On, Project Created By, and Project Type are mandatory and cannot be removed.
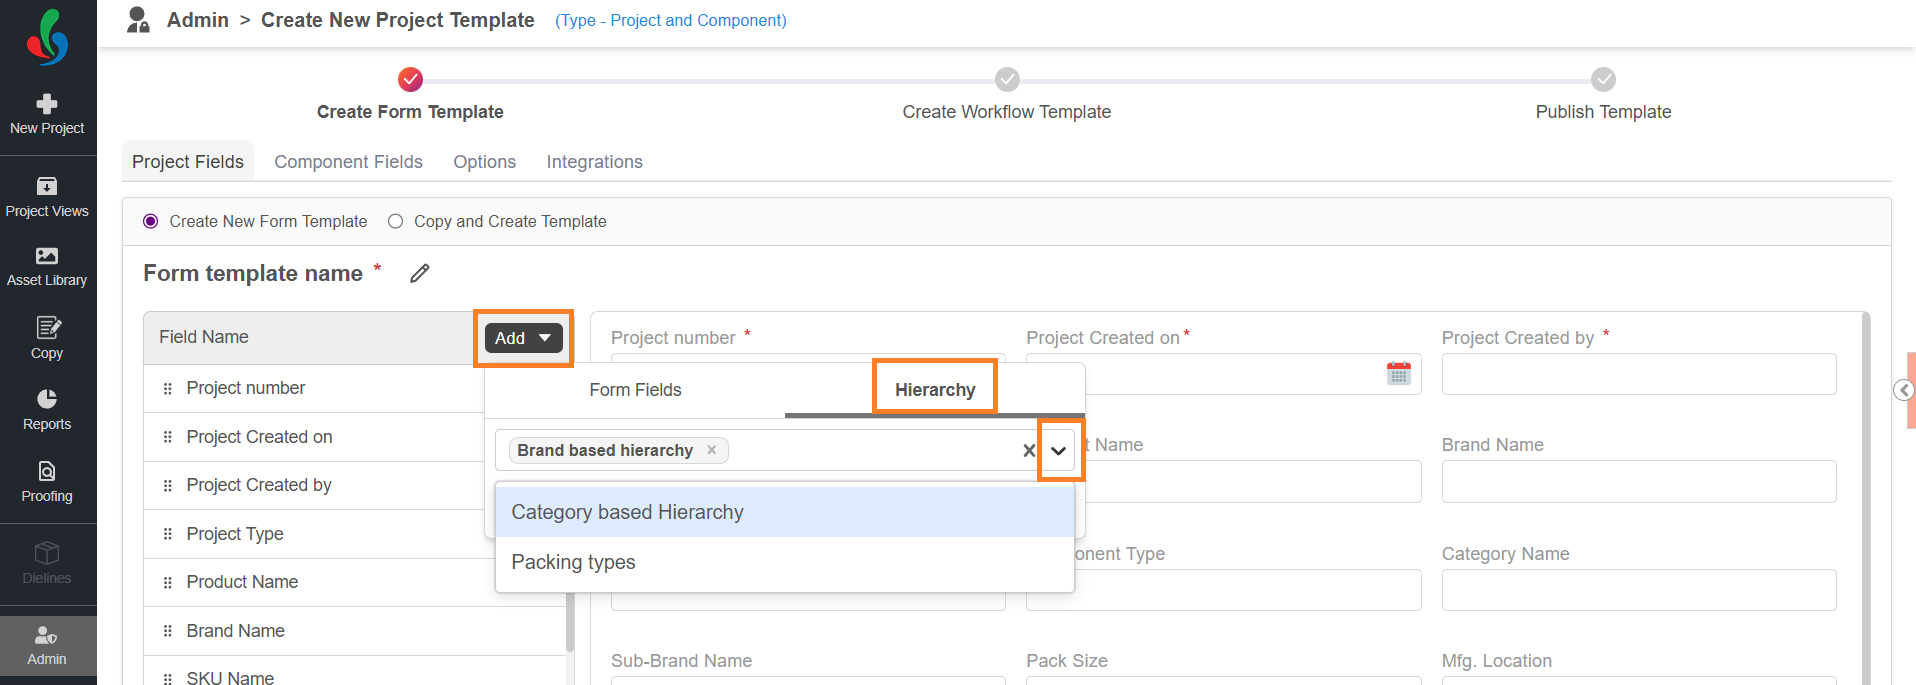
- If required, add dependency field as desired, to know more about dependency field refer to Dependency Field:
- Click Add and select Hierarchy from the list.
- Click the drop-down icon and select the desired hierarchy from the list. To create new hierarchy, refer to Dependency Field.
- The fields from the selected hierarchy will be dynamically inserted.
Note: If a field from the hierarchy already exists in the form, the hierarchy will be linked, but the duplicate field won't be added.
If a field linked to a hierarchy is removed from the form, the entire hierarchy will be removed.
- The fields from the selected hierarchy will be dynamically inserted.
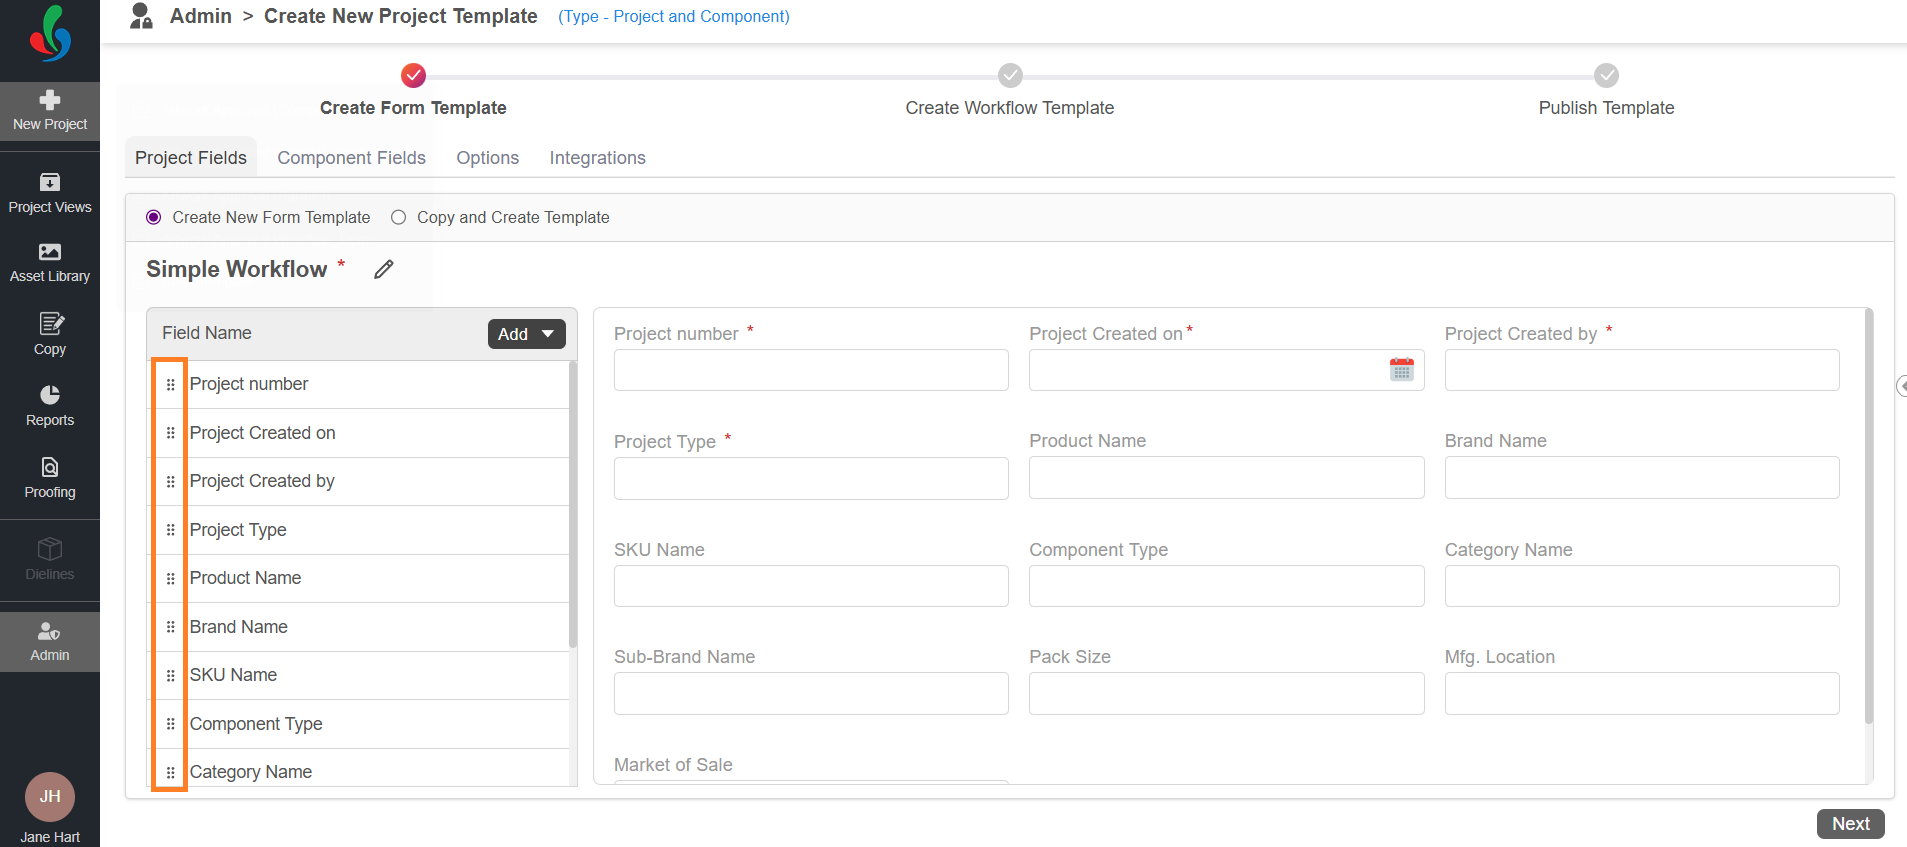
- Rearrange Fields:
- Use the drag icon (⋮⋮) to reorder fields in the form.
- Use the drag icon (⋮⋮) to reorder fields in the form.
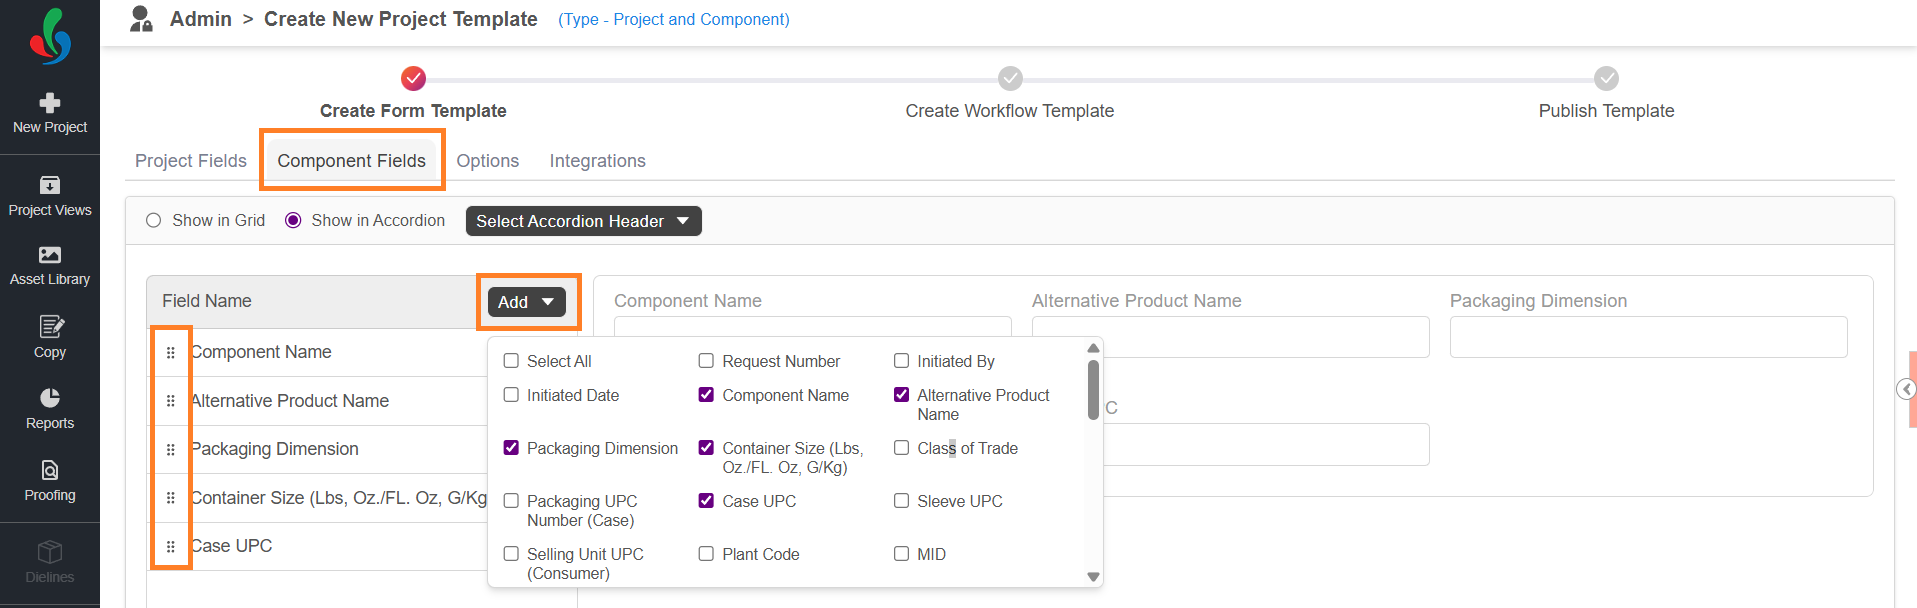
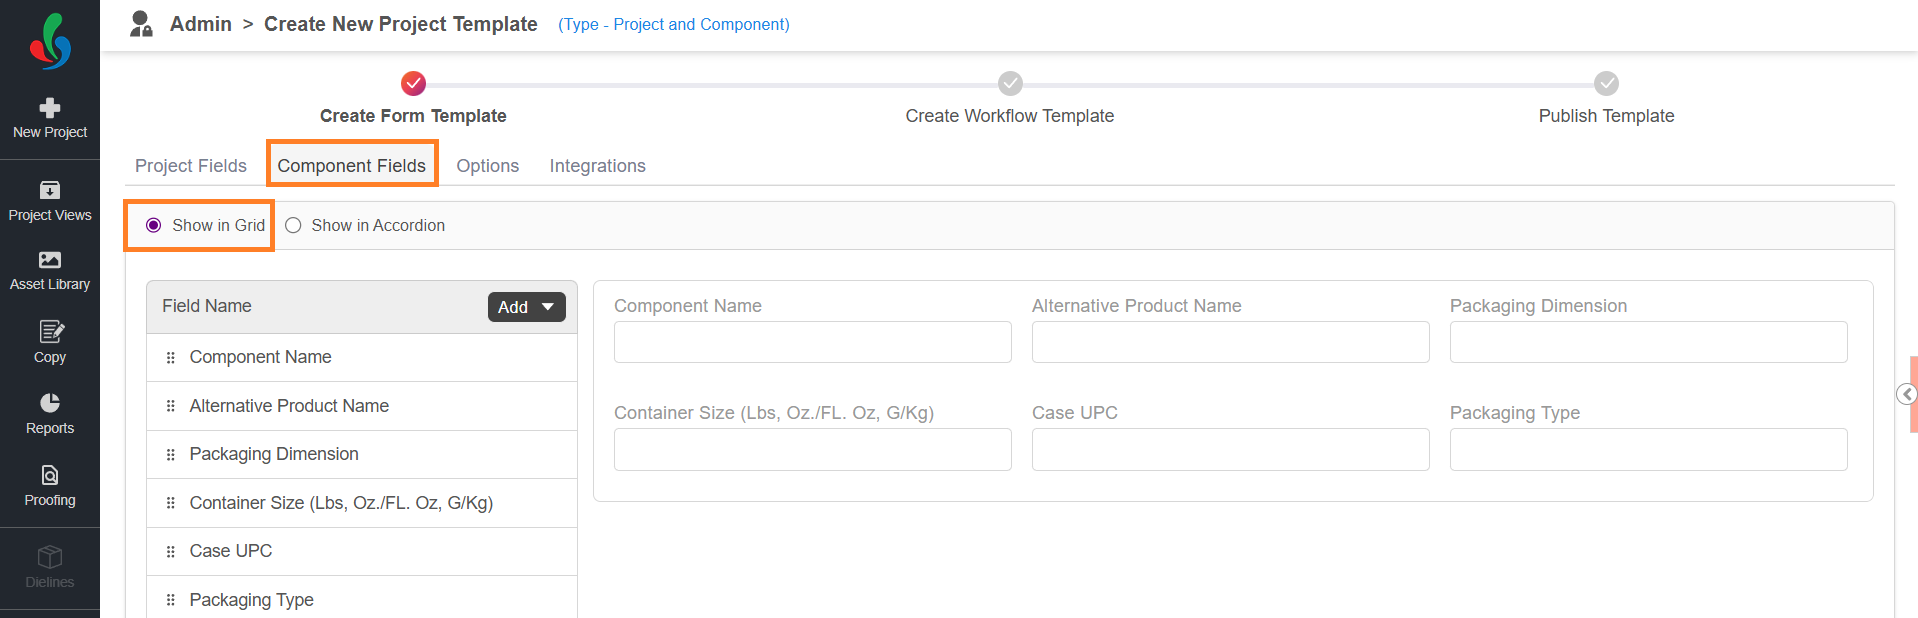
- Configure Component Fields:
This tab allows you to define specific fields for capturing component details. To configure component fields:- Click the Component Fields tab.
- Add Component Fields:
- Click Add and select the desired fields from the list.
Note: The system displays a set of predefined component fields by default—you can choose from this list. - Selected fields will appear in the component form.
- Uncheck fields to remove them.
- Click Add and select the desired fields from the list.
- Rearrange Fields:
- Use the drag-and-drop icon (⋮⋮) to reorder fields.
- Use the drag-and-drop icon (⋮⋮) to reorder fields.
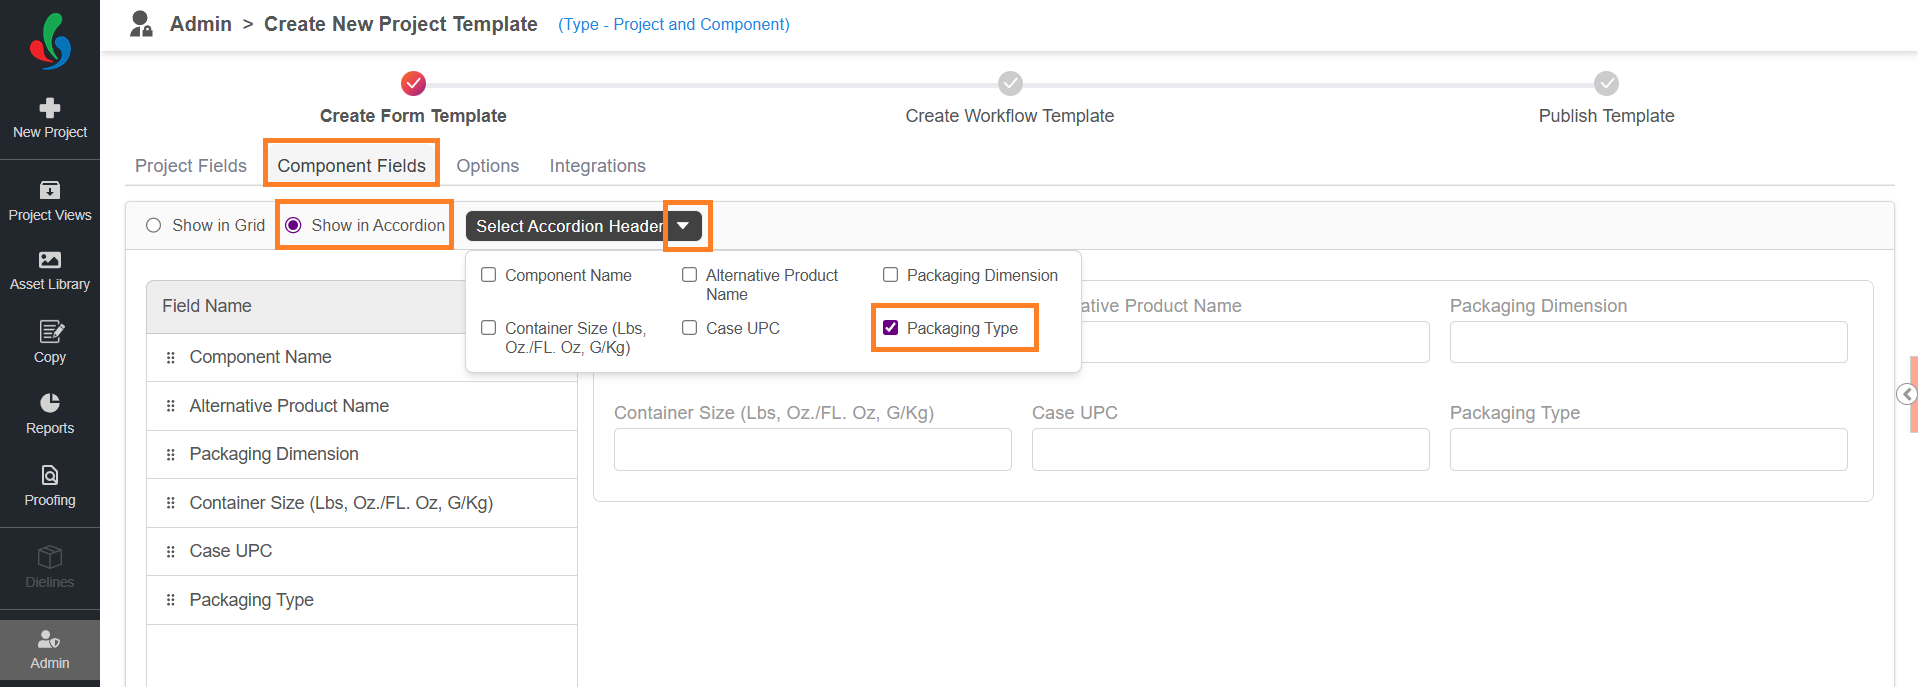
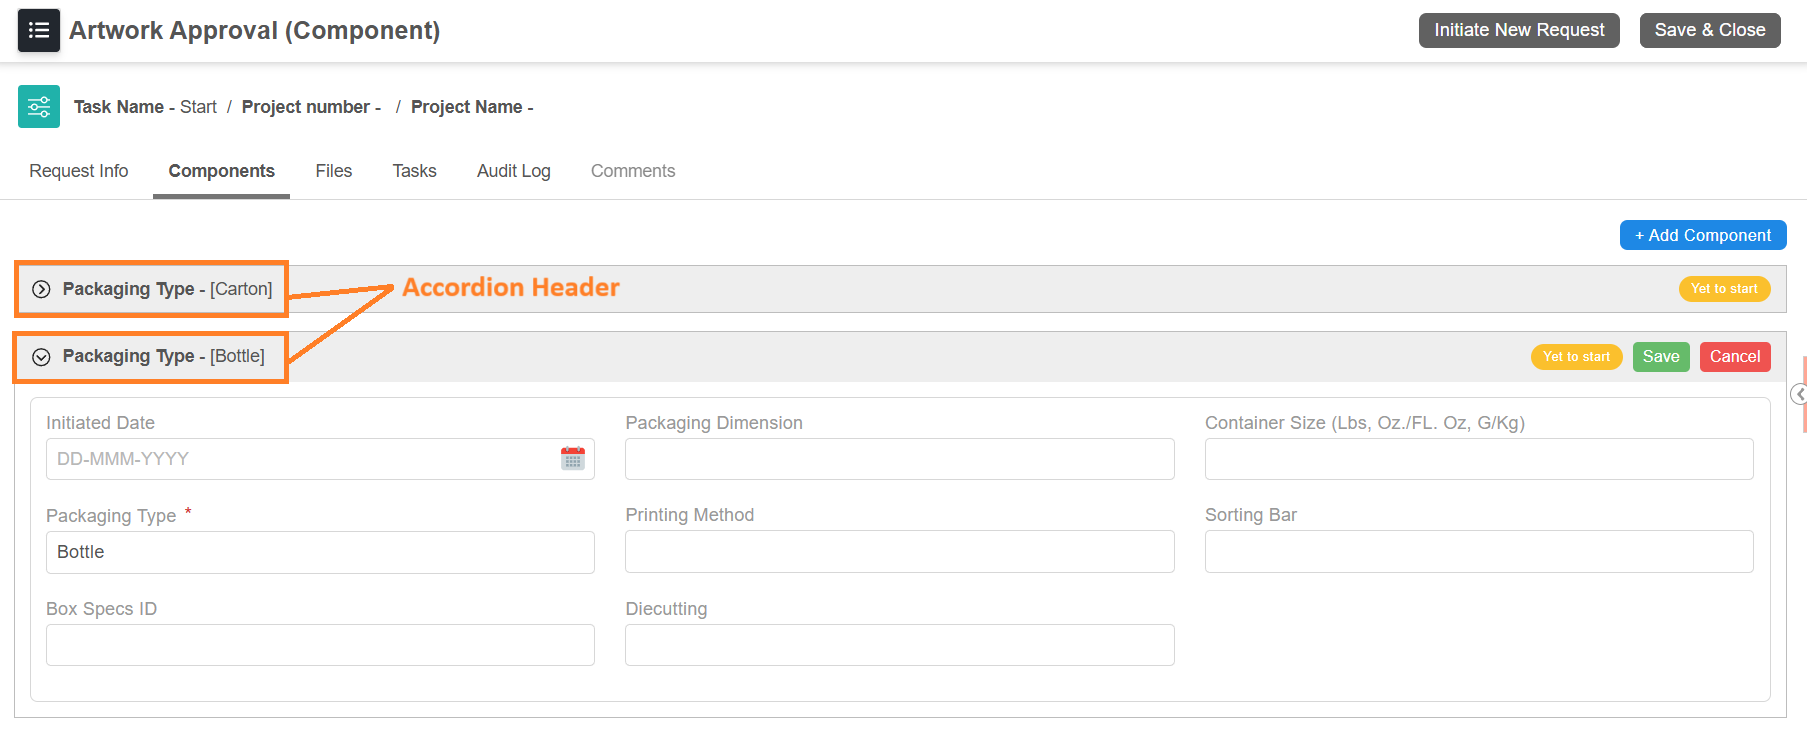
- Configure Accordion Header:
The Accordion Header acts as the title for each component section, helping users quickly identify and group components based on specific field values.
For example, if you're organizing components by packaging types such as Carton, Label, or Tin Can, setting the accordion header to Packaging Type will visually categorize them accordingly.- Make sure that the Show in Accordion option is selected.
- Click the Show in Accordion drop-down menu.
- Select the desired field(s) from the list to use as the accordion header.
Note: Maximum of four fields can be selected as accordion header. Only fields that are already added to the component fields tab will appear in the drop-down list. If you wish to use a specific field as an accordion header, ensure it is added to the component fields first. - Runtime Behavior:
- During runtime, only the fields that have values will be displayed in the component header.
- For example, even if you select four fields as accordion headers, but only two of them have values for a particular component, only those two will appear in that component’s header.
- Show Components in Grid View (Optional):
- If you prefer to display components without an accordion header, select the Show in Grid option instead. This will list components in a simple grid format.
- If you prefer to display components without an accordion header, select the Show in Grid option instead. This will list components in a simple grid format.
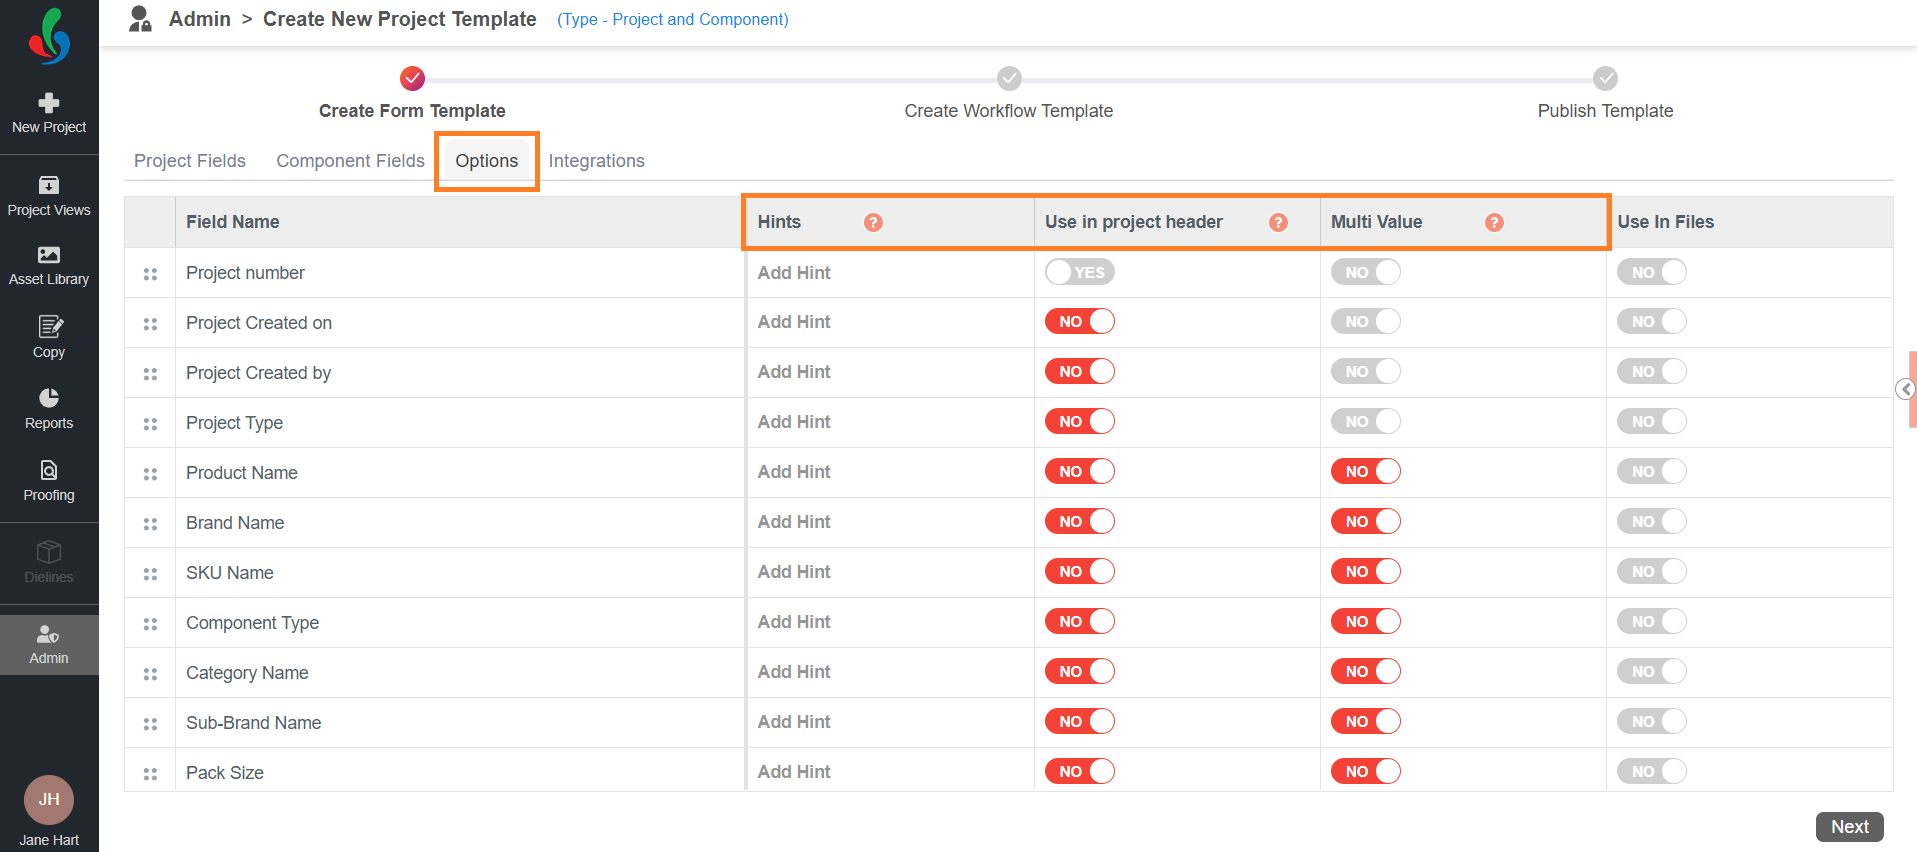
- Configure Field Properties:
- Click the Options tab.
- Set Field Properties:
- Multi-Value:
Enable this option to allow fields to accept multiple inputs, such as tags or reviewers.- Toggle Yes to enable.
- Toggle No to disable.
- Use in Project Header:
Make specific fields visible in the project header for easy access during creation.- Toggle Yes to make the field visible.
- Toggle No to hide it.
Note: A maximum of three fields can be visible in the project header.
- Add Hints:
Provide guidance by adding hints directly to the form fields.- Click Add Hint for the desired field.
- Enter the hint text and click Save.
- Multi-Value:
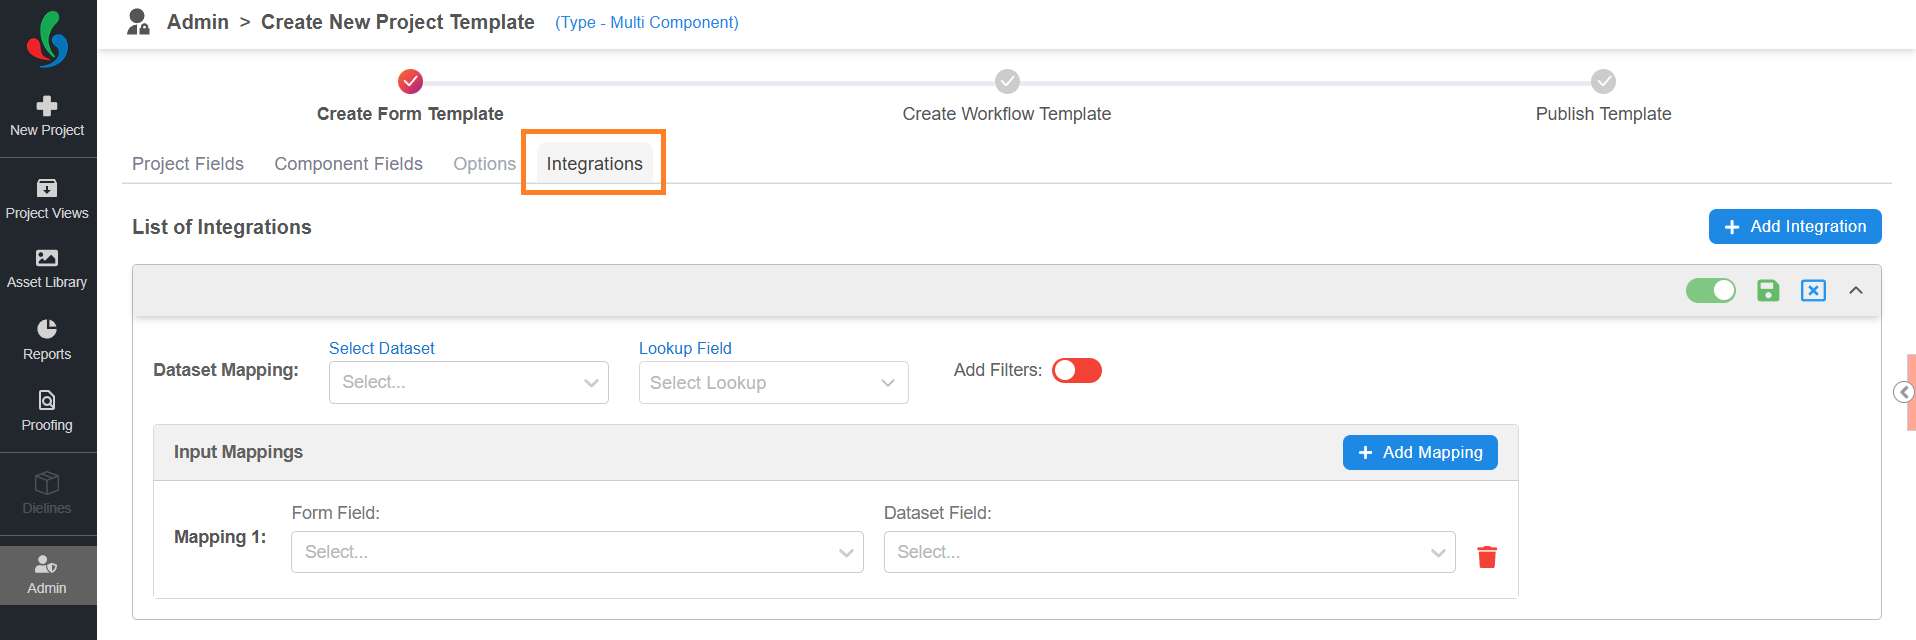
- Configure Integration (Optional):
- ManageArtworks supports seamless integration with SAP systems and PIM (Product Information Management) software, enabling organizations to synchronize critical data with their packaging workflows. This integration allows users to automatically populate project and component fields in ManageArtworks using data from SAP or internal sources.
- To integrate data, refer to Integrate Data with Project Templates.
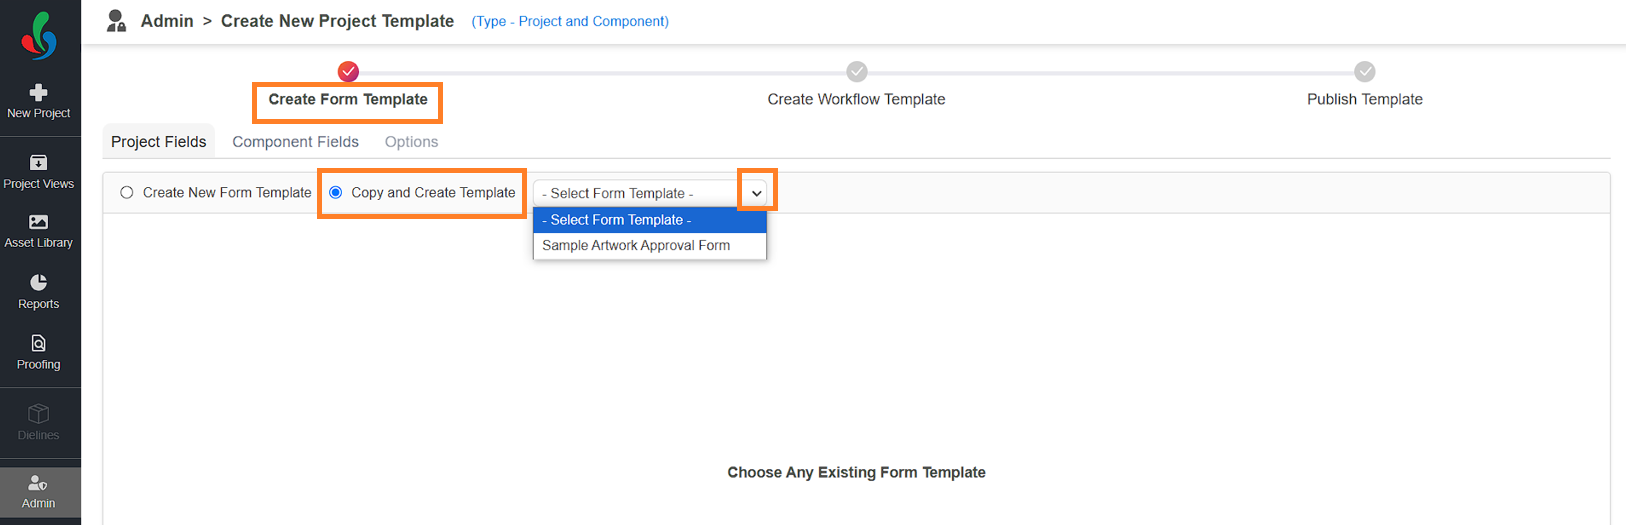
03. Build Your Form Template (Copy and Create Template Method)
- Select an Existing Template:
- Choose Copy and Create Template.
- Click the Copy and Create Template drop-down menu and select the template you'd like to modify.
- Customize the Form:
- Click the edit icon located next to the form template name placeholder and enter a descriptive name that reflects the template's purpose (e.g., "Artwork Approval Form_V2").
- Modify Form as needed:
- Project Fields: Follow the same steps as in Step 02. 3. to configure fields.
- Dependency Field (Optional): Follow the same steps as in Step 02. 4. to configure fields.
- Component Fields (Only for Multi-Level Approval flow template): Follow the same steps as in Step 02. 6. to configure fields.
- Configure Fields: Follow the same steps as in Step 02. 7. to configure fields.
- Configure Integration (Optional): Refer to Integrate Data with Project Templates.
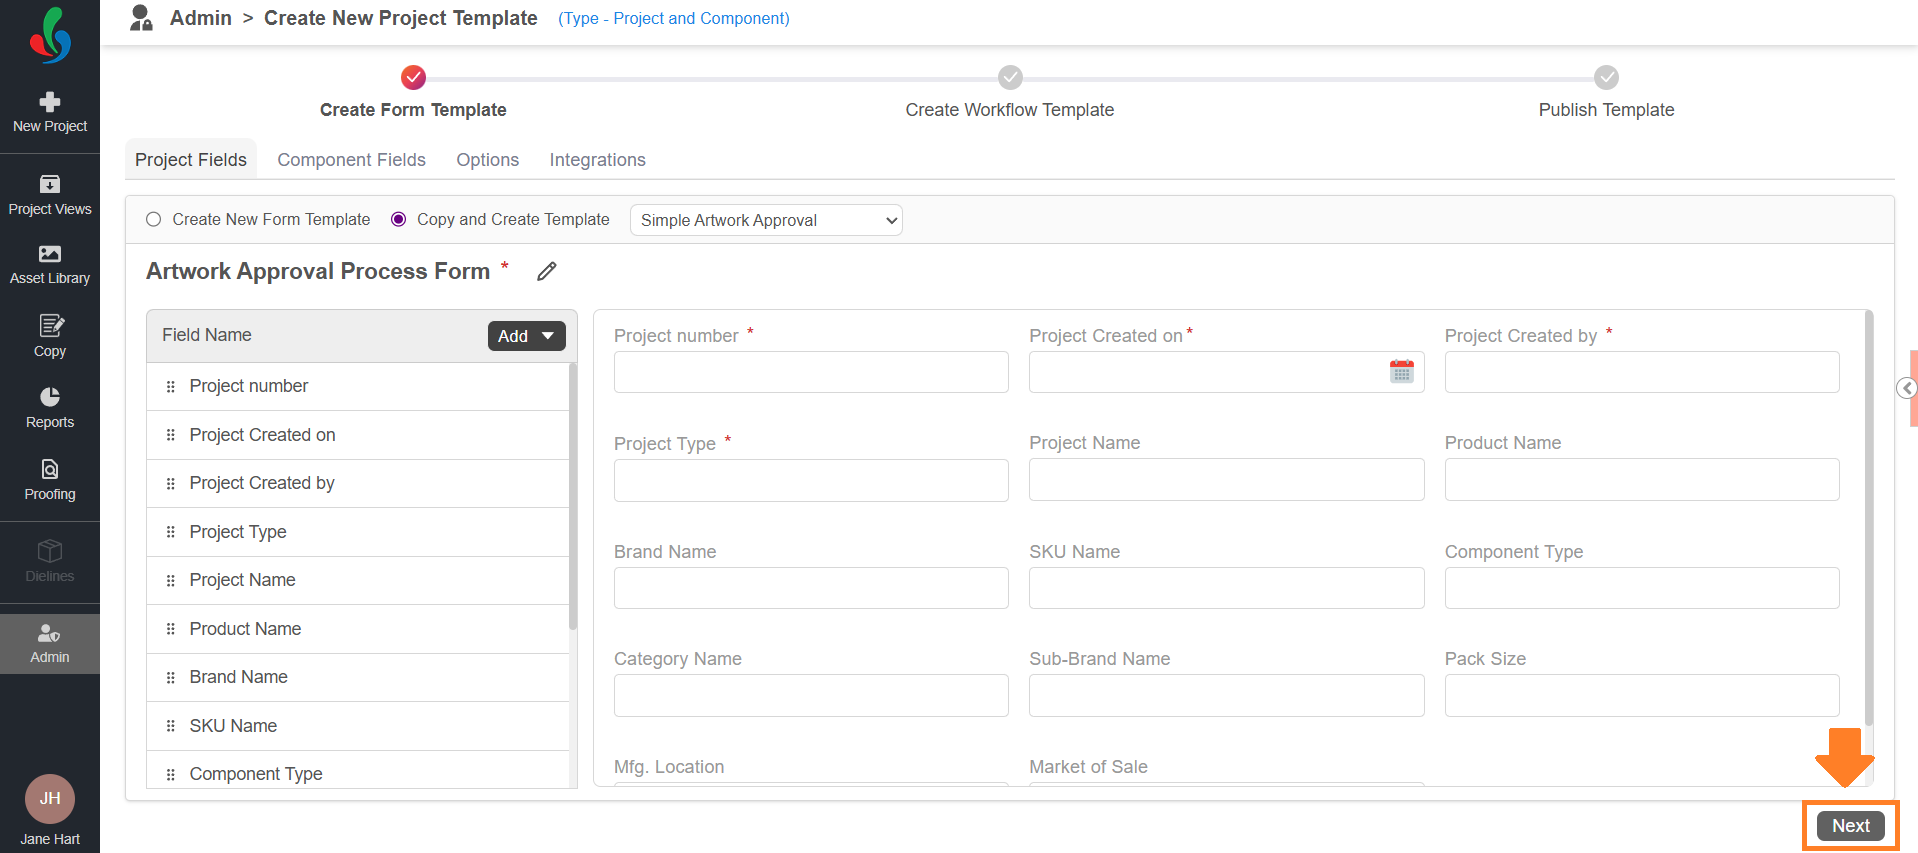
04. Proceed to Workflow Template
- Once your form is configured, click Next to move on to customizing the workflow template.