Data Integration
 | Note: Data Integration is an enterprise feature available exclusively to users on the Enterprise plan. For more information on all ManageArtworks plans, click here. |
ManageArtworks supports seamless integration with SAP systems and PIM (Product Information Management) software, enabling organizations to synchronize critical data with their packaging workflows. This integration allows users to automatically populate project and component fields in ManageArtworks using data from SAP or internal sources.
Admin Data Integration
The Admin Data Integration screen allows Admin users to preview SAP data that has been imported into the system. Although editing or uploading data is not available via the UI, this section helps ensure visibility and traceability of SAP-related data processes.
 | Note: Currently, data integration and customization are handled on the backend. To upload or update SAP data, contact your ManageArtworks support team. |
Access Admin Data Integration
To access the Admin Data Integration screen:
- Log in to your ManageArtworks account.
- Navigate to the Admin module.
- Click the Admin Data Integration tab.
- The screen contains two tabs:
- SAP Data
- Customized Data.

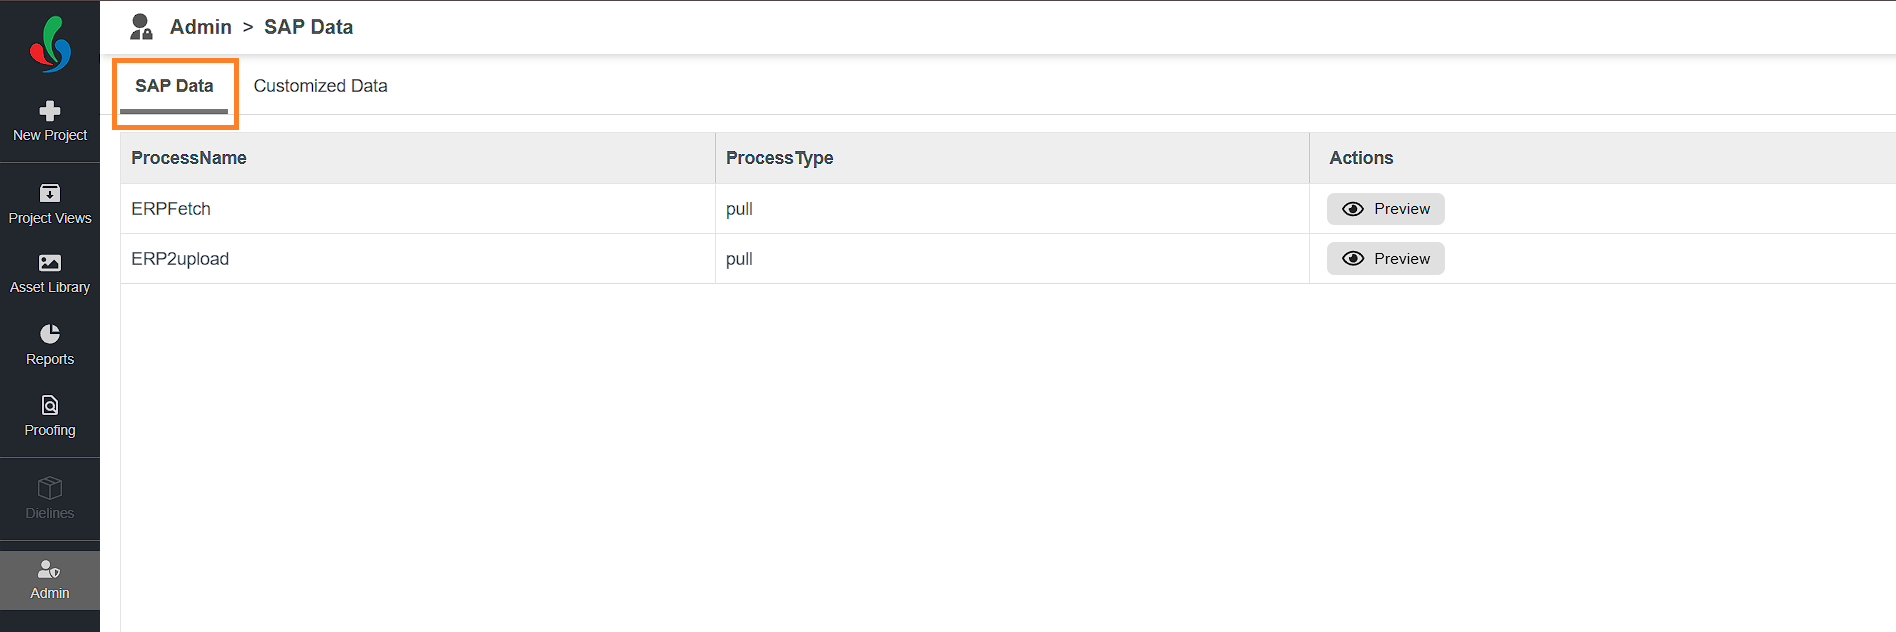
SAP Data Tab
The SAP Data tab lists all the data fetched into the system.
| Note: These records reflect raw SAP data fetched into the system. You cannot edit or upload new data from this interface. Please contact ManageArtworks support team to fetch the data into the system. |
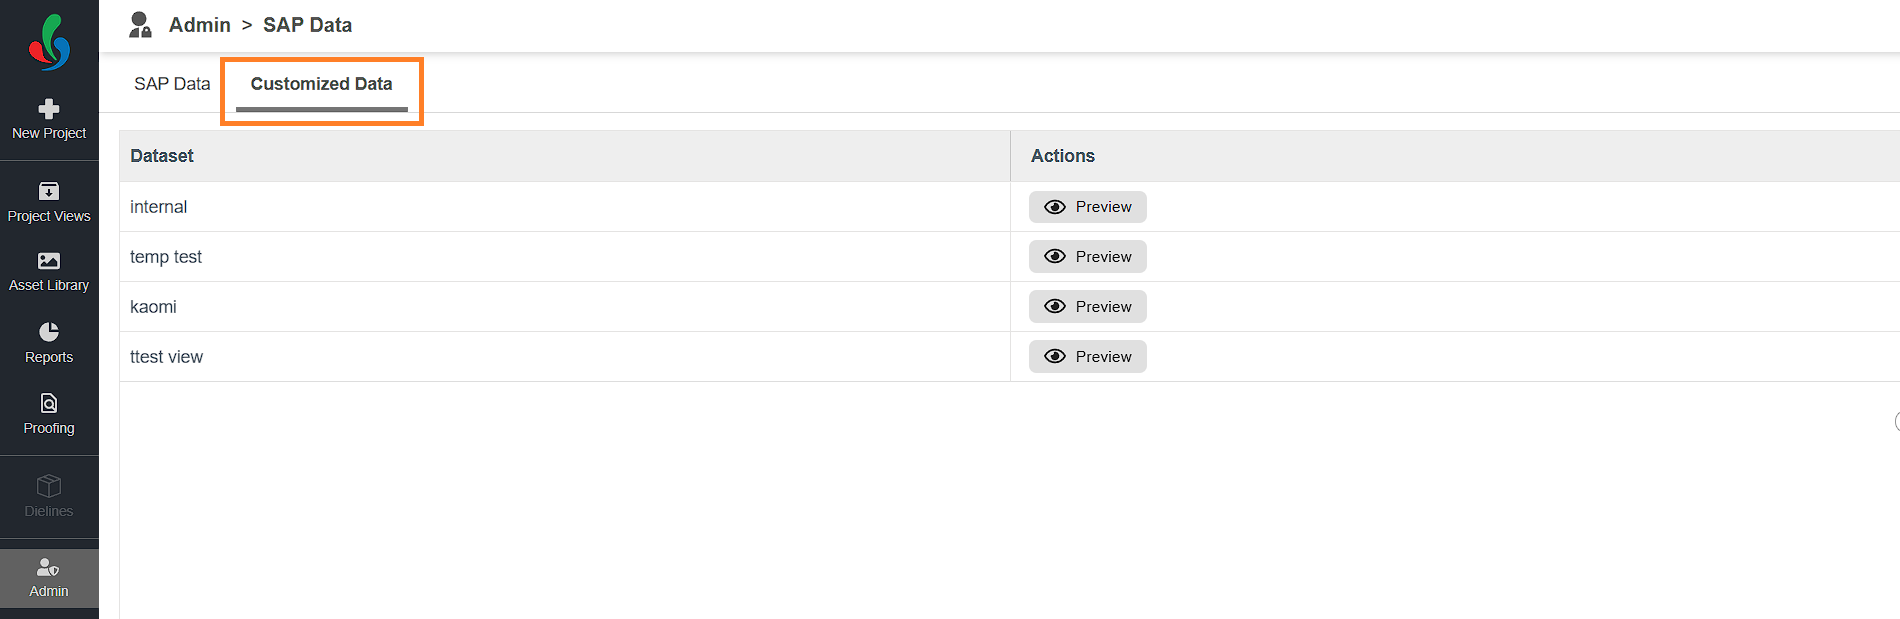
Customized Data Tab
The Customized Data tab displays filtered or refined SAP data tailored to specific business needs. While SAP may return a broad set of values, customized data focuses only on relevant fields.
Why Use Customized Data?
- SAP data may include numerous fields (e.g., Brand, Category, Component Code, SKU Code).
- You may only need a subset of this data (e.g., only Component Code and SKU Code).
- Customized Data lets you create targeted views with only the required fields.
- Multiple customized views can be created from a single SAP data set.
| Note: Customized views are also configured in the backend. Please contact ManageArtworks support team to define or update these views. Only customized data can be linked to project templates in ManageArtworks. Even if the SAP data is successfully imported, you must customize it to use it within workflow templates. Without customization, SAP data cannot be mapped to project fields or components. |
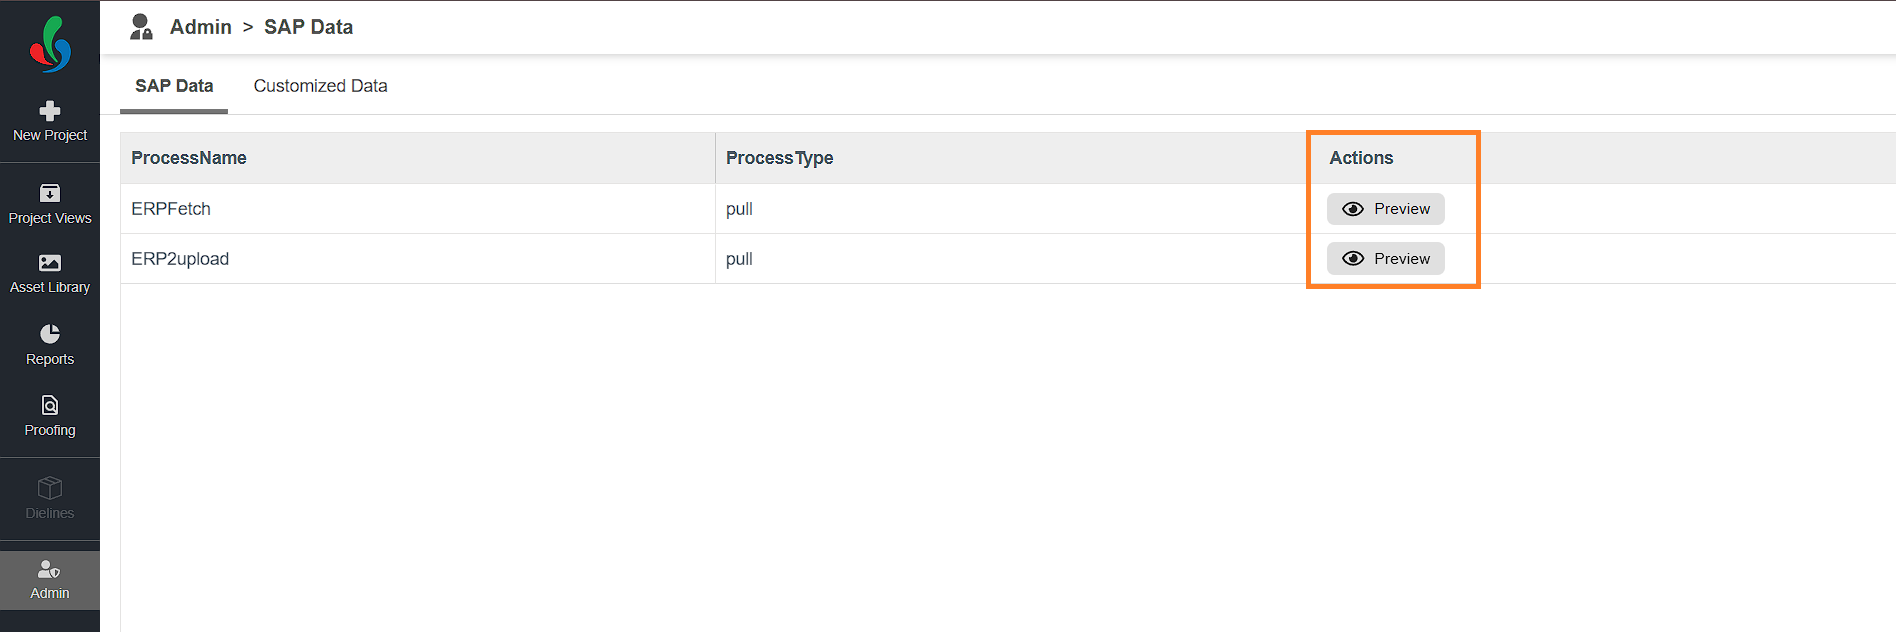
Preview Data
To preview any SAP or Customized Data entry:
- Go to the appropriate tab (SAP Data or Customized Data).
- Click the Preview button in the actions column associated with the desired data.
- This opens a detailed view of the data for preview.
Integrate Data with Project Templates
ManageArtworks allows you to integrate internal or SAP data with project templates to streamline data entry and maintain consistency across workflows. This integration works similarly to dependency fields—where the value selected in a primary field influences the values in related fields. However, in integrations, only the lookup field (the primary field) is selectable by the user. All other mapped fields are auto-populated based on the lookup value.
To integrate data with project template:
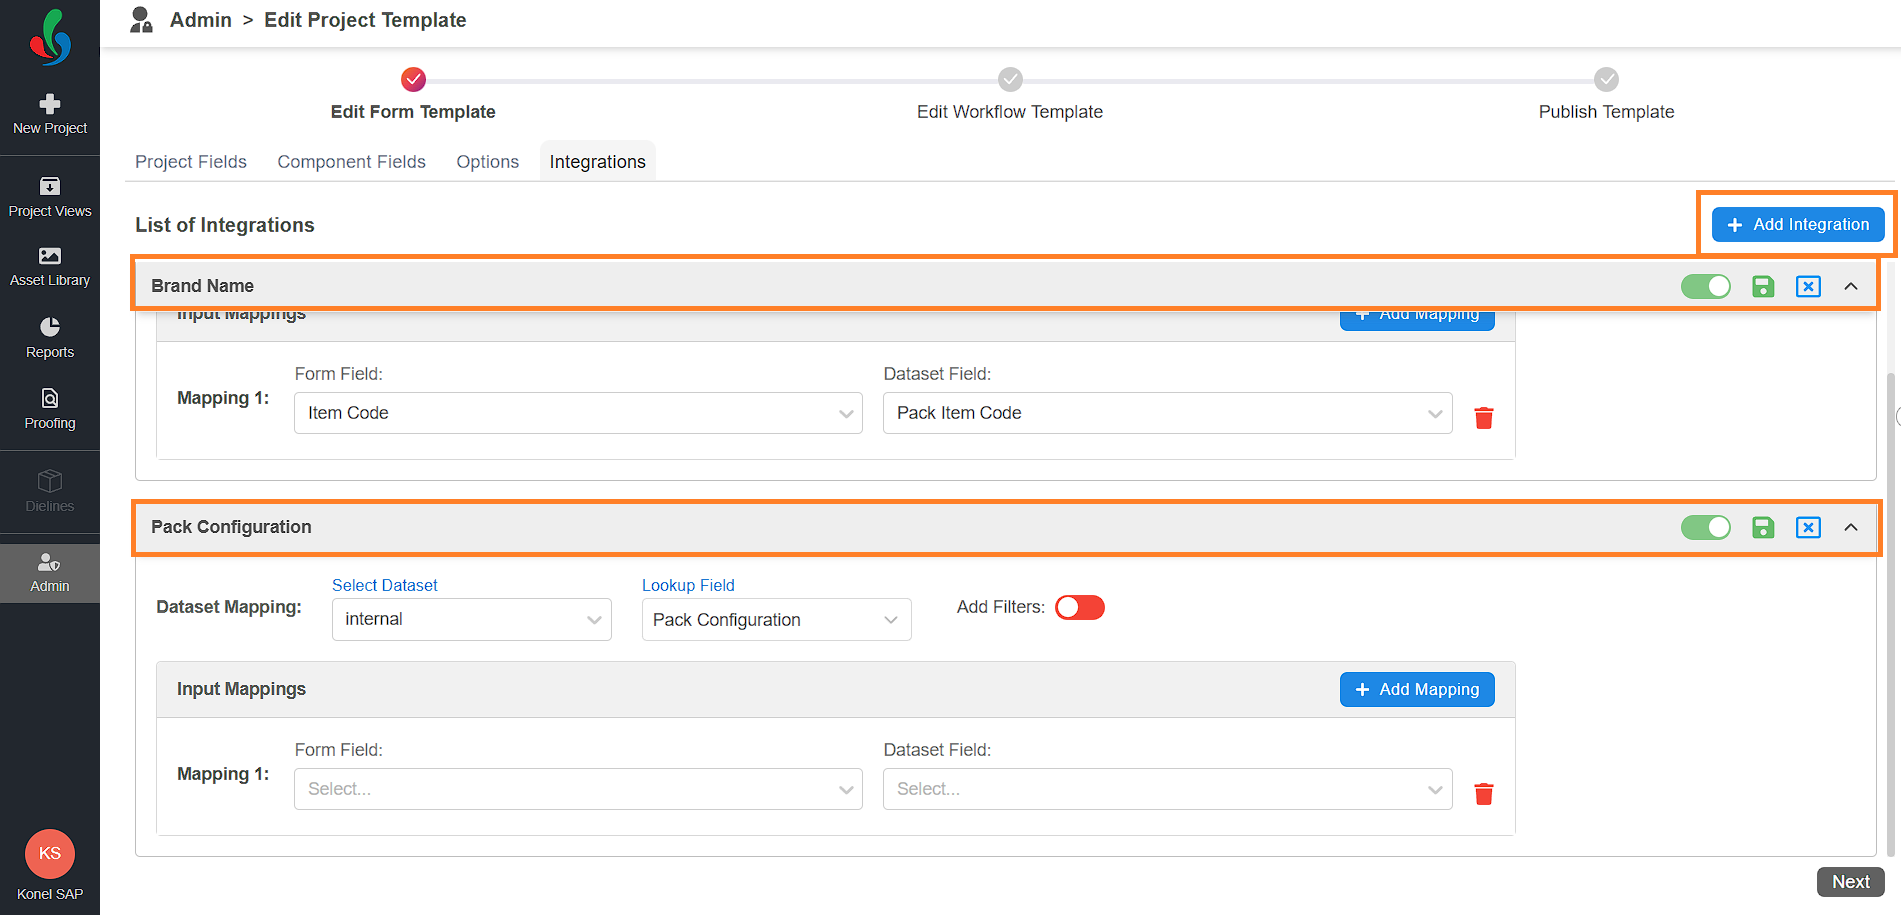
- Navigate to the Create/Edit Form Template page.
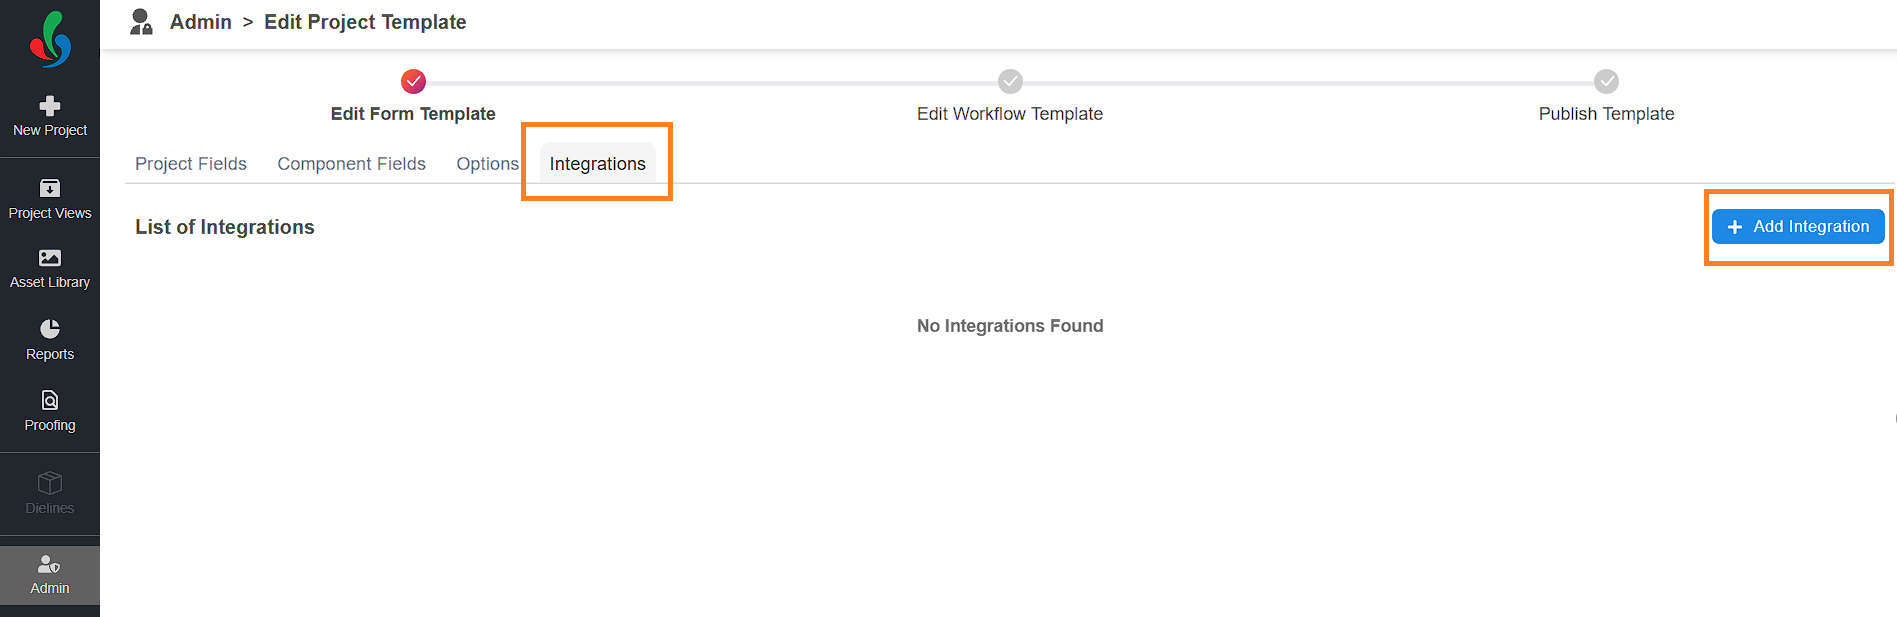
- Select the Integrations tab from the Form Template interface.
- Click Add Integration.
Note: The Add Integration button is available only if at least one dataset has been configured in the system. Ensure that the required dataset is created and available under Customized Data before attempting to add an integration.
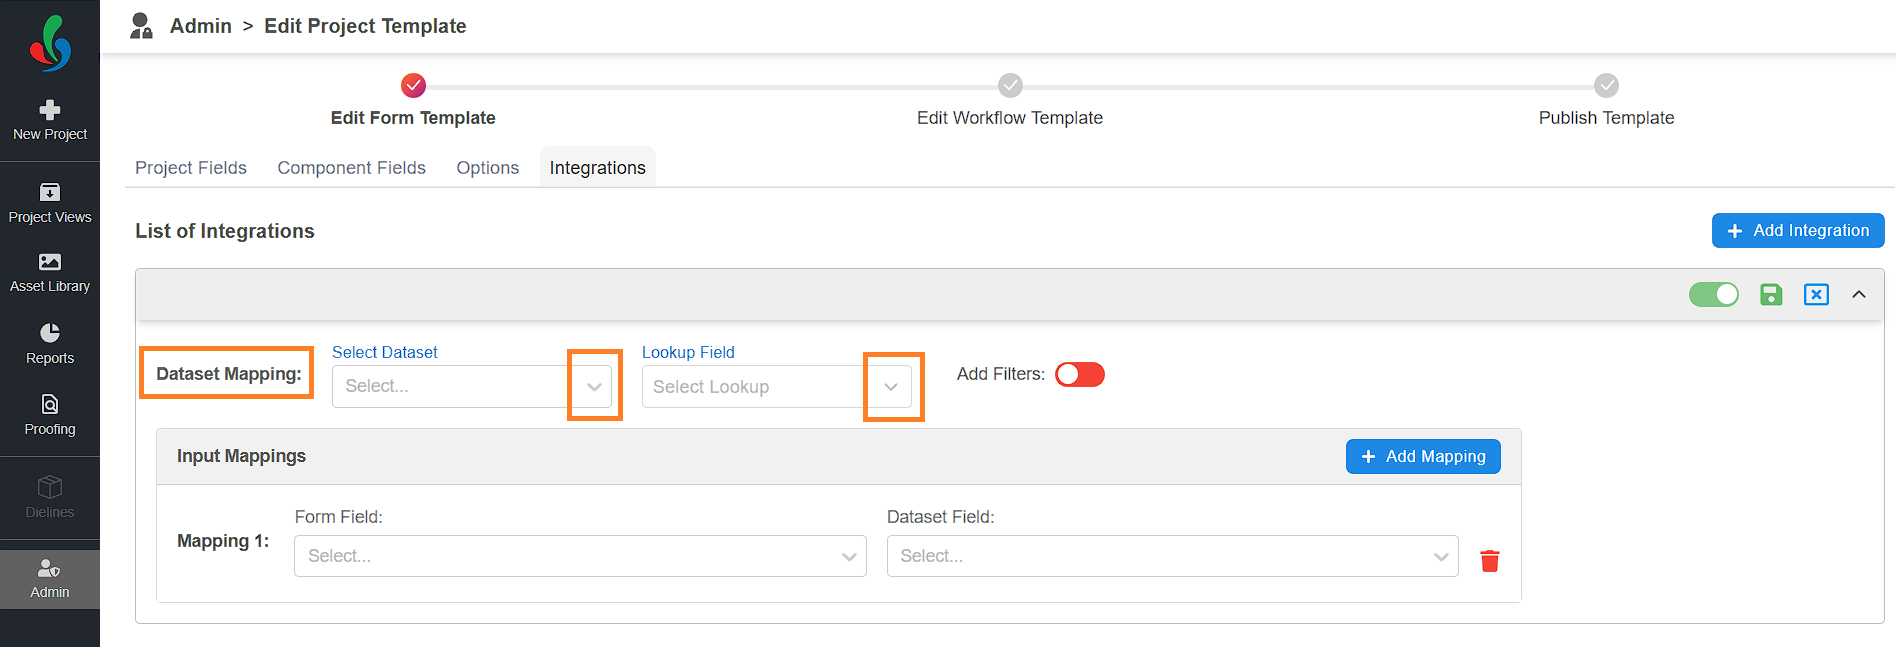
- Configure Dataset Mapping:
- Select Dataset: Choose a dataset from the drop-down menu.
Note: Only datasets listed in the Customized Data tab (under Admin > Admin Data Integration) are available here. Ensure the dataset you want to use is properly added and customized. - Lookup Field: Select the primary field users will interact with (e.g., Brand Name). This field will display a lookup icon in the form, allowing users to lookup for the values from the selected dataset.
Note: If you select a Project Field as the lookup, you can only map project fields with the dataset. To map Component Fields also, add a separate integration and select a component field as the lookup.
- Select Dataset: Choose a dataset from the drop-down menu.
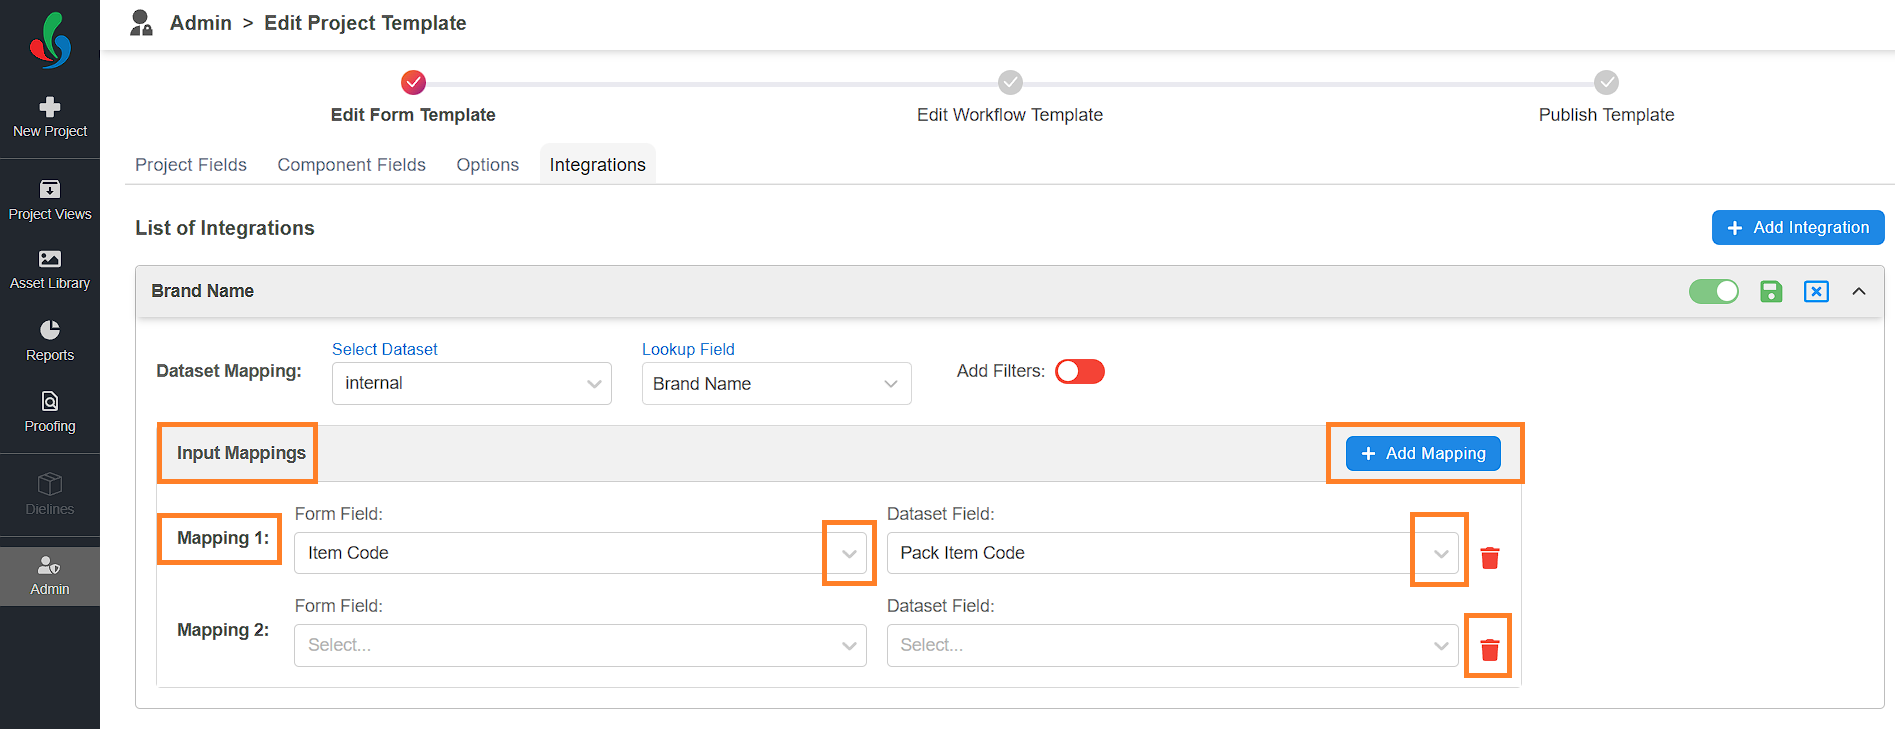
- Map Input Fields:
Under Input Mappings:- For Mapping 1, choose a Form Field (e.g., Item Code) from the drop-down menu.
Note: The type of form field—project or component—will be shown based on your selected lookup field. - Then select the corresponding Dataset Field (e.g., Pack Item Code).
Note: Only fields from the selected dataset will be shown. - To map additional mappings, click Add Mapping and repeat the steps. You can add any number of mappings as needed.
- To delete the mappings, click the delete icon associated with it.
- For Mapping 1, choose a Form Field (e.g., Item Code) from the drop-down menu.
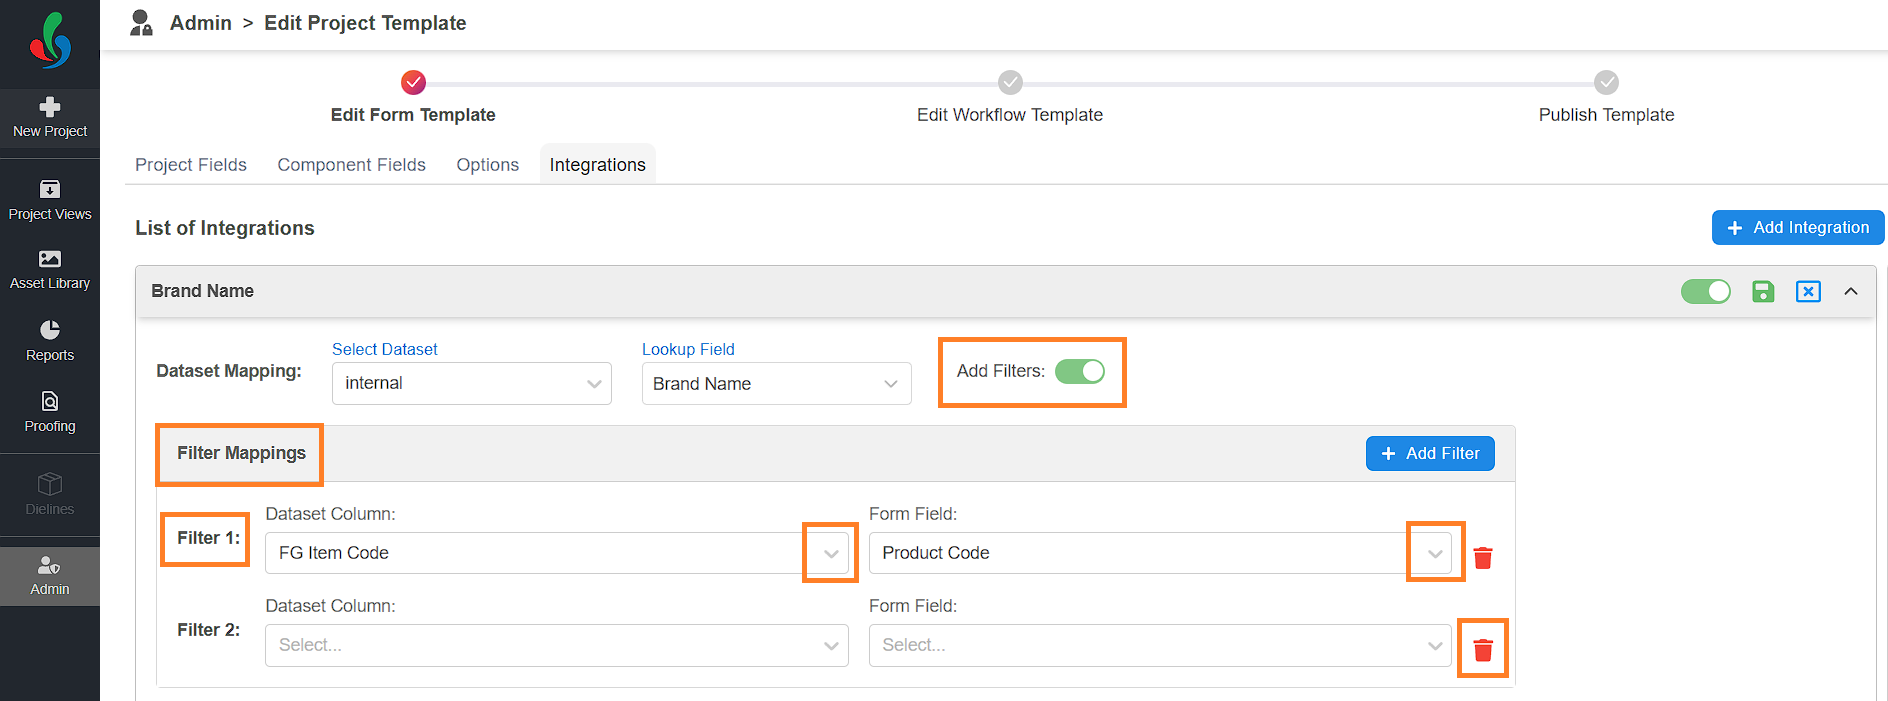
- Add Filters (Optional):
Use filters to narrow down the dataset shown in the lookup pop-up based on user input in other fields. This helps users view only the relevant data during selection.
For example, if the dataset includes multiple records but you want to display only those that match a specific value entered in another field (such as Project Code), you can configure a filter to achieve this. If Project Code is used as a filter, and a user enters a value at runtime, only the records where the dataset’s value matches the entered value will appear in the lookup.- Toggle Add Filters to On.
- For Filter 1, select a Dataset Column (FG Item Code) from the drop-down menu.
- Then select the corresponding Form Field (e.g., Product Code).
- Click Add Filter to create more filter conditions. Repeat the process as required.
- Click the save icon to apply your integration settings.
- Add More Integrations (Optional):
- If needed, click the Add Integration button to configure another set of mappings — for example, if you want to integrate both project and component fields.
- Repeat steps 4, 5 and 6 to configure dataset mapping.
- Publish the template to update the changes.