
Dependency Field
 | Note: The Dependency Field is an Enterprise Plan feature but can be added as an add-on for Growth Plan users. It is essential to configure the required metadata fields as "Use as Collection" for them to appear as dependency fields. Only metadata fields with "Use as Collection" properties will be available for selection. For configuration instructions, refer to Manage Metadata Fields. |
A Dependency Field is a type of metadata field that establishes a hierarchical or conditional relationship between different fields within the system. This feature allows users to create and manage dependencies between fields, ensuring that the selection of one field dictates the available options in another.
Example
- Primary Field: Packaging Type (e.g., Bottle, Box, Bag)
- Dependent Field: Material Type (e.g., Glass, Plastic, Cardboard)
- If "Bottle" is selected as the packaging type, the material type field options can be limited to "Glass" and "Plastic."
- If "Box" is selected, the material type field option can be restricted to "Cardboard."
How do I set up a dependency field?
01. Access the Dependency Field Settings
- Log in to your ManageArtworks account.
- Navigate to the Admin module.
- Click the Dependency Field tab.
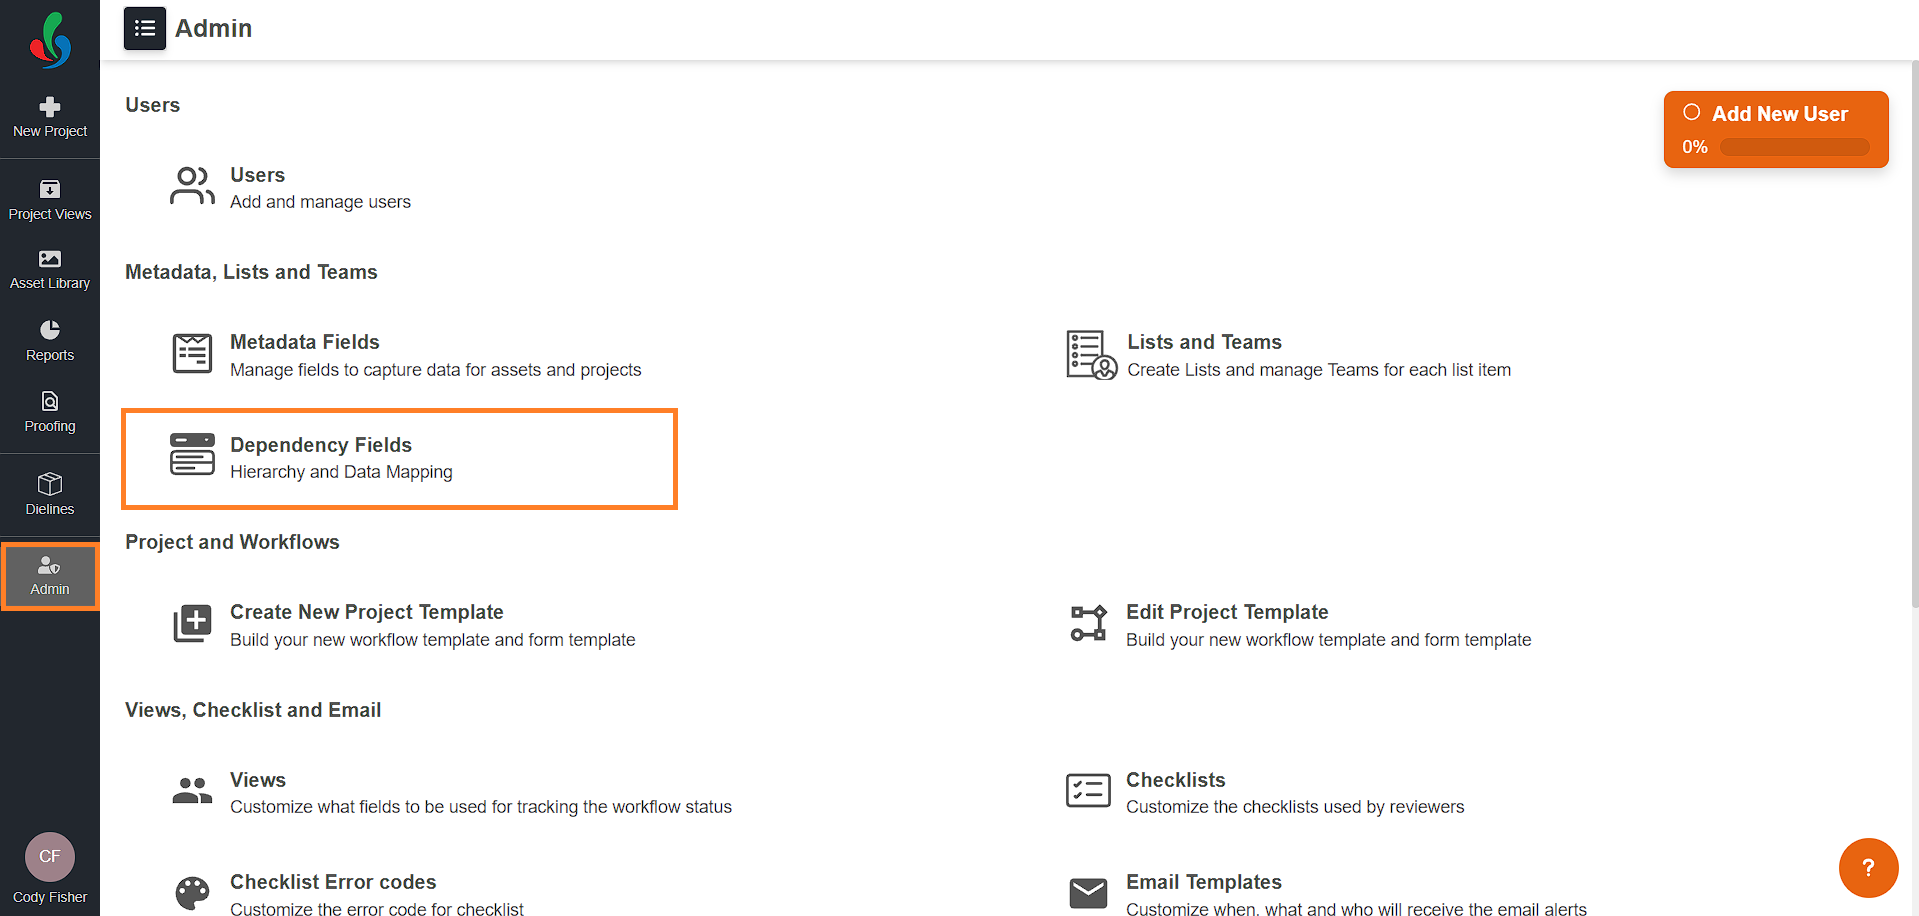
02. Create a New Dependency Hierarchy
- Click the Add button in the upper-right corner.
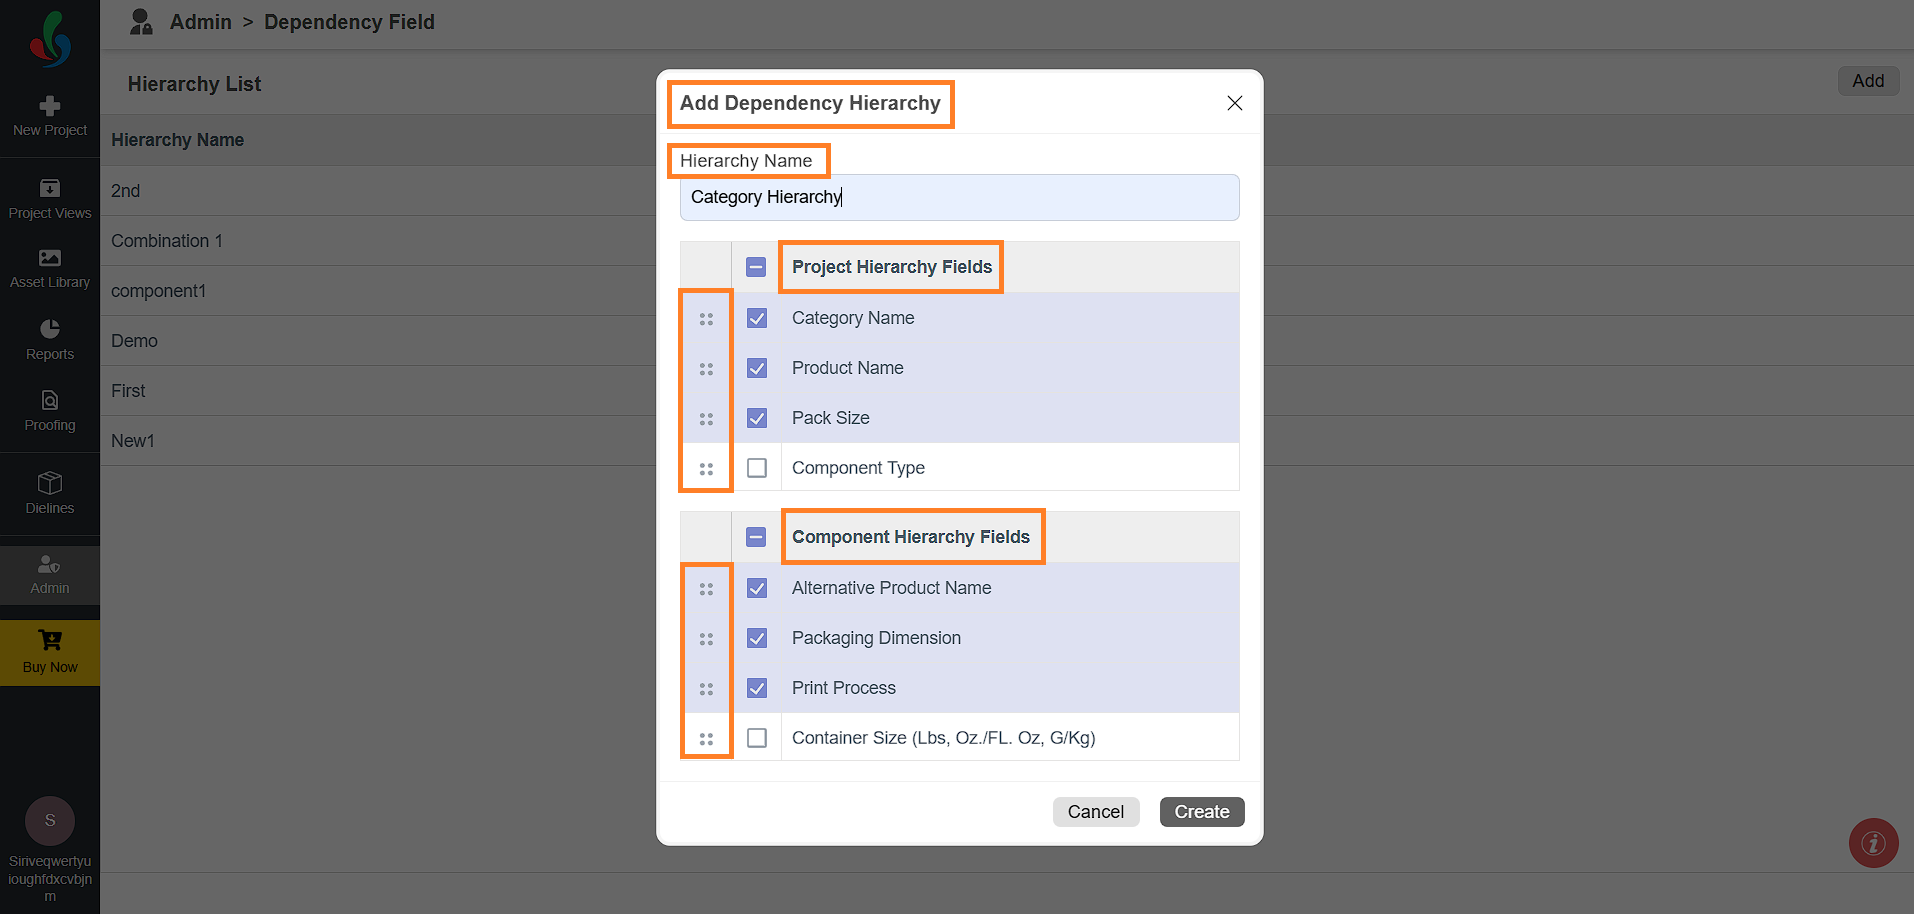
- The Add Dependency Hierarchy pop-up will appear.
 | Note: Users on the Growth Plan can create a dependency hierarchy only for project fields. Users on the Enterprise Plan can create a dependency hierarchy for both project and component fields. For more information on all ManageArtworks plans, click here. |

03. Configure the Dependency Hierarchy
- Hierarchy Name:
- Enter a descriptive name for the hierarchy.
- Project & Component Fields Configuration
Note: Component dependency field configuration is available only in the Enterprise Plan. The system automatically distinguishes between Project Fields and Component Fields. Users cannot manually select or configure which fields belong to projects or components—this is handled by default within the system.
For more information or assistance with configuring component fields, please contact the ManageArtworks Support Team. - Project Hierarchy Fields:
- Choose the project metadata fields to include in the hierarchy (e.g., Category, Product Name, Pack Size) from the available list.
Note: You can select up to 8 fields. Only project metadata fields configured with the "Use as Collection" option will appear in the list. For details on how to enable metadata fields as collections, refer to Manage Metadata Fields.
- Use the drag icon (::) to rearrange the selected fields in the preferred order.
- Choose the project metadata fields to include in the hierarchy (e.g., Category, Product Name, Pack Size) from the available list.
- Component Hierarchy Fields (Available only in Enterprise Plan):
- Choose the component metadata fields to include in the hierarchy (e.g., Component Name, Packaging Type, Print Process) which will reflect in the Component tab.
Note: You can select up to 8 fields. Only component metadata fields configured with the "Use as Collection" option will appear in the list. For details on how to enable metadata fields as collections, refer to Manage Metadata Fields.
- Use the drag icon (::) to rearrange the selected fields in the preferred order.
- Choose the component metadata fields to include in the hierarchy (e.g., Component Name, Packaging Type, Print Process) which will reflect in the Component tab.
04. Dependency Relationship
- Even though Project and Component fields are selected separately, they are linked together.
- The topmost selected field under Project Hierarchy acts as the Primary Field, while the others serve as Dependent Fields.
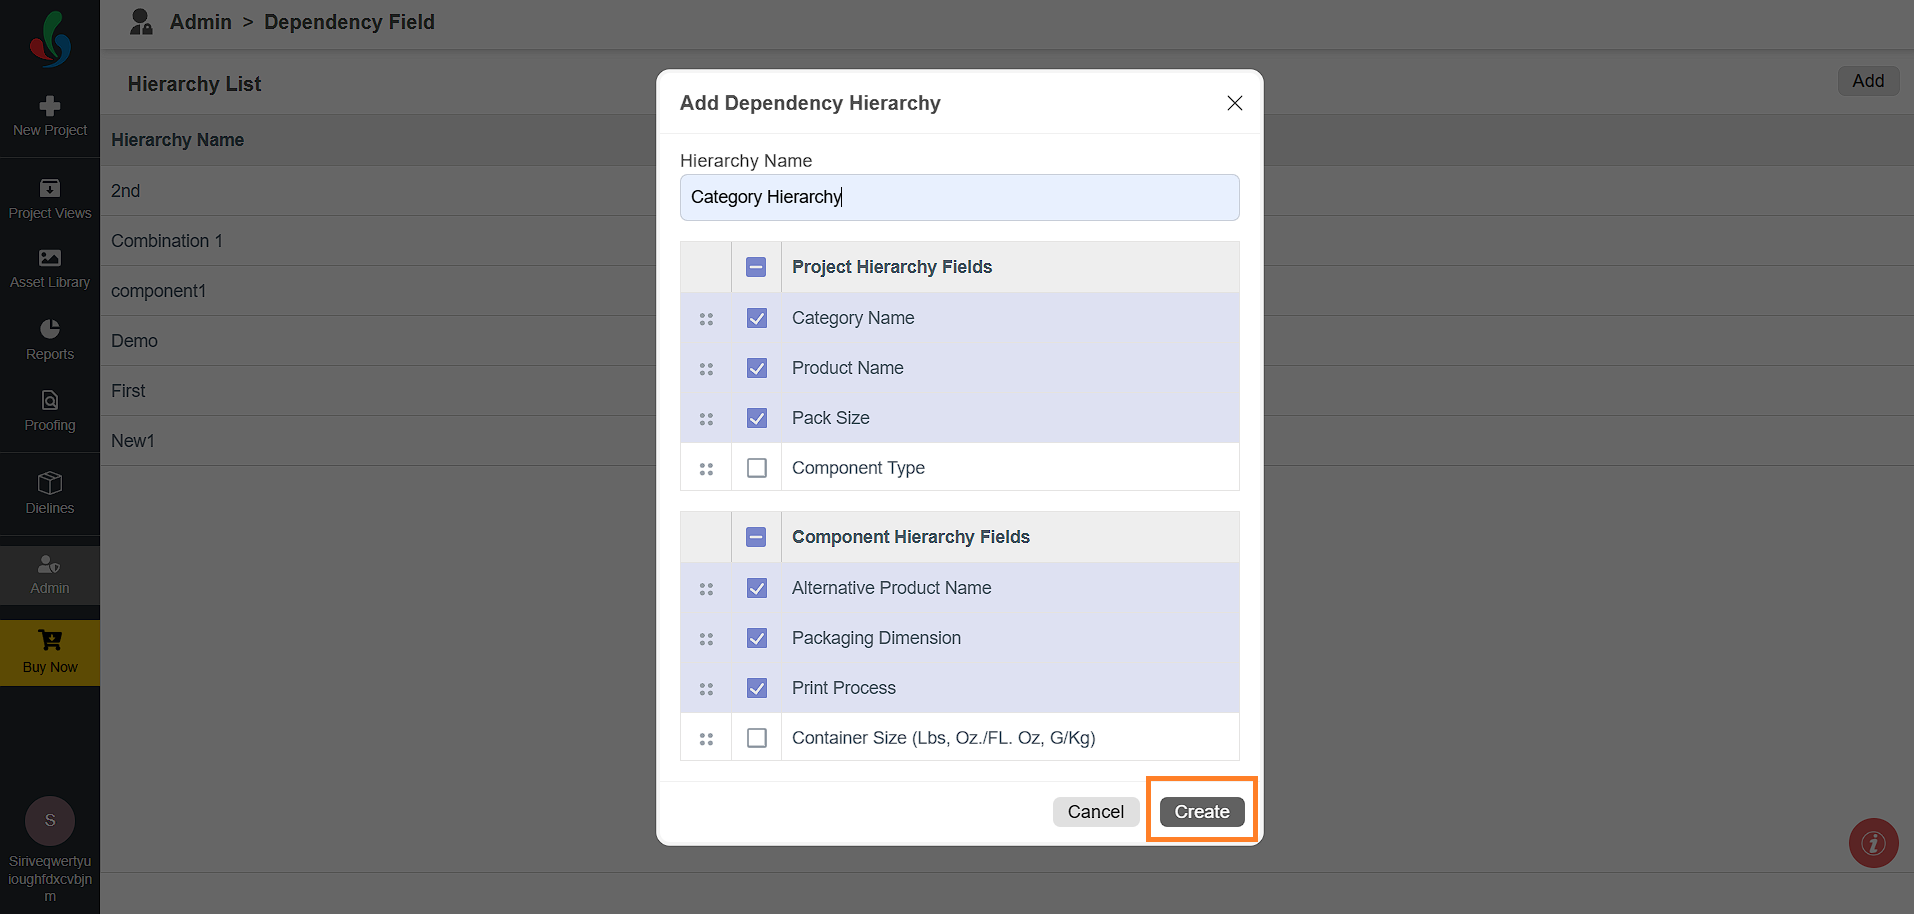
05. Finalize the Configuration
- Once configured, click Create to finalize the hierarchy.
Data Mapping
Once the hierarchy is created, you need to map data to it::
- Click the Data Mapping button associated with the desired hierarchy.
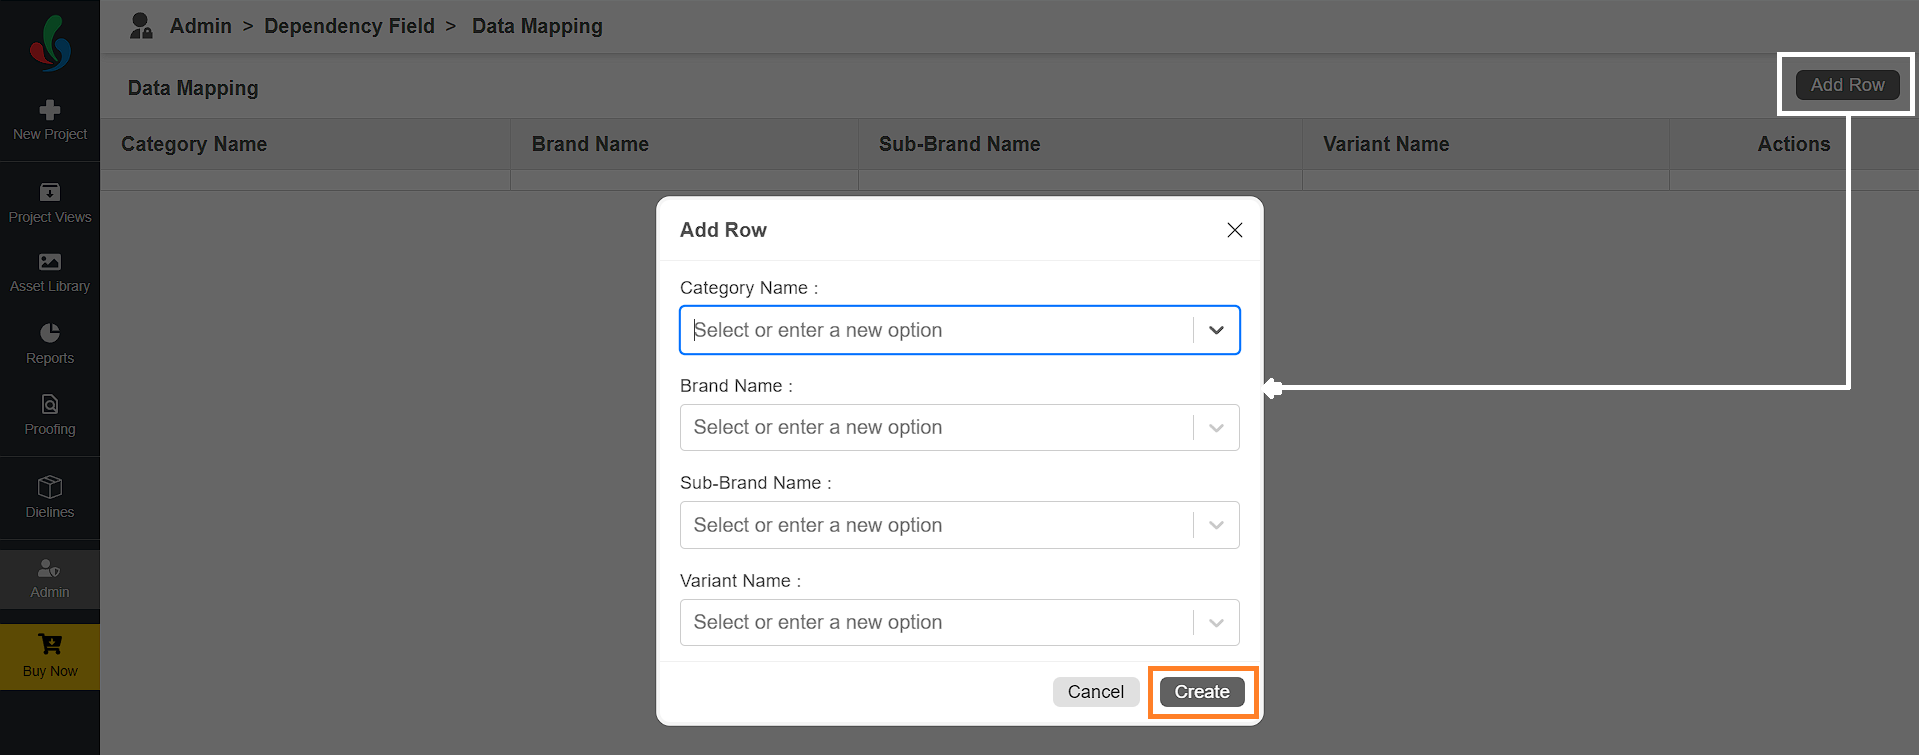
- Click Add Row to start mapping.
Fill in Data
- A pop-up window will display all available Project and Component fields based on the hierarchy.
- Click on each field to either:
- Select from existing options (e.g., clicking the "Category" field will display master data from Lists and Teams).
- Enter new values if applicable.
- After completing the field entries, click Create to save the mapping.
- Repeat the process to add more rows as needed.
Example of Data Mapping:
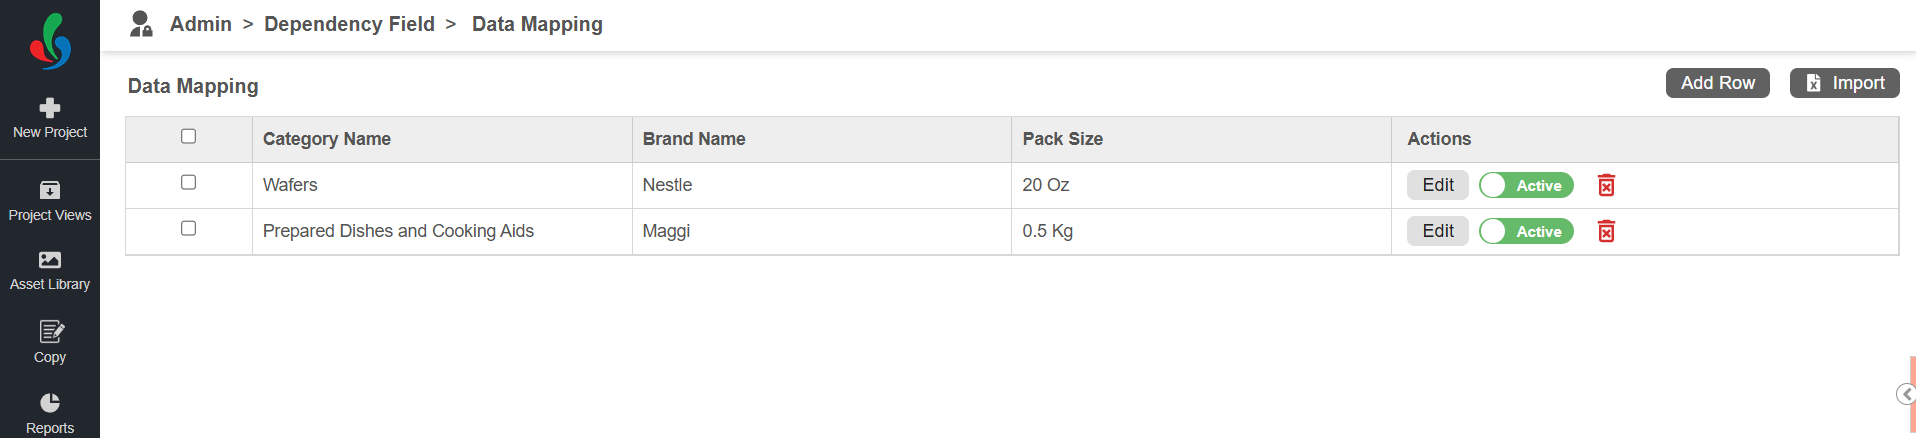
- Category: Wafer | Brand: Nestle | Size: 20 Oz
- Category: Prepared Dishes | Brand: Maggi | Size: 0.5 Kg
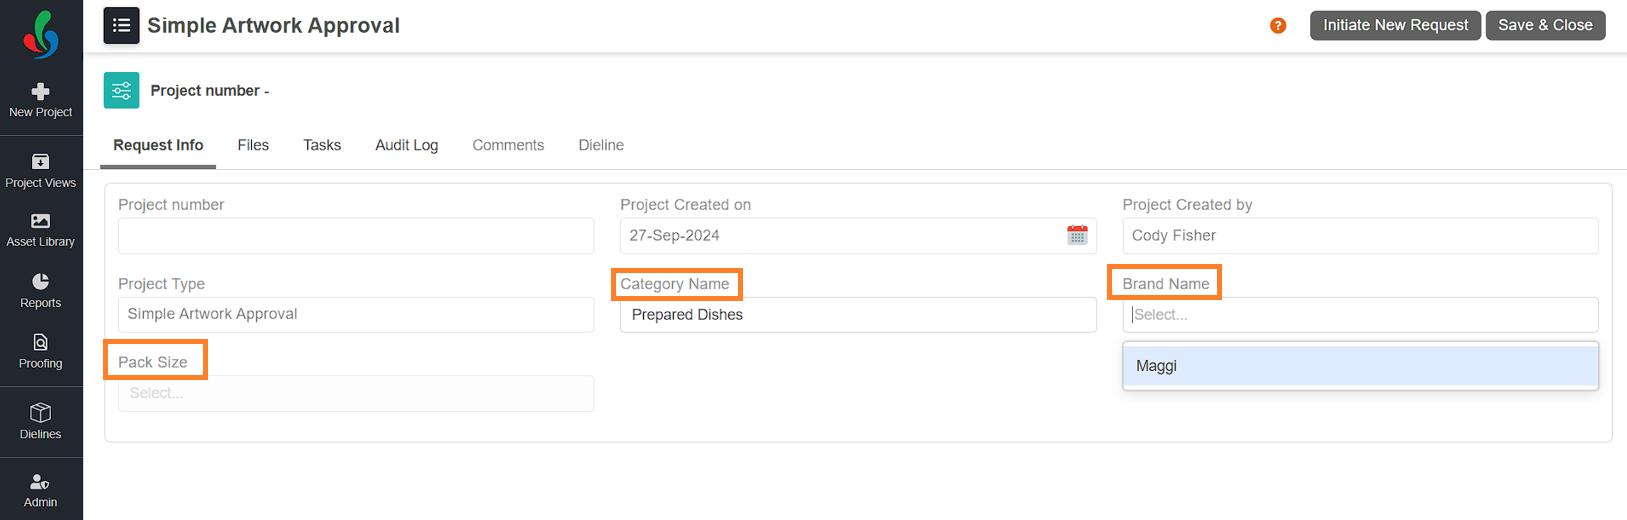
End-User Behavior:
On the end-user side, when the user clicks the "Category" field, only relevant options (Wafer and Prepared Dishes) will be shown and if "Prepared Dishes" is selected, then "Brand" field will only show "Maggi".
If Component fields are included in the hierarchy:
After completing all fields in the Request Info tab, the fields in the Component tab will become selectable, one by one, in the defined order.
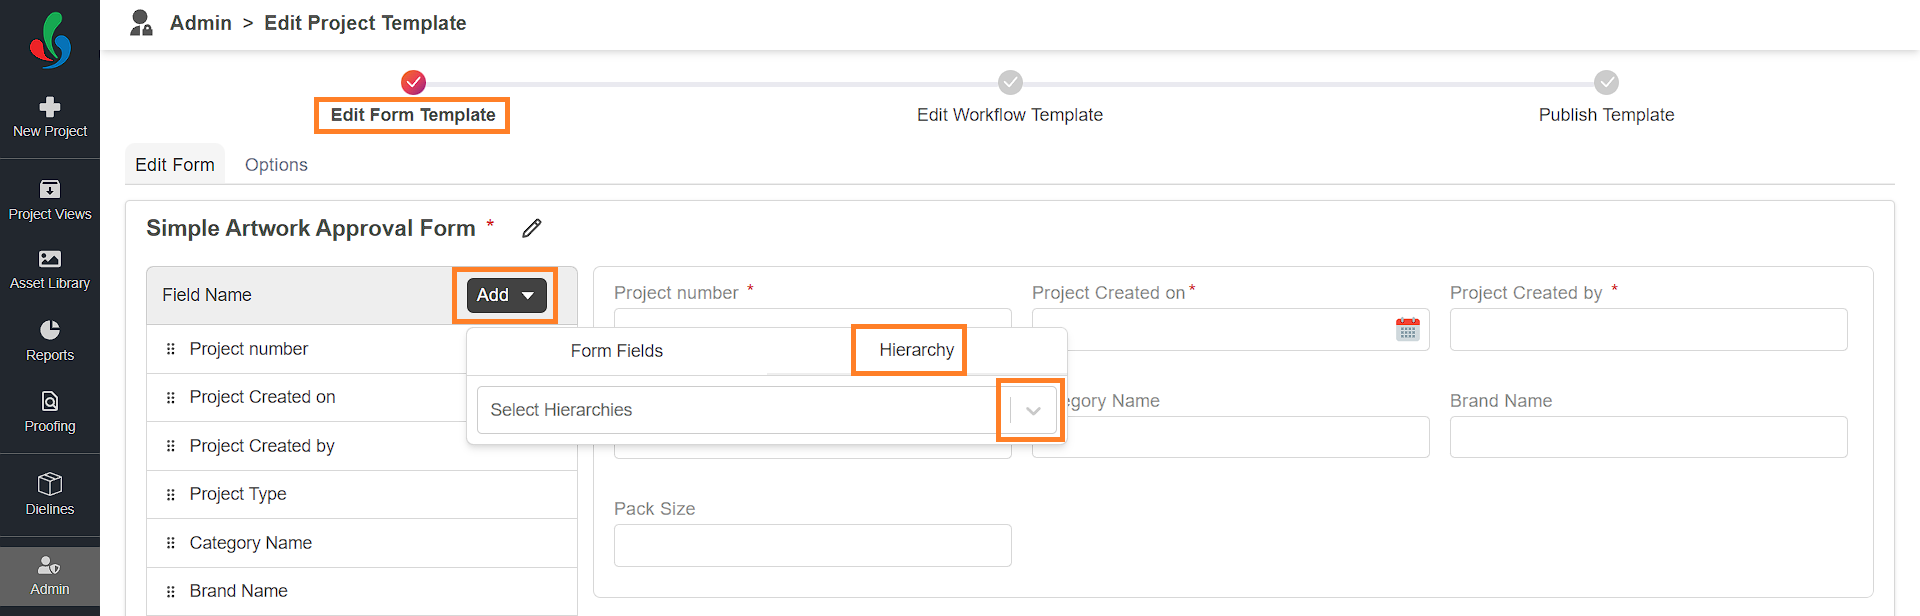
Form Template Mapping
Dependency field hierarchies can be mapped to form templates, allowing dynamic management of form fields.
To Map a Dependency Field Hierarchy to a Form Template:
- Navigate to the Create/Edit Form Template page.
- Click Add Field.
- Select Hierarchy from the list.
- Click the drop-down icon and choose the desired hierarchy to add it to the form.
- The fields from the selected hierarchy will be dynamically inserted.
Note: If the hierarchy includes component fields, and you are working with a workflow template that has components, the fields will be dynamically inserted into the Component tab..
- The fields from the selected hierarchy will be dynamically inserted.
- Publish the template to update the changes.
Note:
- If a field from the hierarchy already exists in the form, the hierarchy will be linked, but the duplicate field won't be added.
- If a field linked to a hierarchy is removed from the form, the entire hierarchy will be removed.