Manage Account Details
The "Account Details" feature in ManageArtworks acts as your control center for managing various account-related settings. It empowers you to:
- Plan Status: Check information like your plan and it's activation status. Refer to Pricing and Upgrading.
- Password Policy: Set rules for password strength and expiration to safeguard your system.
- Default Settings: Choose the landing page you want users to see first when they log in.
- Language: Set your preferred language for a tailored experience.
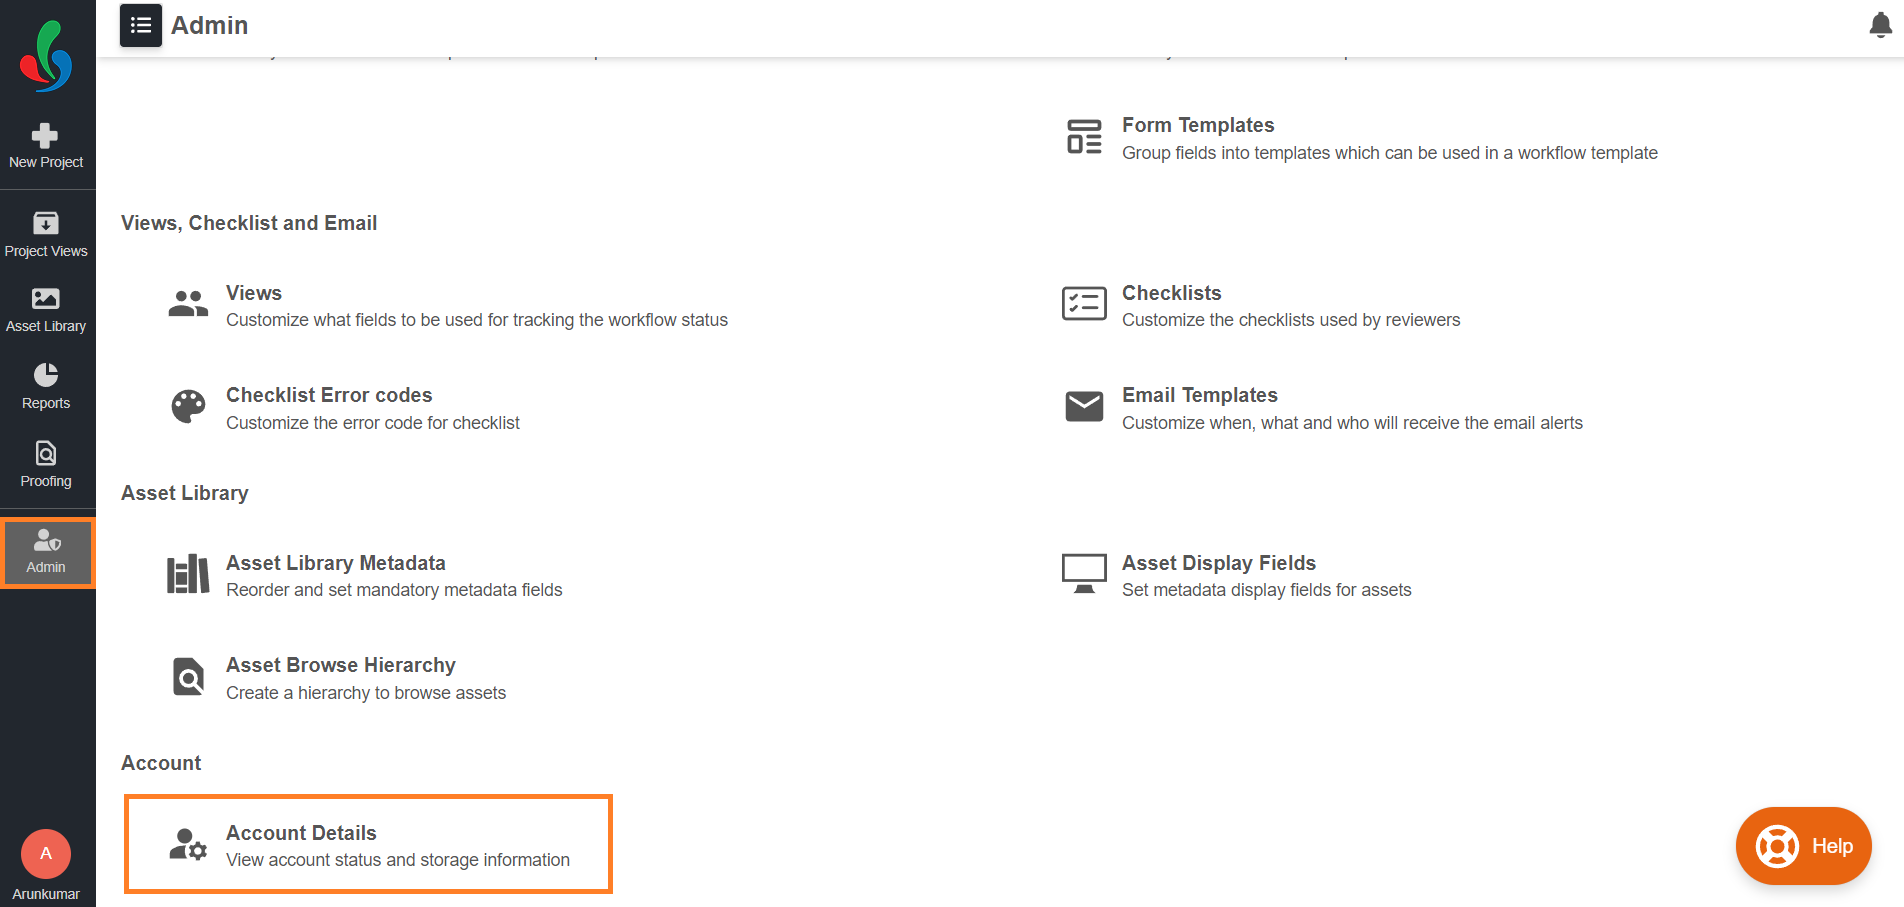
Access Account Details
- Log in to your ManageArtworks account.
- Select the Admin module.
- Click the "Account Details" tab.
How do I change the password policy?
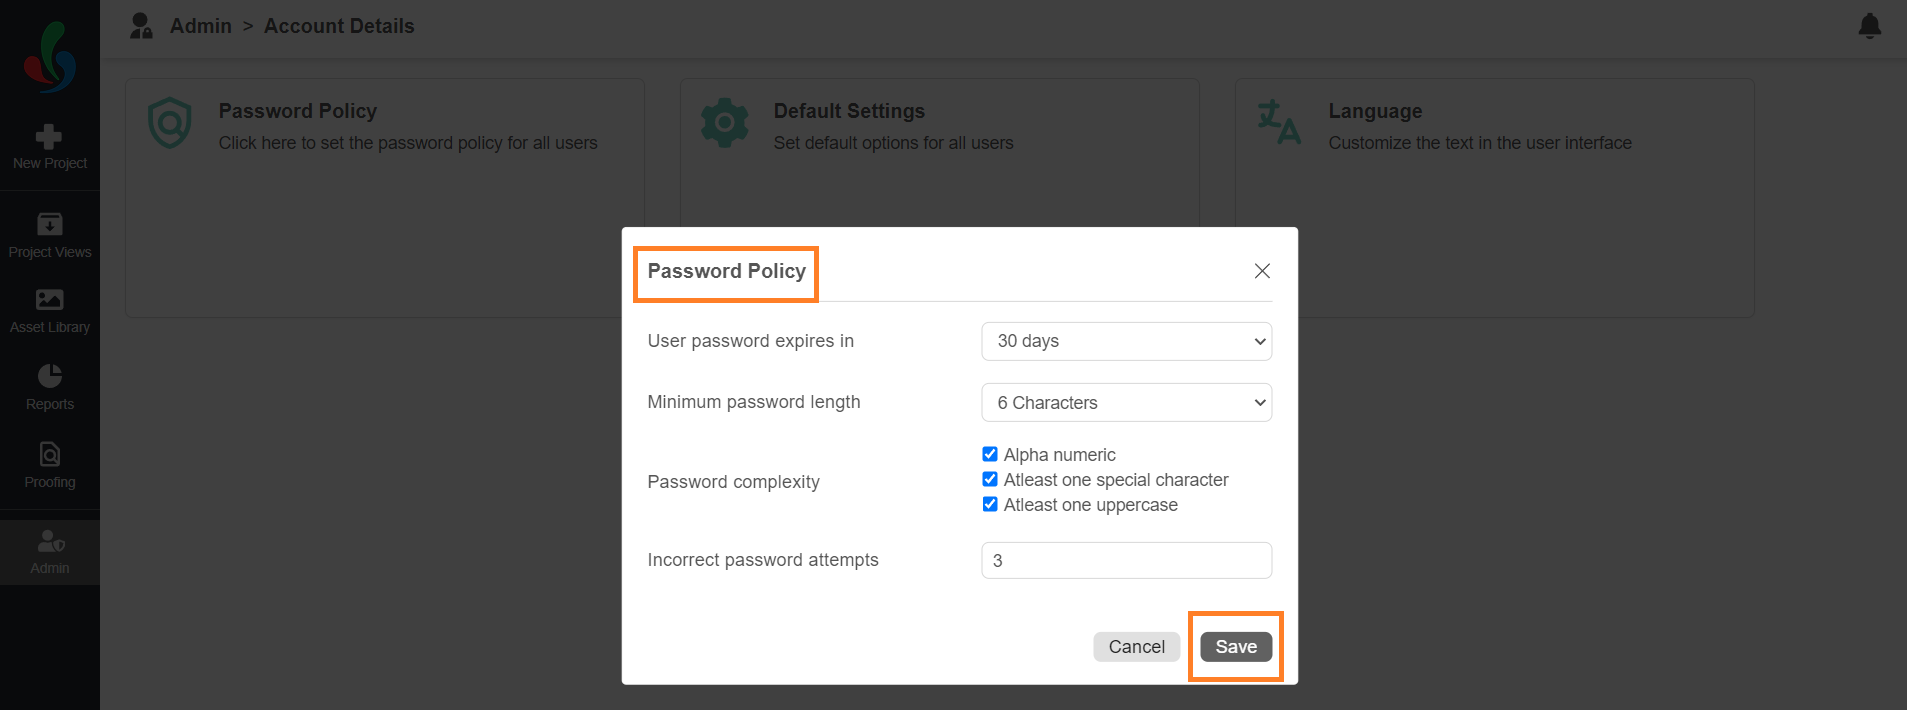
Change Password Policy
- Navigate to Account Details.
- Click the "Password Policy" tab.
- Customize the following settings:
- Password Expiration: Specify the number of days after which passwords should expire.
- Minimum Length: Set a minimum number of characters required for passwords.
- Complexity Rules: Choose whether to enforce alphanumeric characters, special characters, or uppercase letters.
- Incorrect Attempt Limits: Determine how many incorrect attempts are allowed before a user is locked out.
- Click "Save" to apply your changes.
How do I change the landing page?
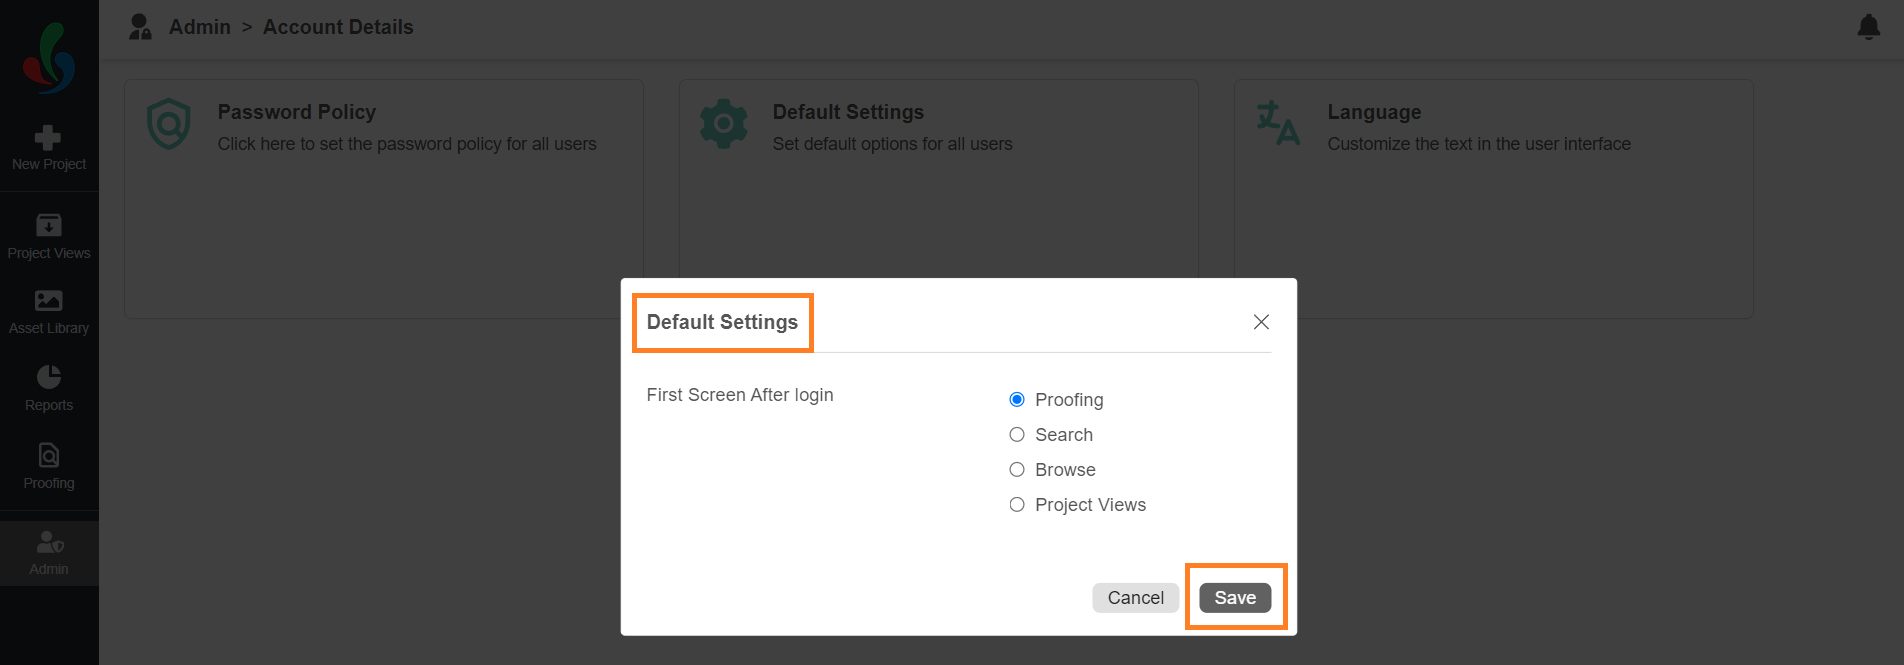
Change Landing Page
- Navigate to Account Details.
- Click the "Default Settings" tab.
- Select the desired module you want users to see upon login (e.g., Proofing, Search, Browse).
- Click "Save" to finalize your choice.
How do I change the language or application's terminology?
Language
ManageArtworks allows extensive language customization options, allowing you to adapt the application's terminology to match yours, creating a more intuitive and familiar experience.
Easily customize terminology for both administrators and end users within distinct tabs in the Language section. Modify admin-related language in the Admin tab and adapt client-facing terminology in the Client tab.
Admin Section: Change Admin-related Language
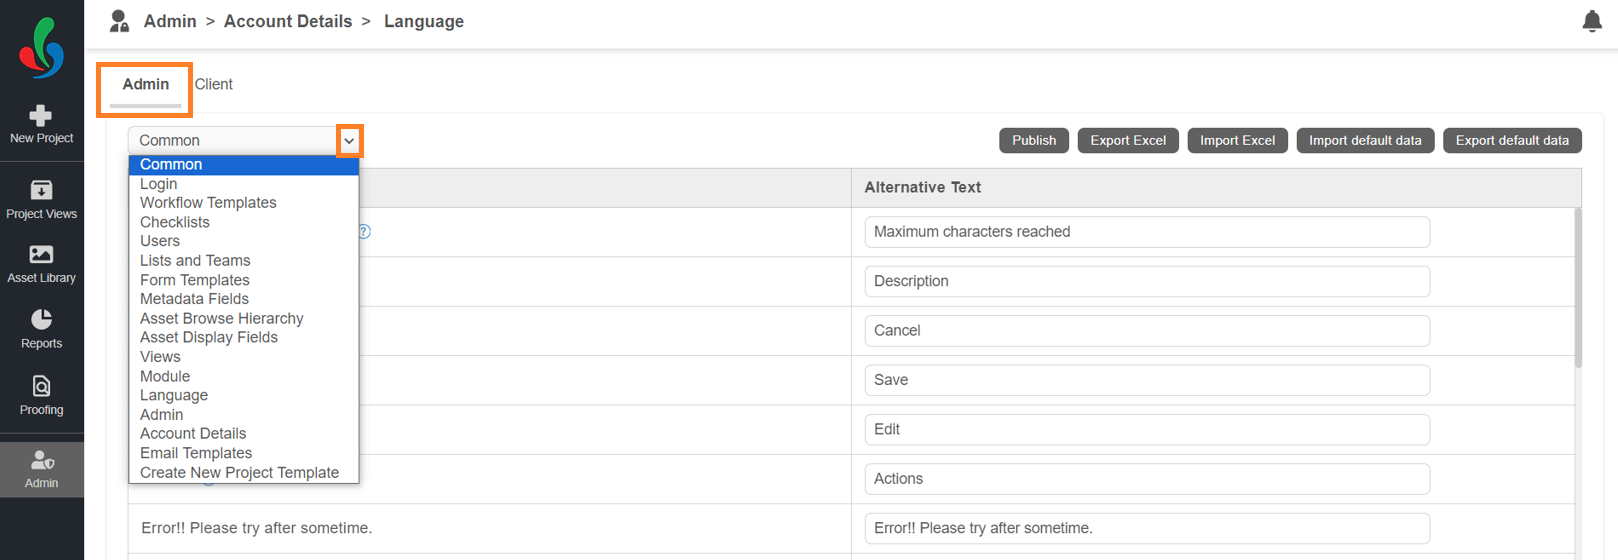
- Navigate to Account Details.
- Click the "Language" tab.
- Click the "Admin" tab.
- Choose Your Element: Click the drop-down icon and select the administrative element you want to customize from a comprehensive list.
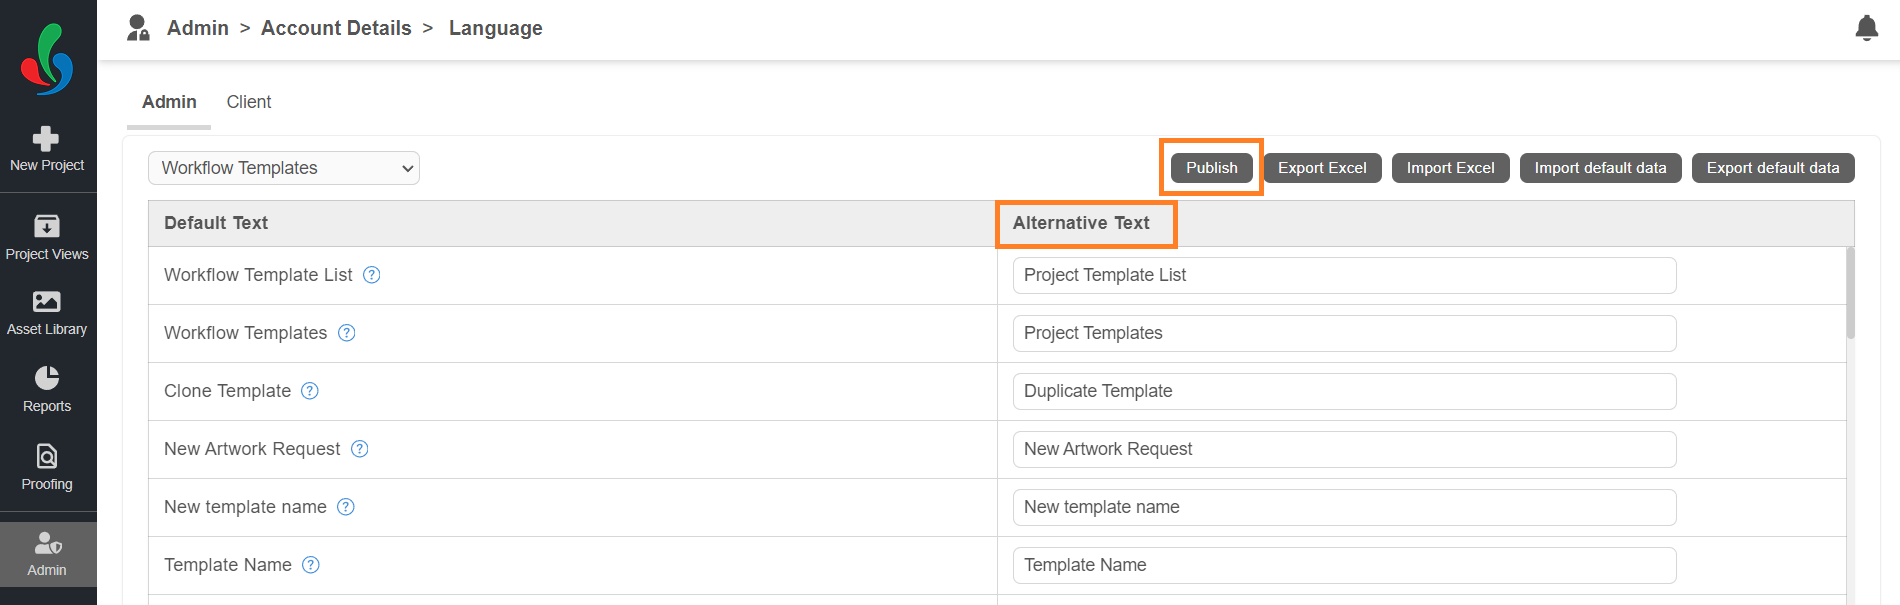
- Provide Your Translations: Enter your preferred alternative text in the "Alternative Text" column for each selected element, replacing the default English terms.
- Apply Changes: Click the "Publish" button to save your customizations.
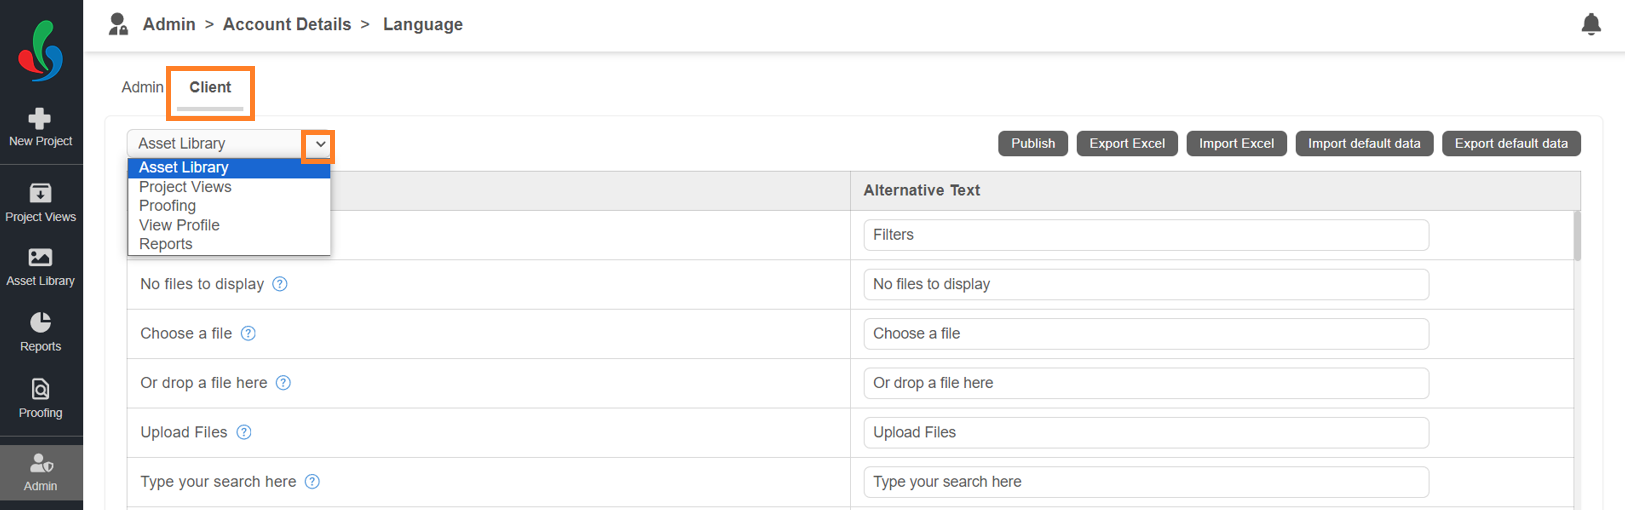
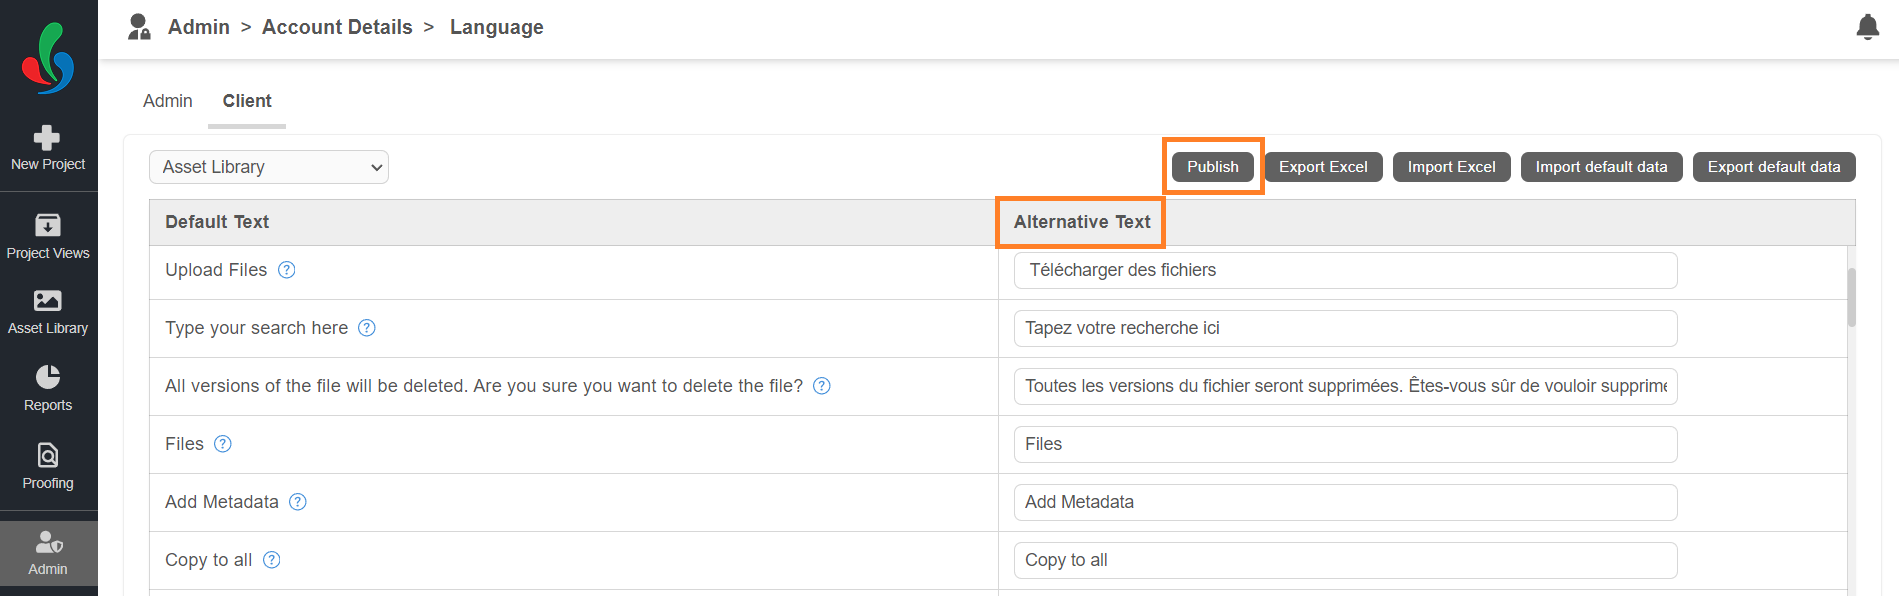
Client Section: Change Client-related Language
- Navigate to Account Details.
- Click the "Language" tab.
- Click the "Client" tab.
- Choose Your Element: Click the drop-down icon and select the administrative element you want to customize from a comprehensive list.
- Provide Your Translations: Enter your preferred alternative text in the "Alternative Text" column for each selected element, replacing the default English terms.
- Apply Changes: Click the "Publish" button to save your customizations.