Create New Project Template (Enterprise Plan)
 | Note: The process for creating a new project template varies depending on the user’s plan. This article focuses on creating a new project template in the Enterprise Plan. For details on creating a project template in the Growth Plan, refer to [Create New Project Template (Growth Plan)]. If you're creating a new project template with Copy Manager, refer to the guide: Configure Project Template with Copy Manager. This article covers the steps to create a project template without Copy Manager. |
How do I Create a New Project Template in the Enterprise Plan?
Creating a new project template involves four key steps:
- Select Approval Flow
- Create Form Template
- Create Workflow Template
- Publish the Template
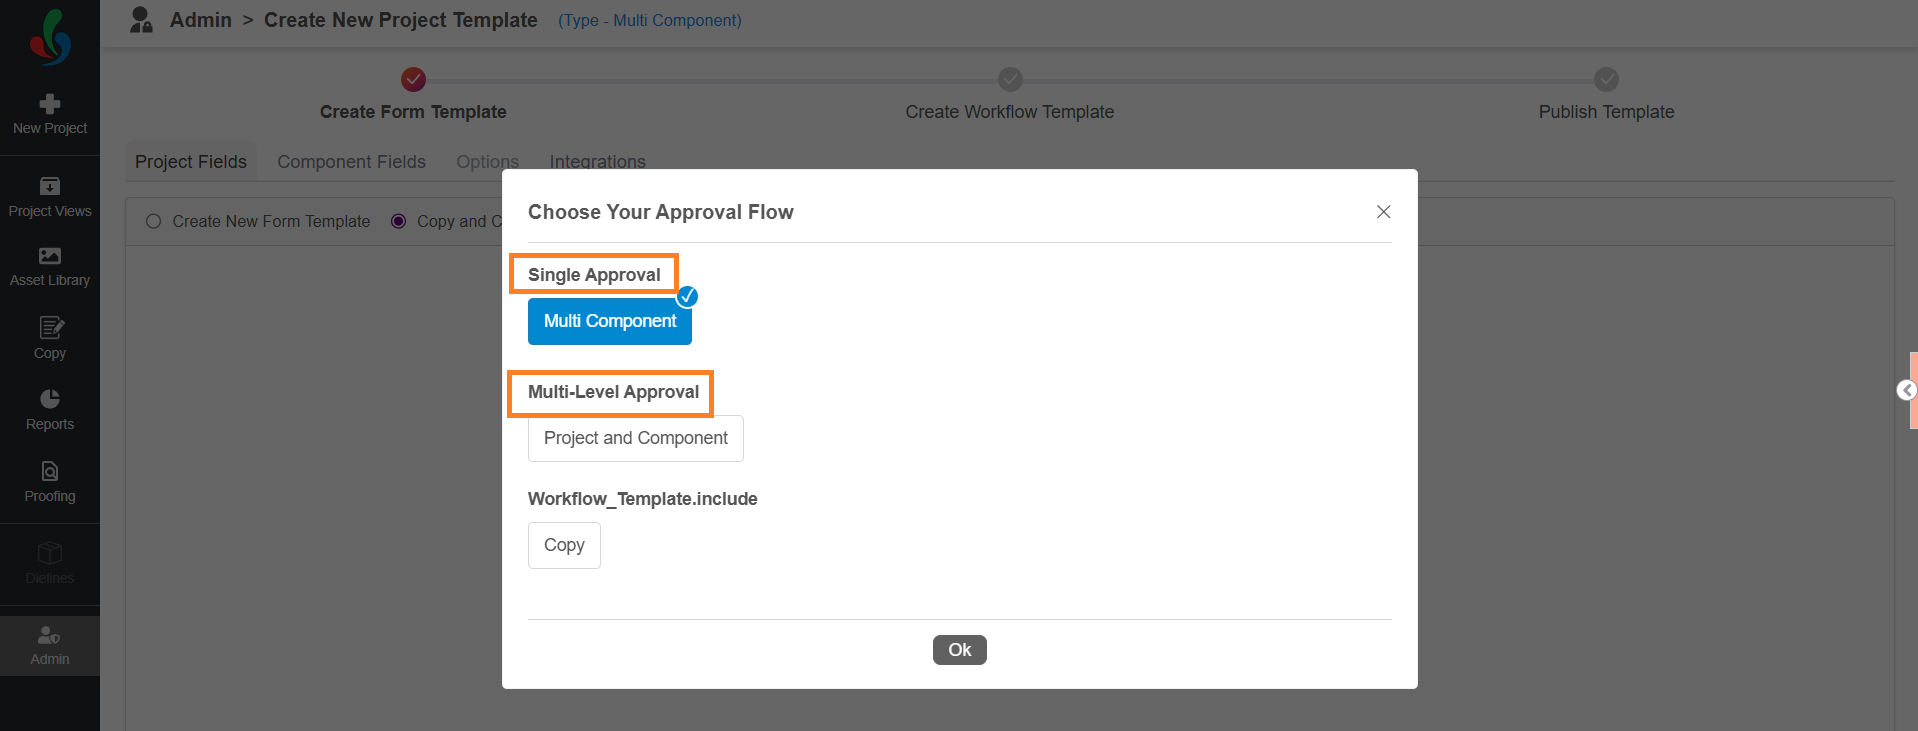
Step 1: Select Approval Flow
You can choose between two types of approval flows:
- Single Approval
- Multi-Level Approval
Refer to Step 1: Select Approval Flow.
| Note: The Copy option in the Workflow Template Includes section is visible only if you have access to Copy Manager. This option applies exclusively to copy tasks. |
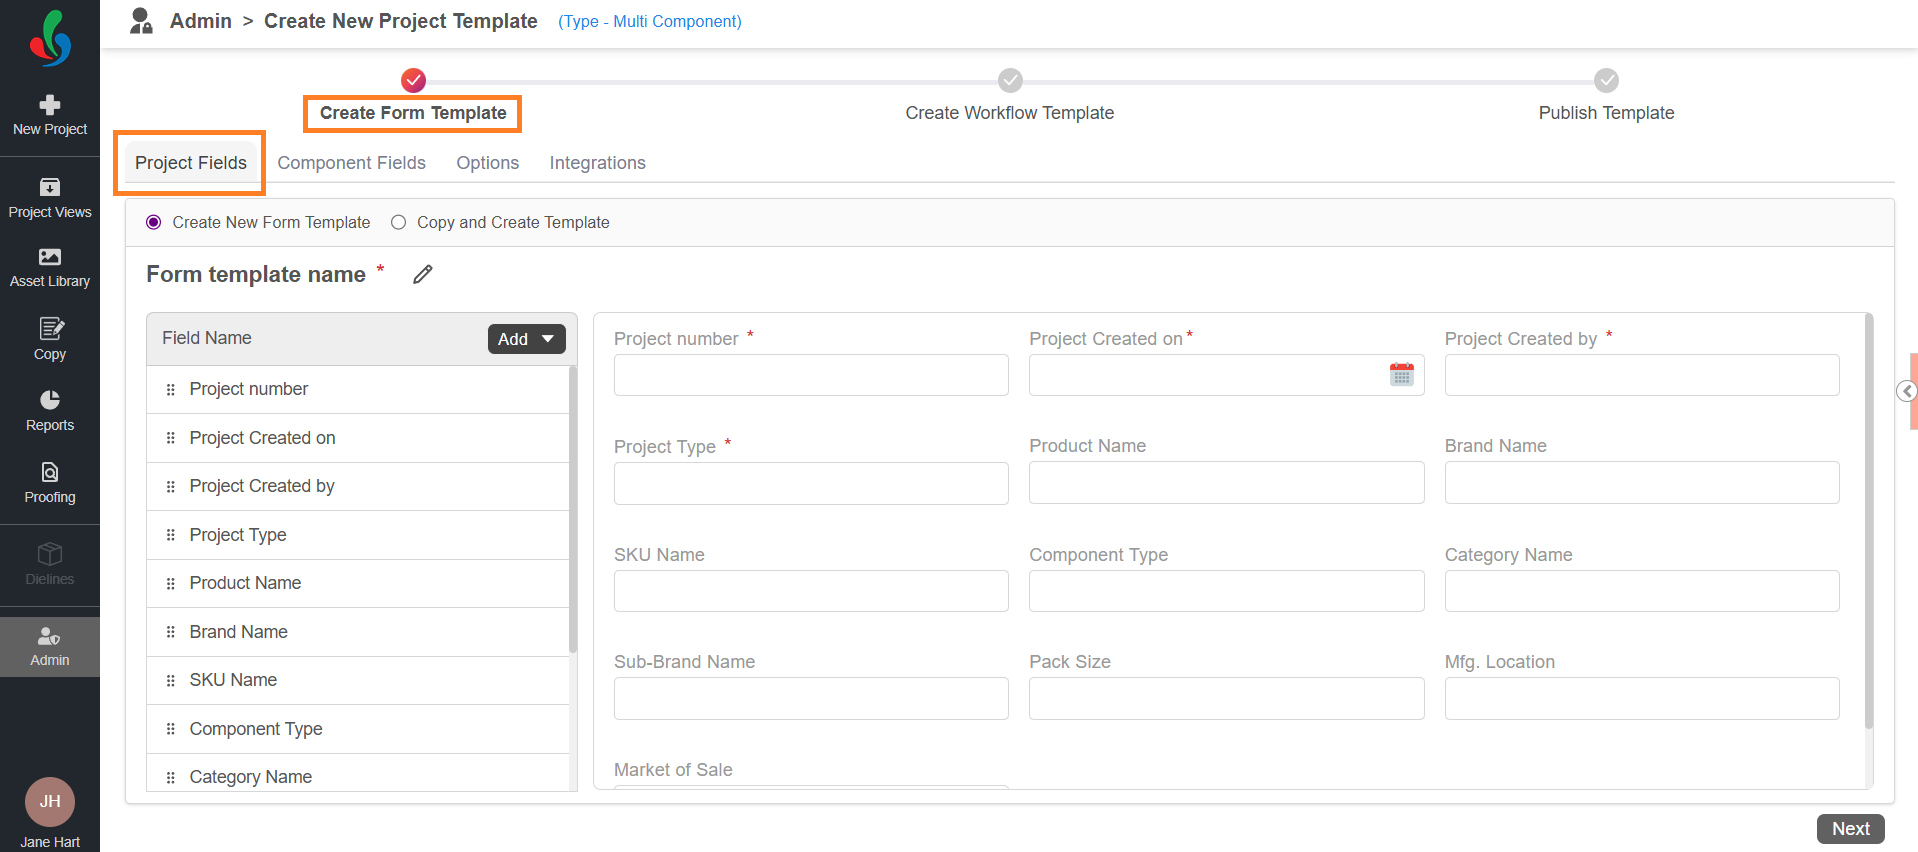
Step 2: Configure Your Form Template
- Customize the Fields
- Define the key information required for each project, such as project number, project name, brand, or category.
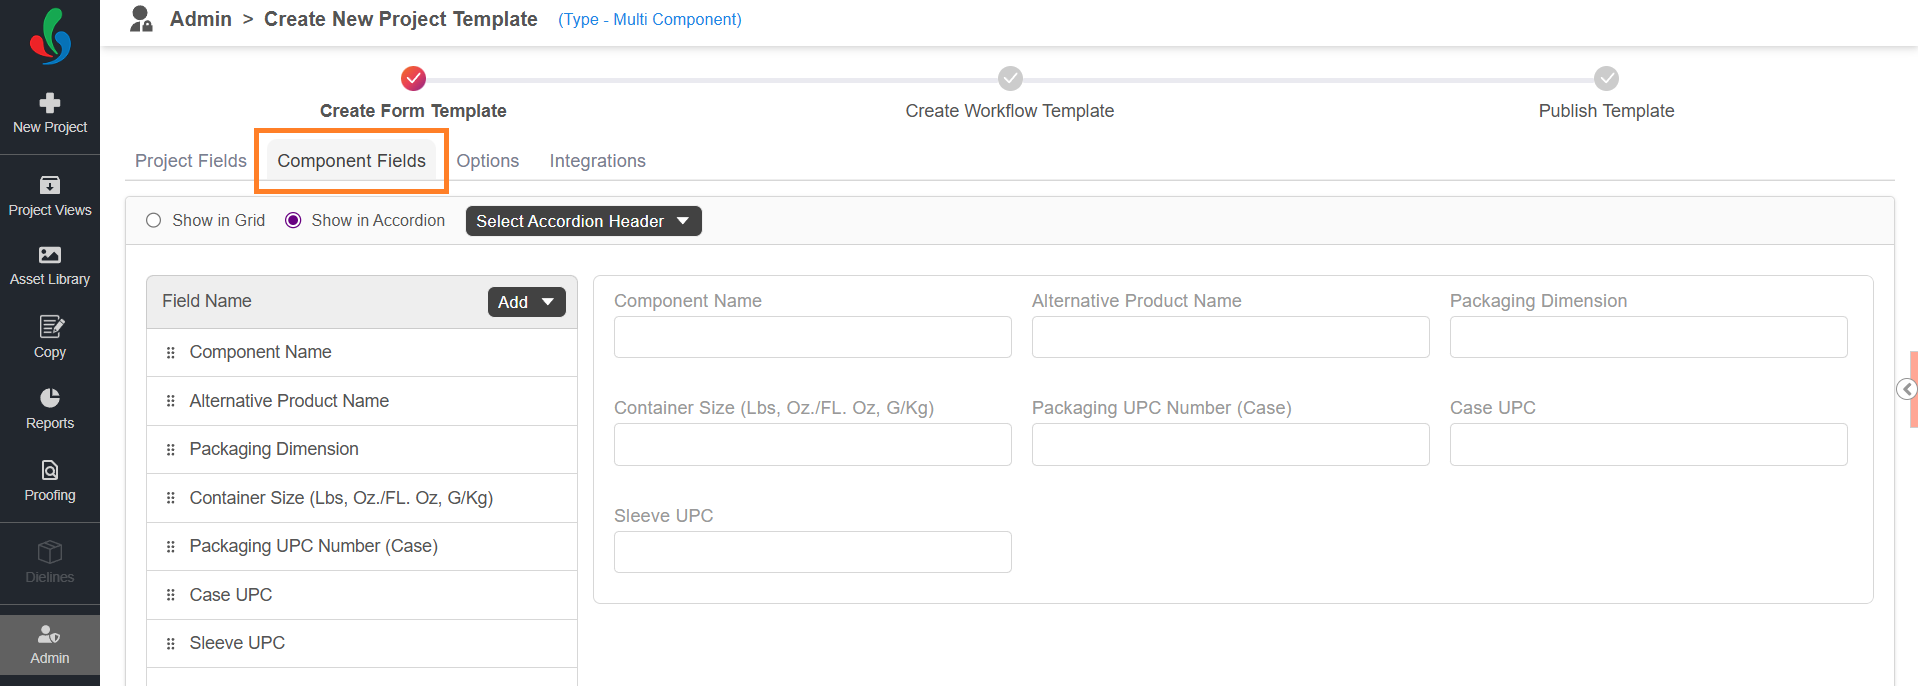
- Set Component Field Properties
- Define fields to capture details for individual components, such as box specifications, packaging dimensions, or other component-specific attributes.
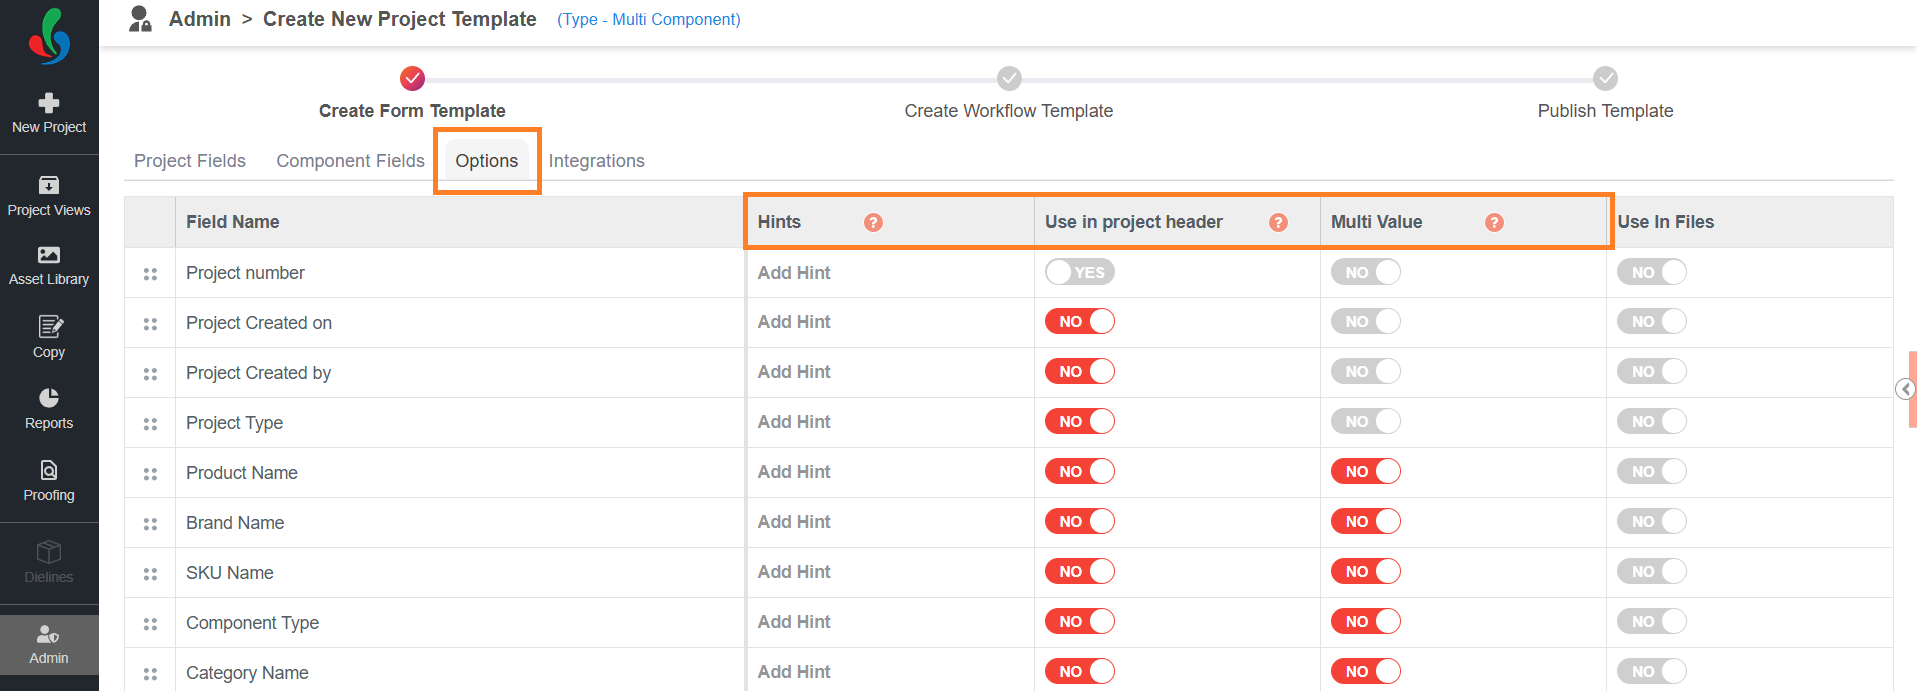
- Set Field Properties
- Use In Project Header: Allows you to make the field visible in the project header, ensuring that key details are easily accessible throughout the project creation process.
- Enable Multi-Value: Allow fields to accept multiple inputs, such as tags or reviewers.
- Add Helpful Hints
- Provide optional hints or tool tips to guide users and clarify field requirements.
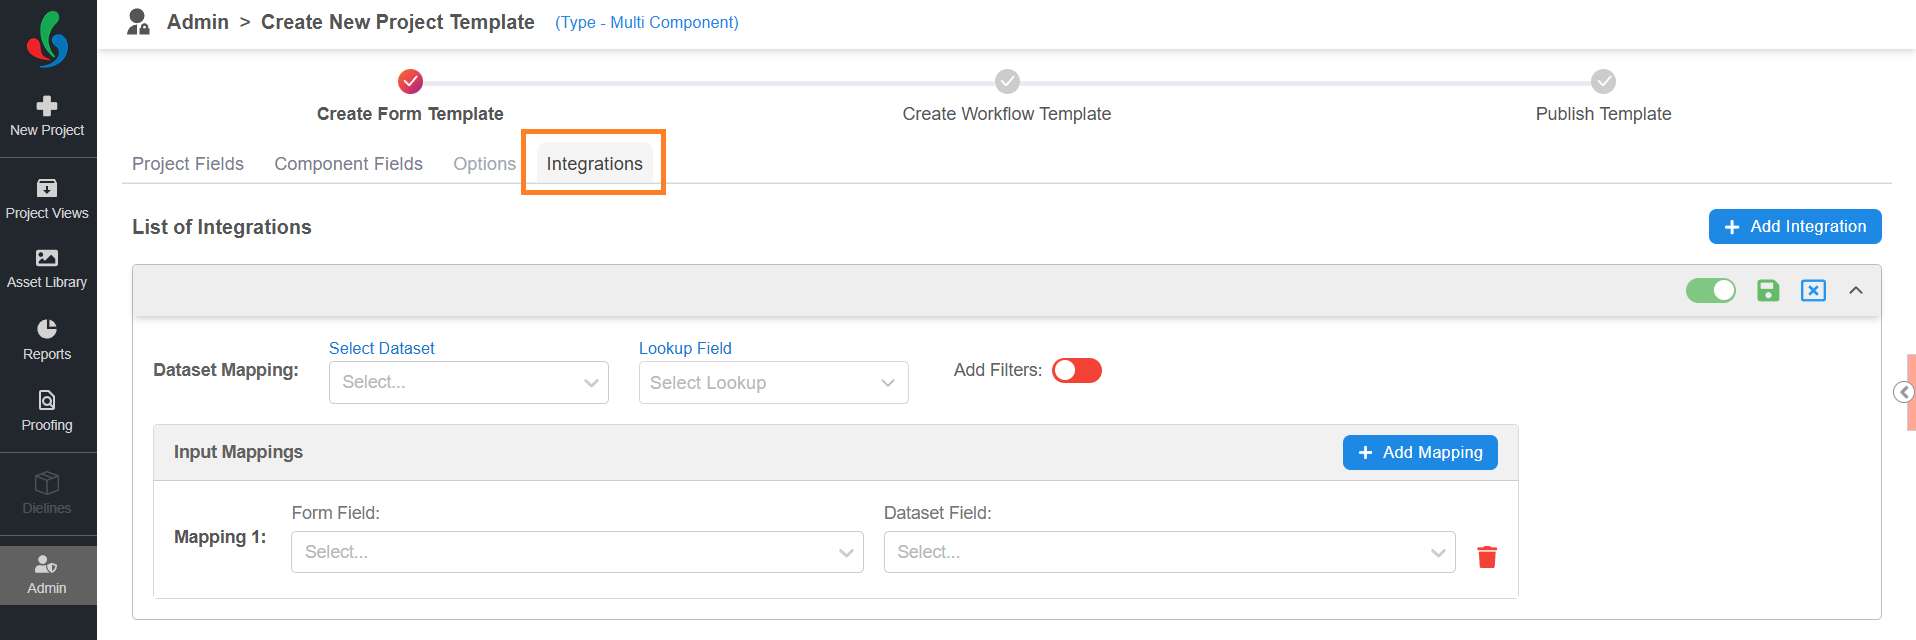
- Configure Integration
- Configure internal or SAP data with project templates to streamline data entry and maintain consistency across workflows.
Refer to Step 2: Create Form Template.
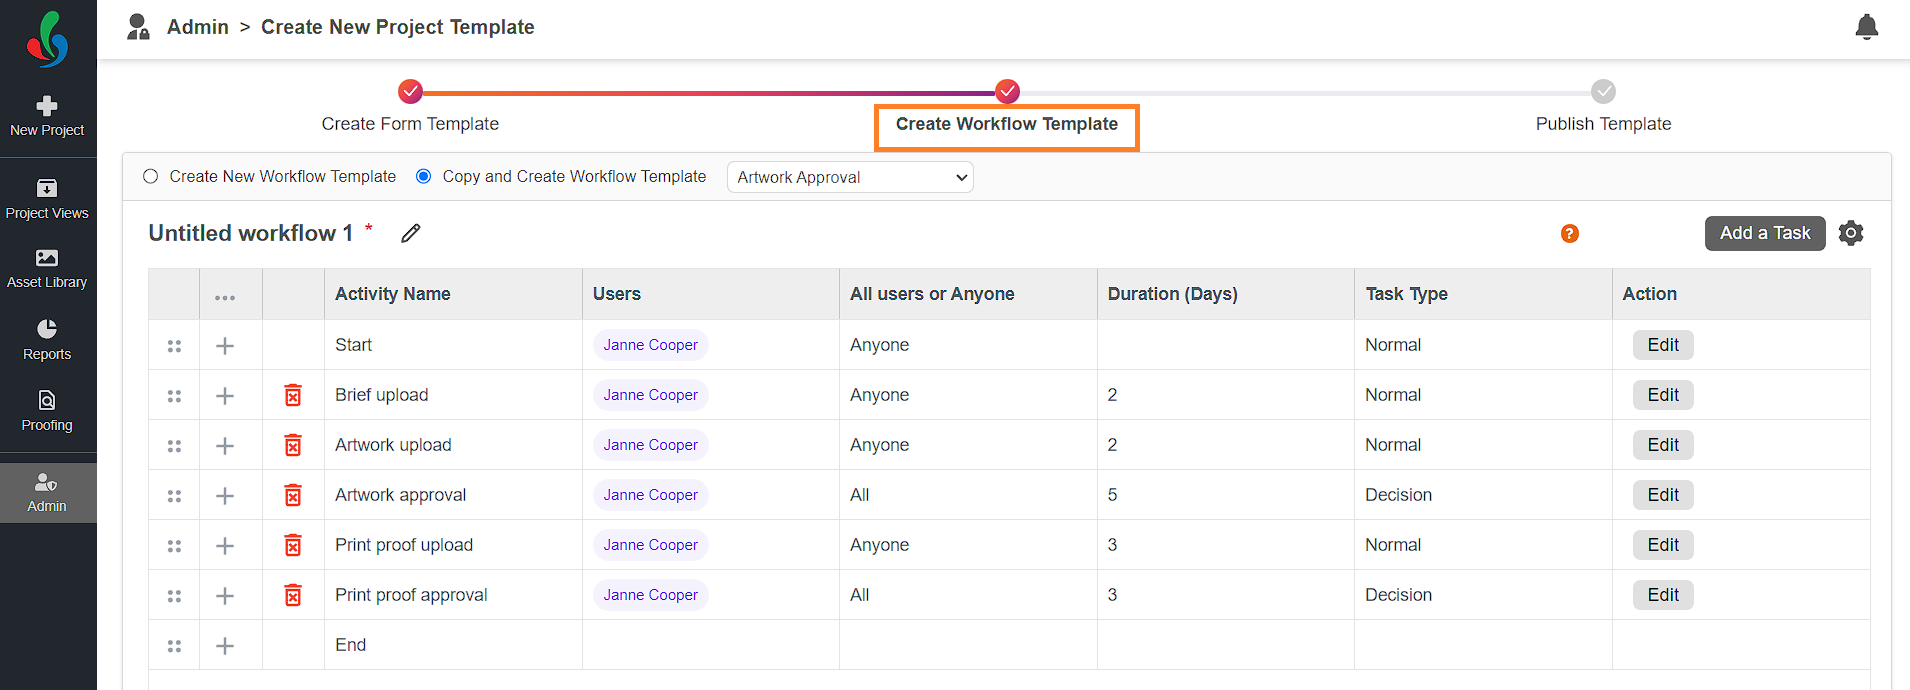
Step 3: Configure Workflow Template
- Define the Task
- Imagine your project as a process. Each stage represents a key step in the process, like Brief Upload, Artwork Review, or Print Proof Approval.
- Utilize Task Types
- Normal Tasks: Assign tasks for users to upload or submit their work for review.
- Decision Tasks: Assign tasks requiring approval or rejection for critical decision-making.
- Add a Fork: Assign parallel tasks that split into multiple simultaneous activities. Each parallel task can be a normal or decision task, allowing for efficient and concurrent progression, like the branches of a fork splitting from one point.
- Connect the Stages
- Use Start and End activities to mark the beginning and completion of your workflow.
- Link tasks logically, ensuring smooth progression through the stages.
Refer to Step 3: Create Workflow Template.
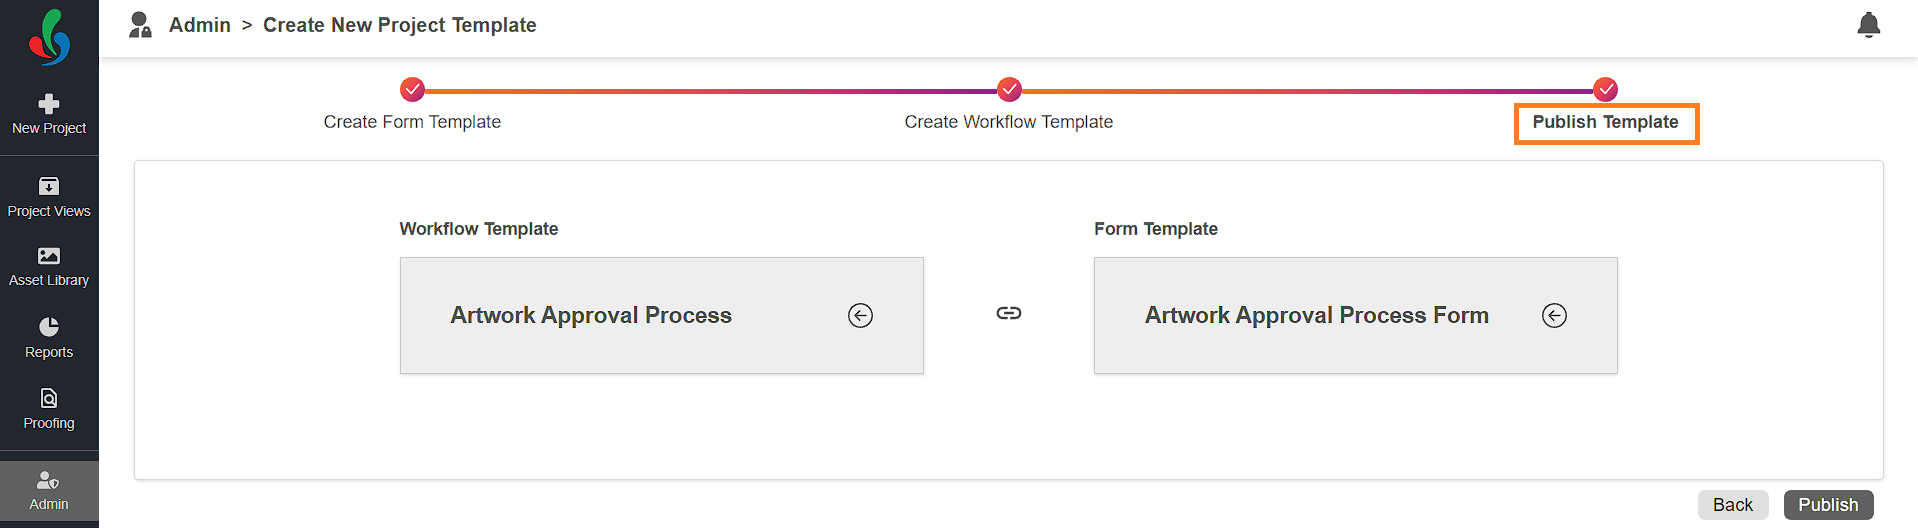
Step 4: Publish Your Template
- Review and Finalize:
- Once you've built and configured your workflow and form template, double-check everything before publishing.
Refer to Step 4: Publish Template.