Checklist Groups: Access, Create and Edit
 | Note: Checklist Groups is an enterprise feature available exclusively to users on the Enterprise plan. For more information on all ManageArtworks plans, click here. |
Checklist Groups allow you to create a collection of checklist items that can be linked to specific tasks. Only checklist groups (not individual items) can be directly linked with tasks.
How do I create a new checklist group?
01. Access Checklist Groups
- Sign in to your ManageArtworks account.
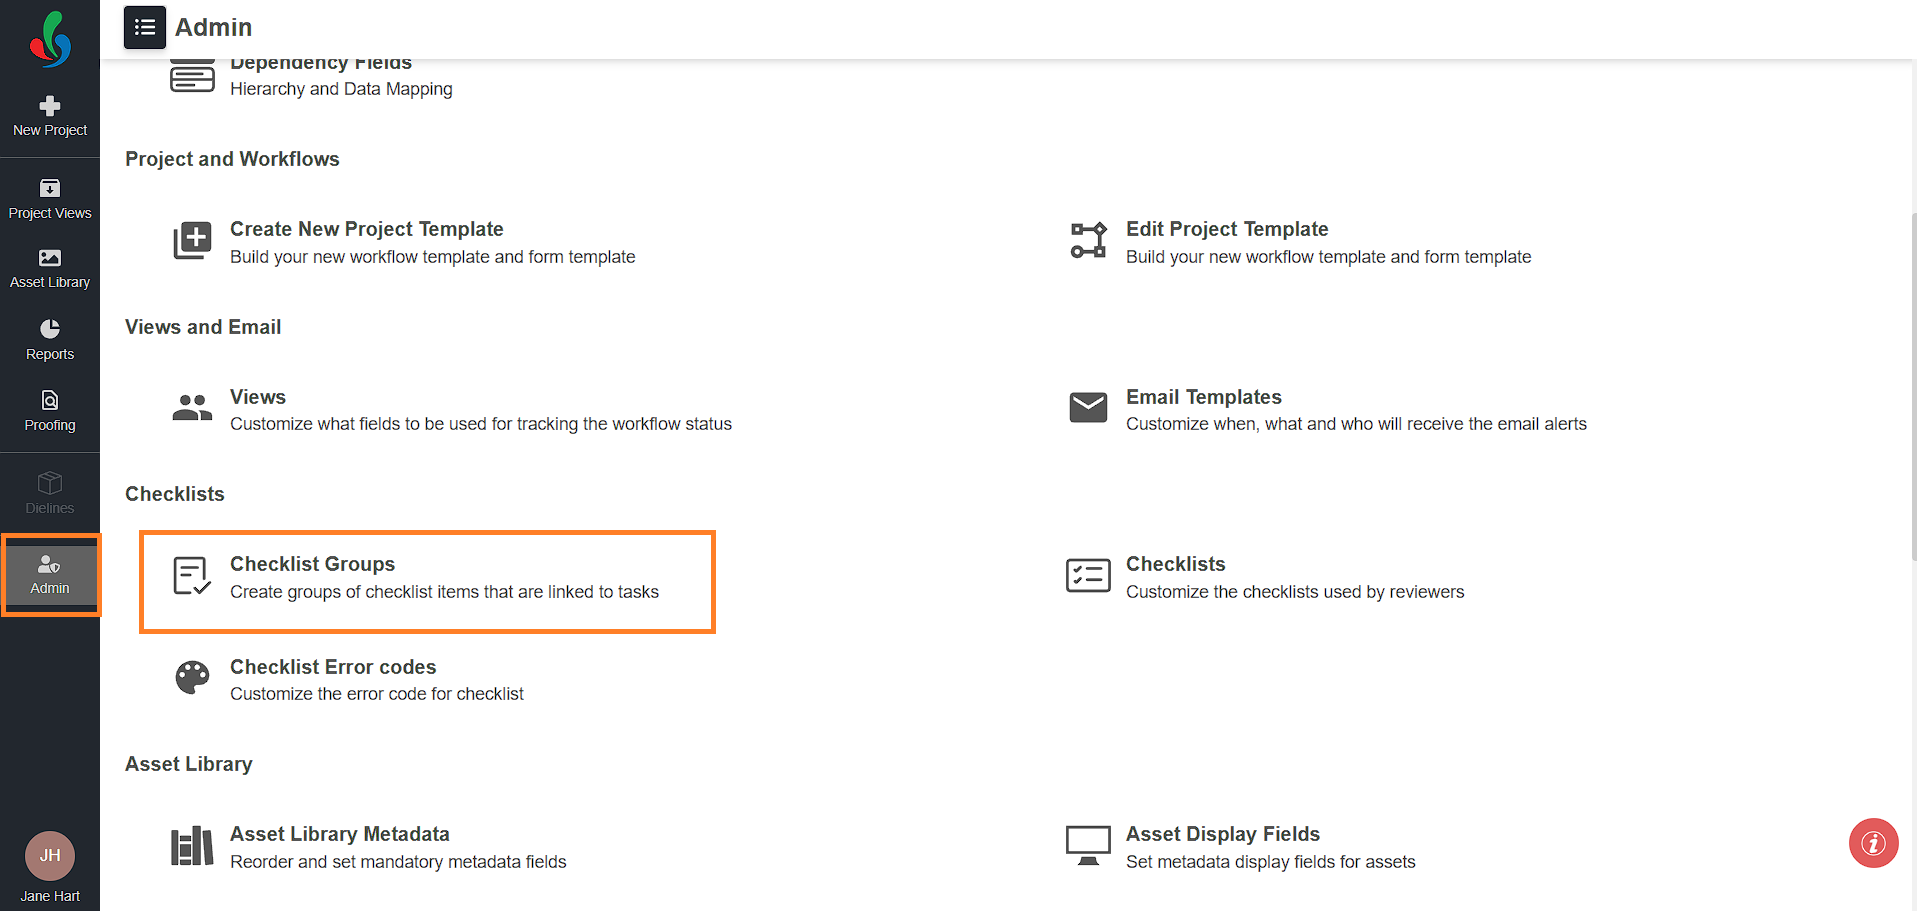
- Navigate to the Admin module.
- Select Checklist Groups.
02. Create a New Checklist Group
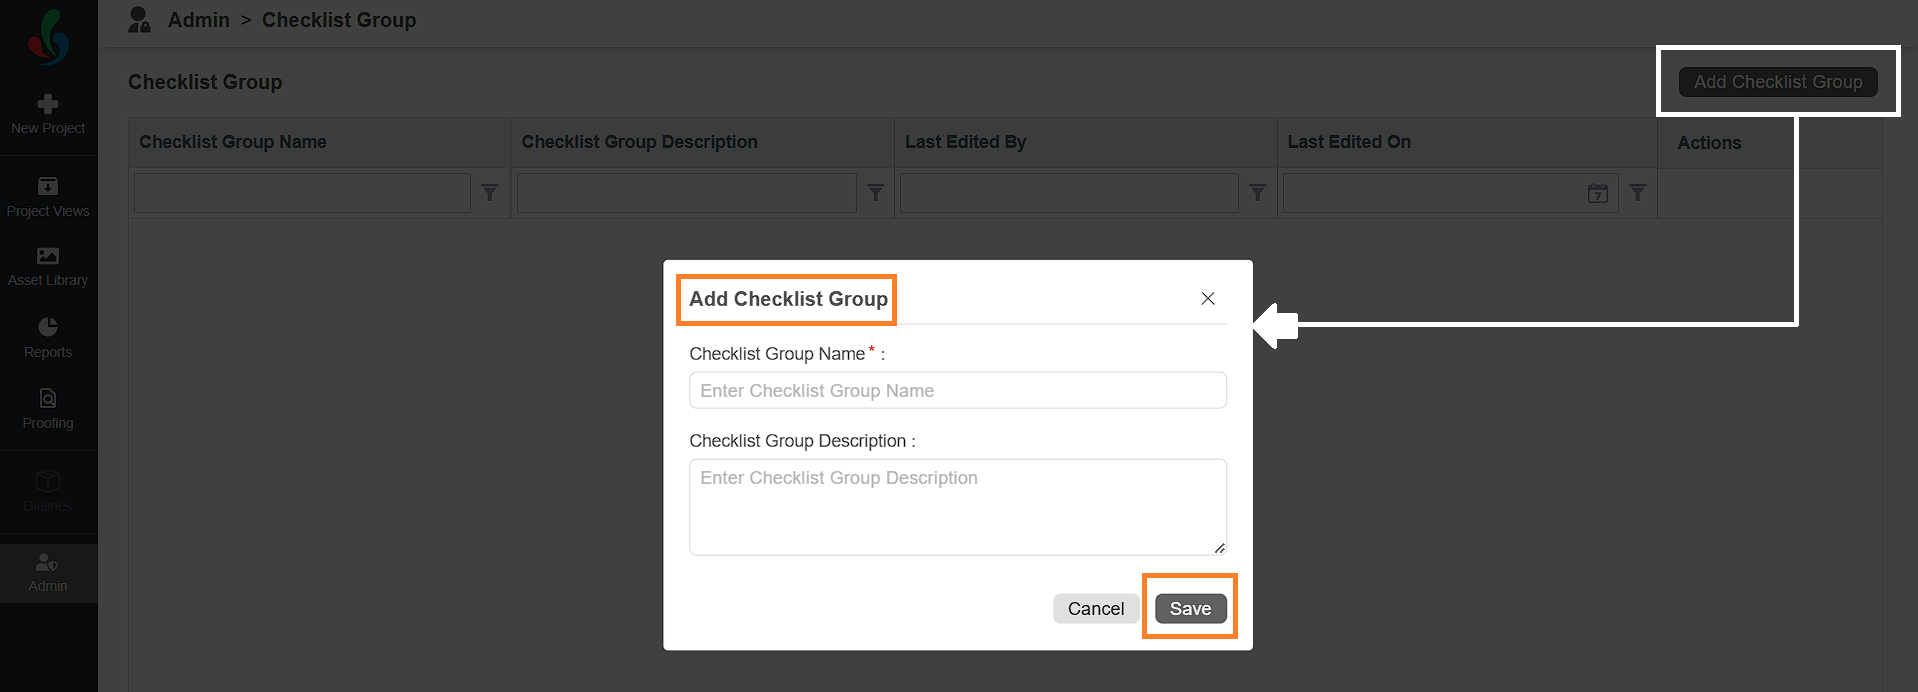
- Select the Add Checklist Group button located in the upper right corner.
- Fill in the following details:
- Checklist Group Name: Enter a clear, descriptive name.
- Checklist Group Description (Optional): Add a brief description to help users understand the purpose of the group.
- Select Save to create the checklist group.
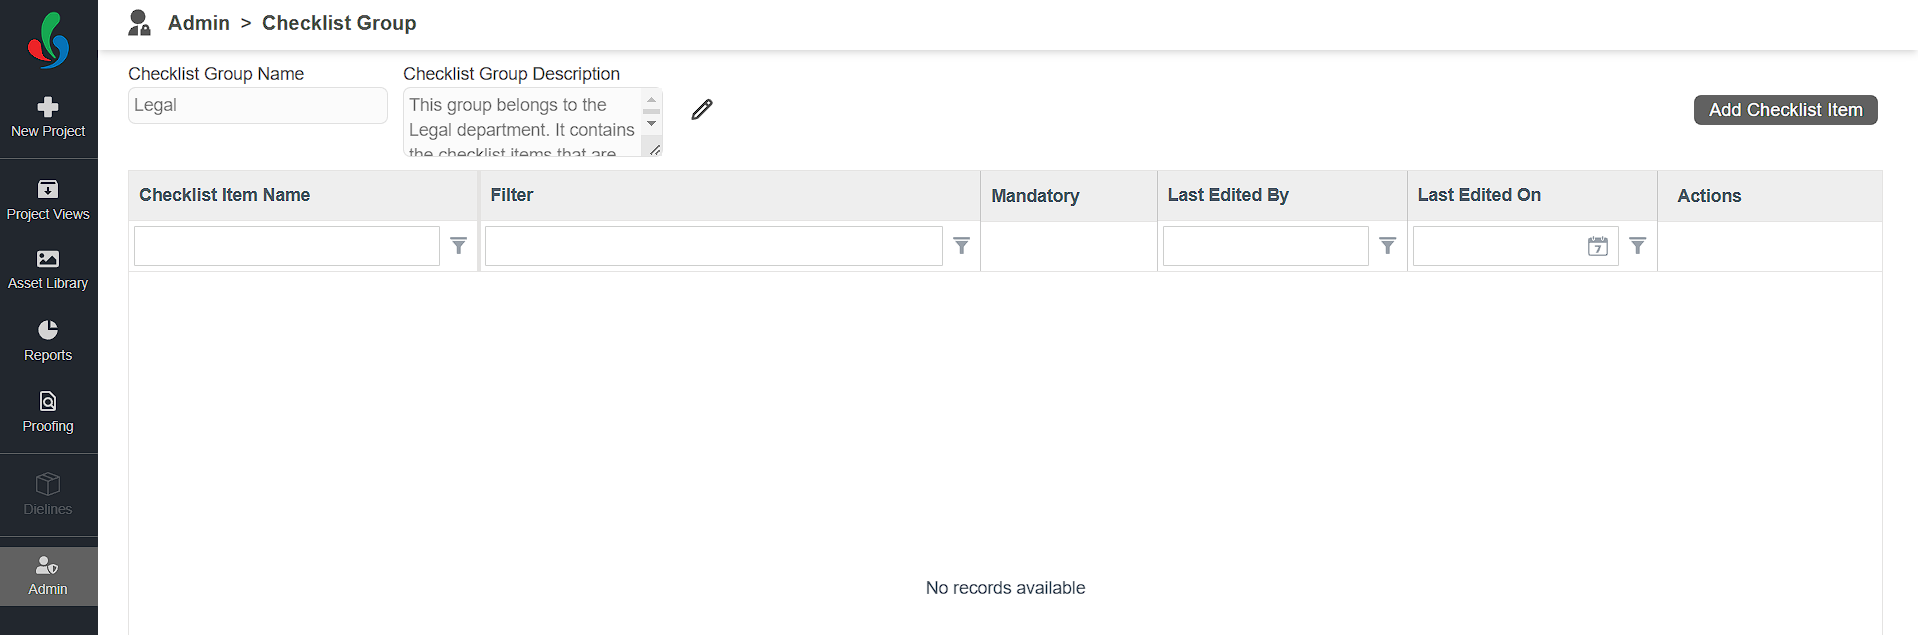
03. Configure the Checklist Group
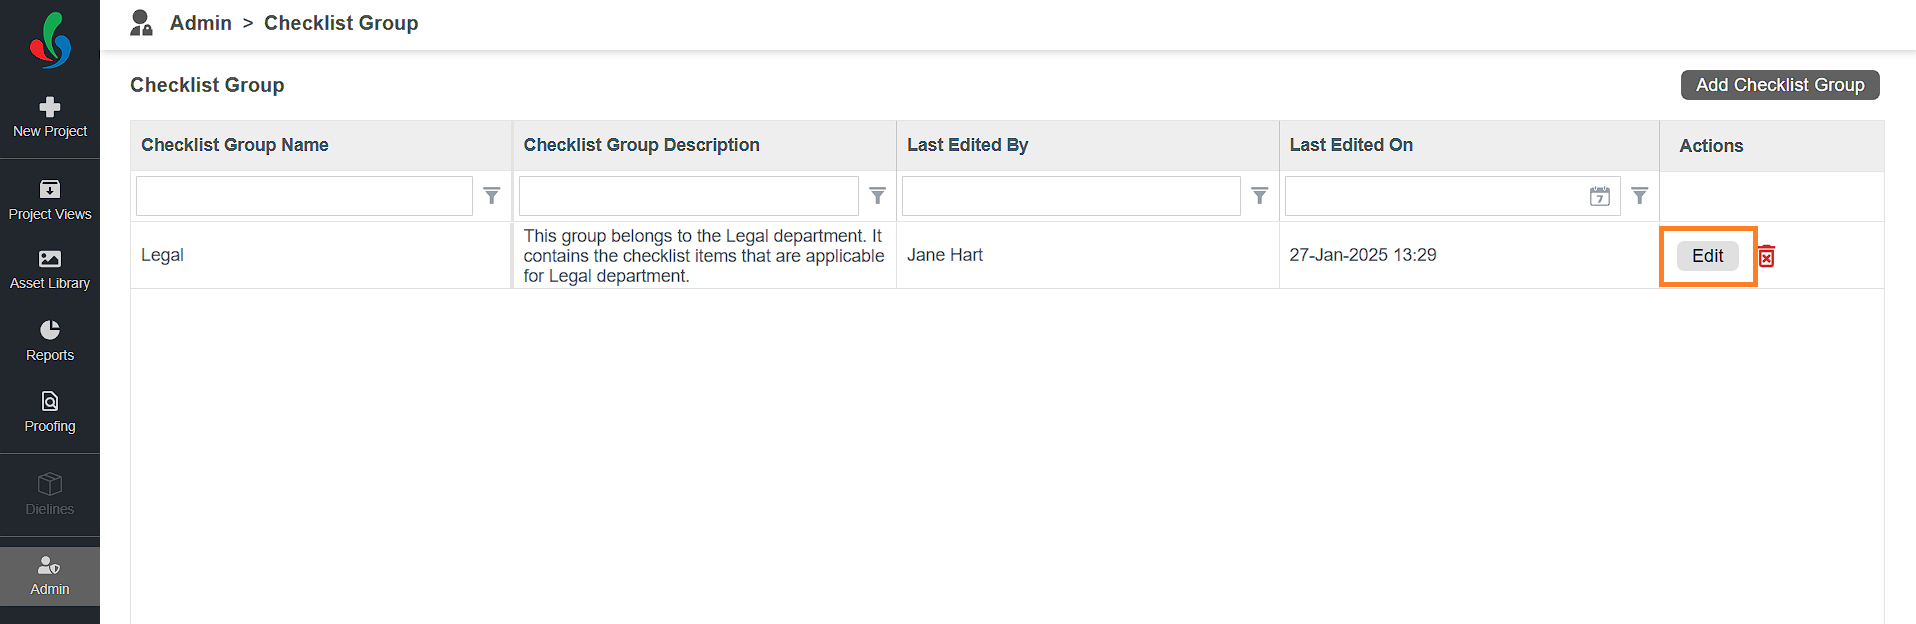
- Select the Edit button next to the checklist group.
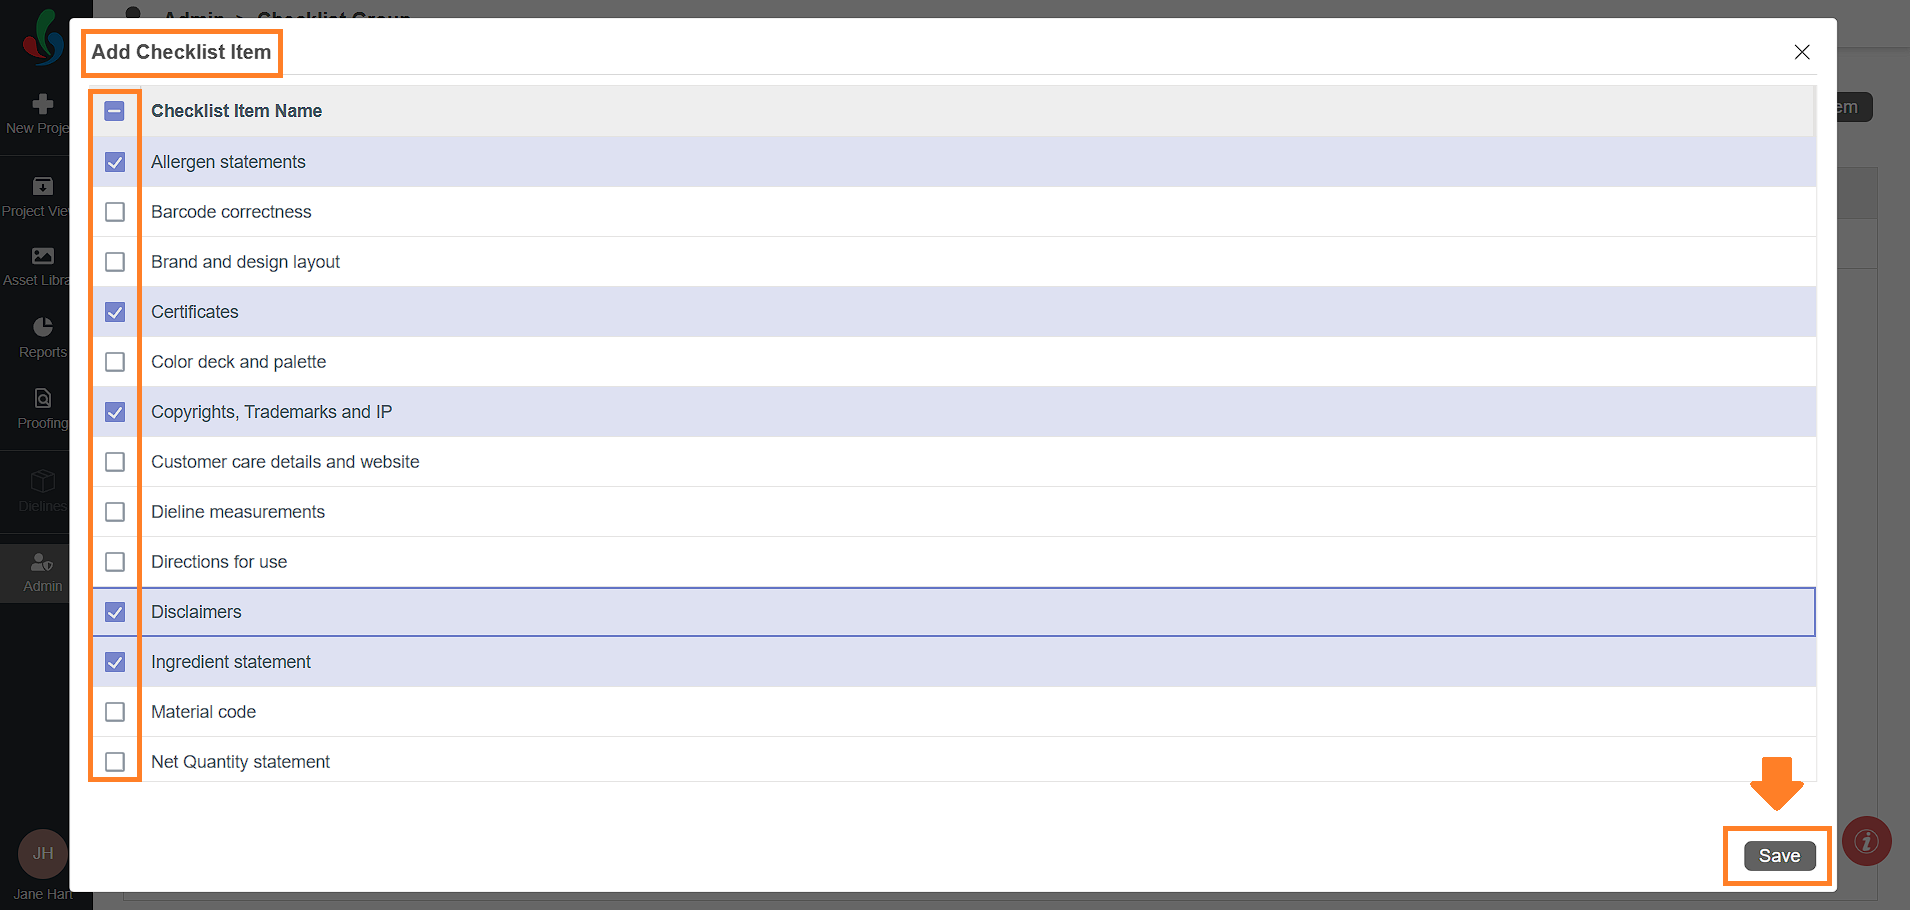
- Select the Add checklist Item button located in the upper right corner.
- Select the checklist items you want to include by checking the check boxes next to their names. To add new checklist item, refer to Create New Checklist Item.
- Select Save to add the selected checklist items to the group.
Additional Configurations for Checklist Items
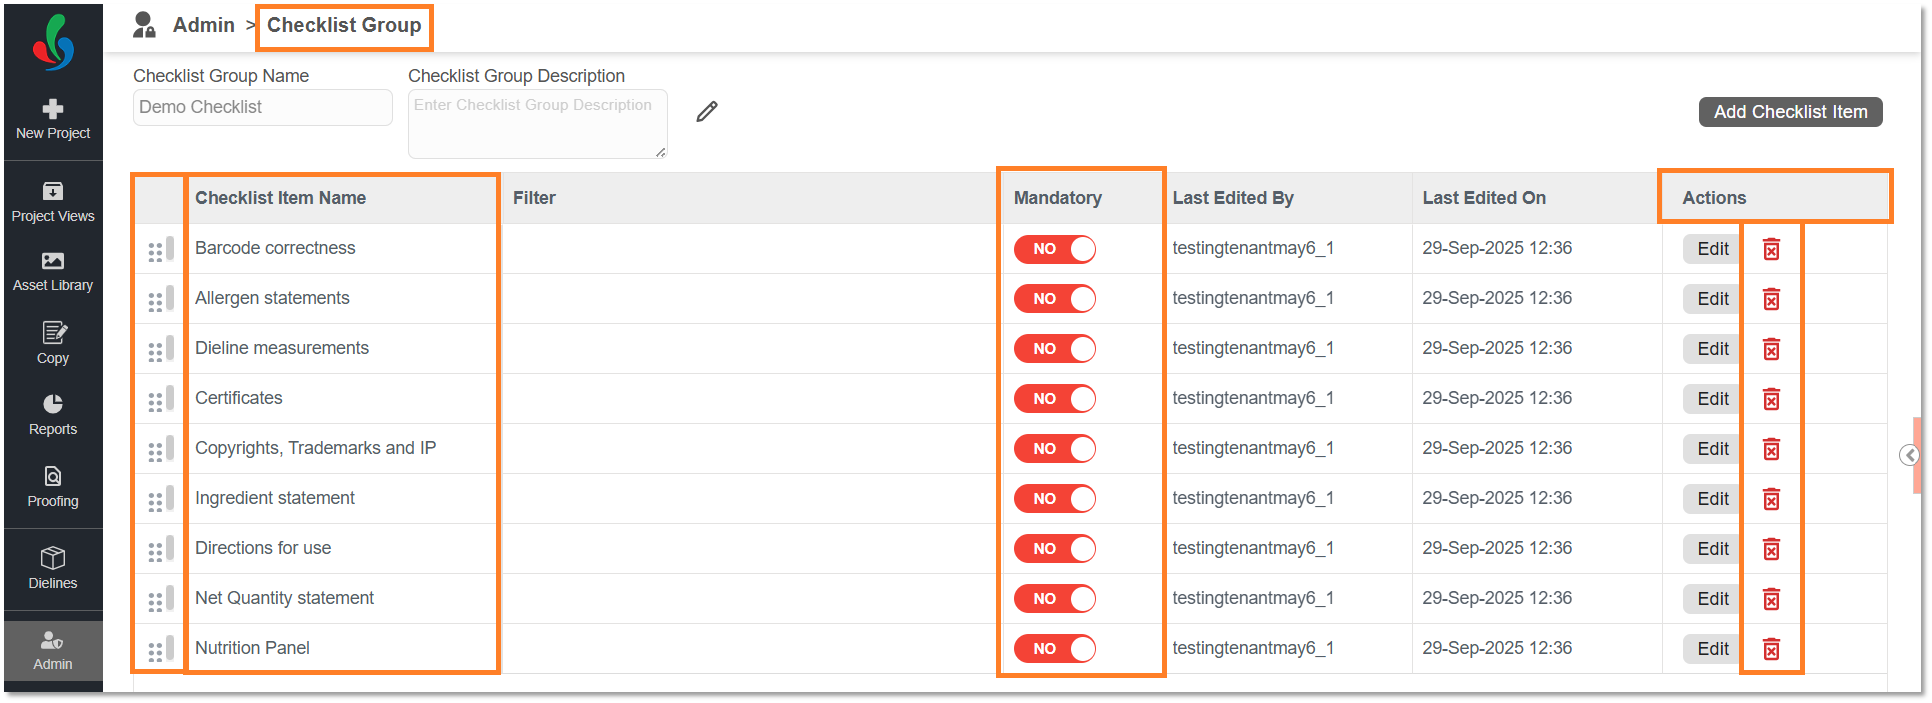
Make Checklist Items Mandatory
- Toggle the Mandatory button to Yes for the checklist items you want to enforce.
Delete Checklist Items
- To remove the checklist item from the group, click the Delete icon in the action column next to the checklist item.
Reorder Checklist Items
- Hover over the drag-and-drop icon.
- Click and drag the checklist item to the desired position within the group.
- Release the mouse to drop the item in place.
- The system will automatically save the new order.
- The updated sequence will also be reflected whenever the checklist group is displayed in workflows or related modules.
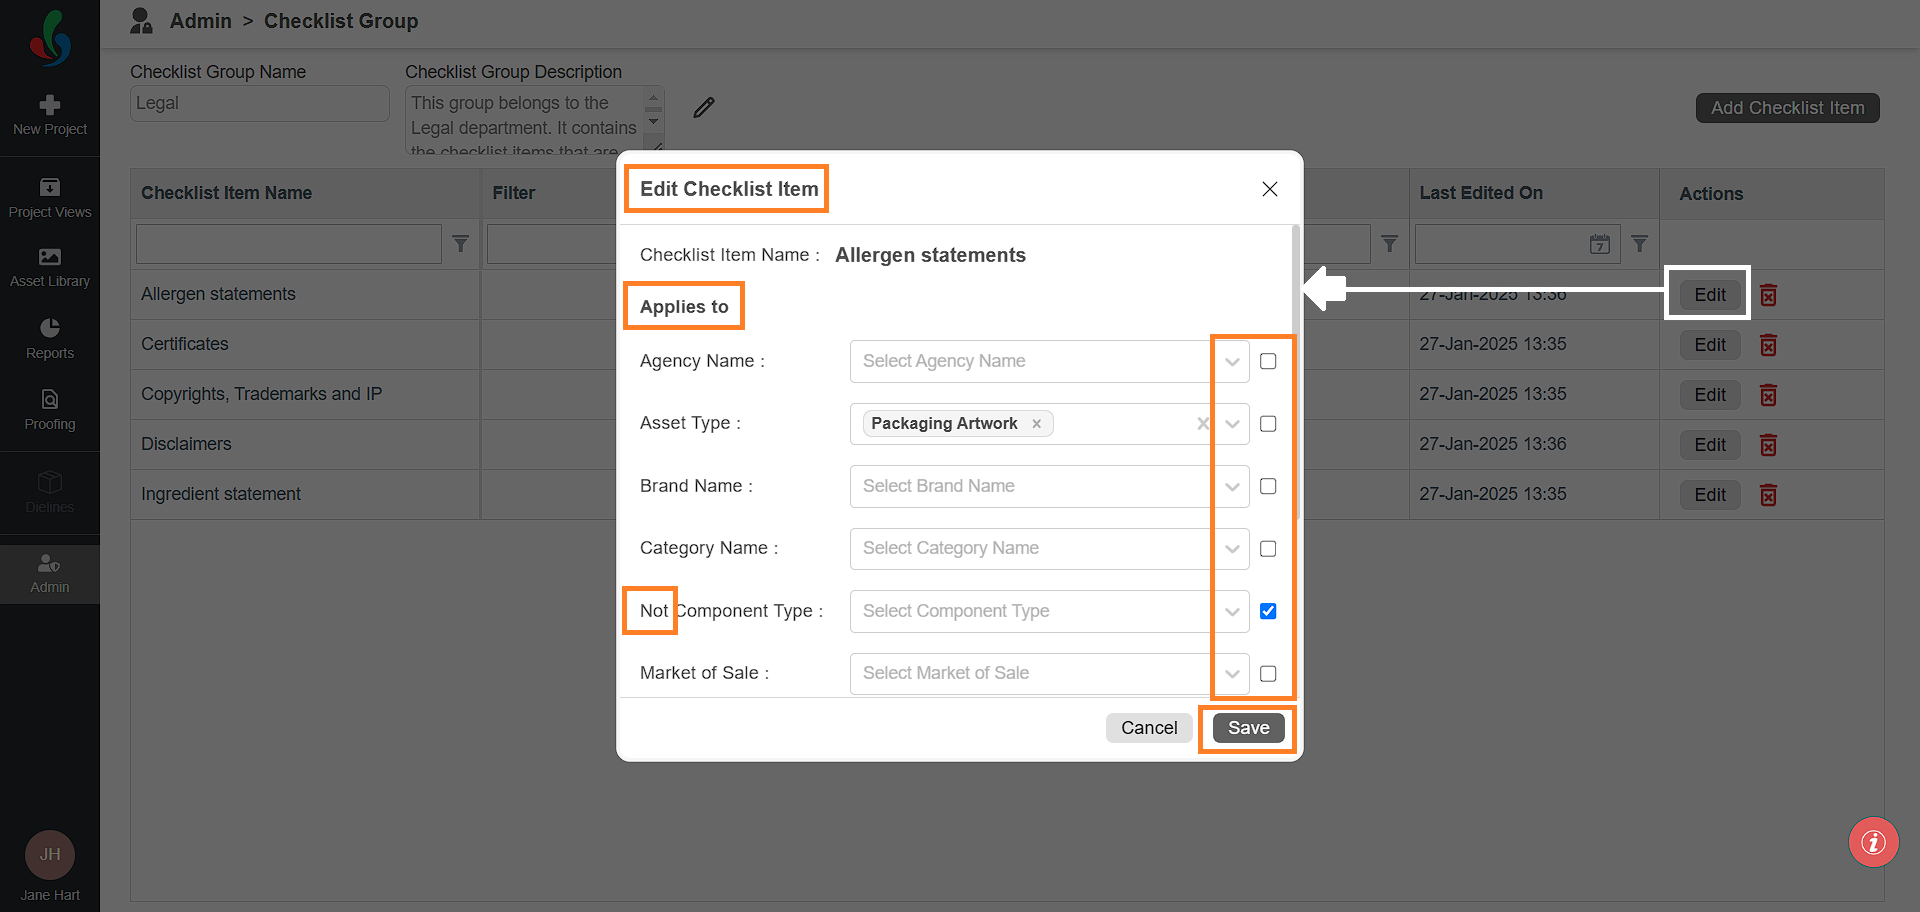
Make Checklist Items Specific to Form Fields
- Click the Edit button next to the desired checklist item.
- A list of applicable form fields will appear, allowing you to configure the checklist item based on specific form fields.
Note: Only form fields configured for the collection will be displayed. - Click the desired form field drop-down menu and select the appropriate values.
Example:
If you select the Asset Type drop-down menu, it will display all available asset types in the system. For instance, if you choose "Packaging Artwork," this checklist item will only appear when a user interacts with the "Packaging Artwork" asset type. Even if the checklist group is configured for a task, the checklist item will only be visible if it matches the asset type the user is working on. If the asset type does not match the checklist item configuration, no checklist items will be displayed, even if the checklist group is associated with the task. - To exclude a form field's applicability for a checklist item, select the checkbox next to the checklist item. Once selected, the word "Not" will be added before the form field name, indicating exclusion.
- After configuring the form fields for the checklist item, click Save to save your configuration.
04. Repeat and Scale
- You can create and configure any number of checklist groups and their items based on your project requirements. Use this feature to ensure tasks are supported by the relevant checklist items for streamlined workflows.
How do I delete a checklist group?
Delete Checklist Group
- Log in to your ManageArtworks account.
- Select the Admin module.
- Click the Checklist Groups tab.
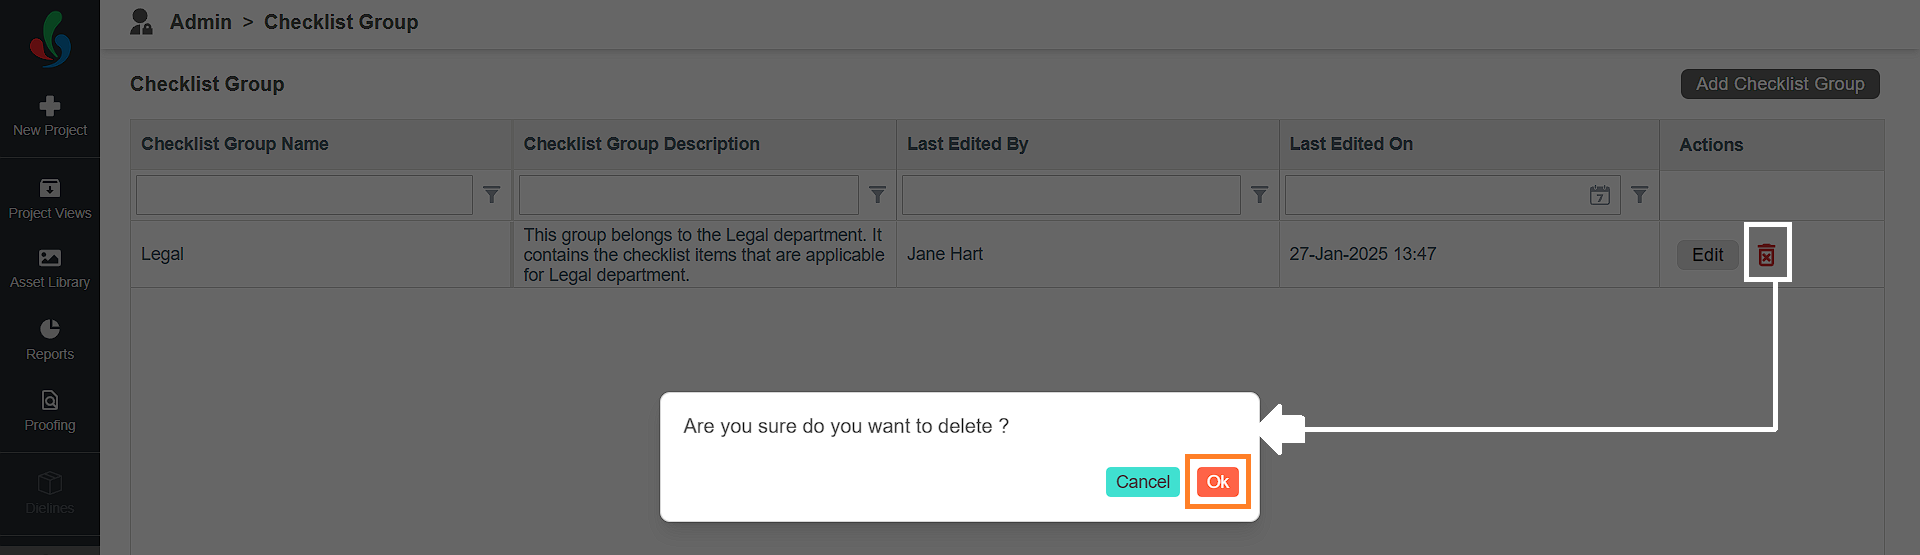
- Click the delete icon associated with the checklist group and confirm.