Checklist in Web Viewer
Checklist Activation
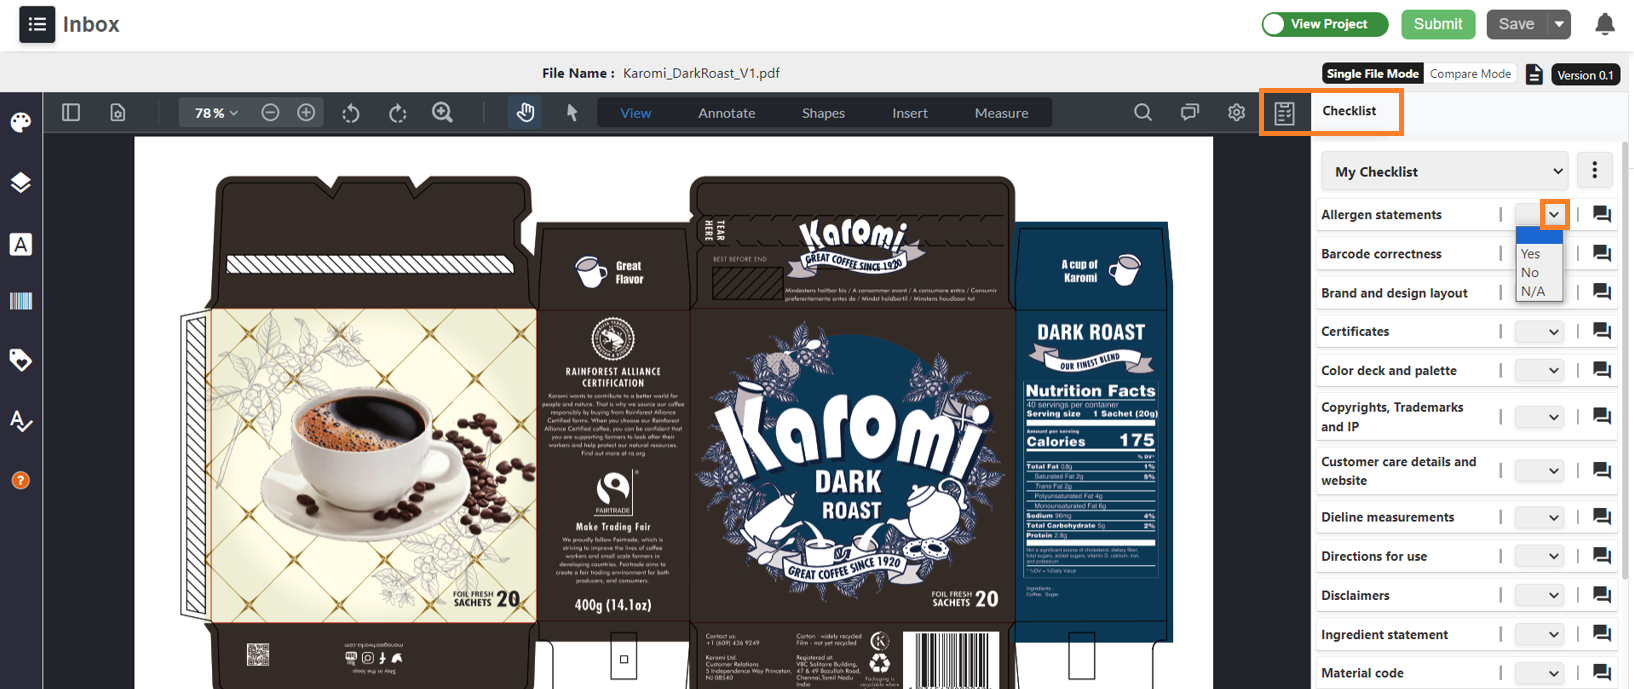
- When you open an artwork from the workflow assigned with a corresponding checklist, the Web Viewer automatically displays the checklist items for verification.
- Think of the checklist as a comprehensive roadmap, ensuring all vital details within the artwork are present and accurate.
Customizing Checklists
- For specific needs, you can customize the checklist attached to the artwork. Refer to the "Checklists: Access, Create and Edit" for instructions on configuring checklist items tailored to your individual requirements.
Managing Checklist Items
- Each checklist item displays a dropdown menu alongside.
- Select "Yes" to confirm the information in the artwork meets the checklist requirement.
- Choose "No" if the information is missing or incorrect.
- Utilize "N/A" (not applicable) if the checklist item doesn't pertain to the current artwork.
Adding Comments
- For detailed feedback or justification regarding specific checklist items, click the comment icon next to the item.
- This opens a comment box where you can provide informative notes.
- Remember, comments have a 1000-character limit.
- Click "Save" to retain your comment within the checklist.


