Dieline and 3D Simulation
 | Note: The Dieline module is an Enterprise Plan feature but can be added as an add-on for Growth Plan users. For more information on all ManageArtworks plans, click here. |
How do I create a dieline and simulate it in 3D?
The Dieline module in ManageArtworks allows users to create or edit Key Line Drawings (KLD) or dielines using a comprehensive library of pre-defined templates. Users can customize dimensions—such as width, length, and height—or adjust the appearance of the selected dieline to generate a realistic preview. Once finalized, the dieline can be exported as a PDF for further design work in external applications like Adobe Illustrator or InDesign.
 | Note on TerminologyThe terms Key Line Drawing (KLD), Dieline, Diecut, and Structural Design all refer to the same concept. For consistency, we will use the term Dieline throughout this guide. |
01. Access the Dieline Module
- Sign in to your ManageArtworks account.
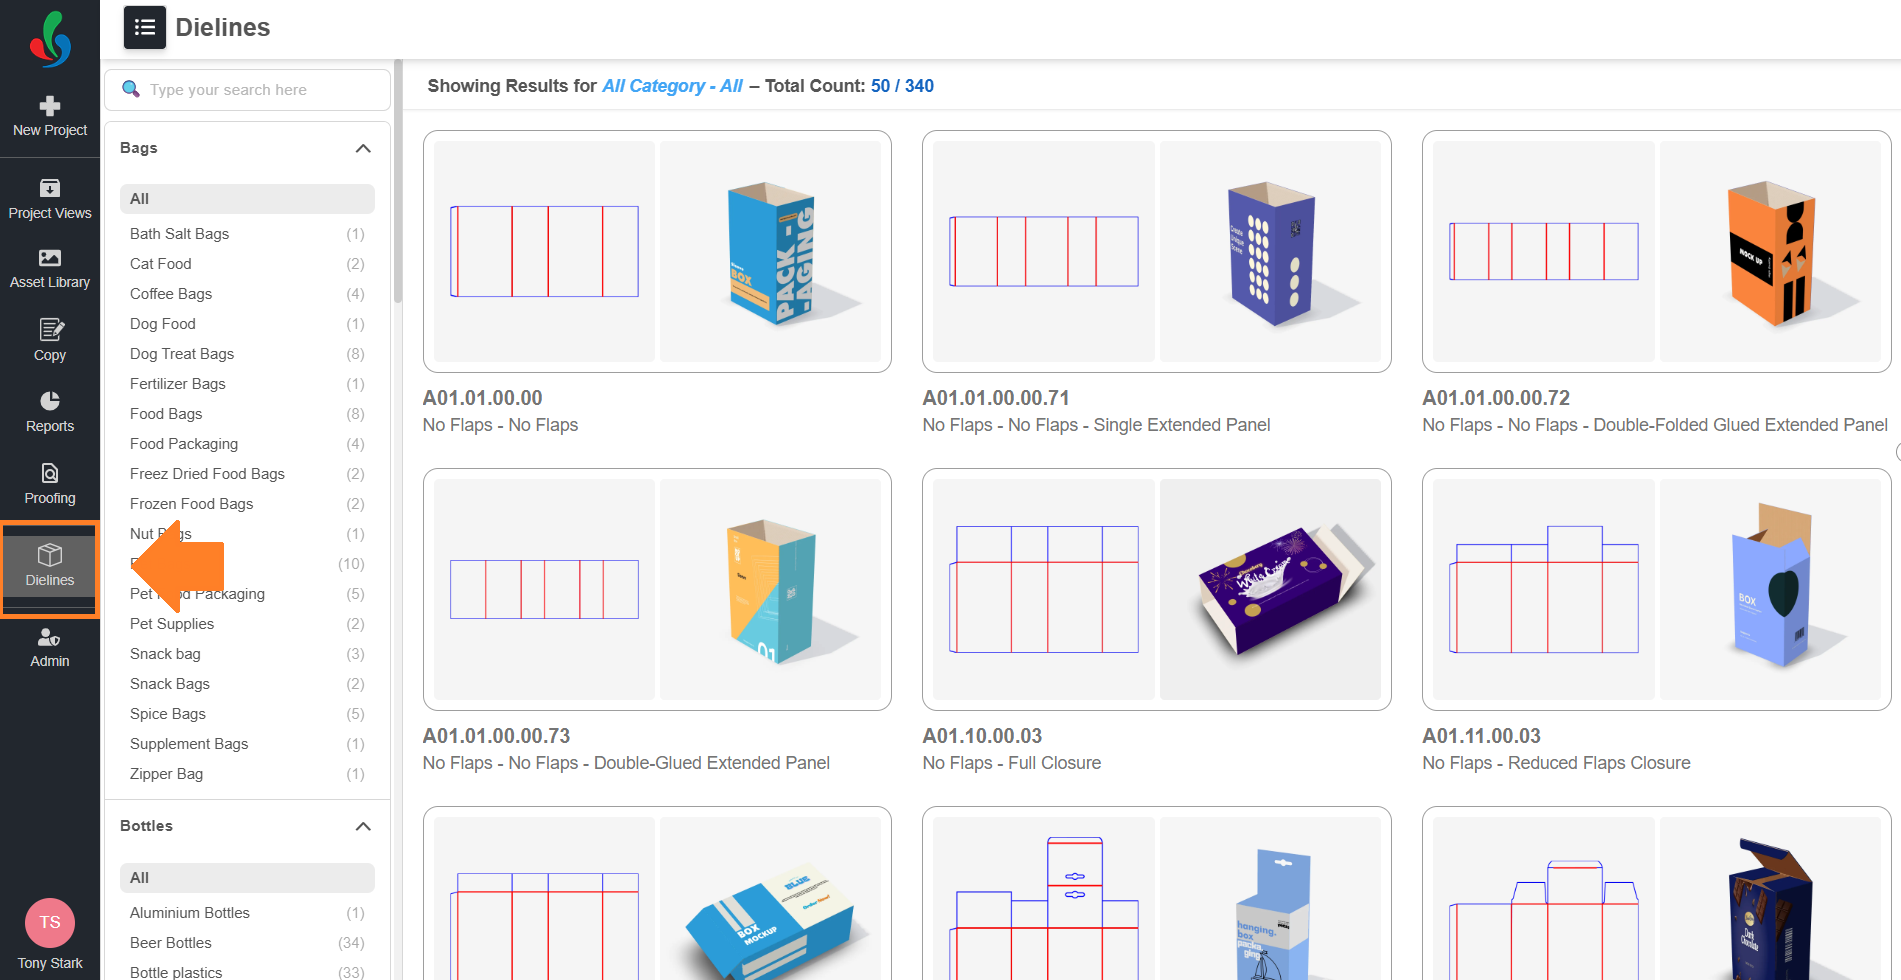
- From the left main menu, select the Dieline module.
02. Choose a Dieline Template
- On selecting the Dieline module, a comprehensive list of predefined dielines will be displayed.
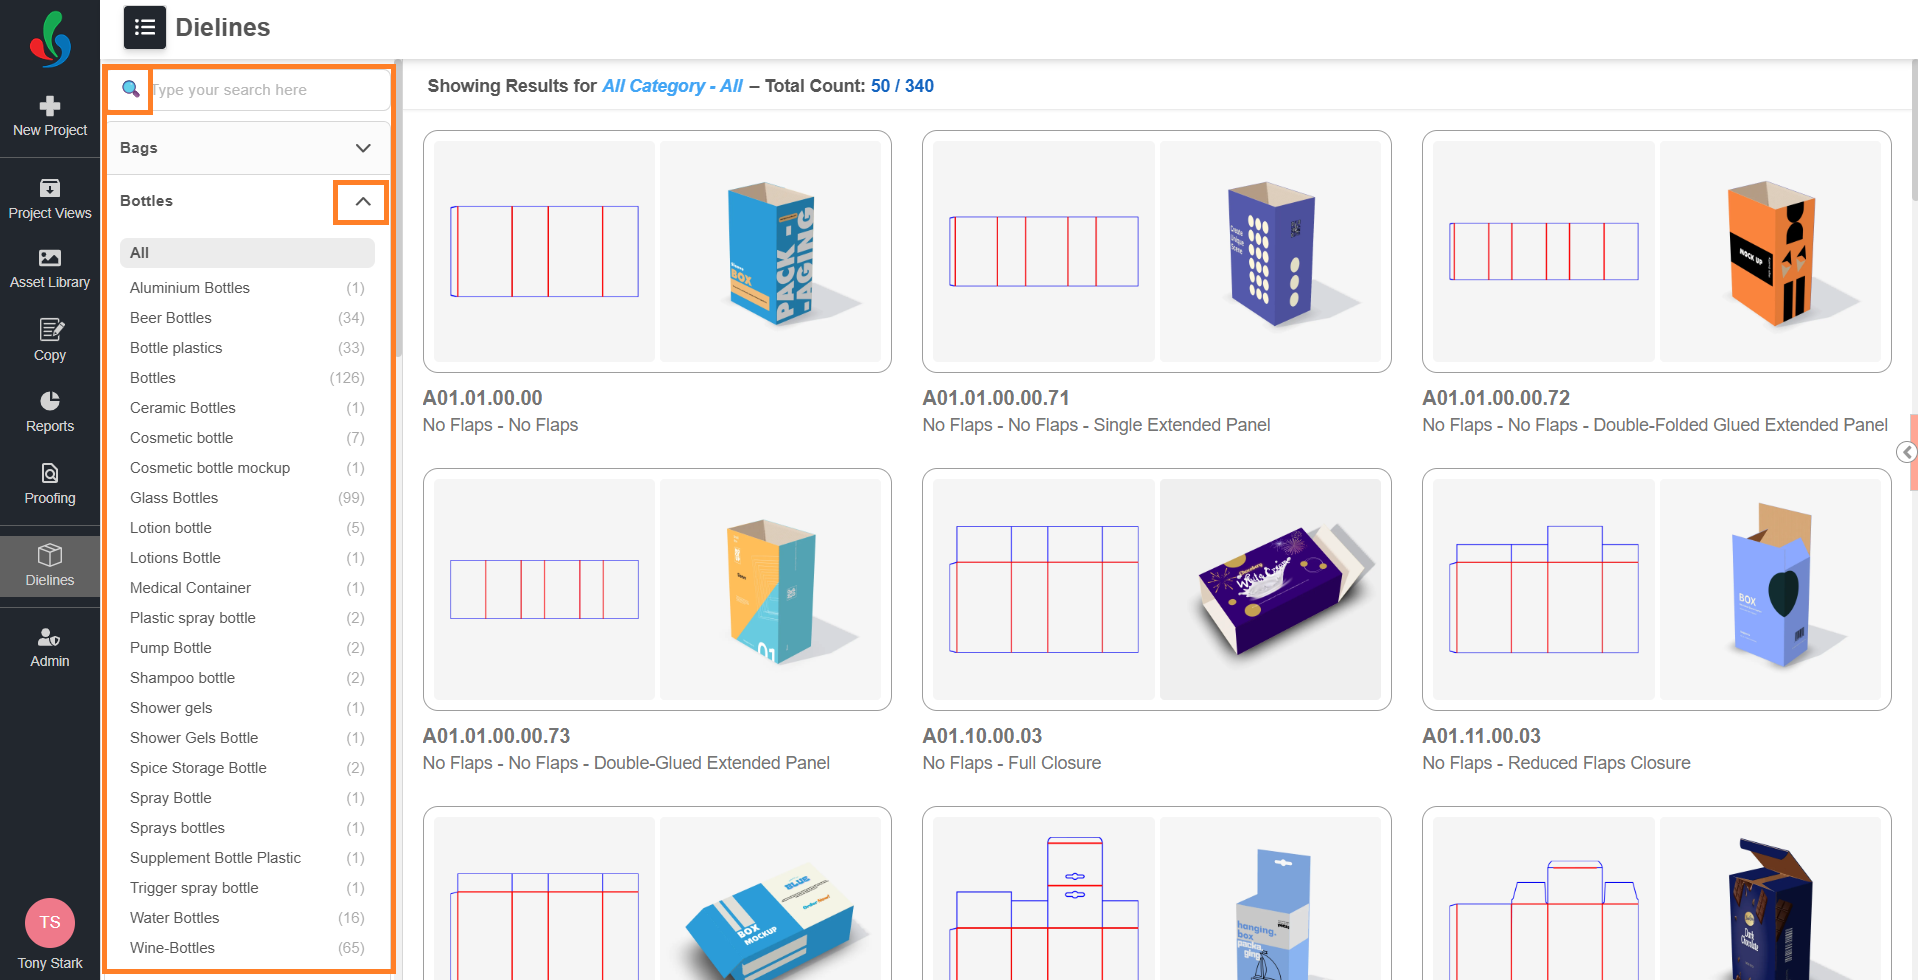
- You can browse and select the desired dieline template using any of the following methods:
- Browse by Category
- In the left filter panel, select a parent category (for example, Bottles) to view it's subcategories like:
- All
- Ceramic Bottles
- Wine Bottles
- Water Bottles
- Glass Bottles
- Bottle Plastics
- Select a subcategory to display matching dieline templates.
- From the results, select the template you want to use.
- In the left filter panel, select a parent category (for example, Bottles) to view it's subcategories like:
- Free Text Search:
- In the search box, type a template name or keyword.
- Press Enter or select the search icon to filter results.
- From the results, select the template you want to use.
- Browse by Category
03. Customize and Preview
Upon selecting a dieline template from the library, you will be redirected to the Customization Interface. The available options vary depending on the type of dieline selected.
| Note:
|
1. Customization Interface
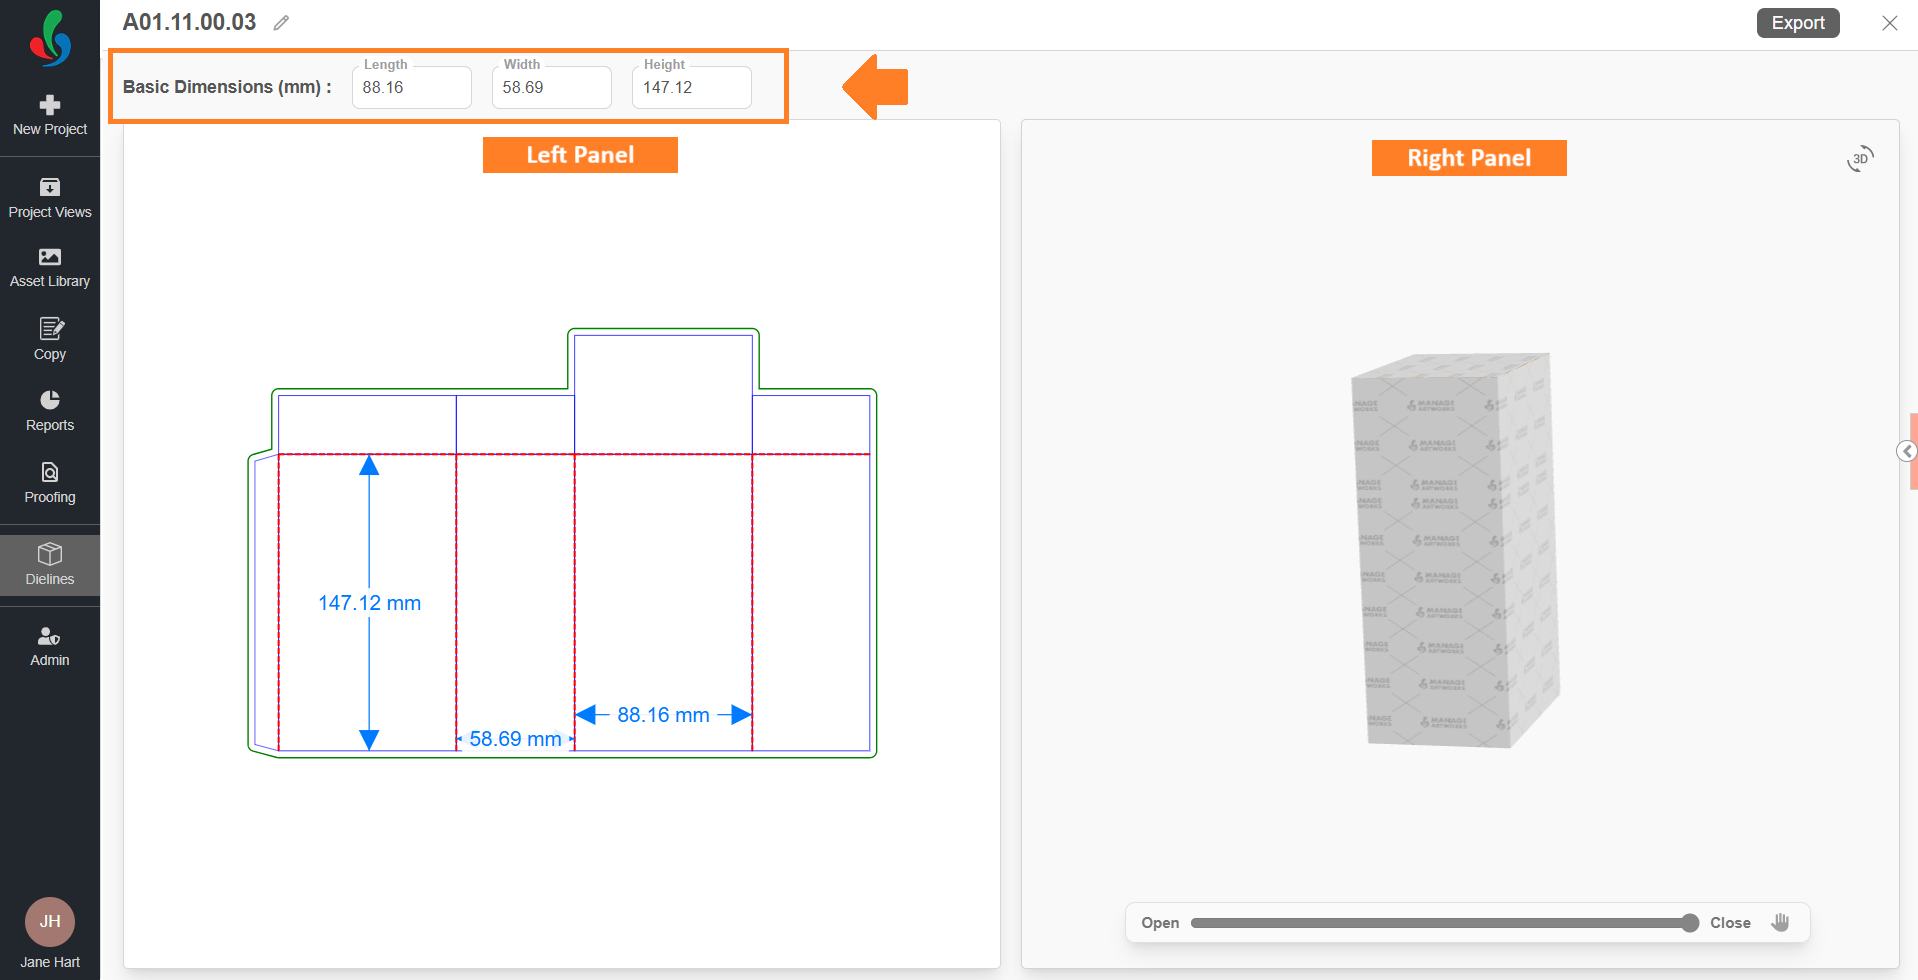
For Folding Cartons
Panel | Functionality |
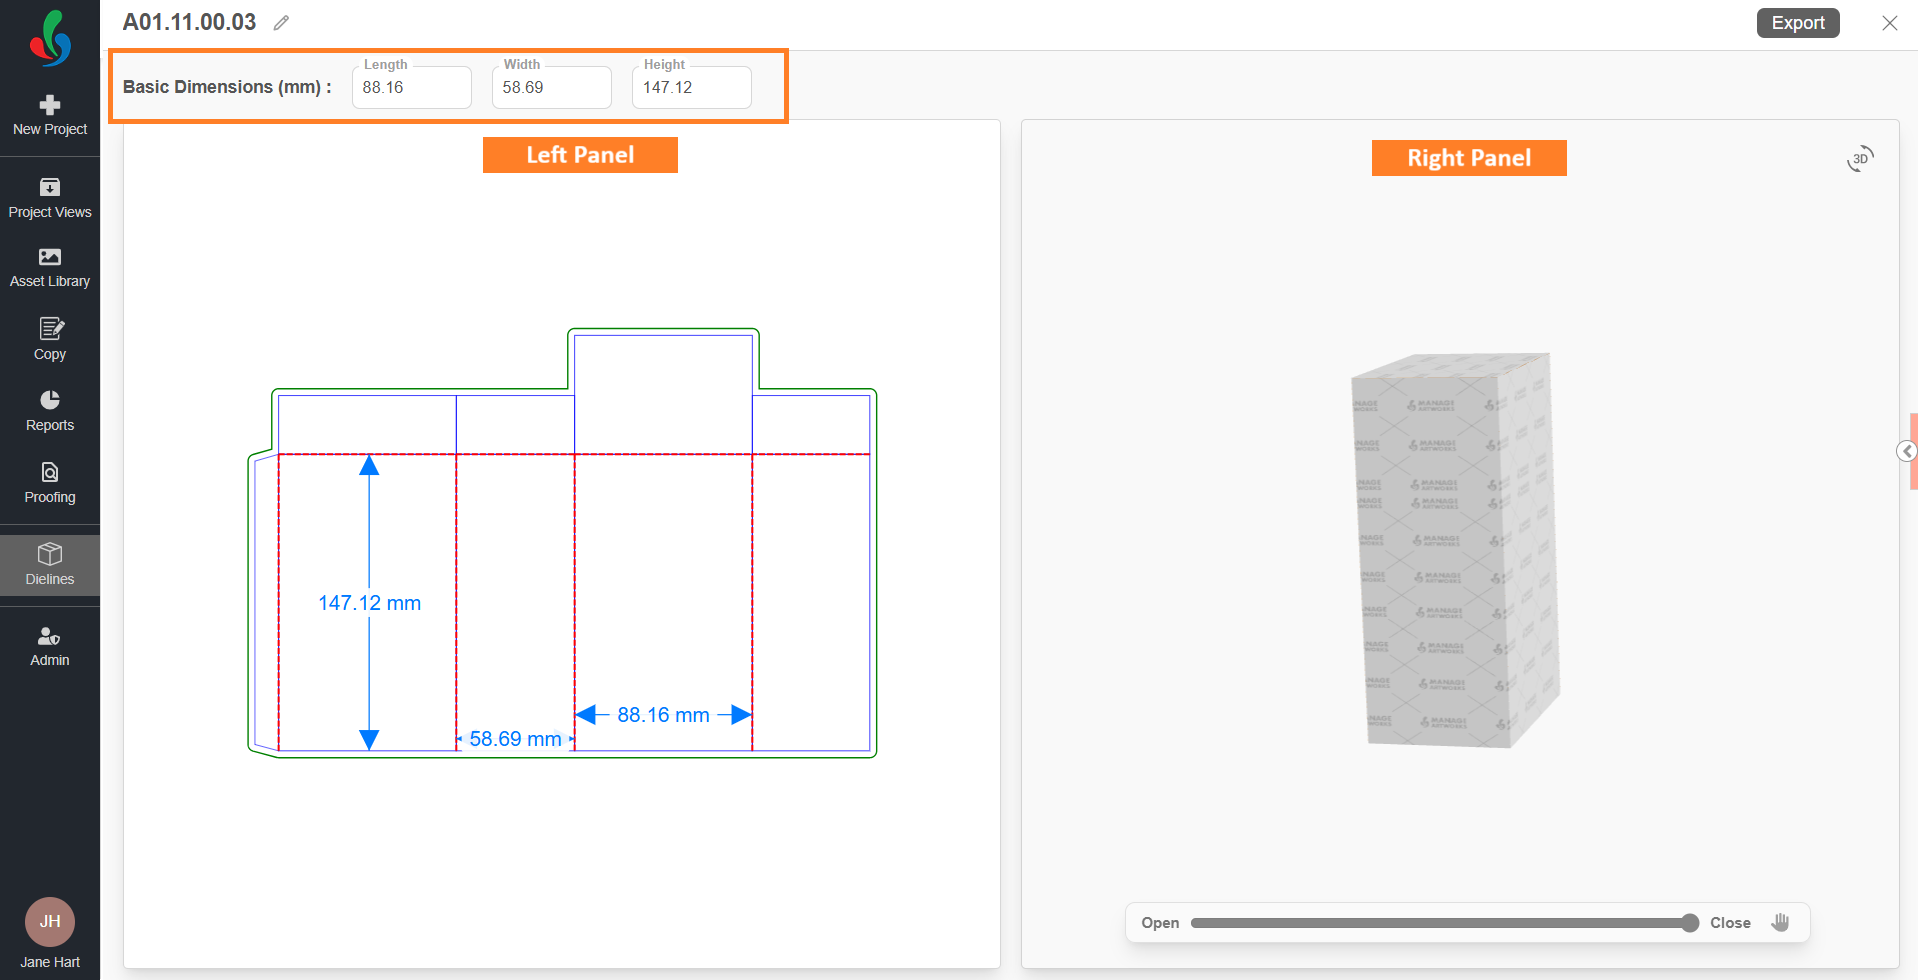
| Left Panel | Displays the dieline's 2D flat layout, allowing users to view the structural design of the carton. Users can also adjust the Length, Width, and Height fields at the top to modify the dieline’s dimensions. |
| Right Panel | Shows a real-time 3D preview of the dieline with interactive controls. |
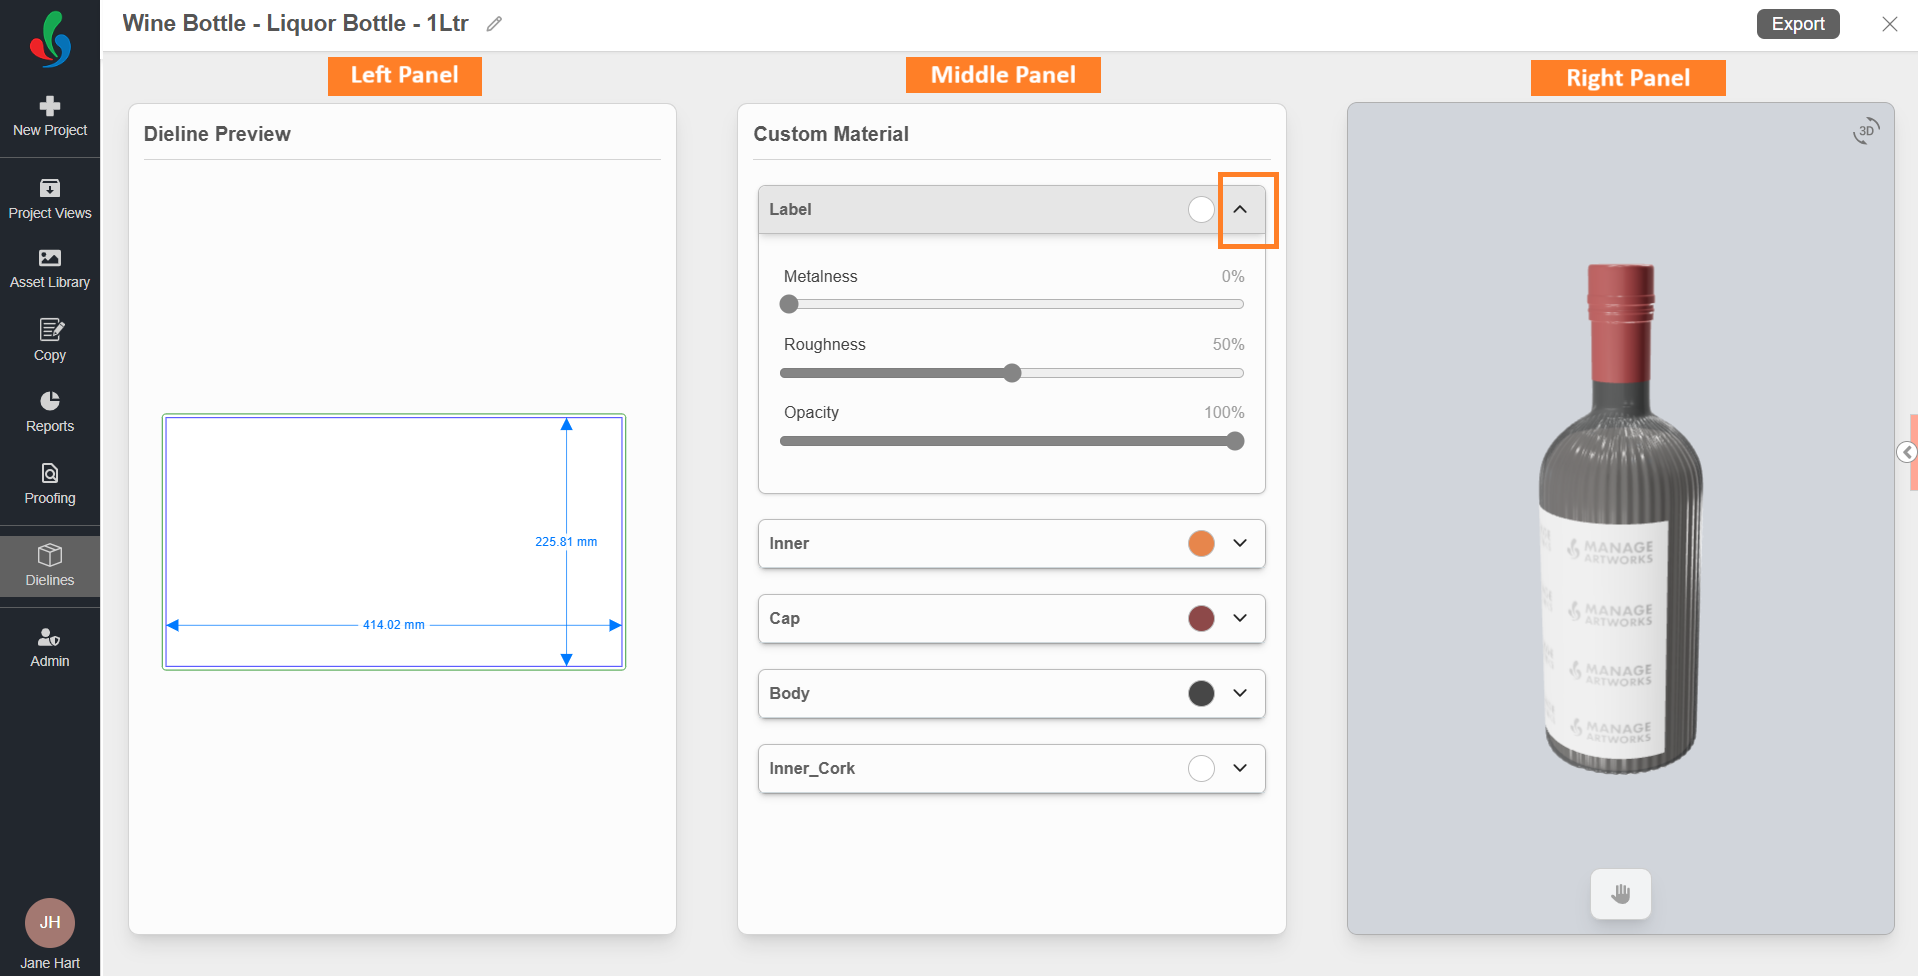
For Non-Carton Categories
Panel | Functionality |
| Left Panel | Displays the dieline’s 2D structural layout (flat view) for reference. |
| Middle Panel | Allows users to customize material properties, depending on dieline type. |
| Right Panel | Shows a real-time 3D preview of the dieline with interactive controls. |
2. Rename the Dieline Title
- Click the pencil (✏️) icon next to the current dieline title.
- Enter a desired custom name in the text field
- Press Enter or click outside the text field to apply.

| Note:
|
3. Customize the Dimension or Appearance
Customization options depends on the selected dieline type:
a. For Folding Cartons
You can configure the physical dimensions:
- Length
- Width
- Height
To change the dimension:
- At the top of the Left panel, click the dimension field you want to change (Length, Width, or Height).
- Enter the new value in the field.
- Check the 3D Preview panel (Right Panel) — the model updates immediately to reflect the new dimension.
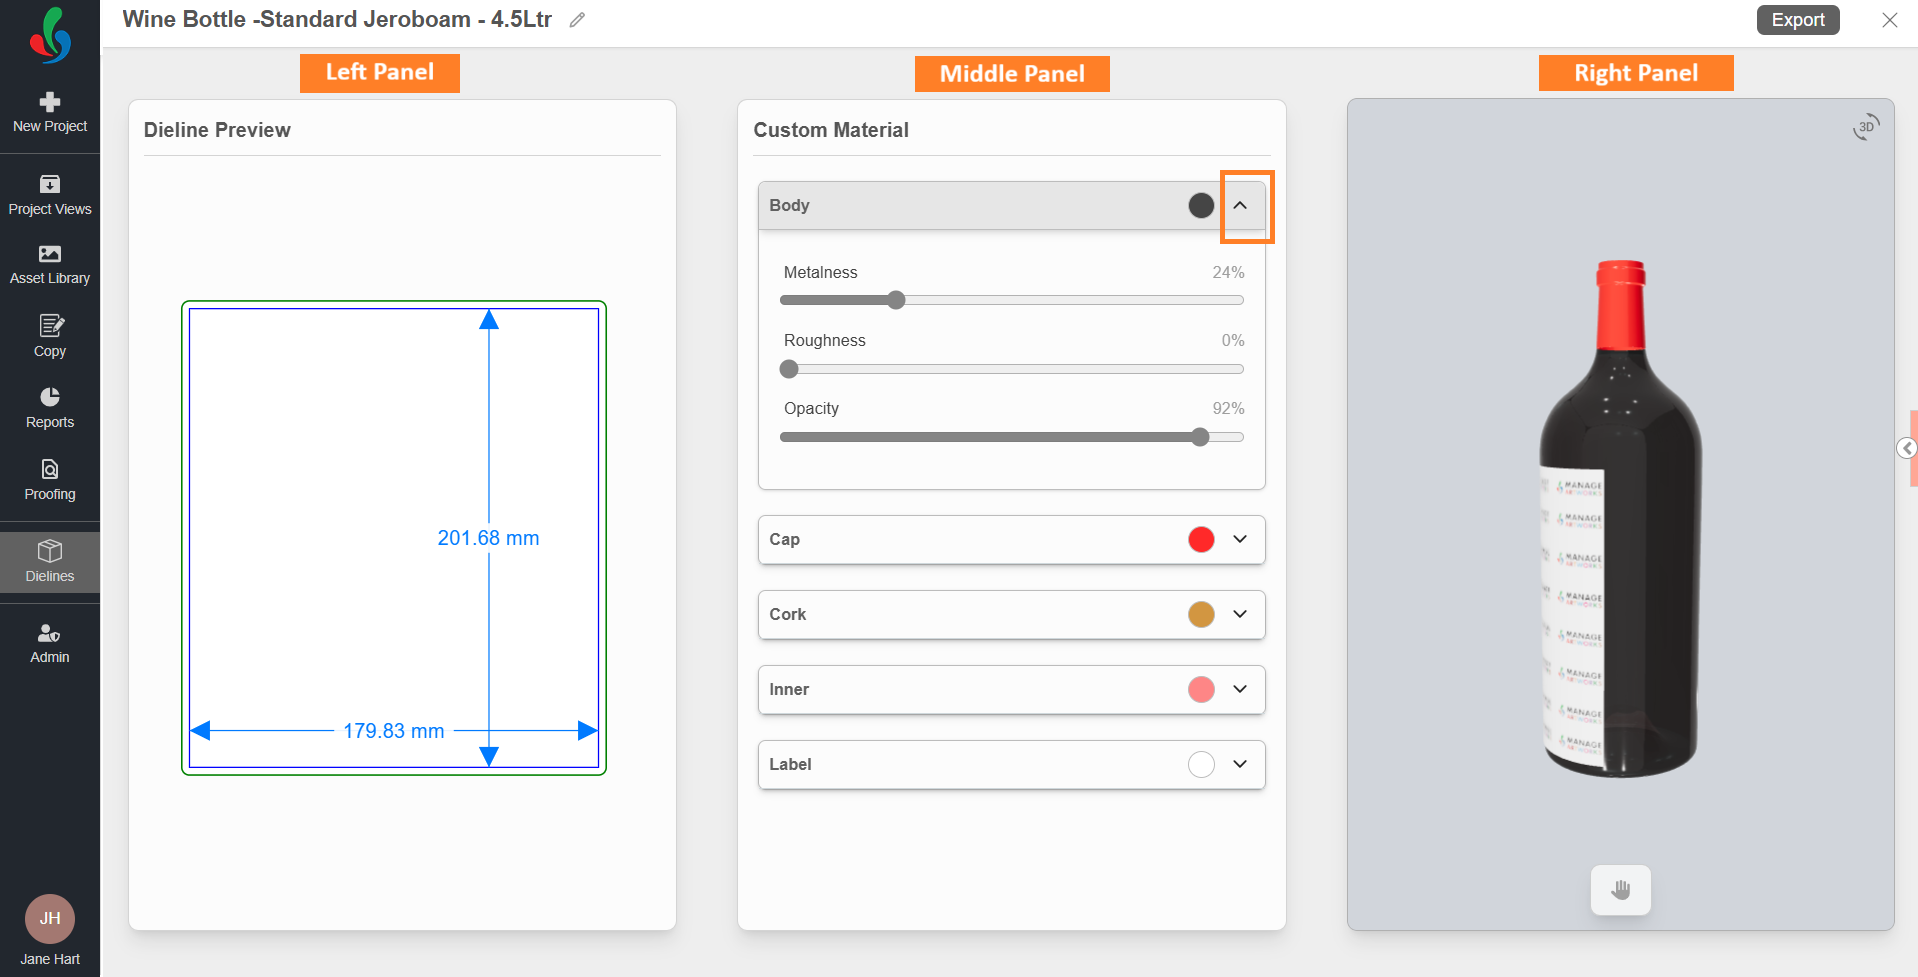
b. For Non-Carton Categories
Instead of modifying physical dimensions, you can adjust Material Appearance settings:
- Metalness – Controls reflective quality of the surface.
- Roughness – Controls surface texture from glossy to matte.
- Opacity – Controls transparency of the material.
| Note: The scope of these settings depends on the dieline type. In some cases, they can be applied to specific parts; in others, they apply to the entire dieline. |
Example (Bottles):
For bottle dielines, appearance settings can be applied independently to parts such as:
- Cap
- Label
- Inner
- Cork
- Body
| Note: The available parts may vary by dieline type. The list below is for reference only and may differ based on the bottle structure. |
To change the appearance setting:
- In the Middle panel, select the part you want to customize (e.g., Body, Cap, Cork, Inner, Label).
- Adjust the Metalness, Roughness, or Opacity sliders to achieve the desired look.
- Check the Right panel — all changes are updated in real time as you adjust the sliders.
- Repeat the steps for other parts until all required customizations are complete.
04. Export the Dieline
You can export the customized dieline as a PDF.
Steps to Export:
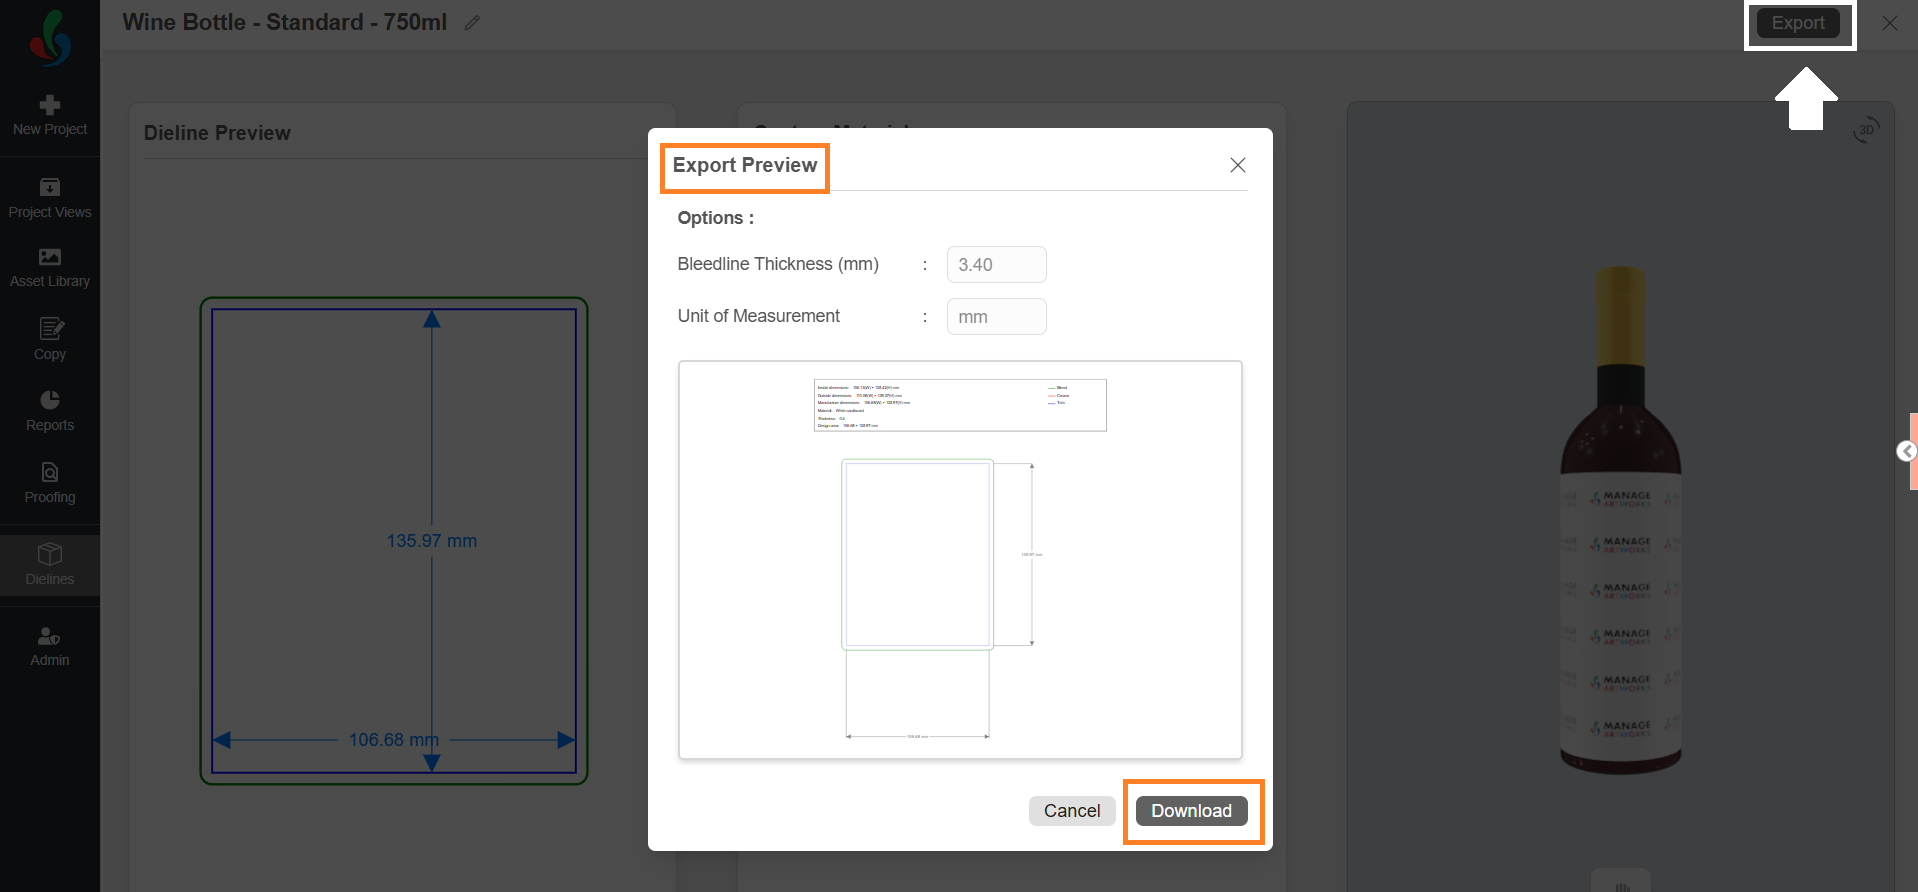
- Click the Export button at the top-right corner of the Dieline editor.
- The Export Preview dialog will appear, displaying the following options:
- Bleed Measurement (mm): This value is pre-filled based on the Admin settings. You can modify it if required.
- Measurement Scale (UOM): The default unit of measurement (e.g., inch or mm or cm) is also pulled from Admin settings. This field is non-editable during export.
Note: To modify the default Bleed Measurement or Unit of Measurement (UOM), refer to Dieline Parameter Configuration in the Admin module.
- A preview of the final downloadable dieline is displayed in the dialog for reference.
- Click Download to save the dieline as a PDF file.