Clone a Project (Enterprise Plan)
In ManageArtworks, you can create a new project from the New Project module. However, if you want to save time, you can clone an existing project, make necessary modifications, and then initiate it. The cloning option is useful when you don't want to create a project from scratch.
 | Note: Depending on your subscription plan, the cloning features may vary. This article focuses on cloning a new project in the Enterprise Plan. For details on cloning a project in the Growth Plan, refer to [Clone a Project (Growth Plan)]. |
 | The key difference between cloning a project in the Growth and Enterprise plans is:
To unlock full cloning capabilities, consider upgrading to the Enterprise Plan. For more information on all ManageArtworks plans, click here. |
How to Clone a Project in the Enterprise Plan?
01. Access the Project Views Module
- Log in to your ManageArtworks account.
- In the left navigation panel, click Project Views.
- By default, the Inbox View will be displayed.
 | Note: You can clone a project from any view. To switch views, click the hamburger menu and select a view to filter projects accordingly. |

02. Open the Clone Option
- Locate the project you want to clone.
- Click the three-dot menu (⋮) next to the project.
- Select Clone from the dropdown menu.
 | Note: You can only clone projects that use a workflow template you have access to. If a project is based on a template where you are not assigned to the Start activity, you cannot clone it. |

03. Configure Clone Settings
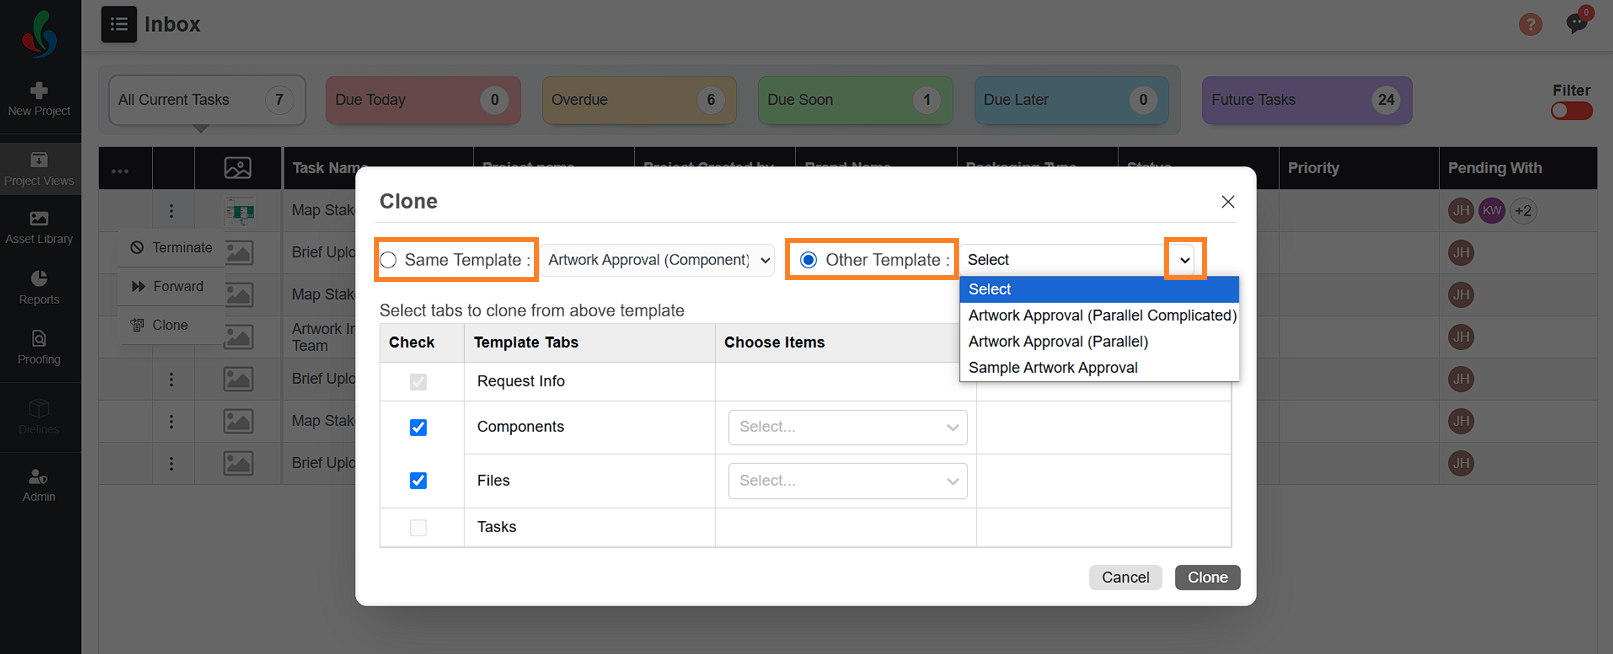
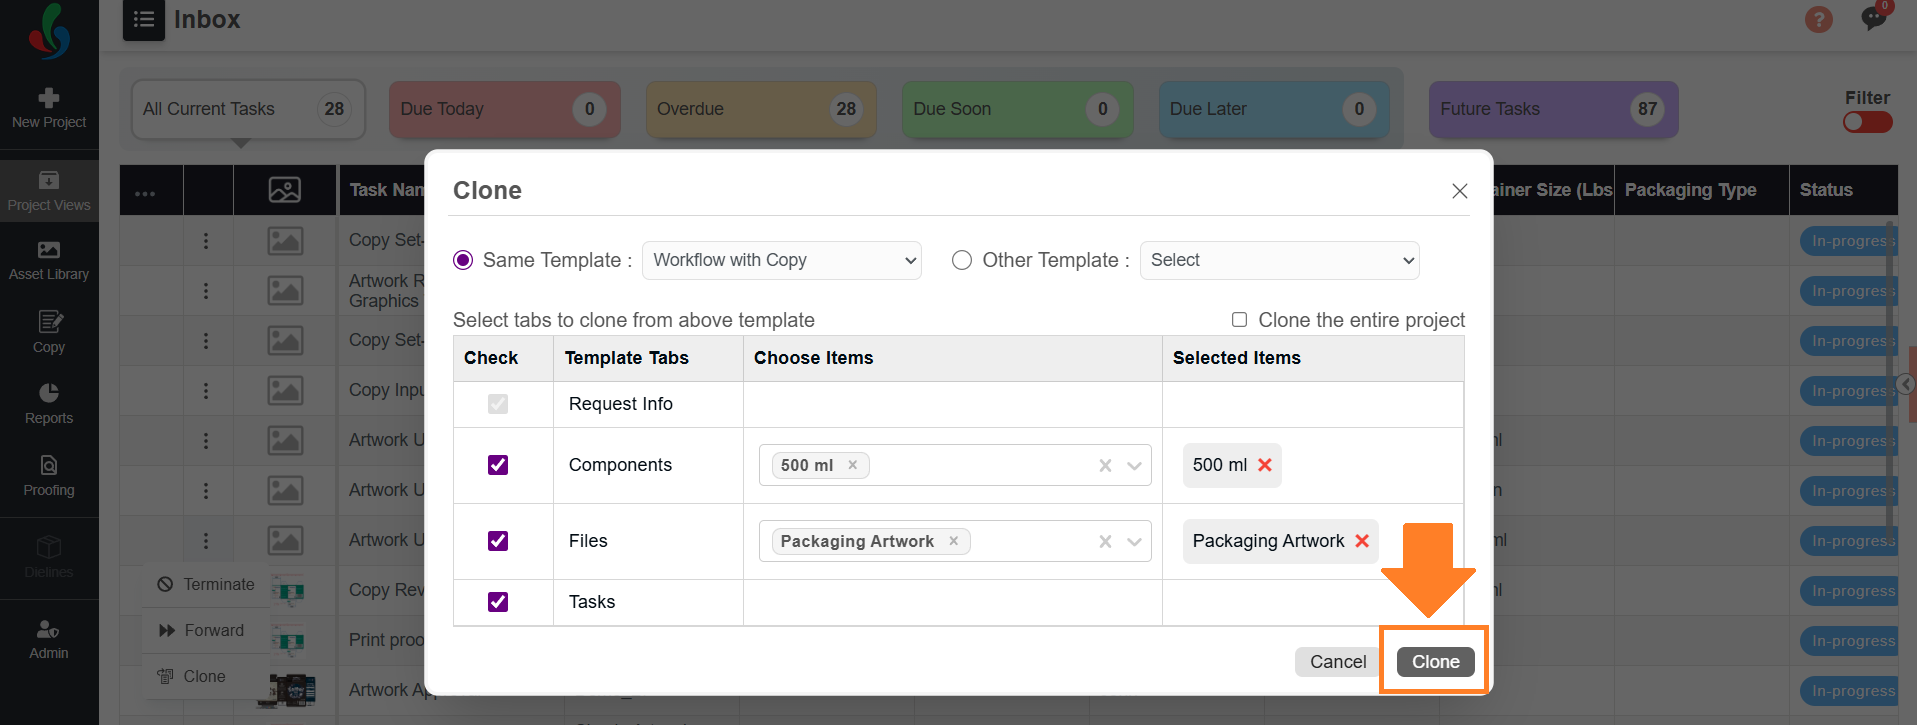
Once you select Clone, a pop-up window will appear, allowing you to configure cloning preferences.
- Select a Workflow Template:
- Same Template – If you want the cloned project to use the same workflow template as the original, then select Same Template.
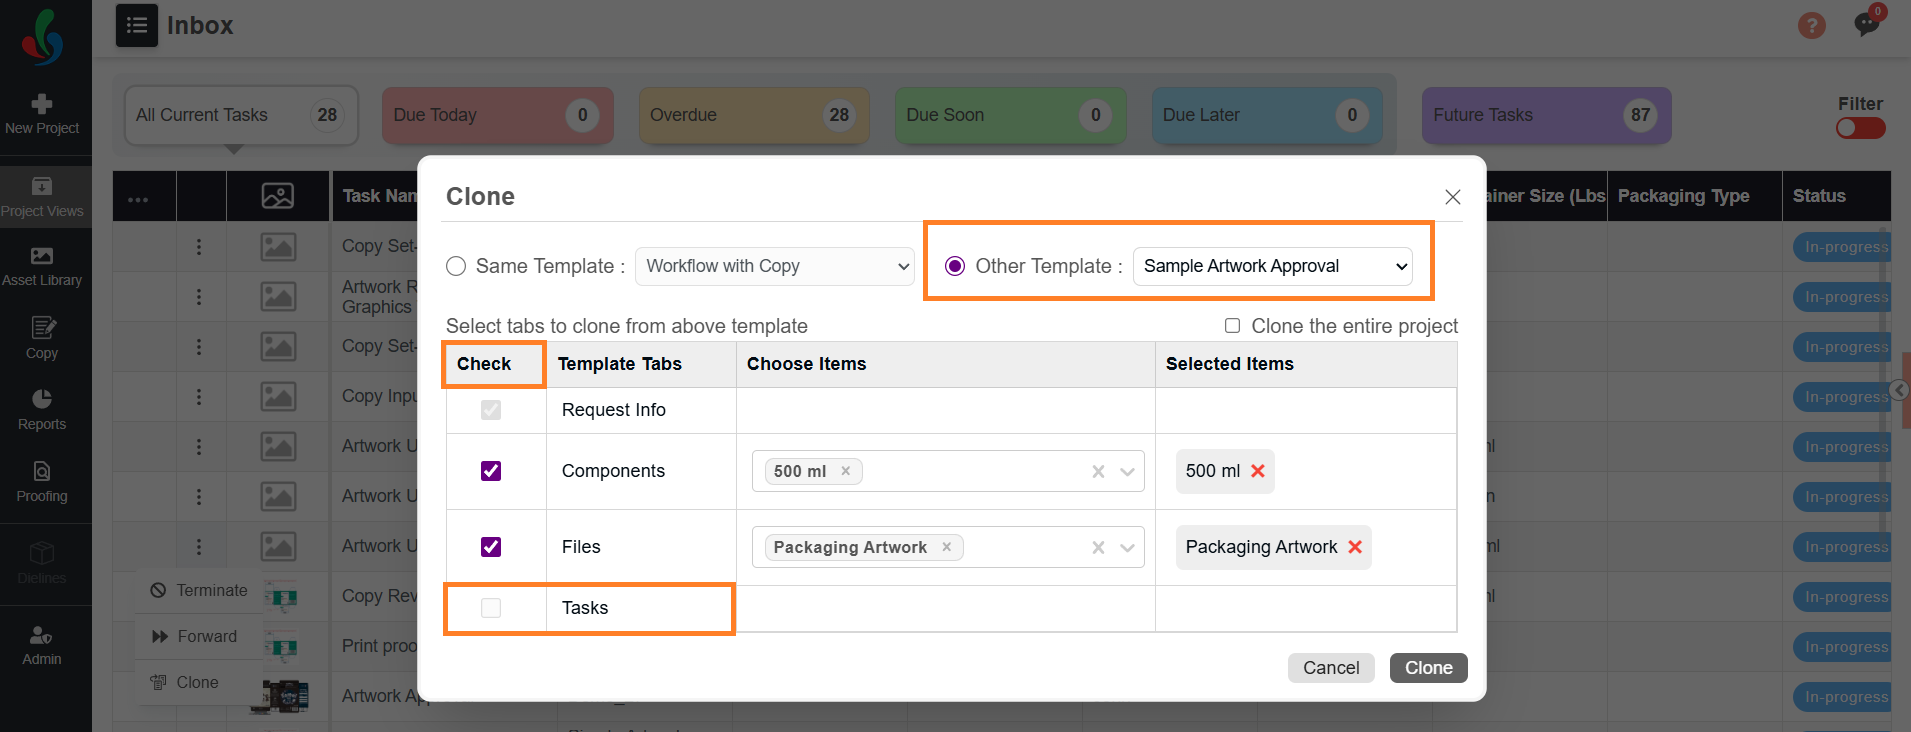
- Other Template – If you want to clone the project with a different workflow template, follow these steps:
- Click the drop-down menu next to Other Template to view a list of all workflow templates you have access to.
- Select the desired workflow template from the list.
- Select What to Clone:
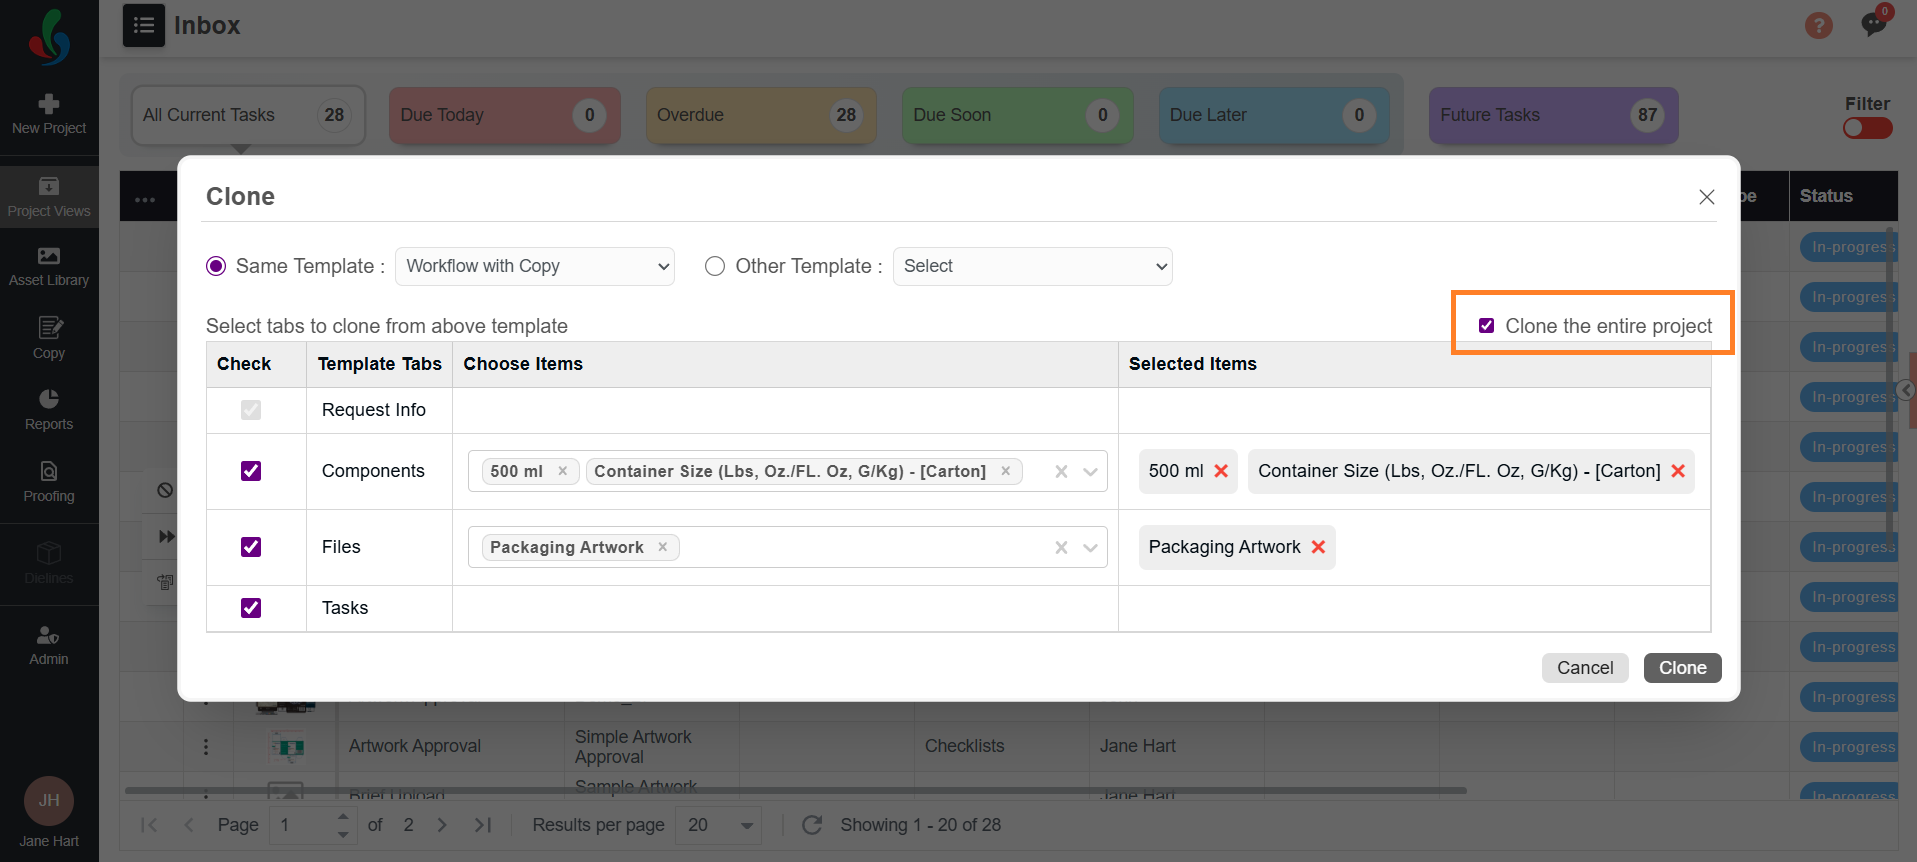
You can either clone everything or customize the details tab by tab:- Clone the Entire Project:
Select this checkbox to copy all available details from all tabs. You can still review and adjust selected items afterward.
Note: If a tab in the original project has no data, it will not be selected for cloning even when this option is enabled.
- Customize Tab Selection:
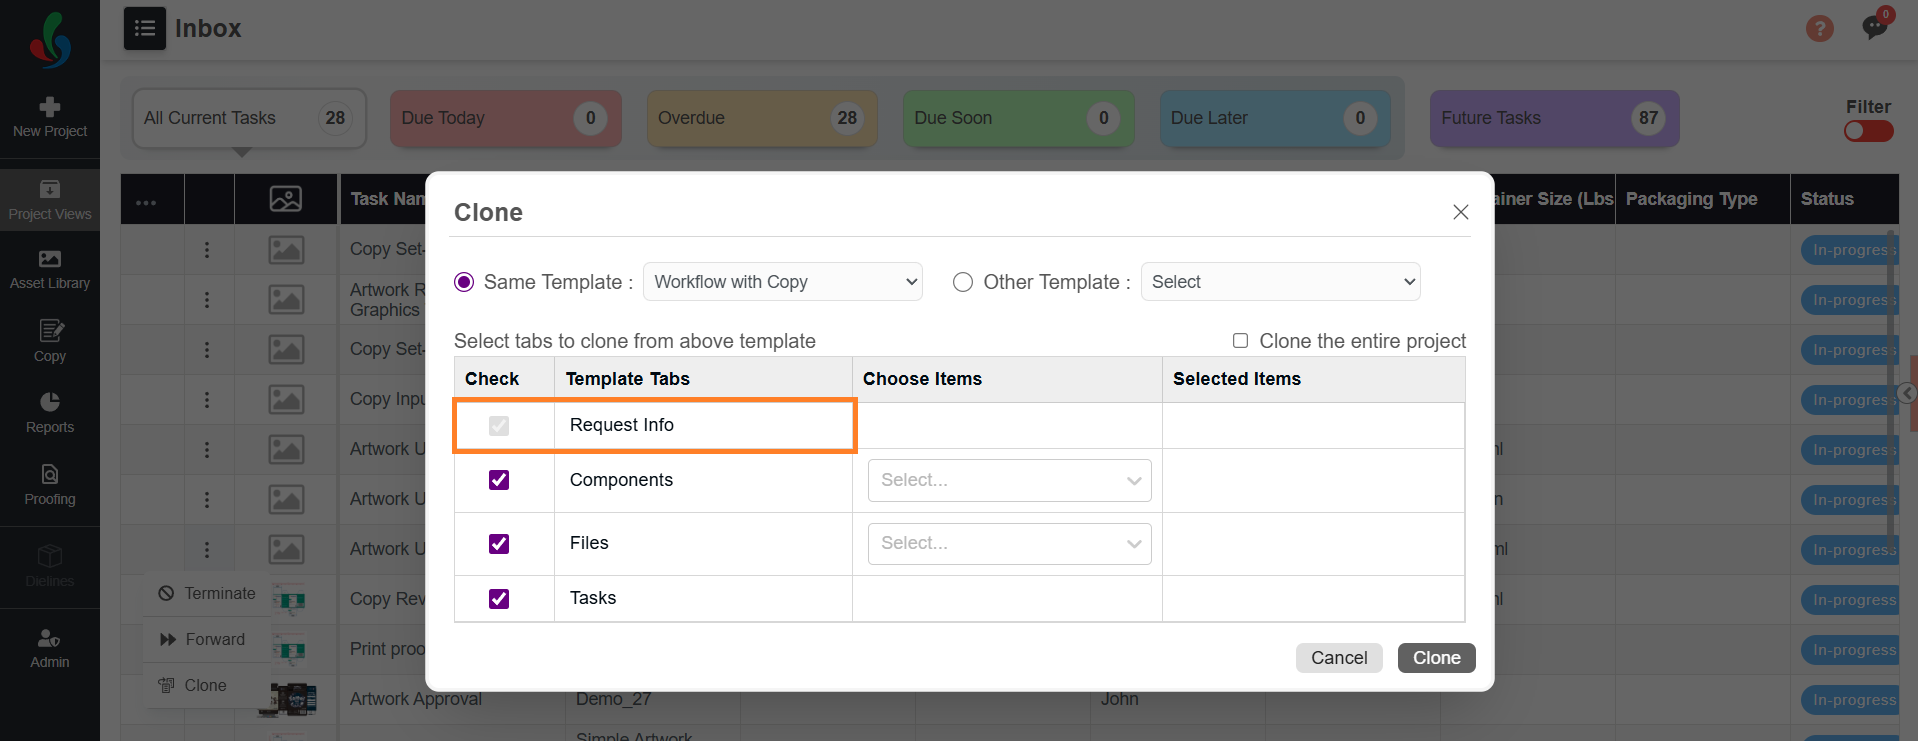
Manually select which tabs and items to clone.- Request Info (Mandatory & Always Cloned)
The Request Info tab details are always cloned by default.- If cloning with the same template, all fields will be duplicated exactly as in the original project.
- If cloning with a different template, only the fields that exist in both the original and selected workflow templates will be populated. Any additional fields unique to the selected template will remain empty.
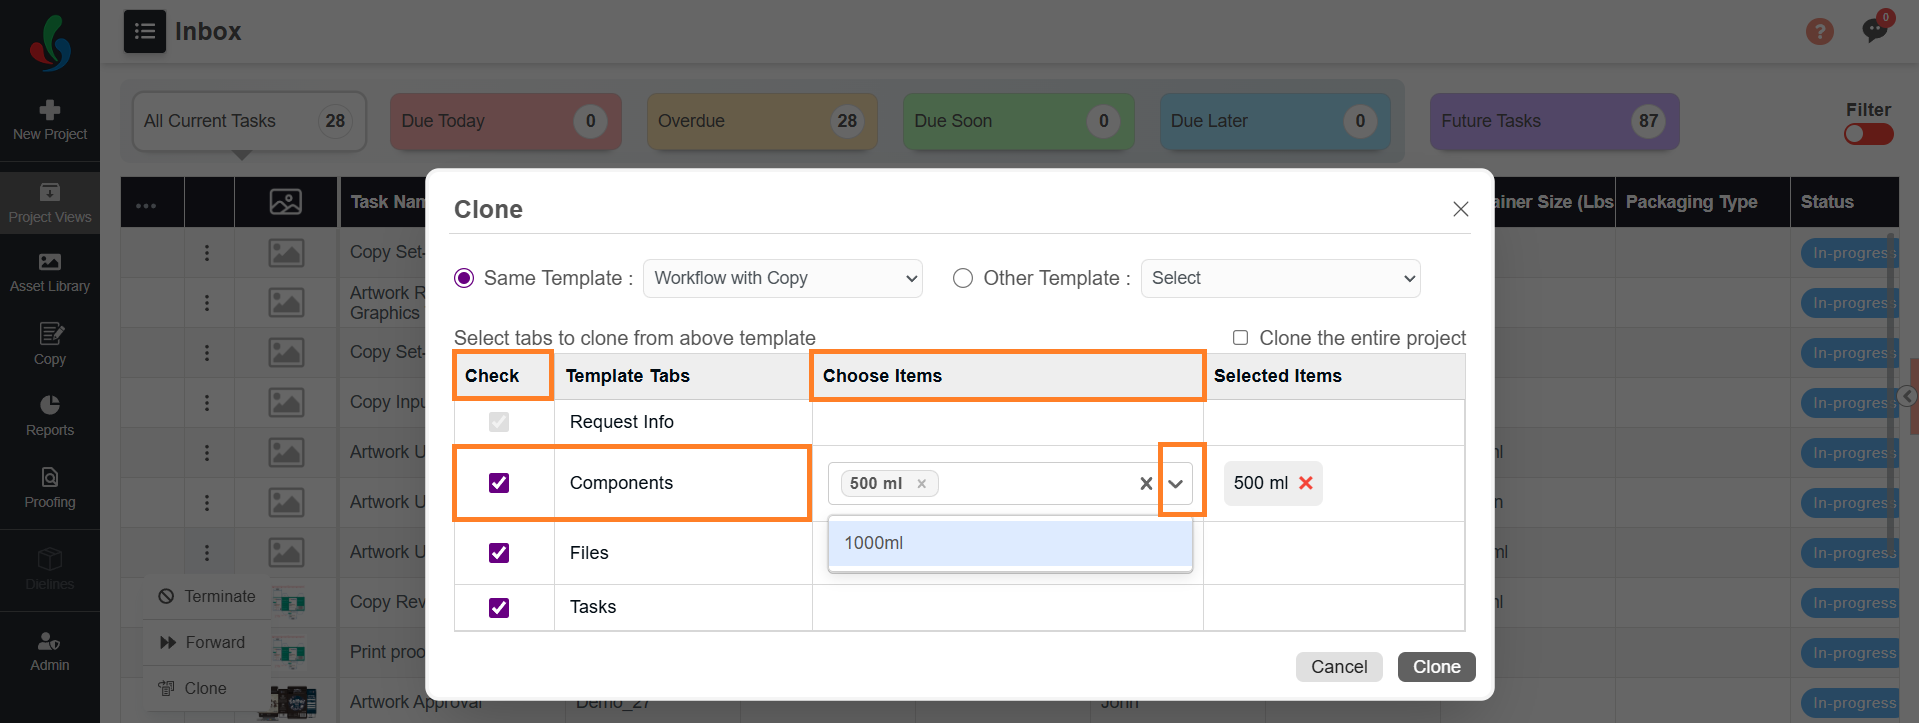
- Components (Optional)
If the original project contains components, you can choose to clone them.- Make sure that the checkbox in the Check column is selected. (Enabled by default if the project has components.)
- Click the drop-down menu in the Choose Items column. It will list out all the component(s) associated with the project.
- Select the desired component(s) that you want to clone.
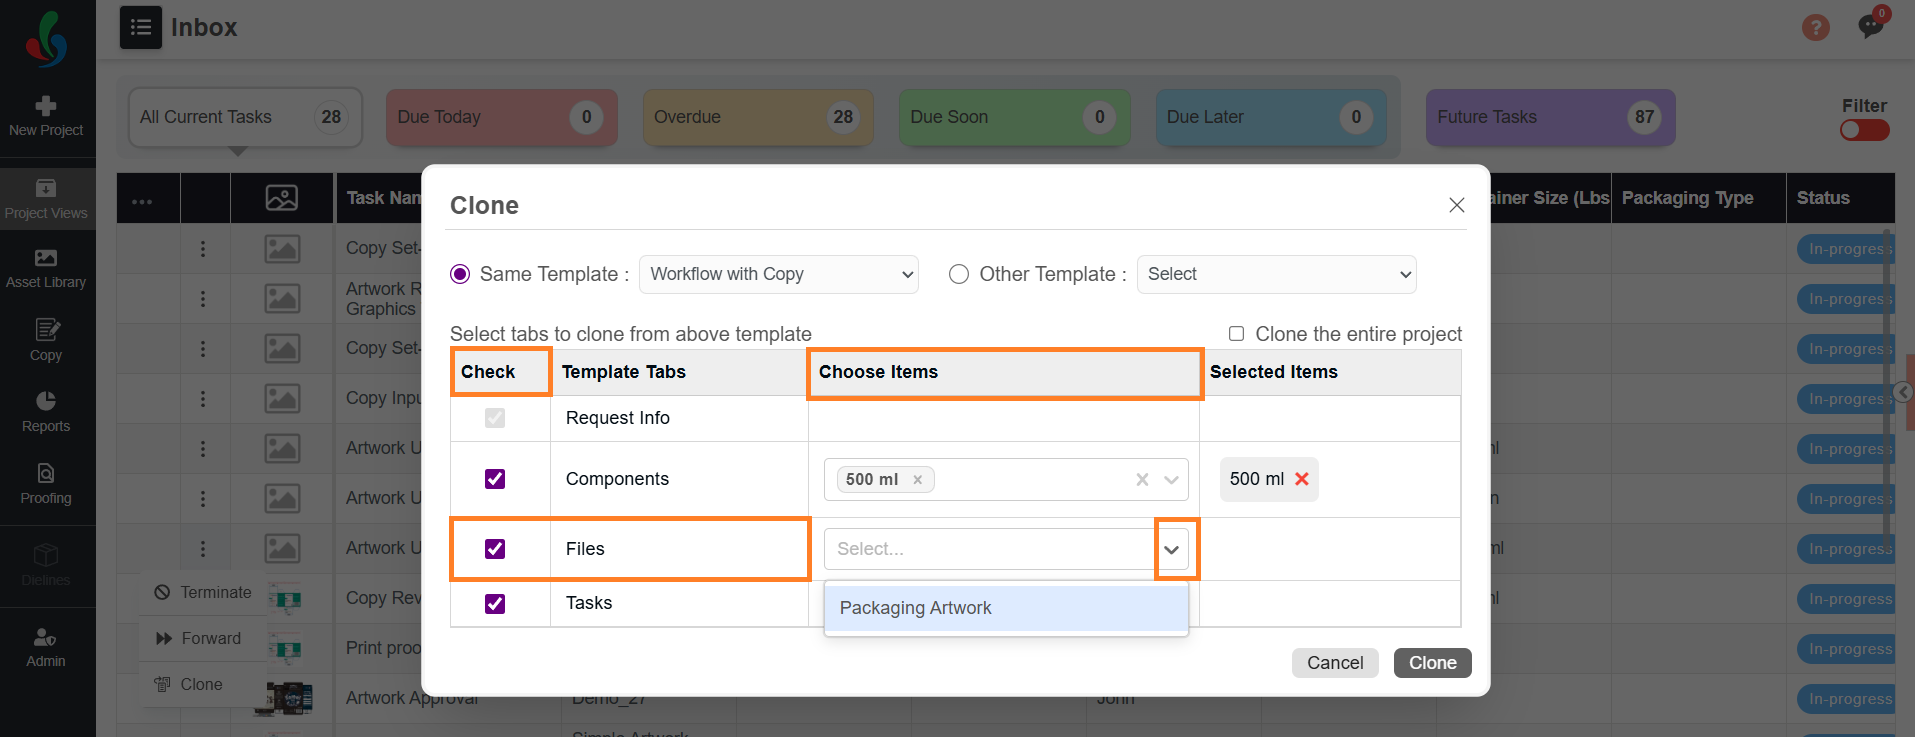
- Files (Optional)
If the project contains Files, you can choose to clone them:- Make sure that the checkbox in the Check column is selected. (Enabled by default if the project has files.)
- Click the drop-down menu in the Choose Items column. It will list out all the file type(s) associated with the project.
- Select the desired file type(s) to be cloned.
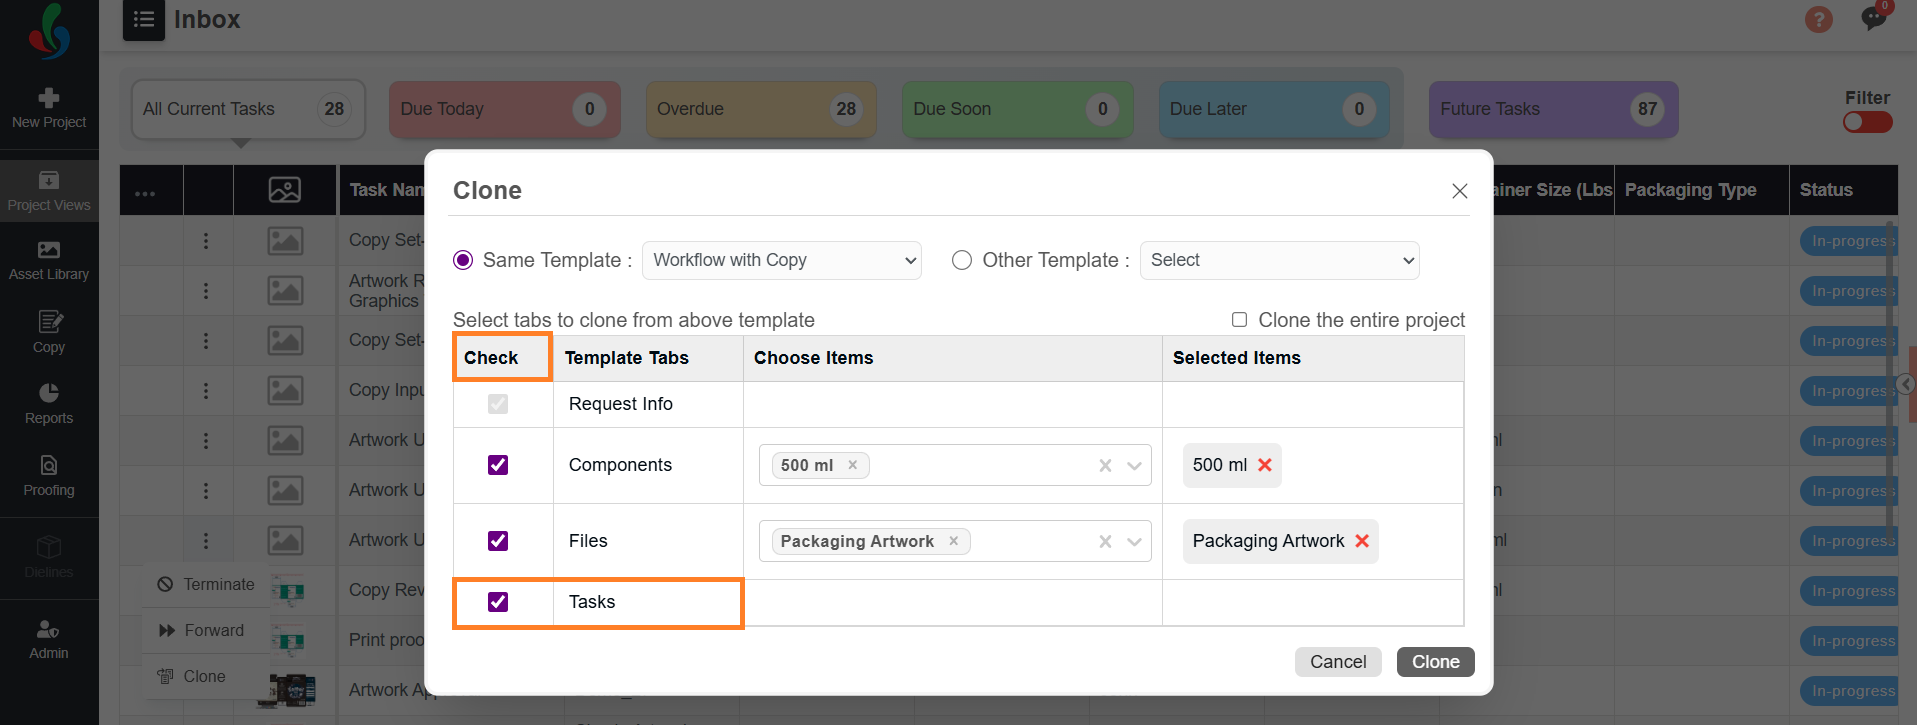
- Tasks (Optional & Template-Dependent)
If cloning with the same template, you can choose to clone the Tasks tab details:- If cloning with Same template:
- To clone user selections and duration settings, make sure that the checkbox in the Check column is selected. (Checked by default.)
- If unchecked, the cloned project will use the default task settings of the workflow template.
- If cloning with a different template, the Tasks tab cloning options will be disabled.
- If cloning with Same template:
- Request Info (Mandatory & Always Cloned)
- Clone the Entire Project:
03. Finalize the Clone
- After selecting the desired cloning options, click the Clone button.
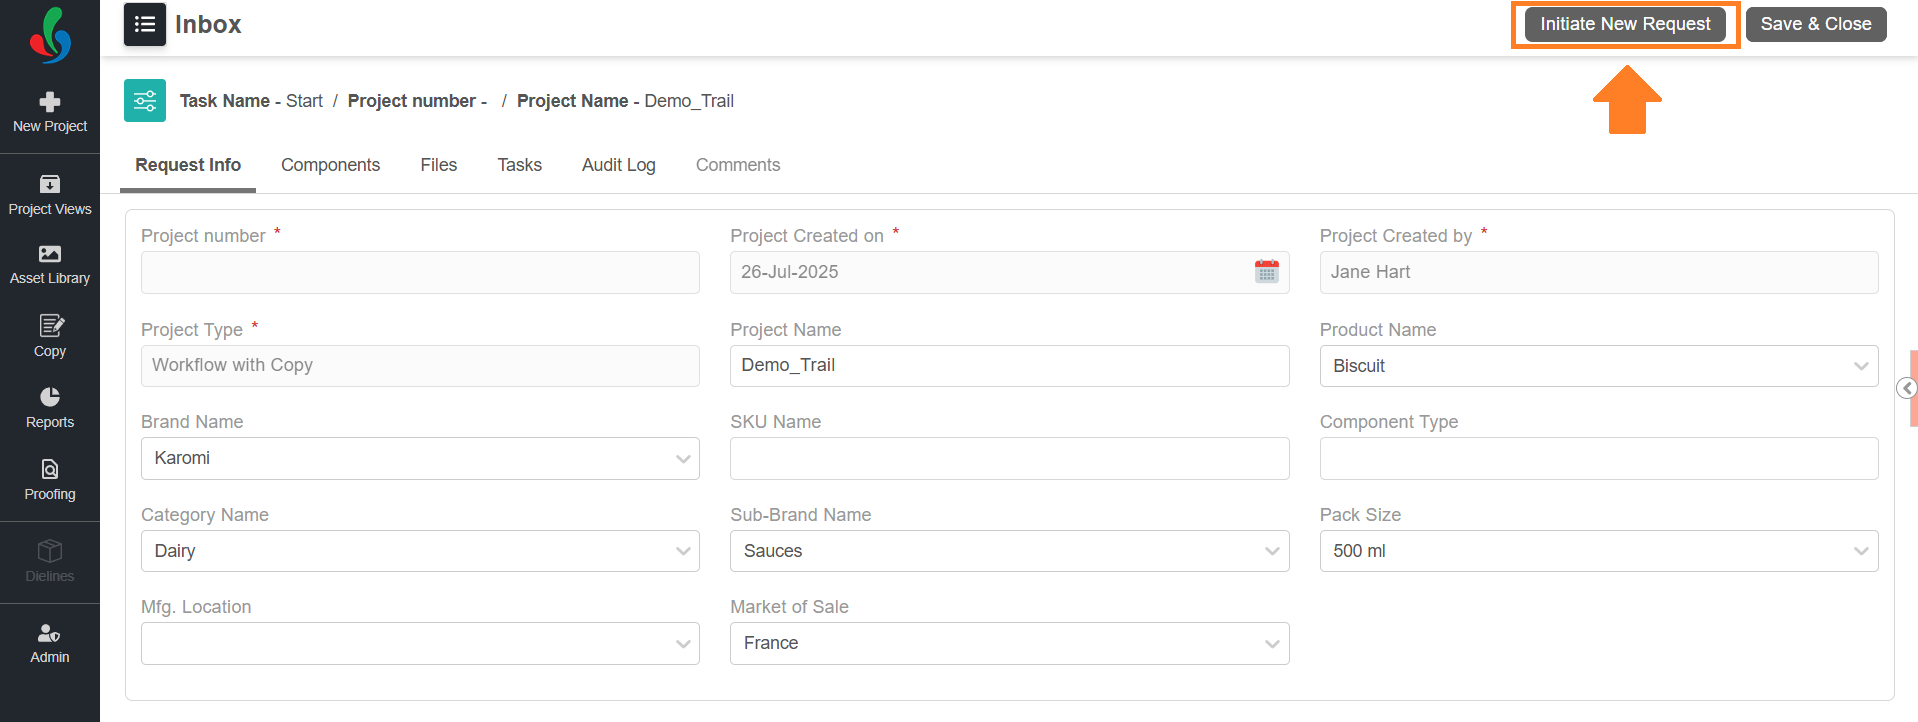
- The system will duplicate the project and redirect you to the New Project page.
- If needed, modify the cloned project before initiating.
Note: To modify a project in the Growth Plan, refer to Start a New Project (Growth Plan).
For Enterprise Plan users, refer to Start a New Project (Enterprise Plan). - Once all modifications are complete, click "Initiate New Project" in the upper-right corner to launch your project.
By leveraging the cloning feature, you can significantly reduce project setup time while maintaining workflow consistency.
