Add a New User (Enterprise plan)
 | Note: The options available when adding a new user differ between the Growth and Enterprise plans.This article covers adding a new user in the Enterprise Plan. For information about adding a new user in the Growth Plan, see Add a New User (Growth Plan). |
How do I add a new user?
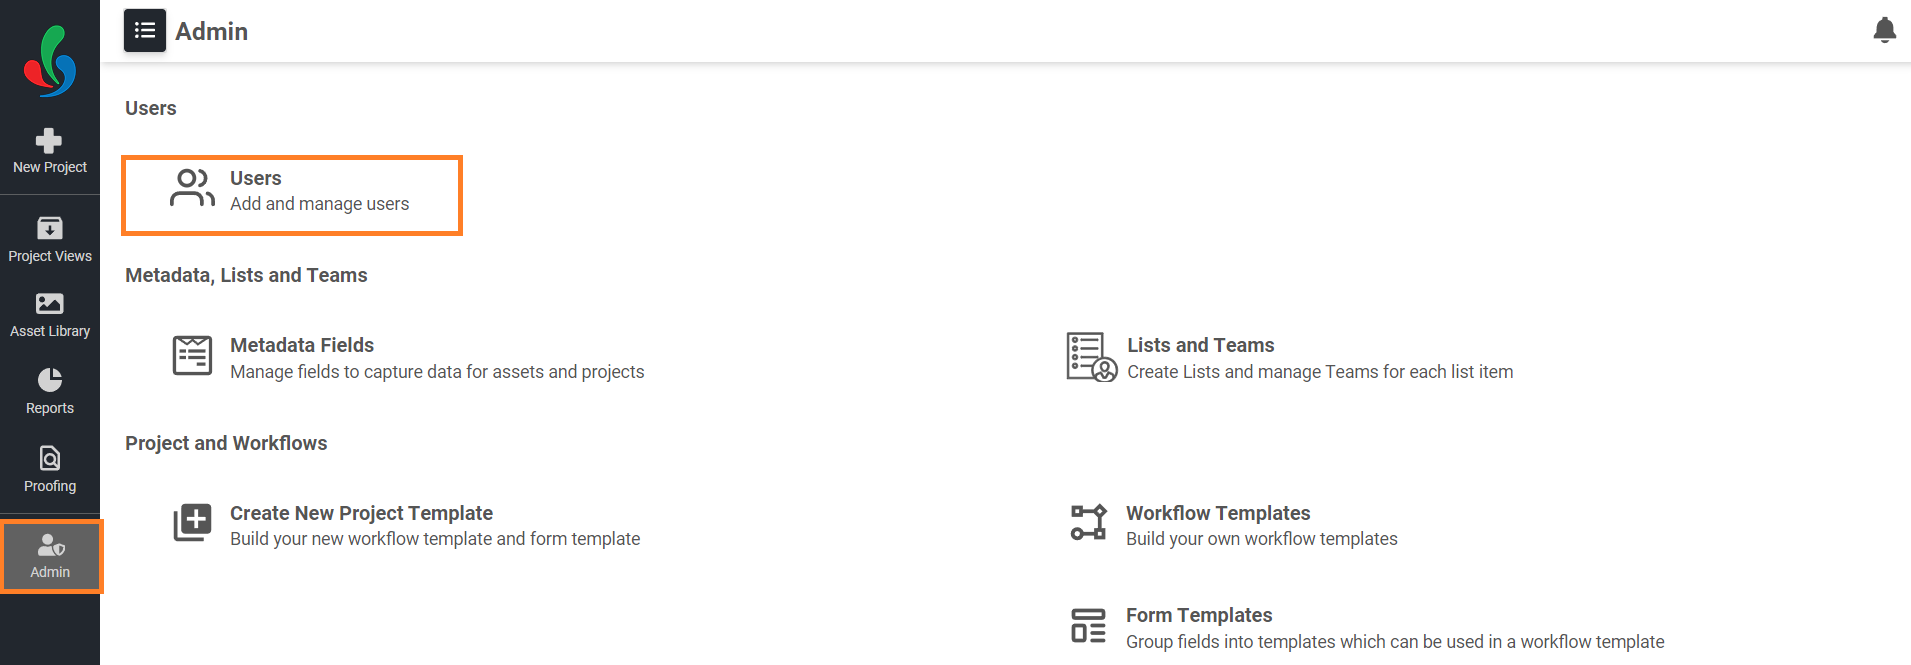
01. Access the Admin Module
- Sign in to your ManageArtworks account.
- Navigate to the Admin module.
- Select Users.
02. Create a New User
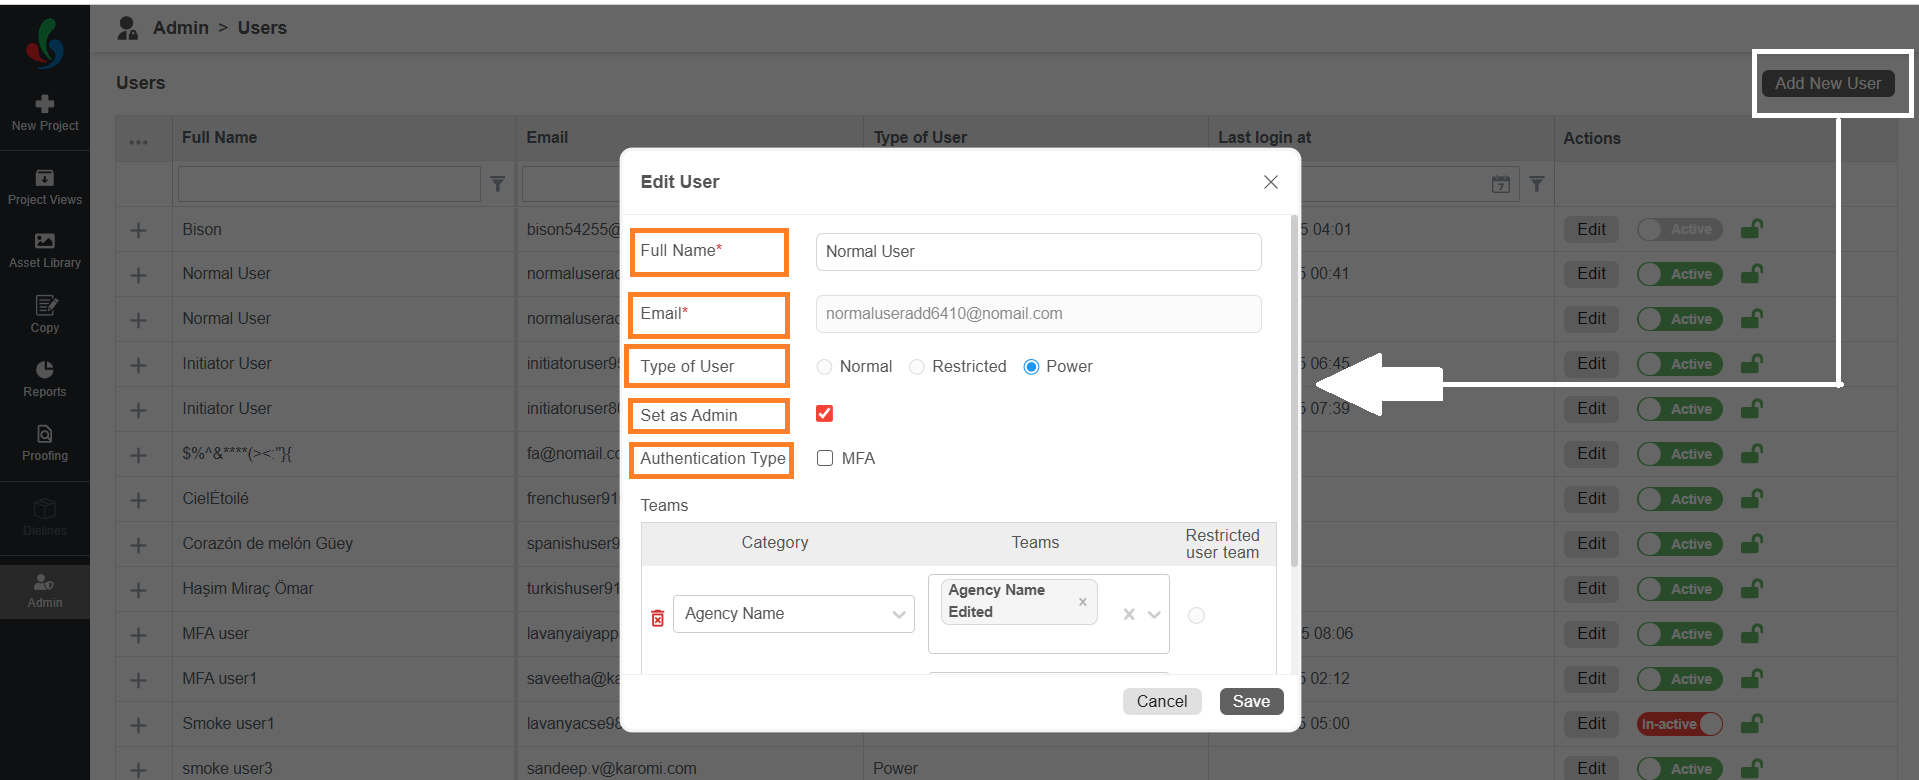
- Select the Add New User button in the upper-right corner.
- A pop-up form opens and prompts you to enter the following details:
- Full Name: Enter the user's full name.
- Email Address: Enter a valid email address for the user.
- Type of User: Choose the appropriate security level:
- Normal: For basic access to view, upload, download, share, and update files.
- Power: Includes all Normal permissions plus delete rights and eligibility for admin access.
- Restricted: For limited viewing and sharing permissions, with custom configurations.
- Set as Admin (Optional): Select this checkbox to grant administrative privileges. Users with admin rights can access the Admin module and use all administrative features.
Note: Only Power users can be set as Admins. - Authentication Type (Optional): Select this checkbox to enable multifactor authentication (MFA) for the user.
When enabled, the user must verify their identity using a one-time password (OTP) sent to their registered email address each time they sign in.- To learn more about MFA, see Sign in using MFA.
 | Important – Applies Only To (Restricted Users Only) If Restricted is selected as the user type, the Applies Only To dropdown will appear. This lets you define where the user's access restrictions apply: 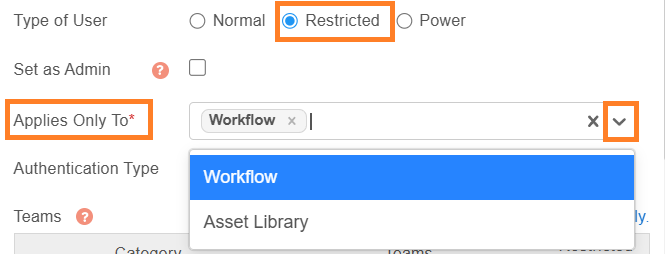
Example: |
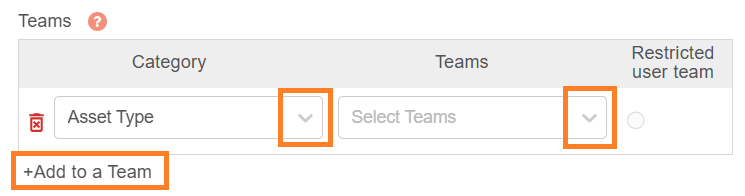
03. Assign Teams
| Important – Applies Only To Restricted Users Type If you're creating a Restricted user, selecting an Asset Type is mandatory. This defines the type of assets the user can access. Click the Teams drop down menu and select desired asset type(s).  |
- Select +Add to a Team to associate the user with specific teams and categories.
- Select a category from the Category drop-down list.
- Select one or more teams from the Teams drop-down list.
| Note: Restricted users can be assigned to only one team. Normal and Power users can be assigned to multiple teams. |
04. Finalize and Create
- Once you've entered all necessary information, Select the Create button to add the new user.
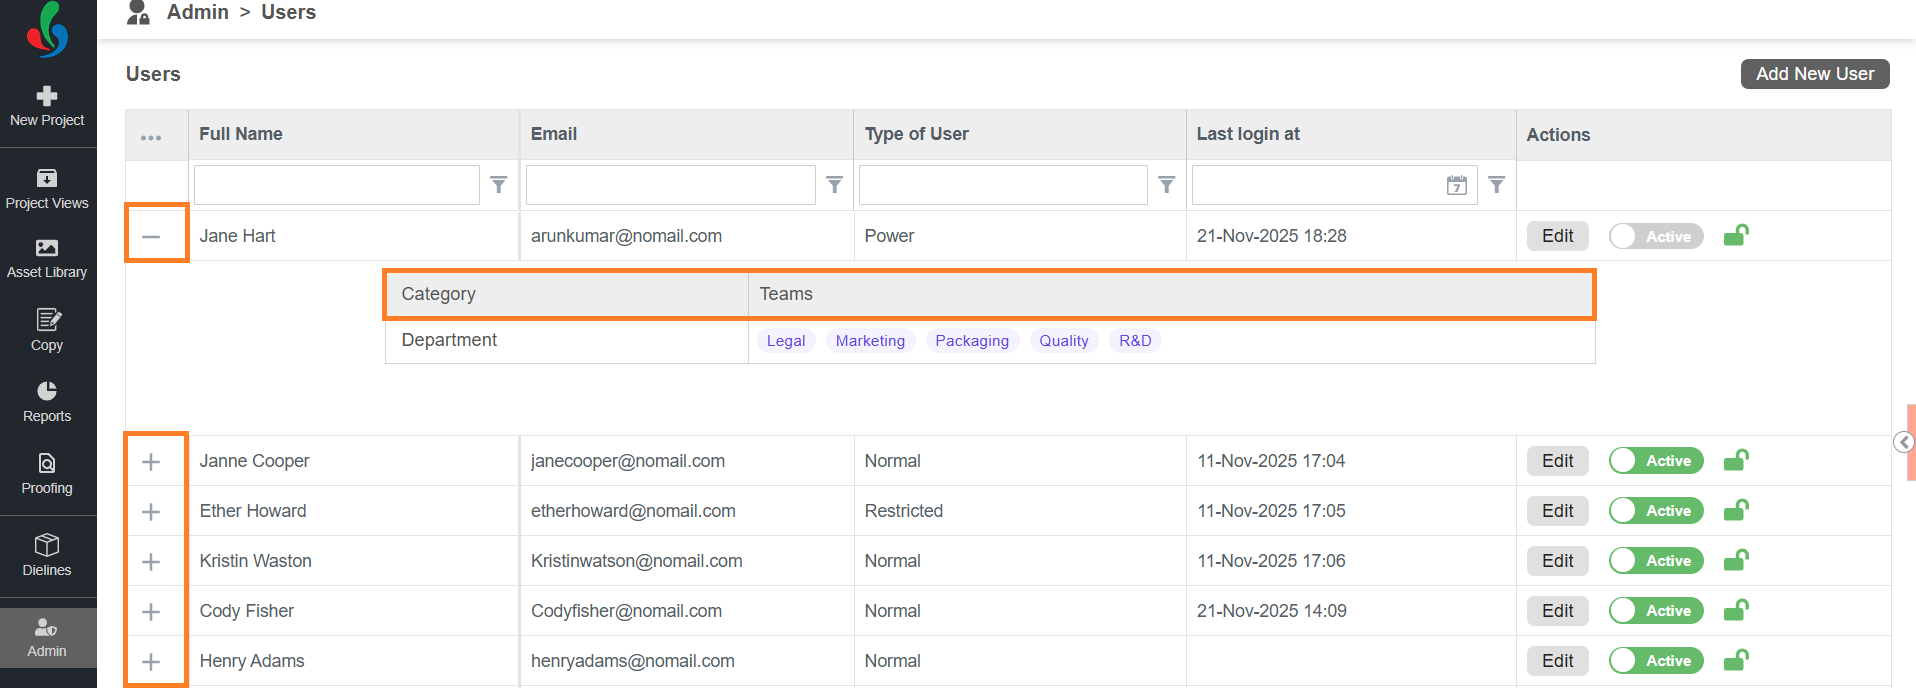
- To view the users associated teams and categories, select the plus icon to expand a user's profile.