
Compare Approval Cycle Snapshots
Copy does not always go through a project once. A task at any stage can be rejected and sent back to Copy Input, and the corrected copy is approved again. ManageArtworks captures the whole copy sheet at each of those approvals, so you can put two of them side by side and see exactly what the rework changed, instead of reading both copy sheets yourself.
Each completed approval is one approval cycle. If the project flow includes translation, the cycle is logged when the translation approval is completed. If it does not, the cycle is logged when the copy approval is completed. Snapshots are captured automatically, and they cannot be edited or deleted.
 | Note: Understanding Cycle Logging Definition of a Cycle: One fully completed approval flow (Copy Input + Approval). If applicable, this also includes Translation Input + Translation Approval. Same Cycle: A rejection during the approval stage does not start a new cycle, even if the input and approval steps are repeated. New Cycle: A new cycle is only logged if a downstream task (after copy/translation approval) is rejected, sending the asset back to Copy Input to repeat the entire approval flow. |
|

01. Open the Copy Sheet
- Sign in to your ManageArtworks account.
- Open the copy sheet you need:
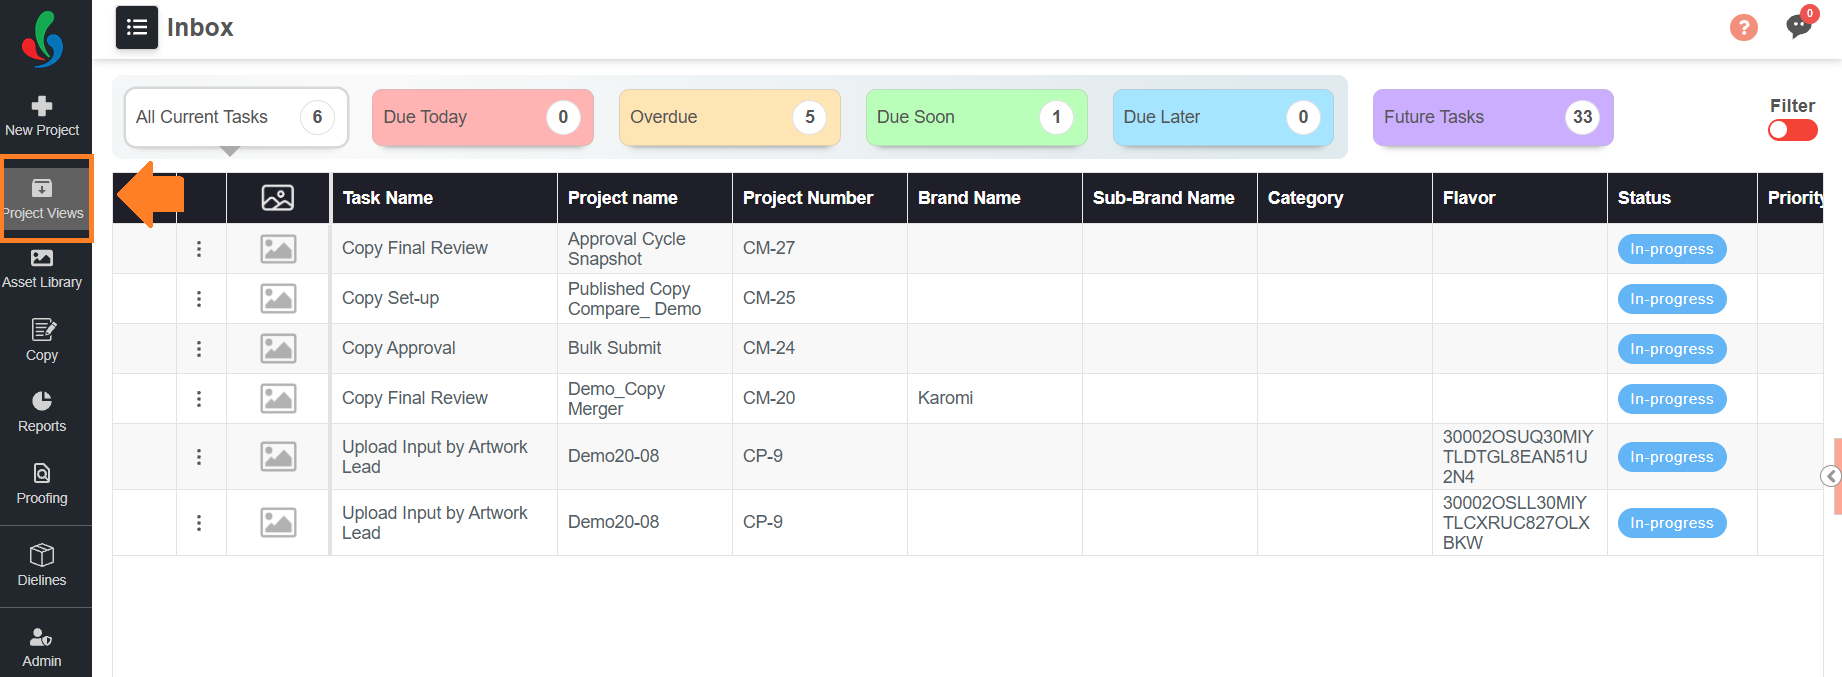
- If the project is still running, navigate to the Project Views module, open the required project, and then select the Copy tab.
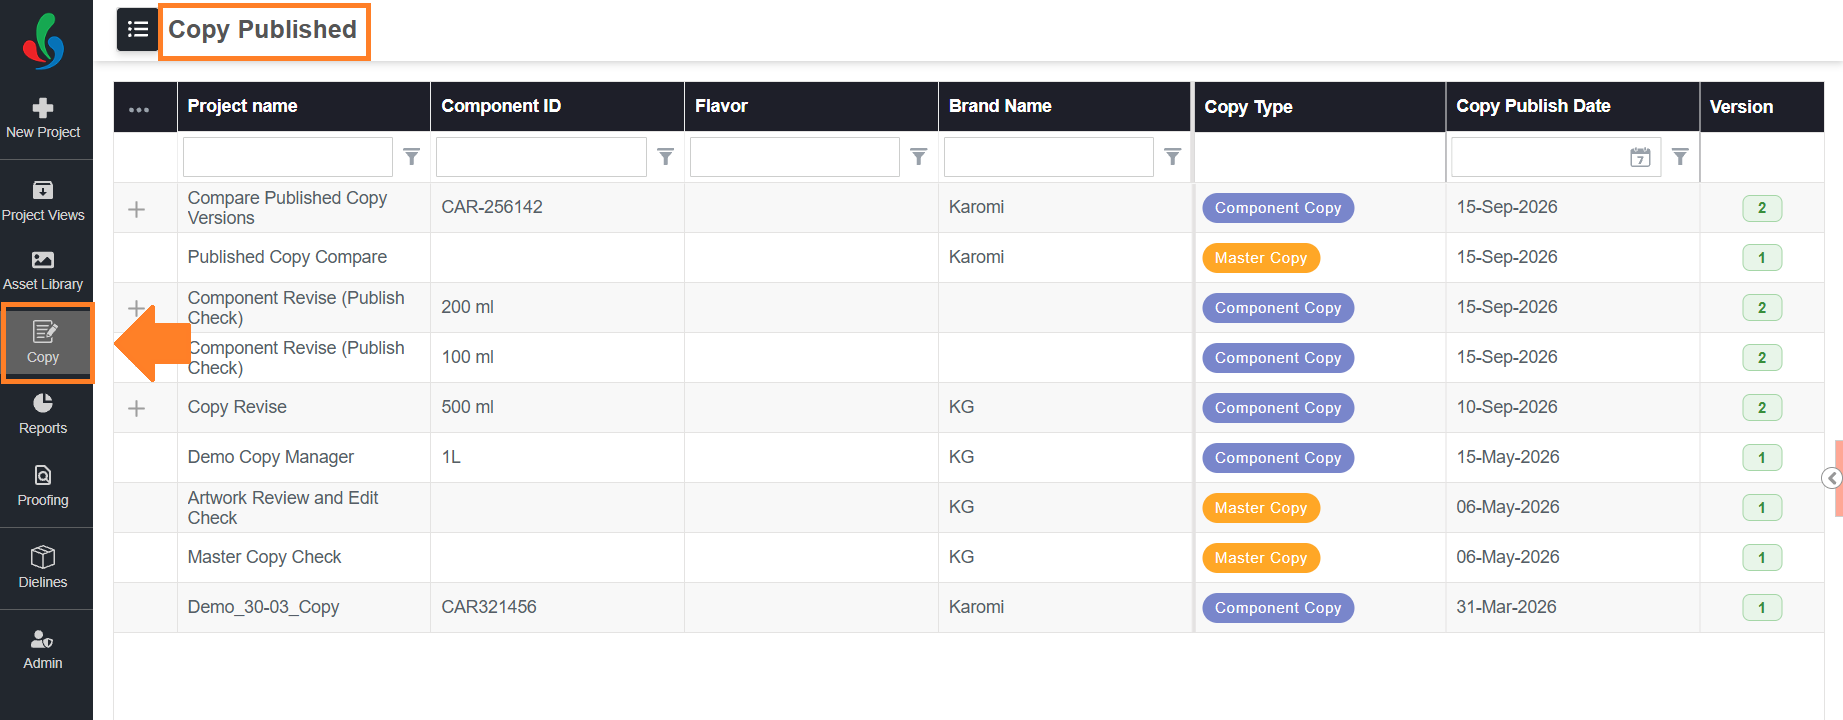
- If the copy is published, hover over the Copy module, select Published Copy, and then select the required copy.
- If the project is still running, navigate to the Project Views module, open the required project, and then select the Copy tab.
02. Initiate the Compare
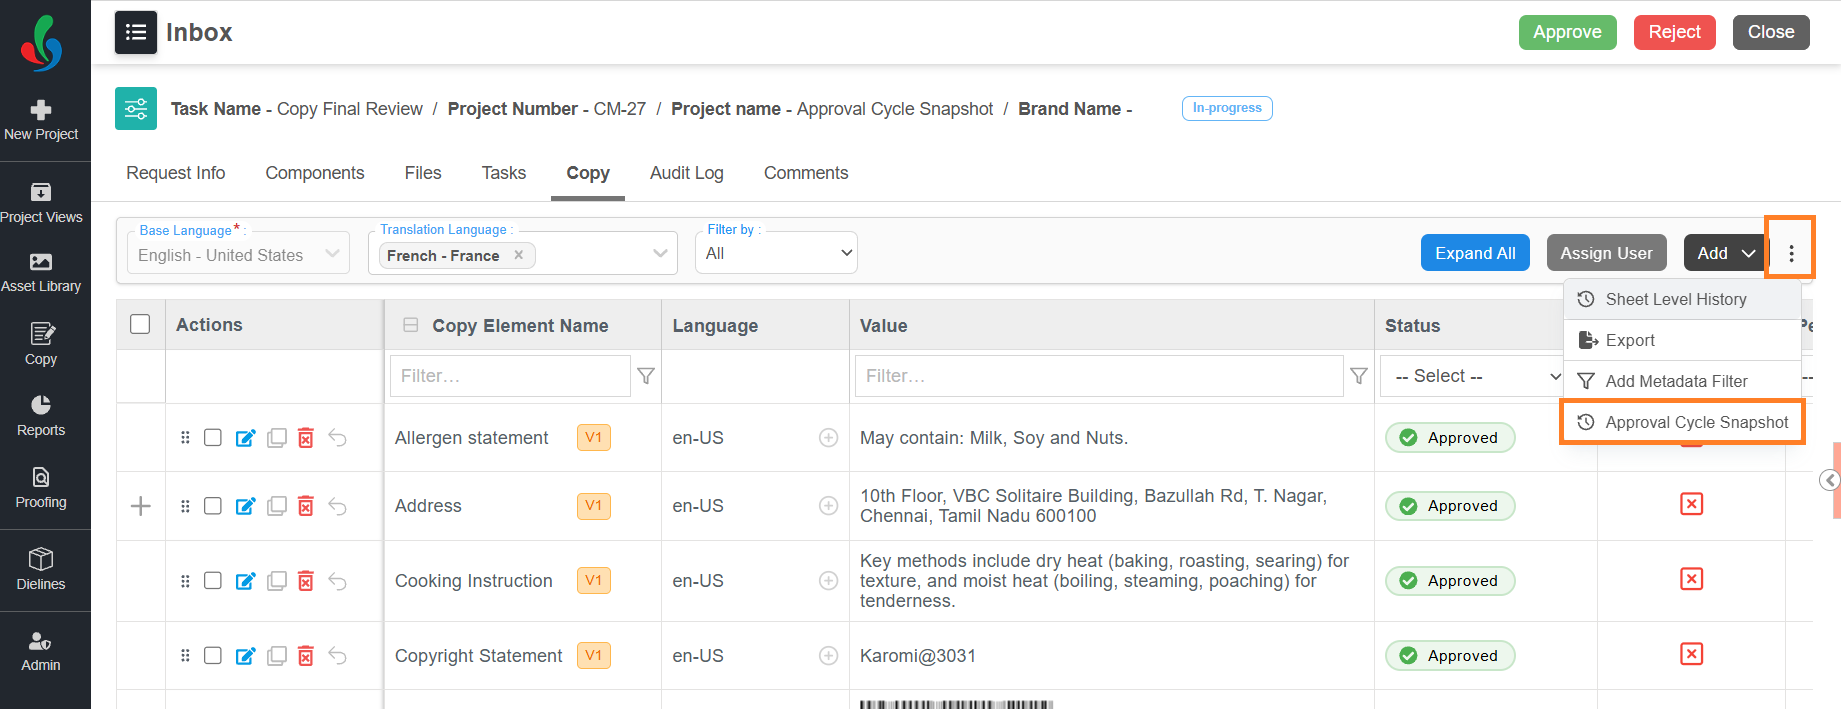
- Select the More Actions (⋮) icon at the top-right of the copy sheet.
- Select Approval Cycle Snapshot.
- If the copy has more than one component, select the required component in the Component drop-down list.
- In the Base cycle drop-down list, select the cycle to compare against.
- In the Compare cycles drop-down list, select the cycle or cycles to compare with the base cycle.
Note: Both cycle drop-down lists show each cycle with its number and the date it was captured, for example Cycle 2 — 18-Sep-2026. The cycles listed are the ones captured for the component you selected.
- Select Compare.



03. Read the Comparison
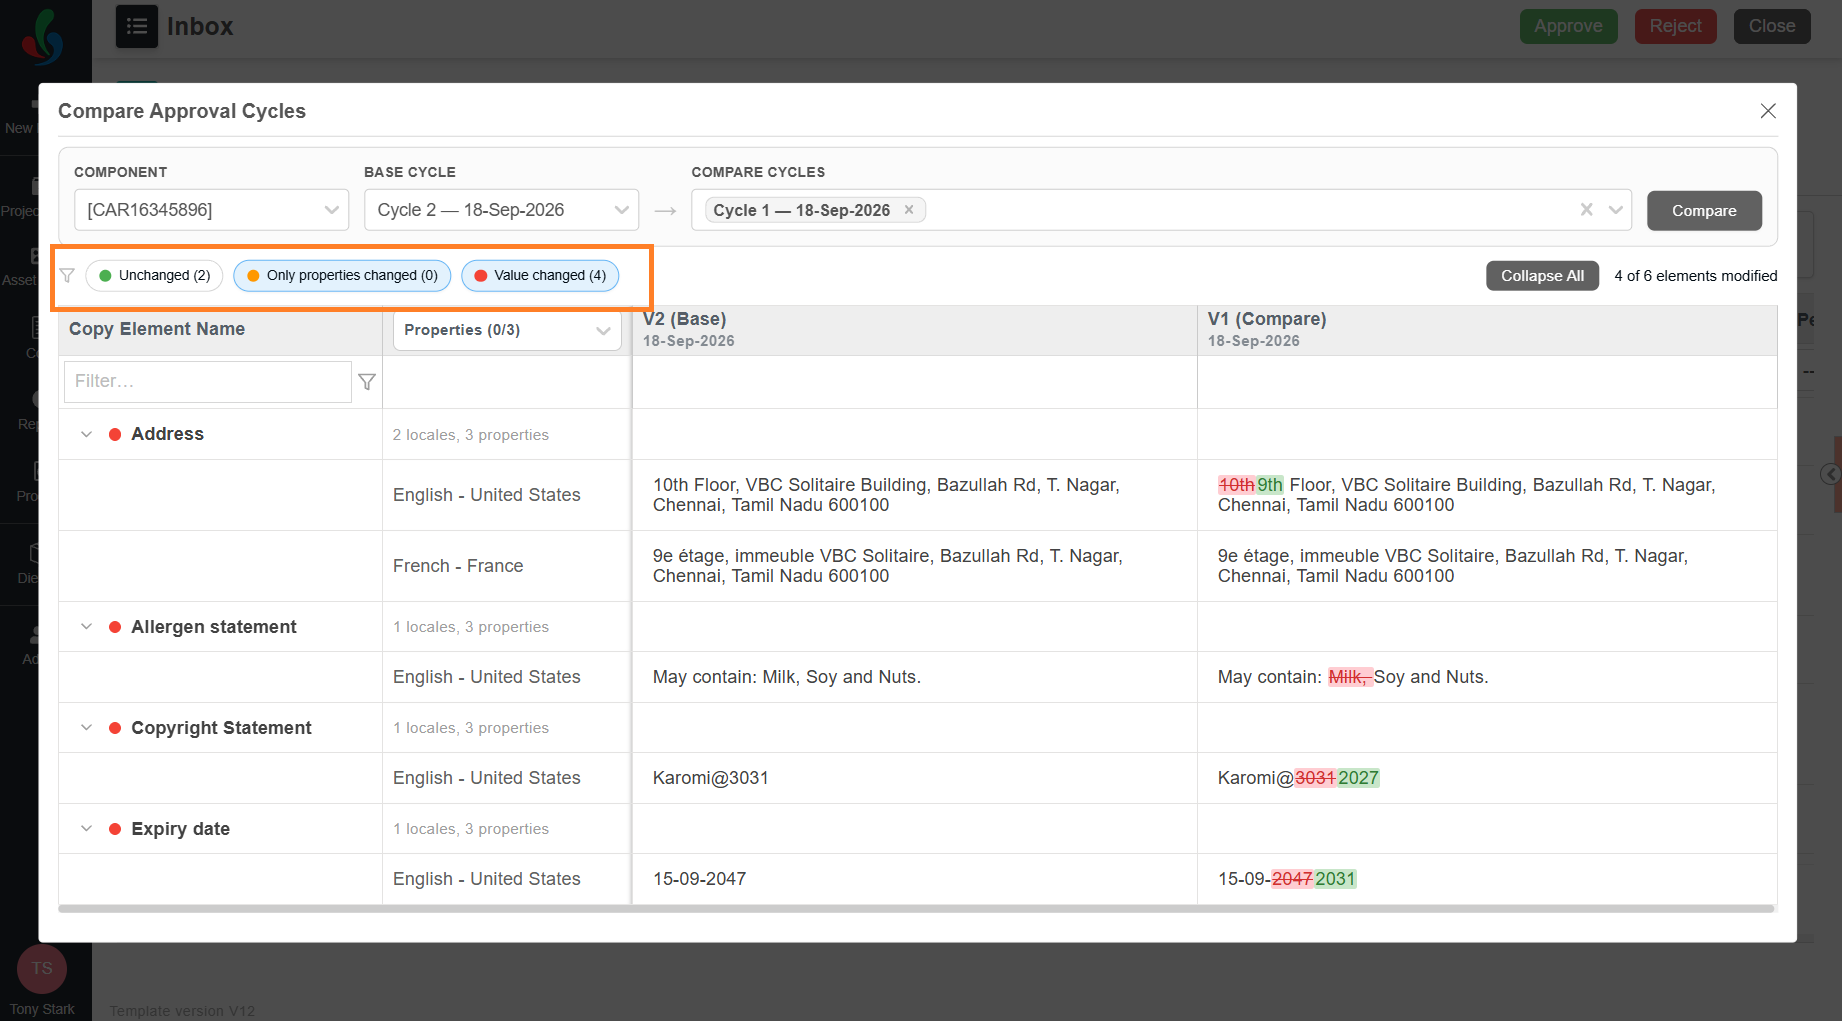
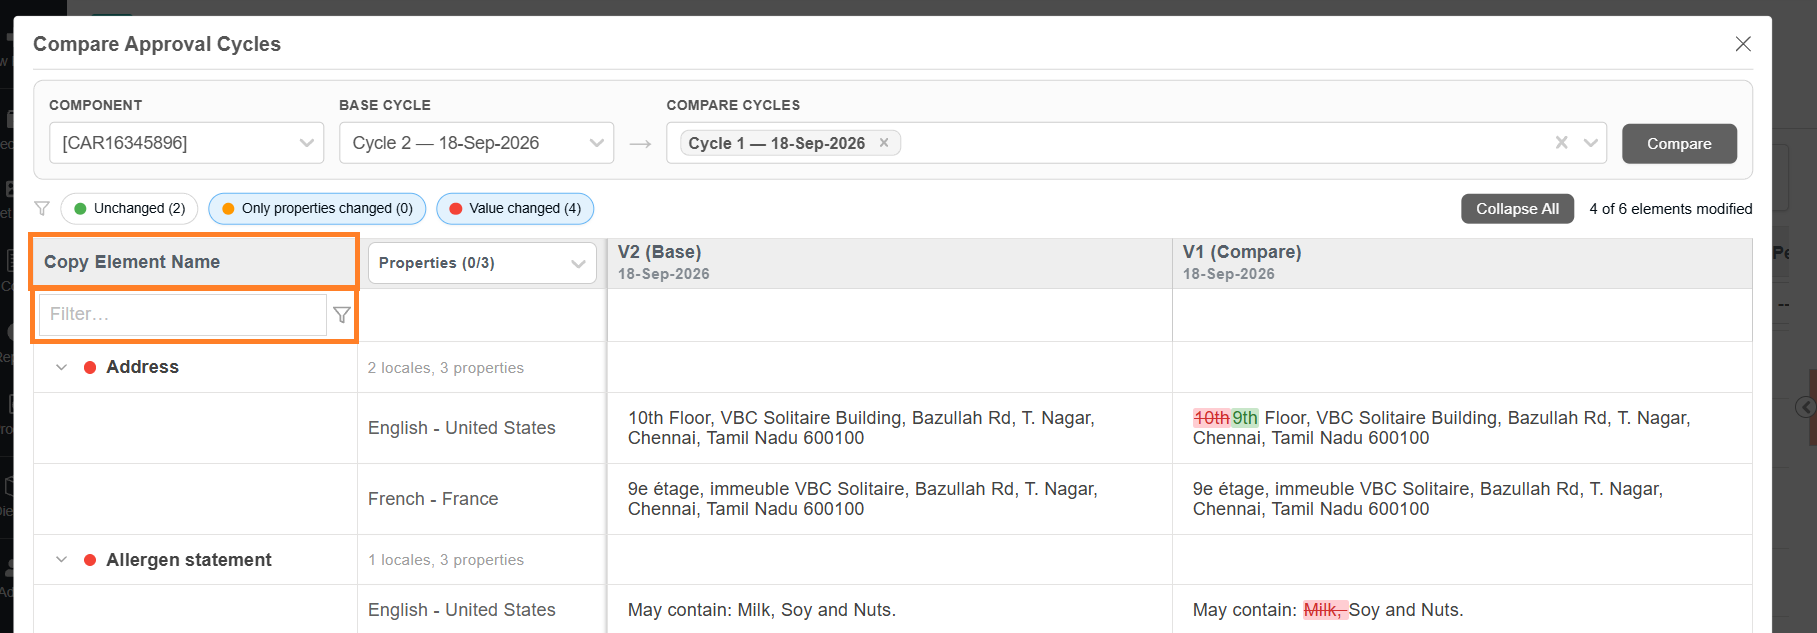
The comparison opens as a grid with one row for each copy element. The base cycle has its own column, headed (Base), and each cycle you selected has a column headed (Compare). Each column also shows the date that cycle was captured. The differences are highlighted in the compare columns.
| Highlight | Meaning |
|---|---|
| Green | Content added in this cycle. |
| Red with a strikethrough | Content removed in this cycle. |
| Red followed by green | Content changed — the old value, then the new value. |
| Not in this version | The copy element does not exist in that cycle. |
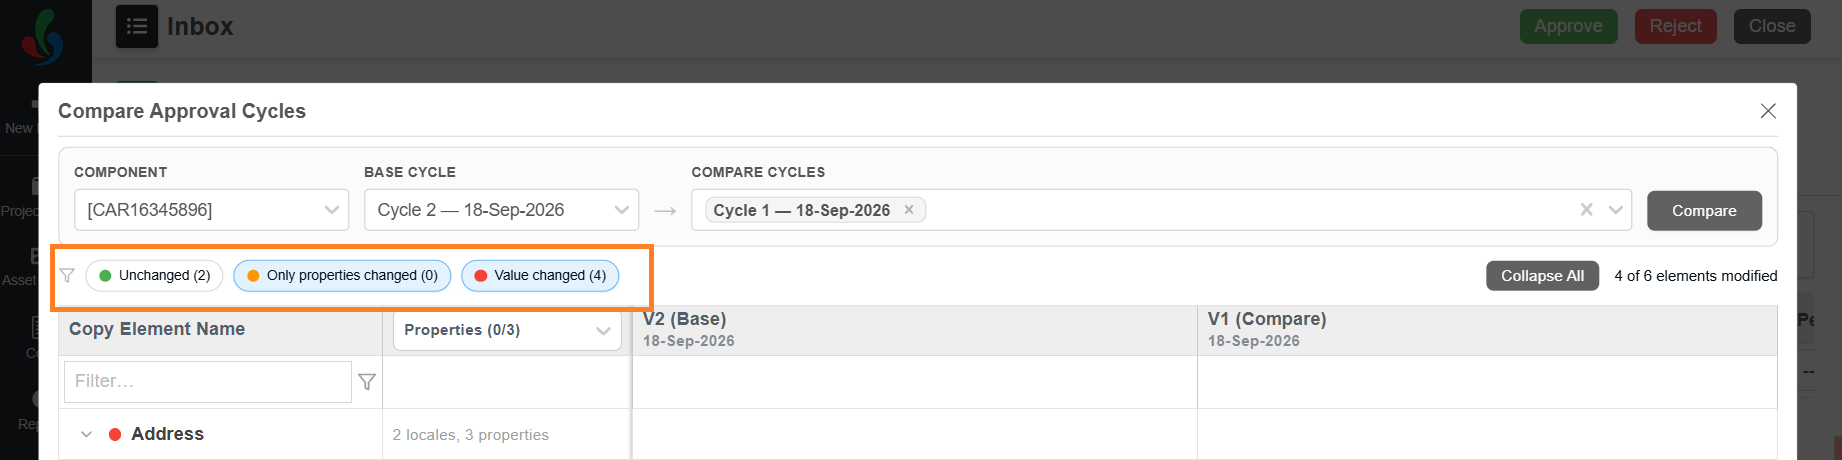
The summary at the top of the comparison counts the copy elements in each state:
- Unchanged — the value and the properties are the same.
- Only properties changed — the value is the same, but the Priority, Copy Category, or Instruction changed.
- Value changed — the copy value itself changed.
It also shows how many copy elements changed in total, for example 4 of 6 elements modified.
04. Narrow the Comparison
The comparison lists every copy element on the copy sheet, whether it changed or not, and a copy sheet for a full pack can run to dozens of them. The controls above and inside the grid cut that list down to what you are checking.
None of them changes the copy or the snapshots. They change only what the grid shows, so you can select and clear them as often as you need, and they apply together — filter by state and by name at the same time to answer a question about one element in one cycle.
- If required, show only the copy elements in one state. Select Unchanged, Only properties changed, or Value changed above the grid. Each one shows its own count, so they also tell you the size of the change before you open anything: one copy element with a changed value after a rejection is a different review from six.
- If required, find a copy element by name. Enter the name in the Filter box under the Copy Element Name column heading. The grid keeps only the copy elements whose names match. This is the quickest way to answer a question about one element — whether the expiry date changed after the rejection, for example — without reading the whole comparison.
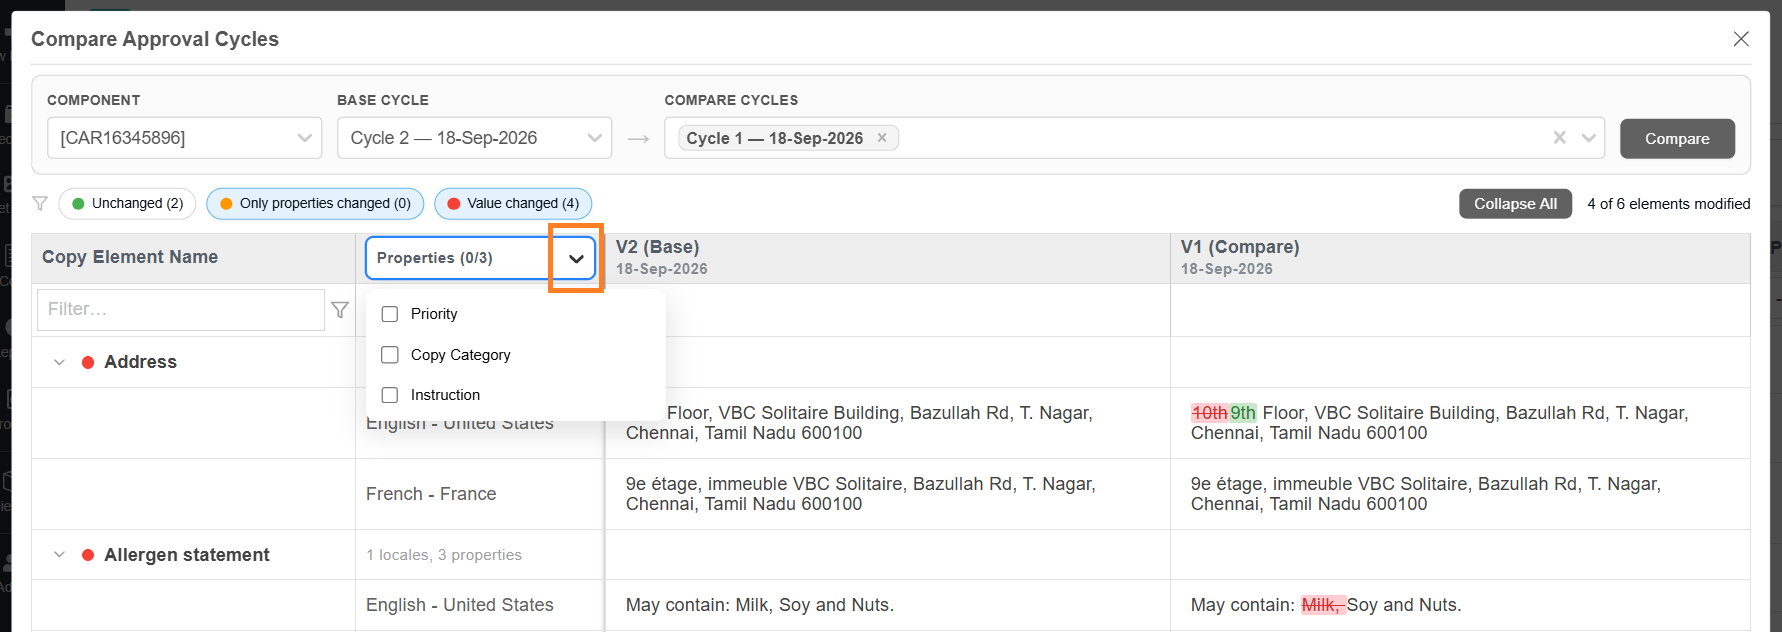
- If required, choose which properties are compared. Select the properties you need from the Properties drop-down list in the column heading. The three properties are Priority, Copy Category, and Instruction, and the count beside the label shows how many of them are selected. All three are compared when none is selected. Comparing fewer properties keeps the grid focused on the copy text when a change to an instruction or a category is not what you are reviewing.
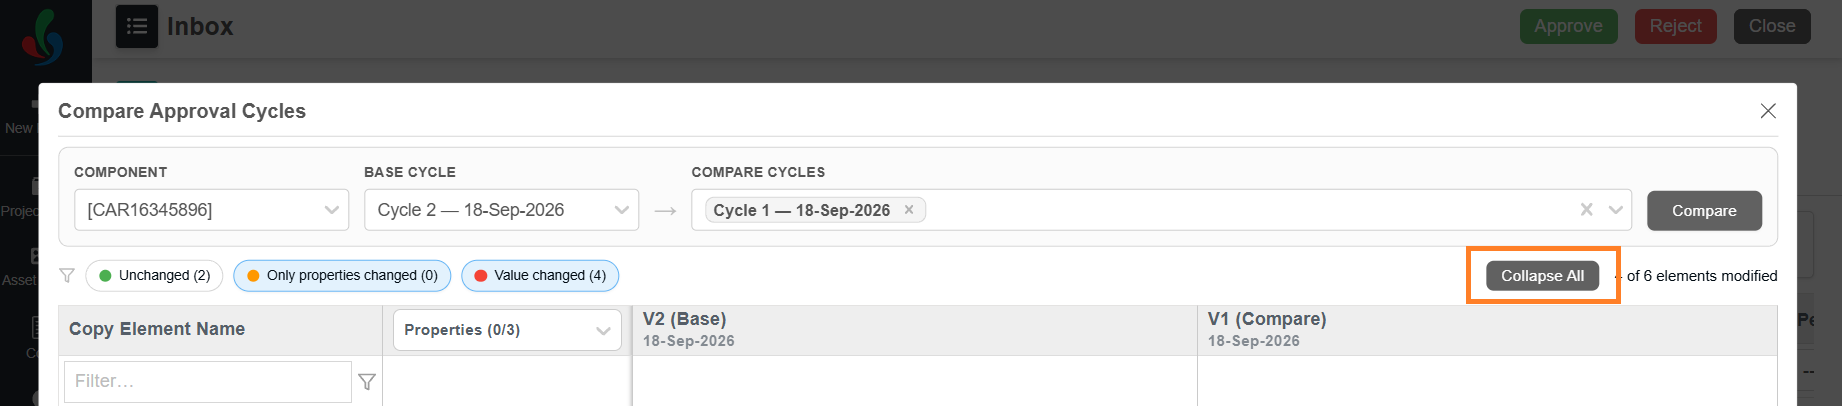
- If required, close the copy elements you expanded. Select Collapse All. Expanding a copy element shows its value in each language, which is where a translation-only change becomes visible. Once several are open the grid is long, and Collapse All returns it to one row per copy element in a single action.
Related Articles
- Revise a Published Copy and Track Versions
- Use Bulk Actions on a Copy Sheet
- Manage Copy Through Project Workflows
- Compare Published Copy Versions