Change Colors in an Artwork
Designers often need to change a color in an artwork: brand guidelines change, a regulation requires a different color for a warning, a printer asks for a print-safe color, or a designer used the wrong shade. Changing every object by hand is slow, and a subtle shade is easy to miss.
With Color Map, designers can replace a color in an artwork in Adobe Illustrator in one action. They choose a source color (a color used in the artwork) and a destination color (the color that replaces it). The pair is a mapping. The destination color can be a color already in the artwork, or a custom swatch that they create in Color Map.
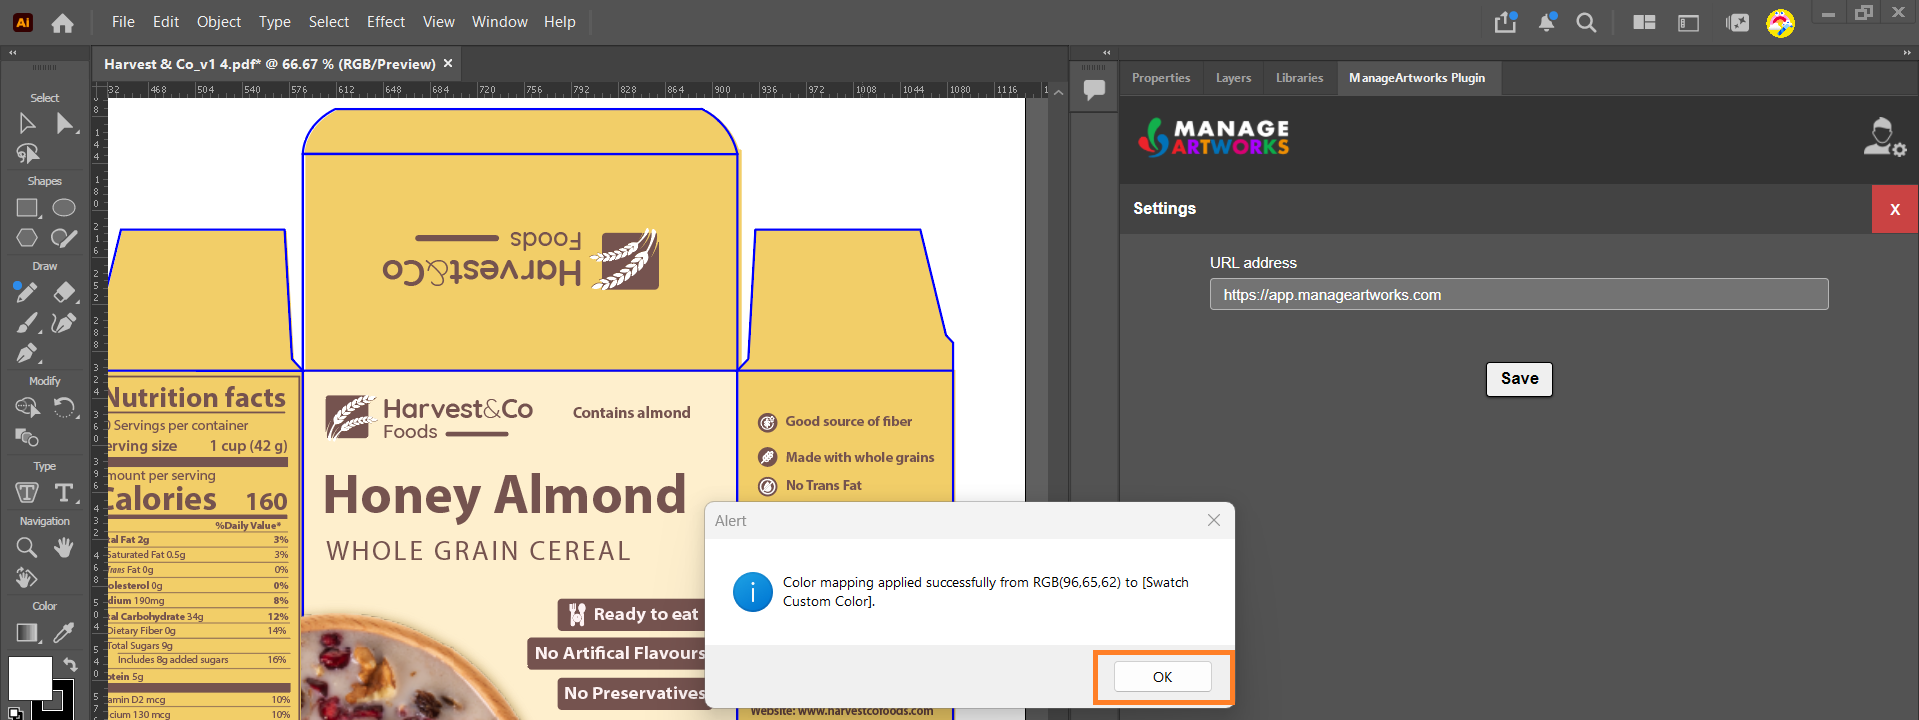
When the mapping is applied, the source color is replaced everywhere in the artwork.
The plugin finds the colors in the artwork and groups them by type:
| Color type | What it is | Best for |
|---|---|---|
| Spot | A single premixed ink, printed on its own plate. Includes special inks such as metallic, neon or varnish. | Brand colors and special colors that must match exactly. |
| Pantone | A spot color from the Pantone Matching System, identified by a code such as Pantone 186 C (C for coated paper, U for uncoated). | Brand colors that must match across designers, printers and manufacturers. |
| Process | A color made by layering cyan, magenta, yellow and black (CMYK) ink. | Photos and complex graphics. A process color cannot always match a vibrant brand color exactly. |
Note:
|

01. Open Color Map
- Make sure that the artwork you want to change is open and active in Illustrator. If several artworks are open, only the active one is changed.
Note: If you switch to another artwork while Color Map is open, the color lists do not refresh. Close Color Map and open it again to load the colors of the active artwork. - Open Color Map:
- If you are not signed in to the plugin:
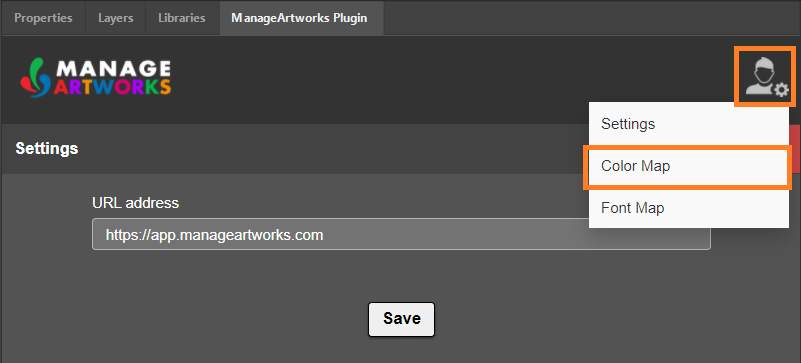
- On the welcome page, select the Settings icon in the upper-right corner of the panel. The Settings page opens.
- Hover over the Settings icon again, then select Color Map.
- On the welcome page, select the Settings icon in the upper-right corner of the panel. The Settings page opens.
- If you are signed in, hover over the Settings icon in the upper-right corner of the panel, then select Color Map.
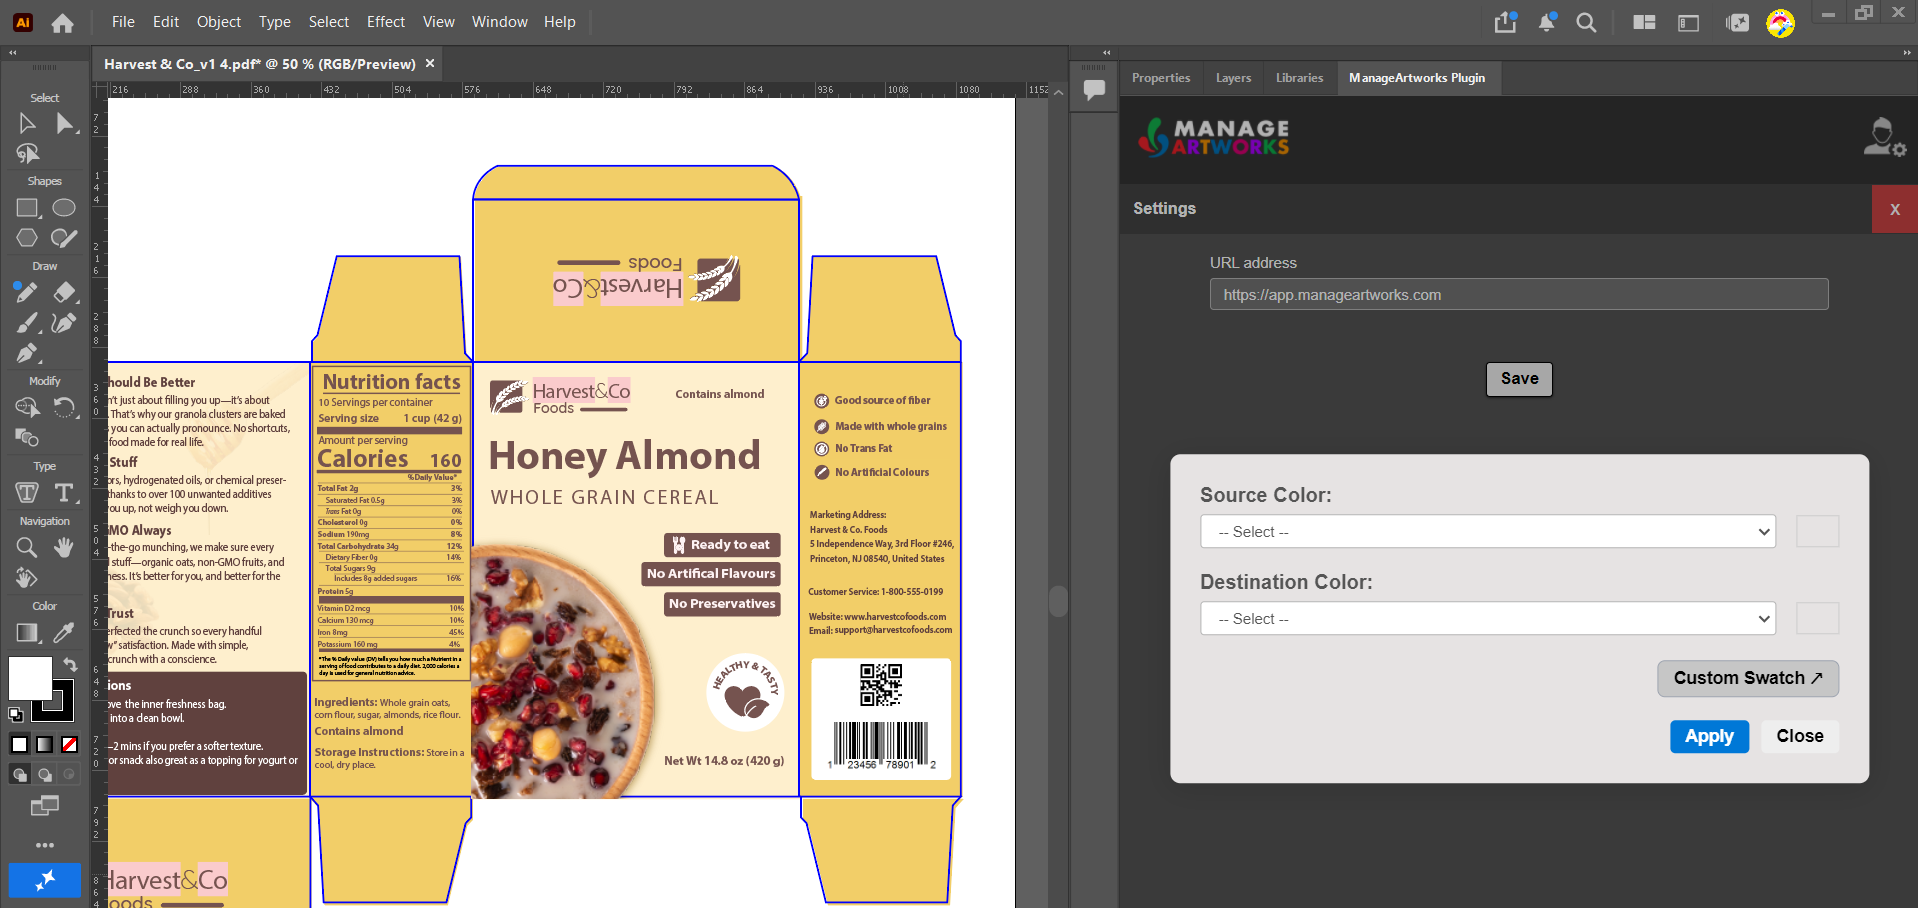
- The Color Map dialog box opens over the Settings page.
- If you are not signed in to the plugin:

02. Choose the Colors
 | Note: You can map one color at a time. To replace another color, apply this mapping first, then repeat stages 02 and 03. |
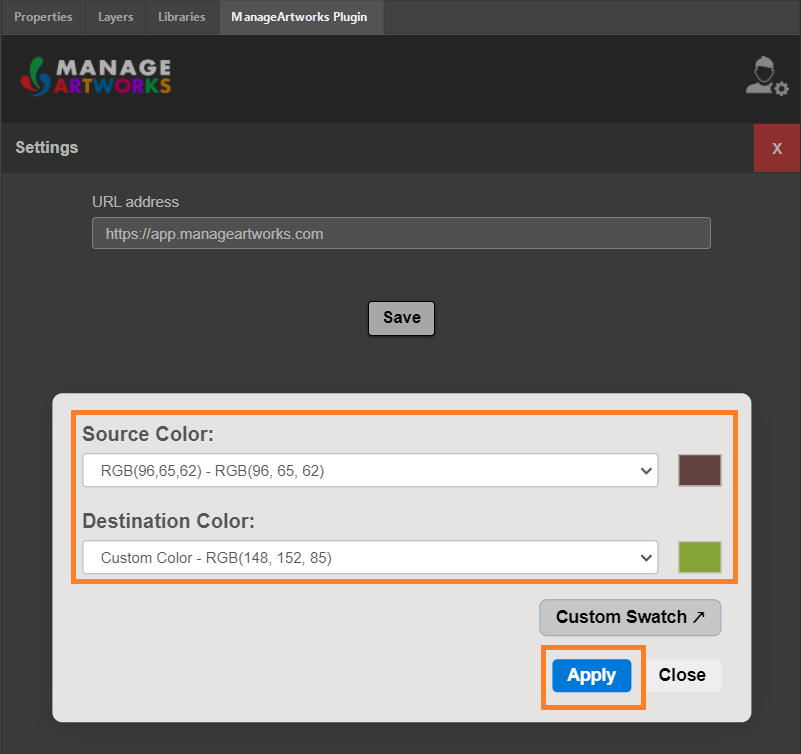
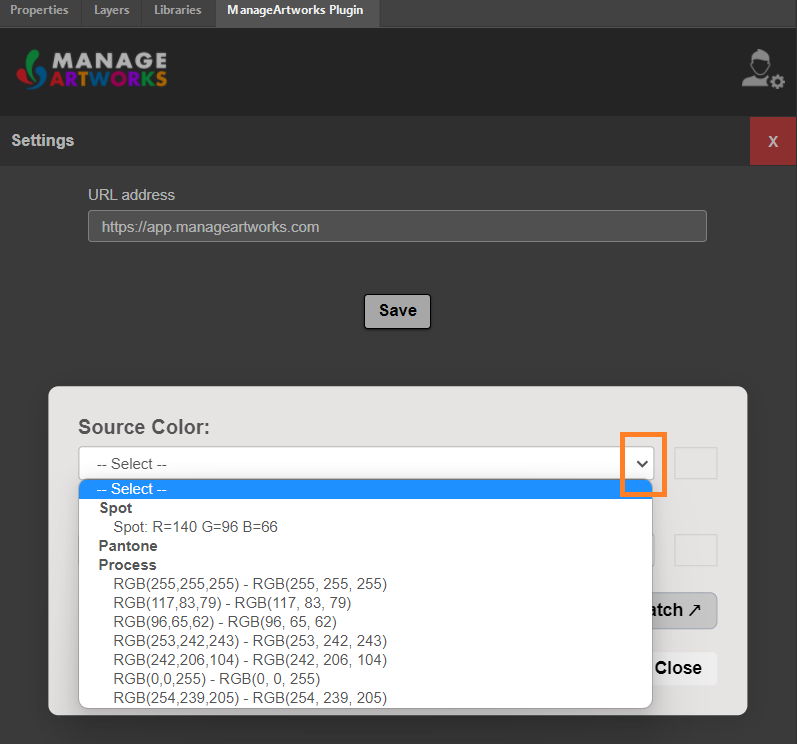
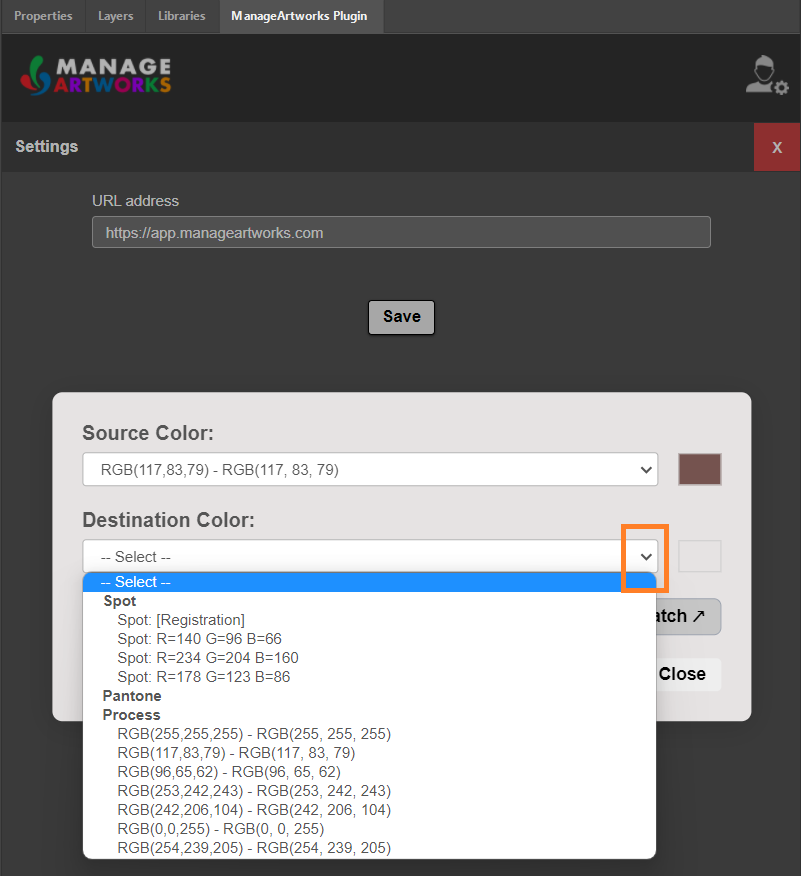
- In the Source Color drop-down list, select the color you want to replace. The list shows the colors used in the artwork, under the Spot, Pantone and Process headings.
- In the Destination Color drop-down list, select the replacement color. The list shows the colors already used in the artwork. If the color you need is not in the list, add it as a custom swatch, then select it in the Destination Color drop-down list. See Add a Custom Swatch (If Required) below.
Add a Custom Swatch (If Required)
- Select Custom Swatch. A dialog box opens for the new swatch.
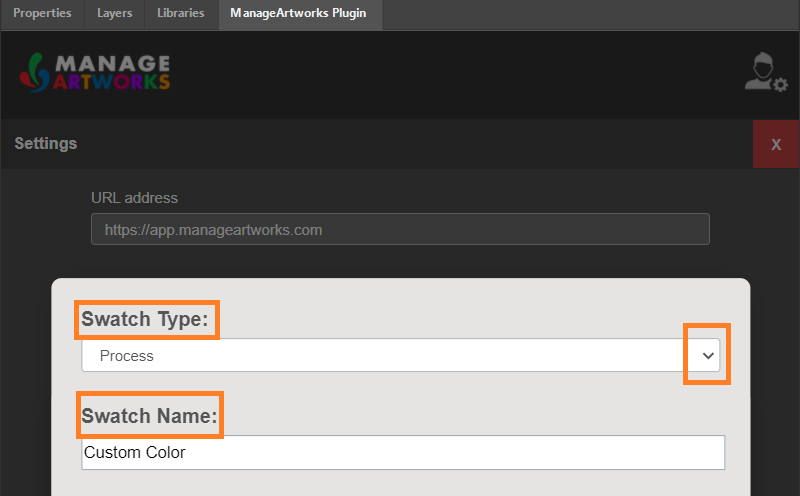
- In the Swatch Type drop-down list, select the type of color:
- Process – Defines CMYK process colors.
- Spot – Defines a premixed or special ink color.
Note: The method of selecting color values is the same for both swatch types. However, the swatch type determines how the color behaves during output and printing.
- In the Swatch Name field, replace Custom Color with a name for the color.
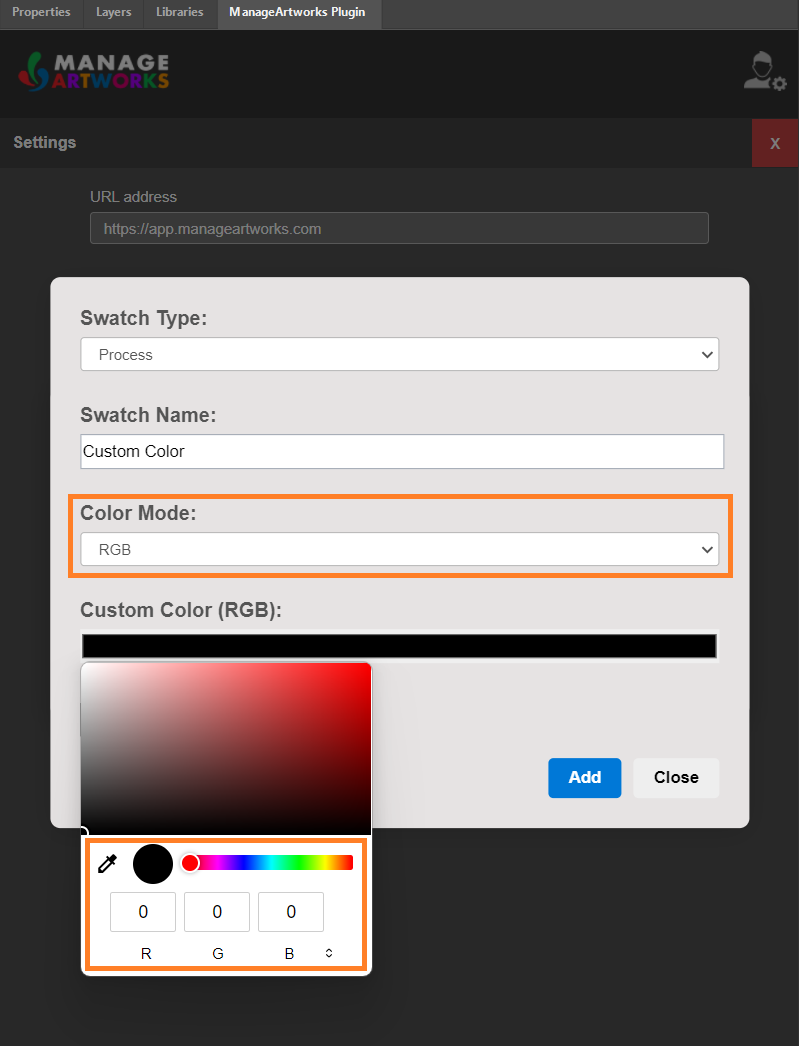
- In the Color Mode drop-down list, select RGB or CMYK, then choose the color:
- If you select RGB:
- Select the Custom Color (RGB) box. A color picker opens.
- Choose the color in any of these ways:
- Select a shade in the color area or drag the hue slider.
- Enter the R, G and B values.
- Select the arrows beside the values to enter HSL or HEX values instead.
- Select the eyedropper icon, then select a color on the screen.
- Select the Custom Color (RGB) box. A color picker opens.
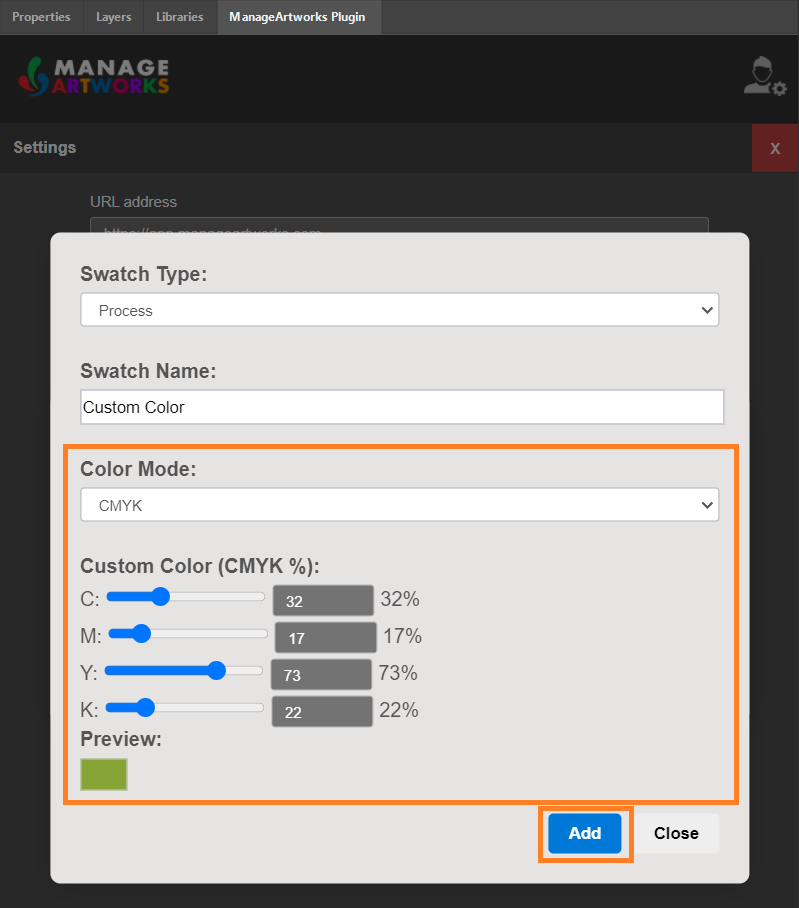
- If you select CMYK, enter the C, M, Y and K values, or drag the sliders. The Preview area shows the color as you choose it.
- If you select RGB:
- Review the color, then select Add. The swatch is added to the Destination Color drop-down list, under Process or Spot. It is also added to the Illustrator Swatches panel.
- In the Destination Color drop-down list, select the newly added custom swatch color.
03. Apply the Mapping
- Make sure that a color is selected in both the Source Color and Destination Color drop-down lists.
- Select Apply. A confirmation message appears.
- Select OK. The source color is replaced everywhere in the artwork.
Note: After the mapping is applied, the replaced color is no longer in the Source Color drop-down list, because the artwork no longer uses it. It stays in the Destination Color drop-down list for reference.