Customize Language
ManageArtworks lets you replace the default wording in the user interface with your organisation's own terminology. If your teams call a project a "job" or a component a "part", you can change the labels to match, so the application reads the way your business speaks.
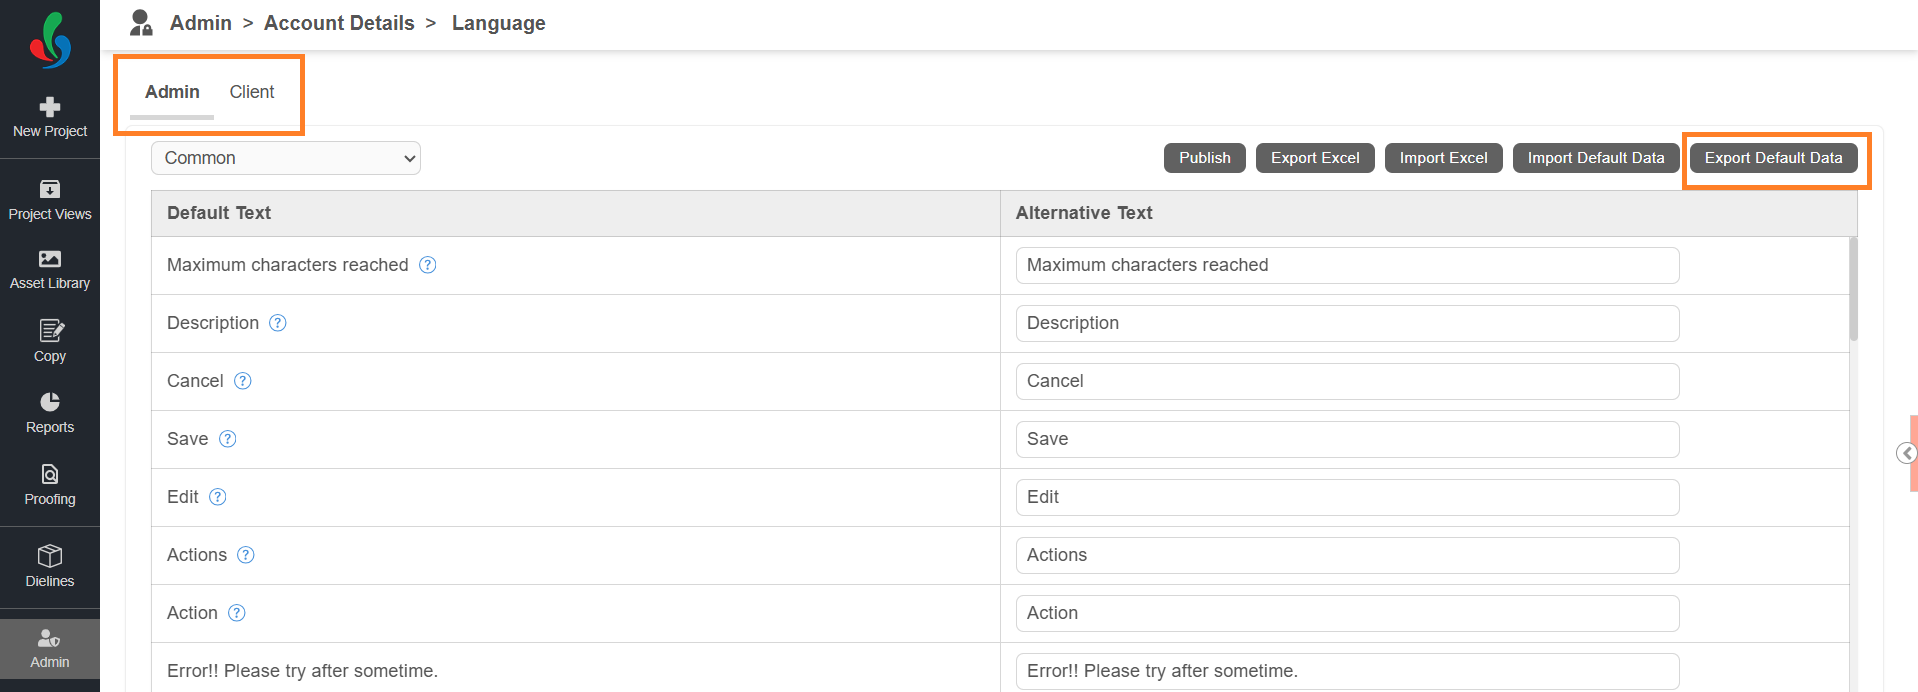
The text is grouped into two tabs:
- Admin — the text administrators see in the Admin module
- Client — the text users see in the rest of the application
The Language option allows you to:
- Replace the default text for individual labels.
- Export the text to Excel, edit it offline, and import it back.
- Publish your changes to all users.
| Note: This changes the wording used in the interface. It does not switch the application to a different language. |

How to Customize the Interface Text
01. Access Language
- Sign in to your ManageArtworks account.
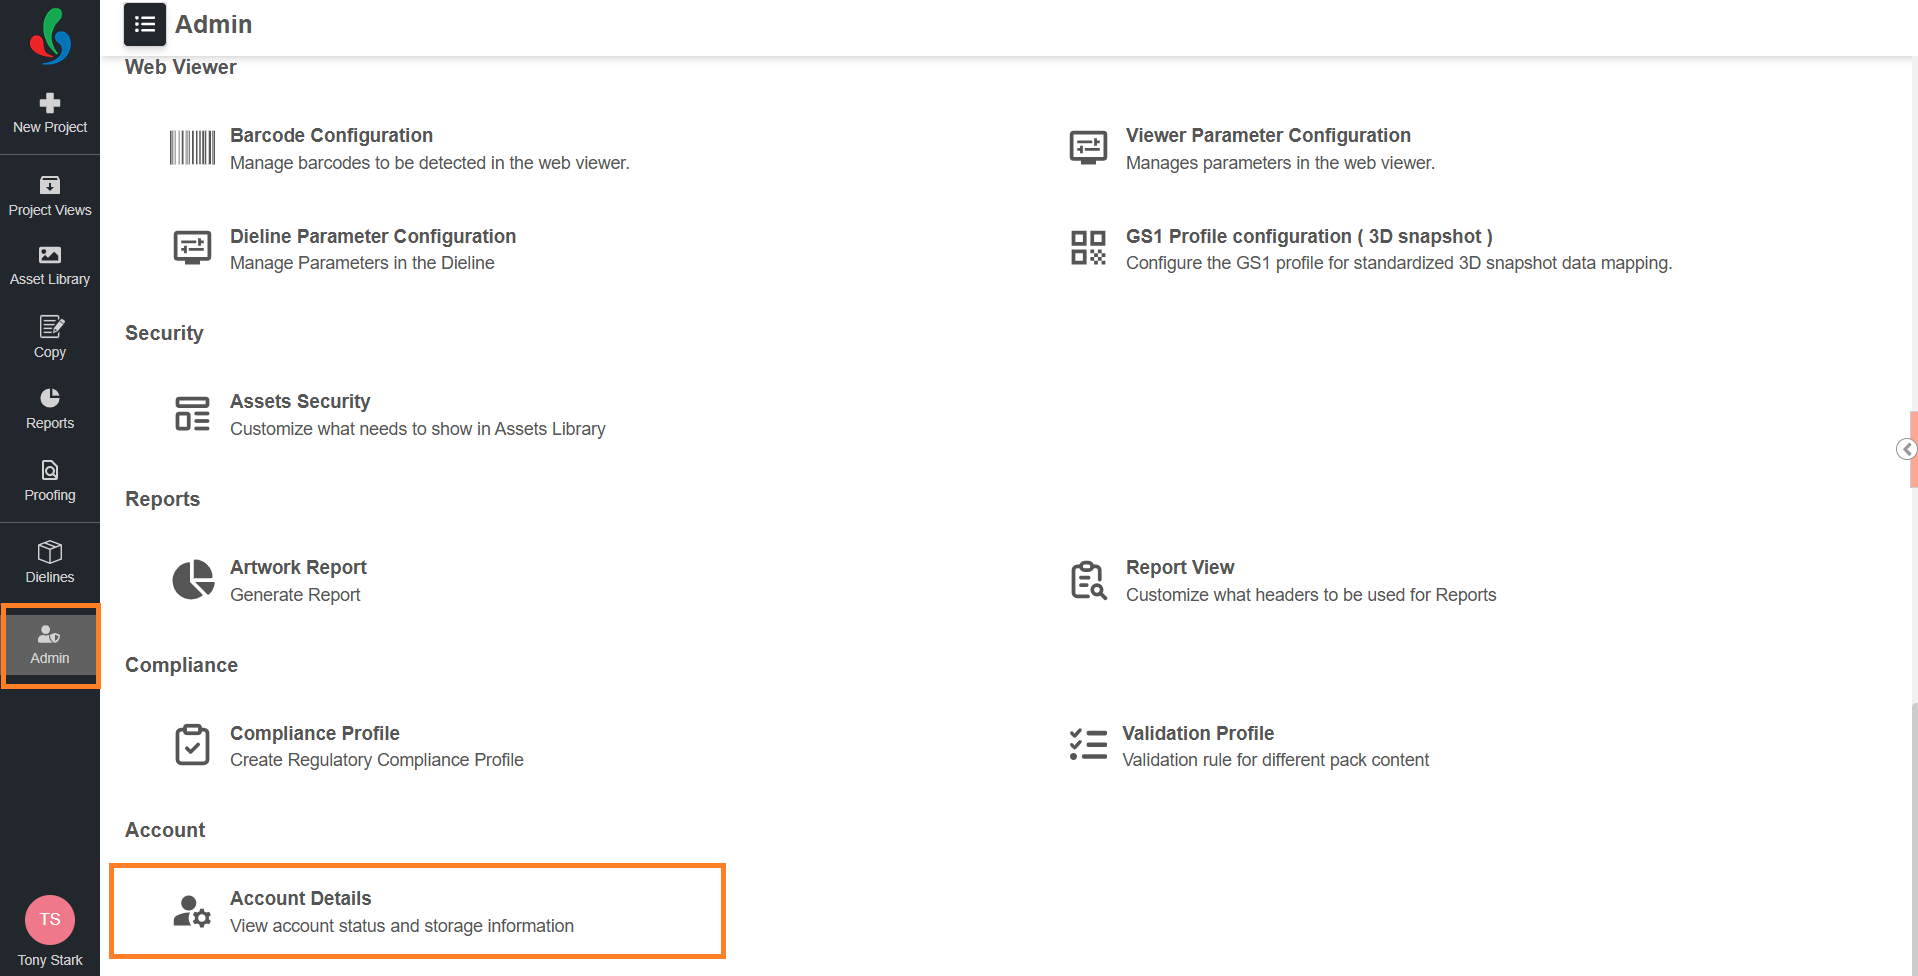
- Navigate to the Admin module.
- Select Account Details.
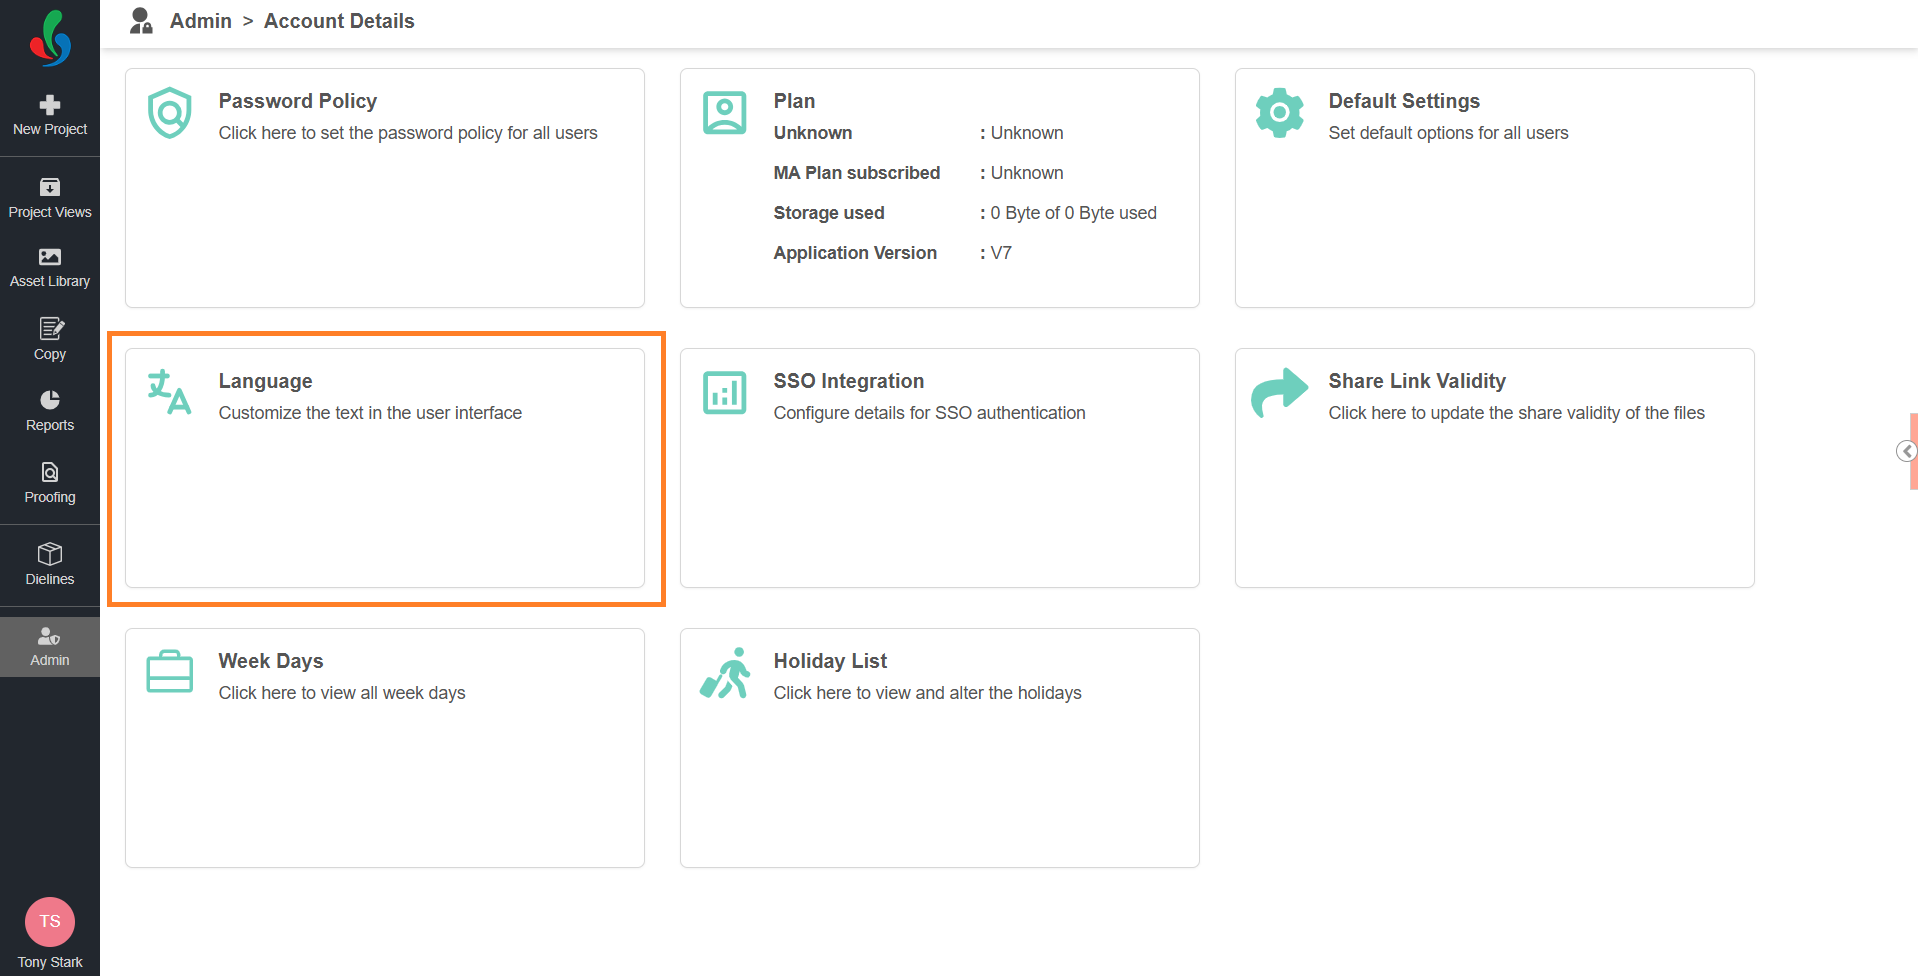
- Select the Language card.
02. Select the Audience and Module
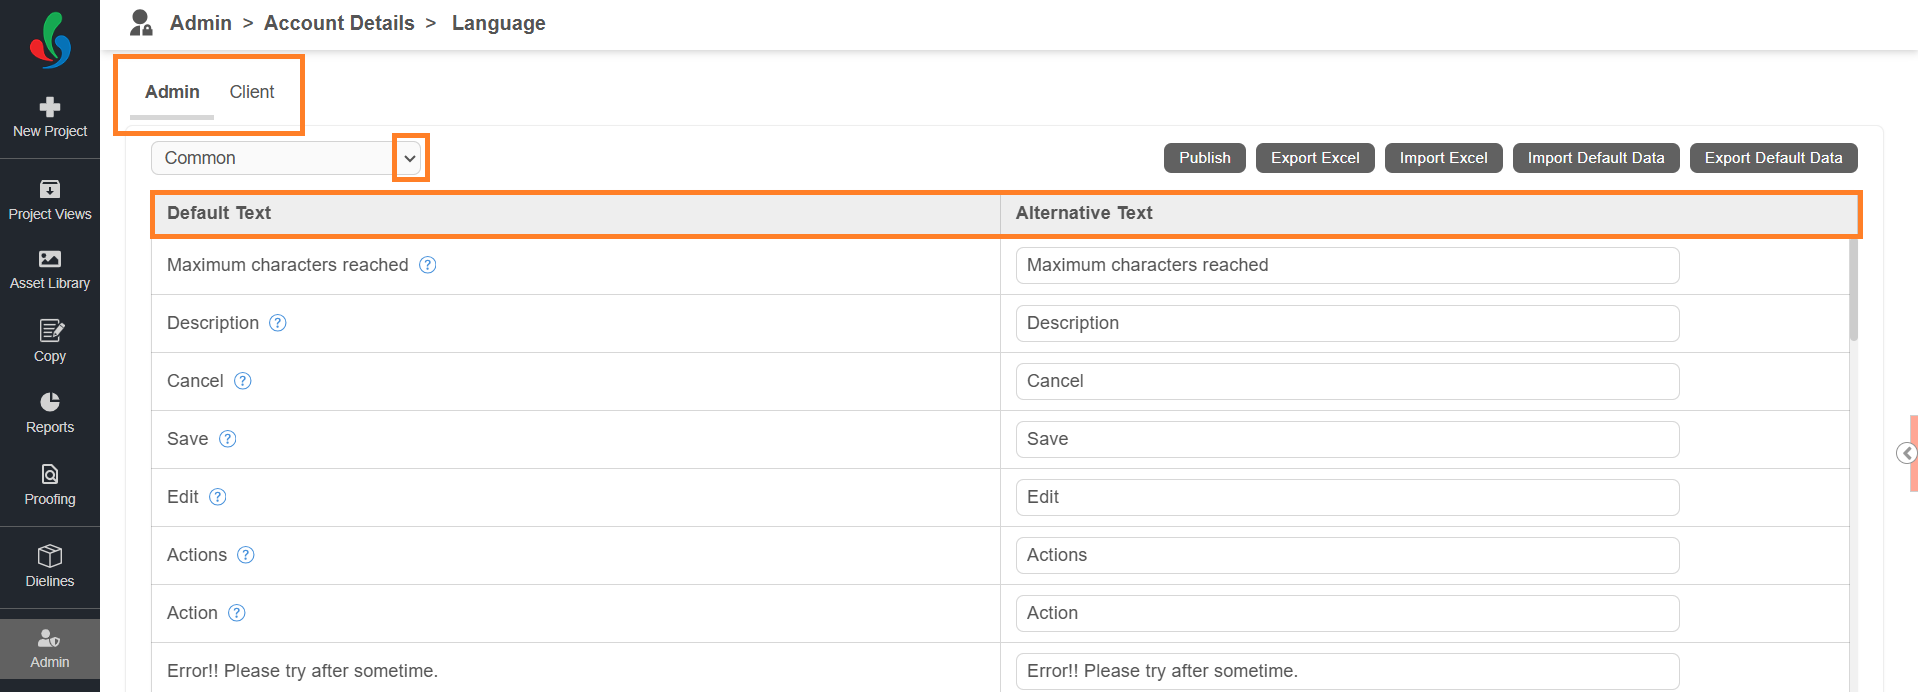
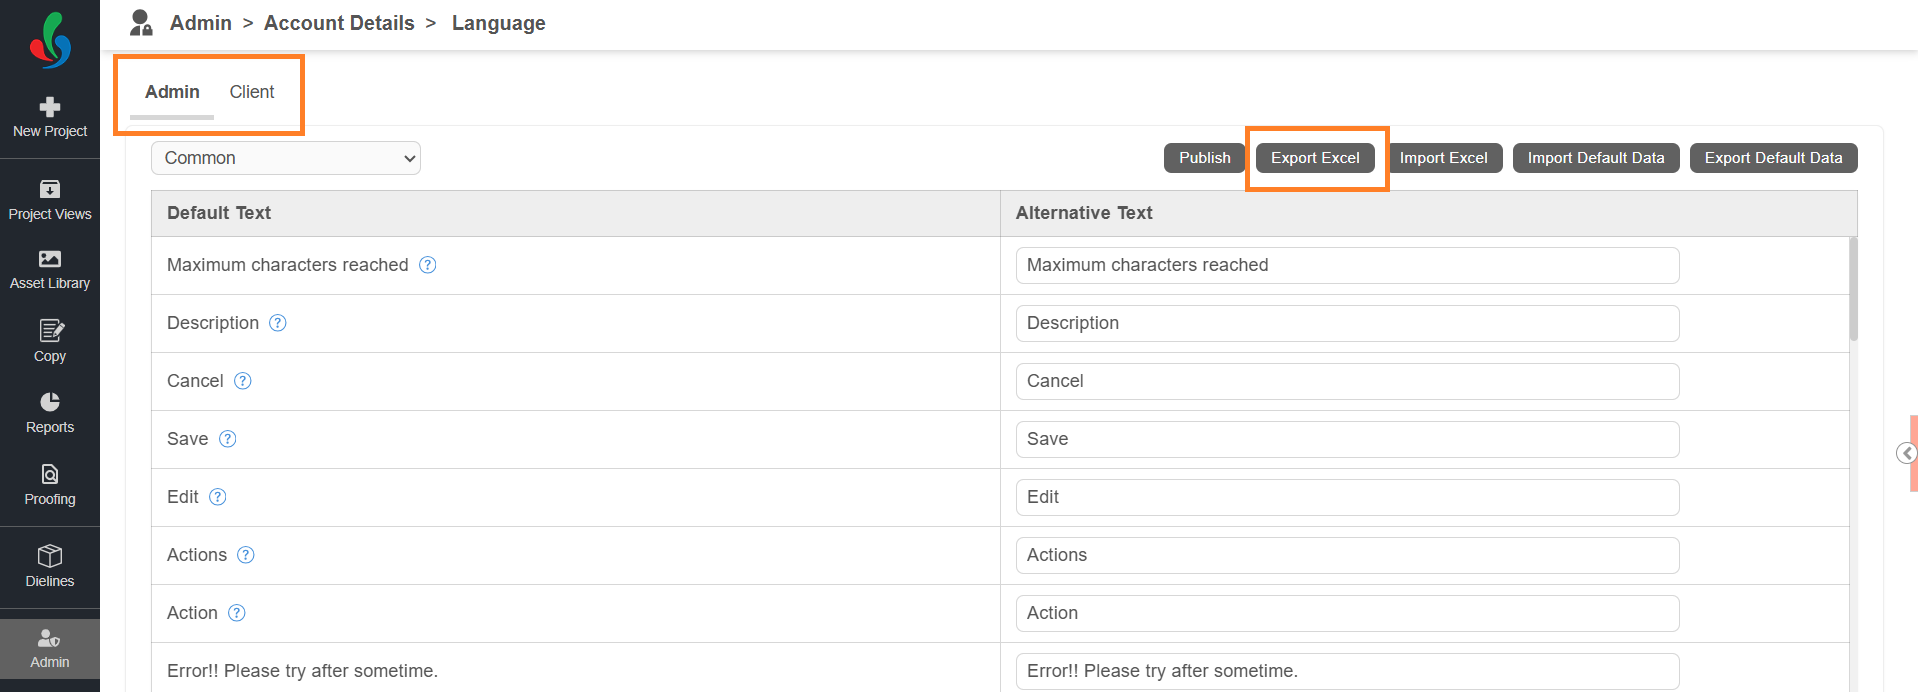
- Select the Admin or Client tab.
- From the module drop-down list, select the module whose text you want to customise — for example, Common, Users, or Workflow Templates.
- The table lists that module's labels, with the Default Text supplied with the application on the left and the editable Alternative Text on the right.
03. Enter Your Wording
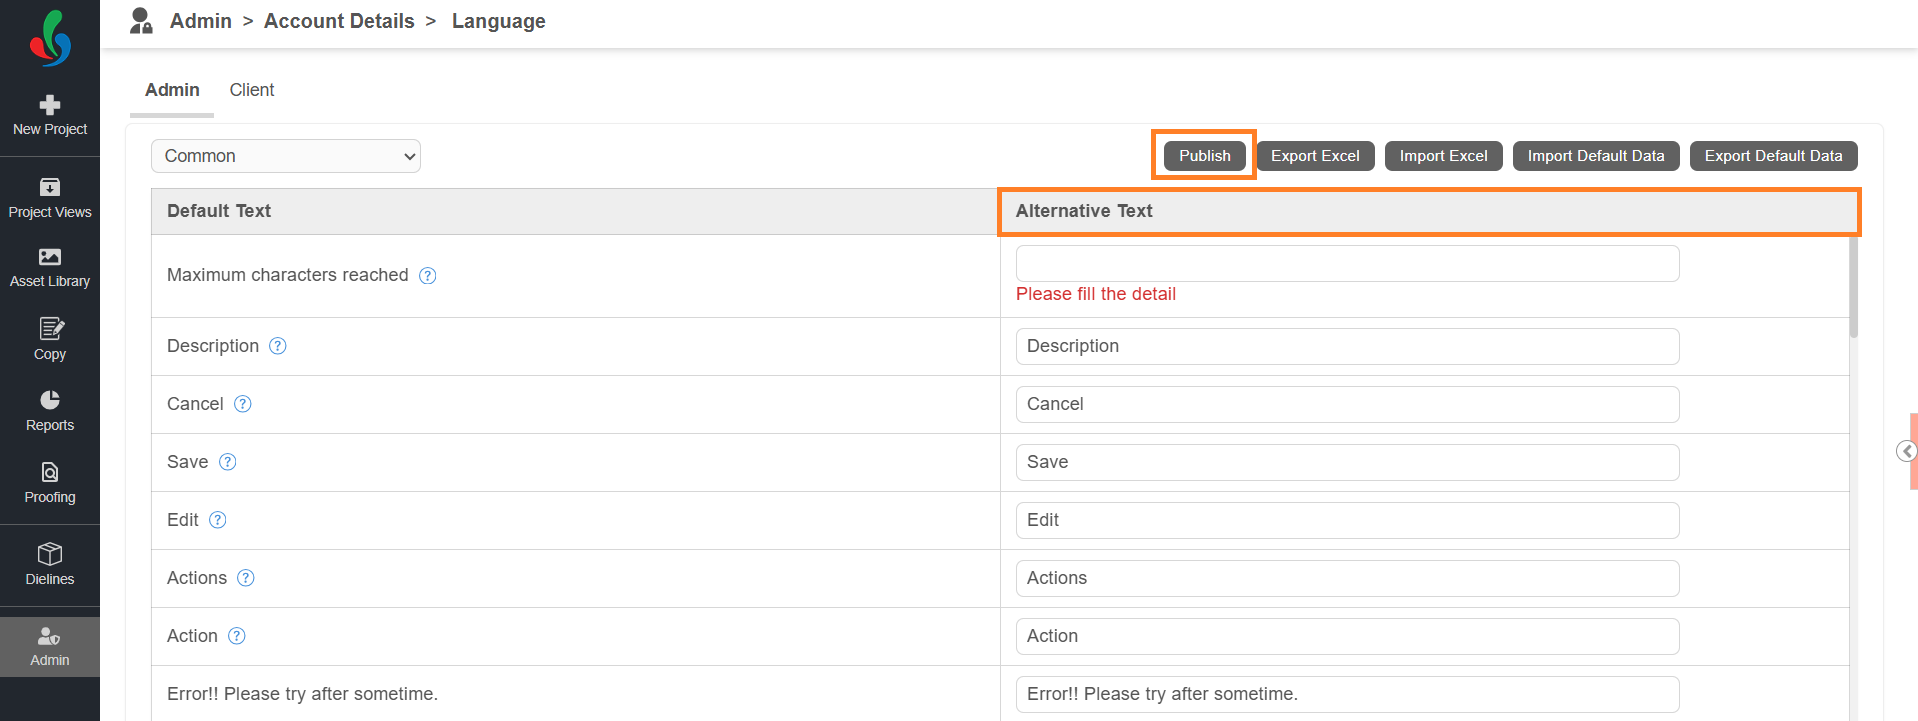
- In the Alternative Text column, replace the wording for each label you want to change. Each field is pre-filled with the default wording, so leave it as it is for any label you do not want to change.
Note: Alternative Text cannot be left empty. - To check where a label is used before you change it, select the help icon next to its default text. A screenshot shows where that label appears in the application.
Note: A screenshot is not available for every label. - Select Publish.
Your wording replaces the default text for all users in your account. Publish applies every change you have made, across all modules and both the Admin and Client tabs.
How to Edit the Text in Excel
For a large number of changes, export the text for every module at once, edit it in Excel, and import it back.
- Select the Admin or Client tab.
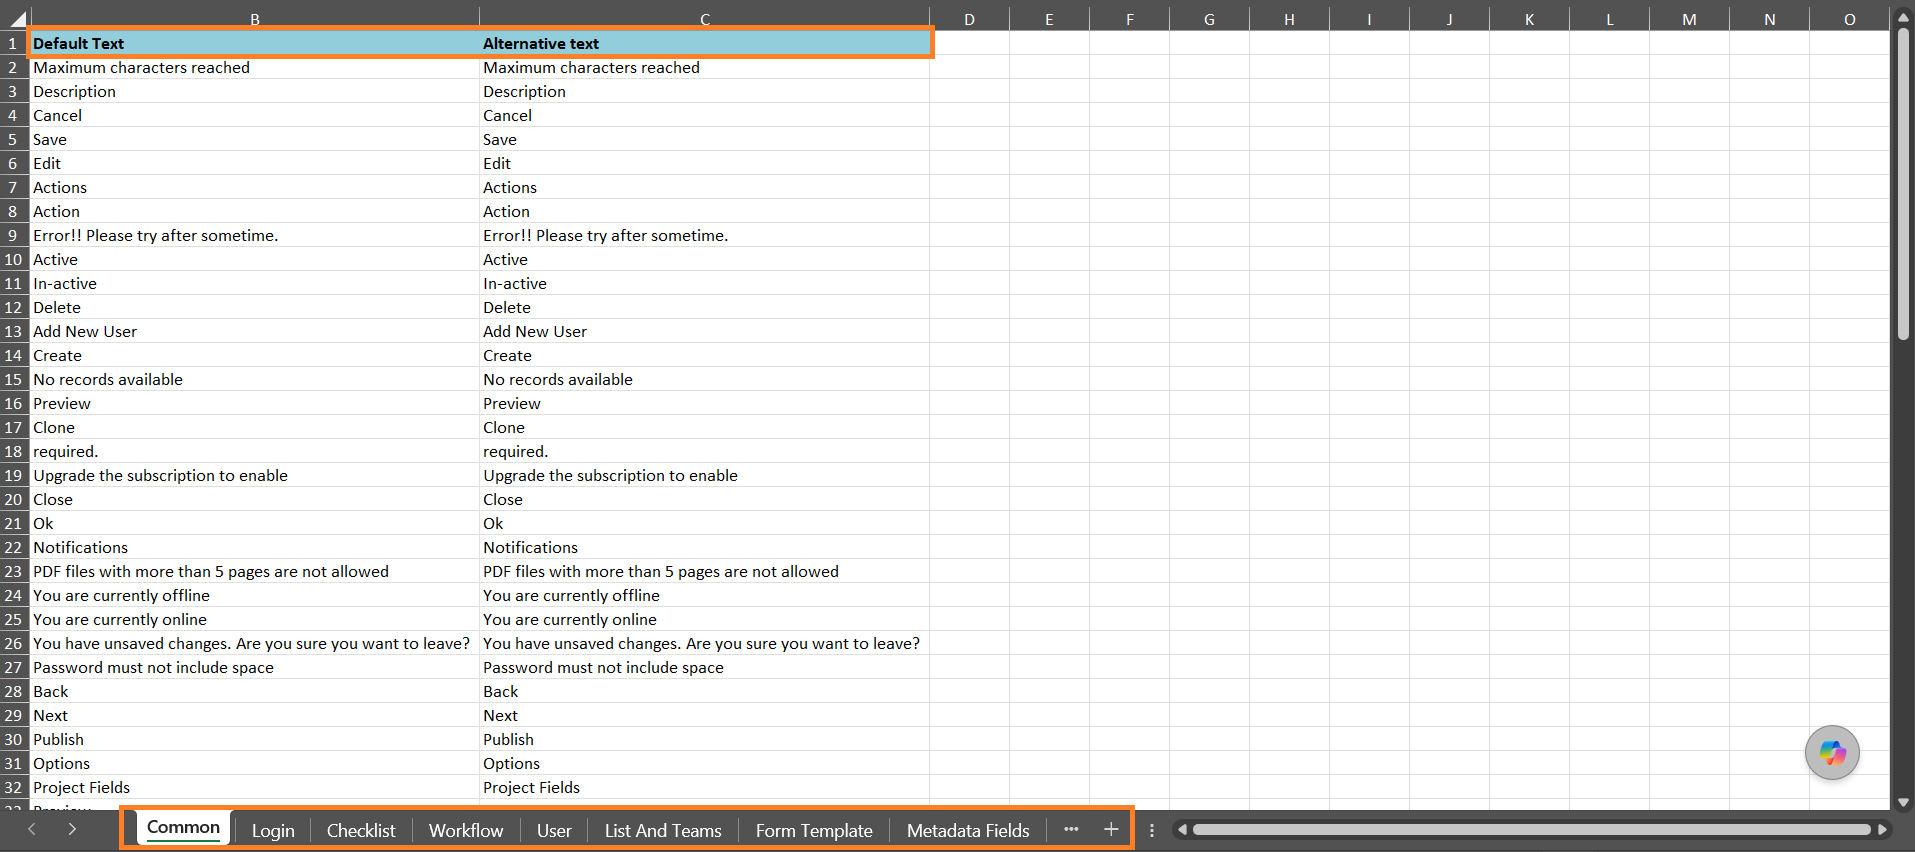
- Select Export Excel. The file contains the labels for all the modules in the selected tab — the Admin tab exports modules such as Common, Login, and Checklists, and the Client tab exports modules such as Asset Library and Workflow Templates.
- Enter your wording in the Alternative text column and save the file.
Note: Do not change the Default Text column, and do not leave an Alternative text cell empty. Each sheet also contains a hidden Key column, which the system uses to match your wording to the correct label. You can unhide it, but do not change its values.
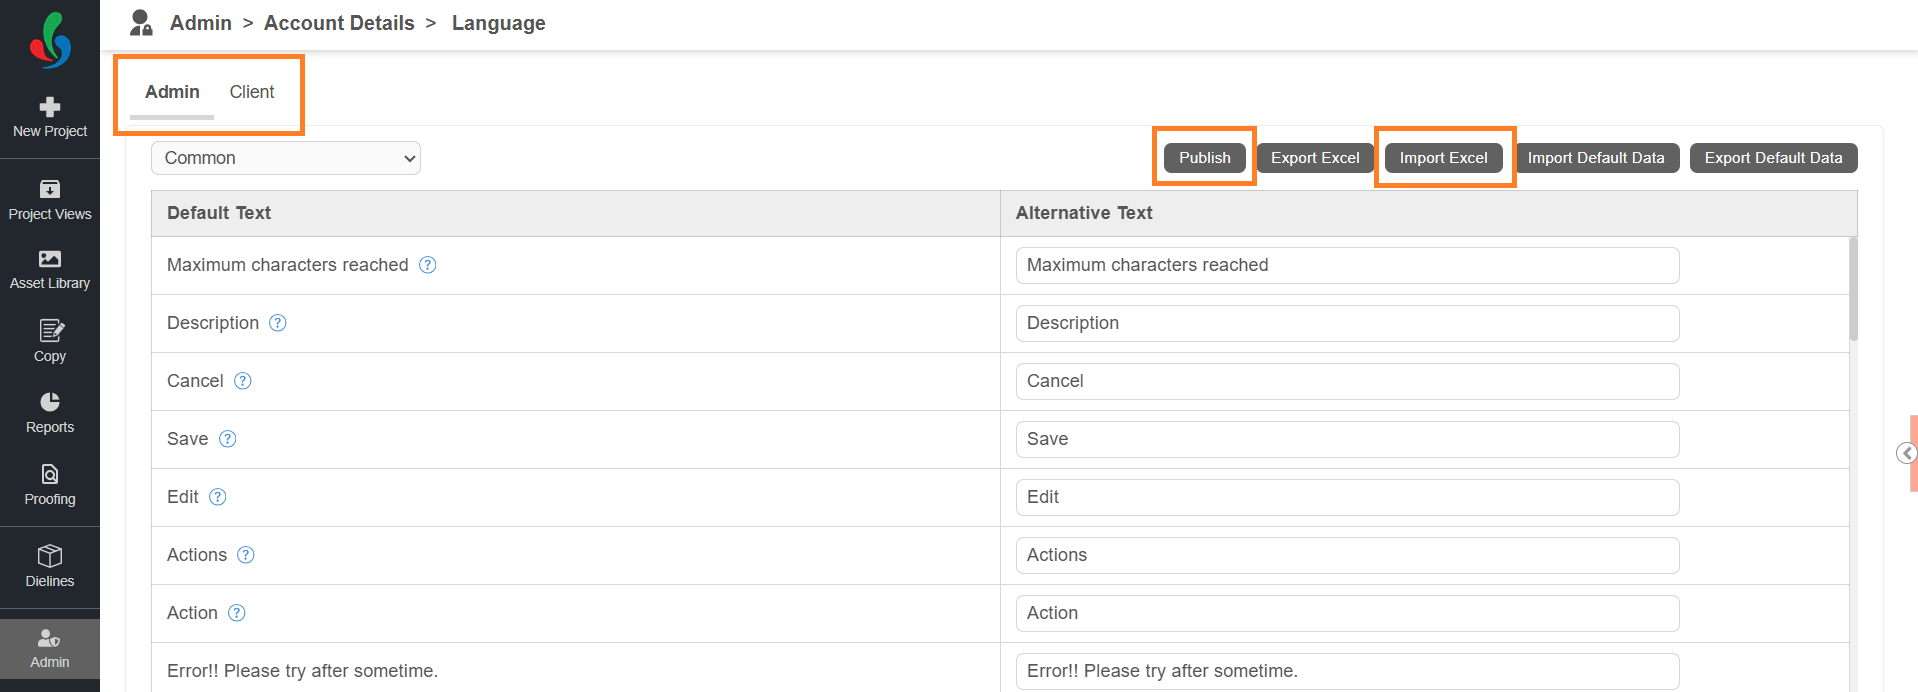
- Select Import Excel and choose your edited file. The alternative text is updated for every label you changed.
Note: Import only a file that you exported from this screen. Other files are rejected. - Select Publish. Your wording appears in the application.
How to Edit Default Data in Excel
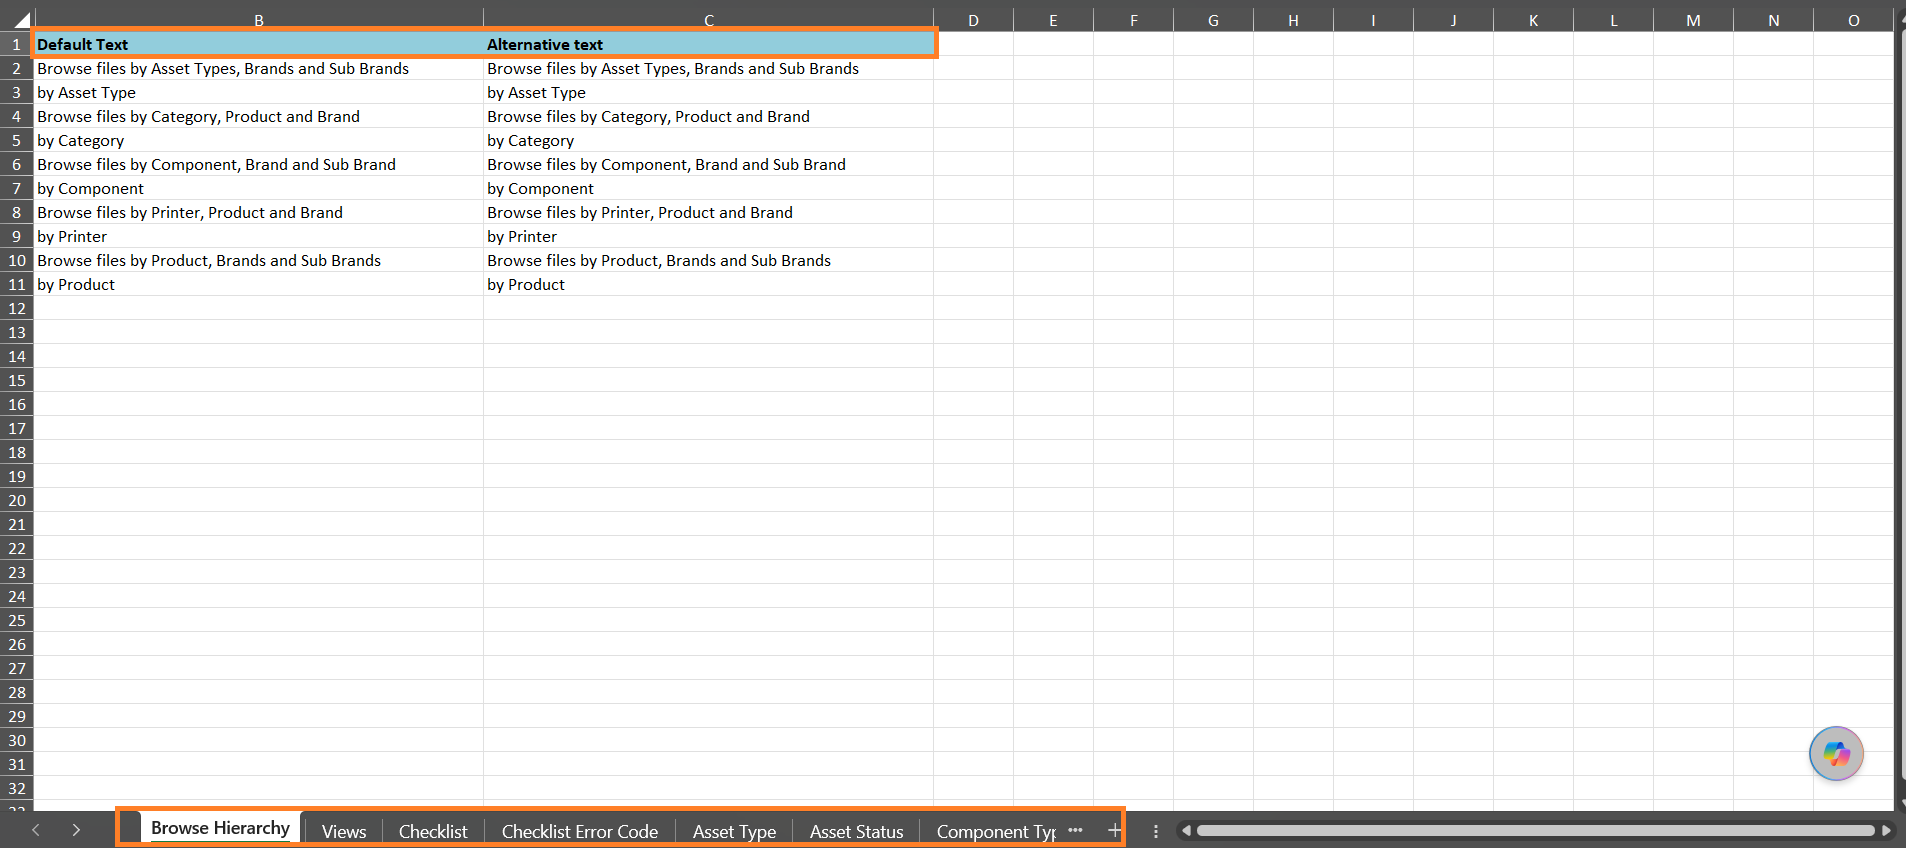
Default data is the pre-configured records supplied with the application — the default browse hierarchies, project views, checklists, checklist error codes, asset types, asset statuses, component types, metadata fields, and departments. You can rename these in the same way you customise interface labels.
- Select Export Default Data. The file contains one sheet per record type.
Note: The default data file is the same whichever tab you are on — unlike interface labels, it is not split between Admin and Client.
- Enter your wording in the Alternative text column and save the file.
Note: Do not change the Default Text column or the sheet names. Each sheet also contains a hidden Key column — you can unhide it, but do not change its values.
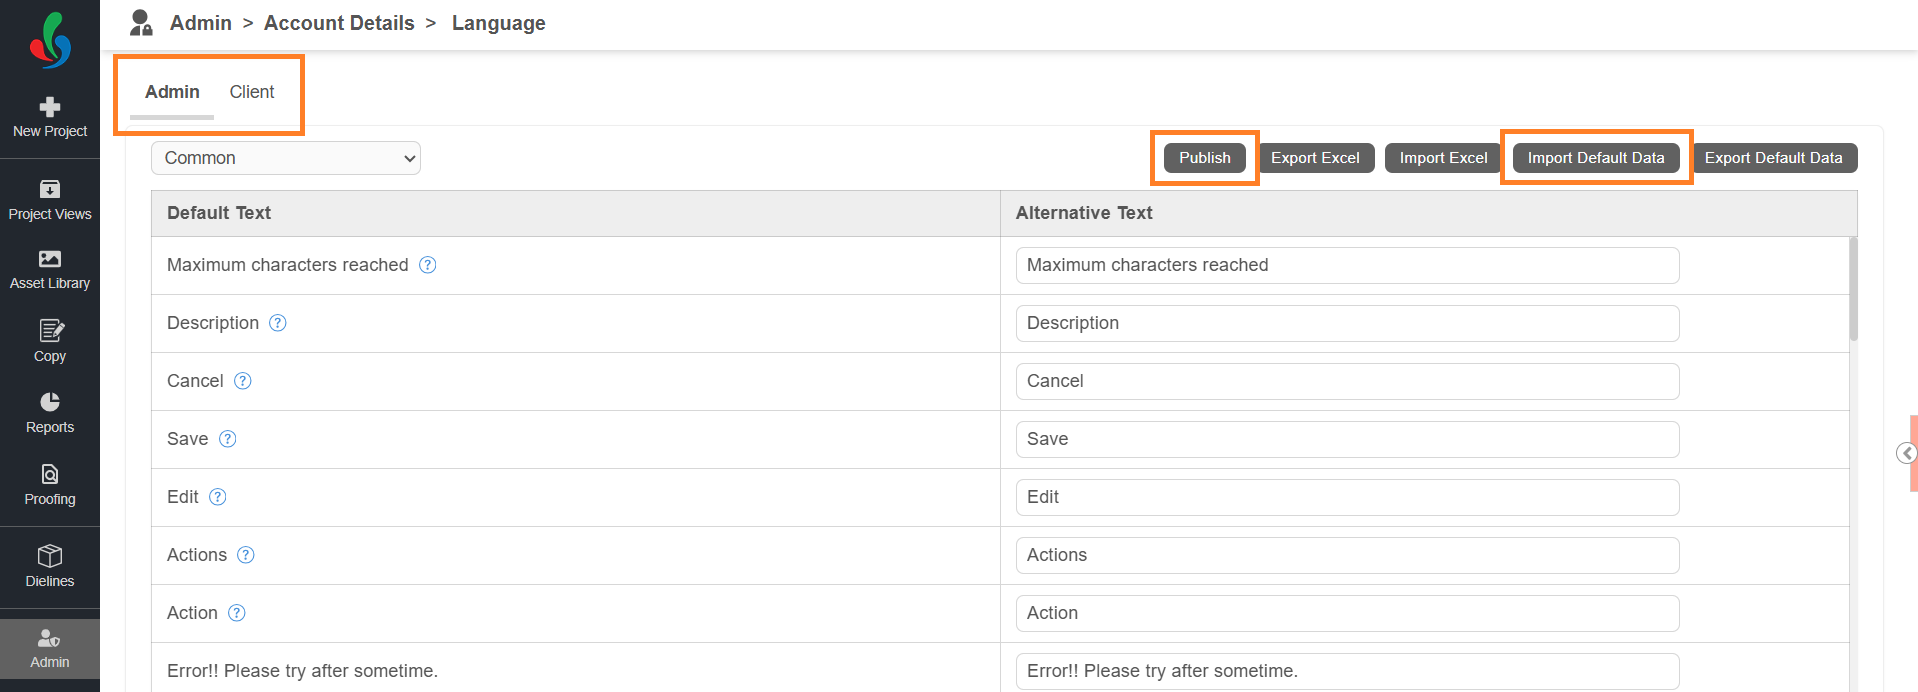
- Select Import Default Data and choose your edited file.
- Select Publish. Your wording appears in the application.