
Copy Roles and Responsibilities
Copy Roles and Responsibilities allow administrators to assign default participants for copy input, approval, translation input, and approval based on project metadata. When a user adds copy elements to a project, the system automatically assigns the configured participants from this template to the respective copy elements.
This helps standardize workflows and ensures the correct stakeholders are assigned during copy management.
 | Runtime FlexibilityEven after importing elements participants from Copy Roles and Responsibilities during project execution:
|
Add a New Role and Responsibility
To add a new role and responsibility:
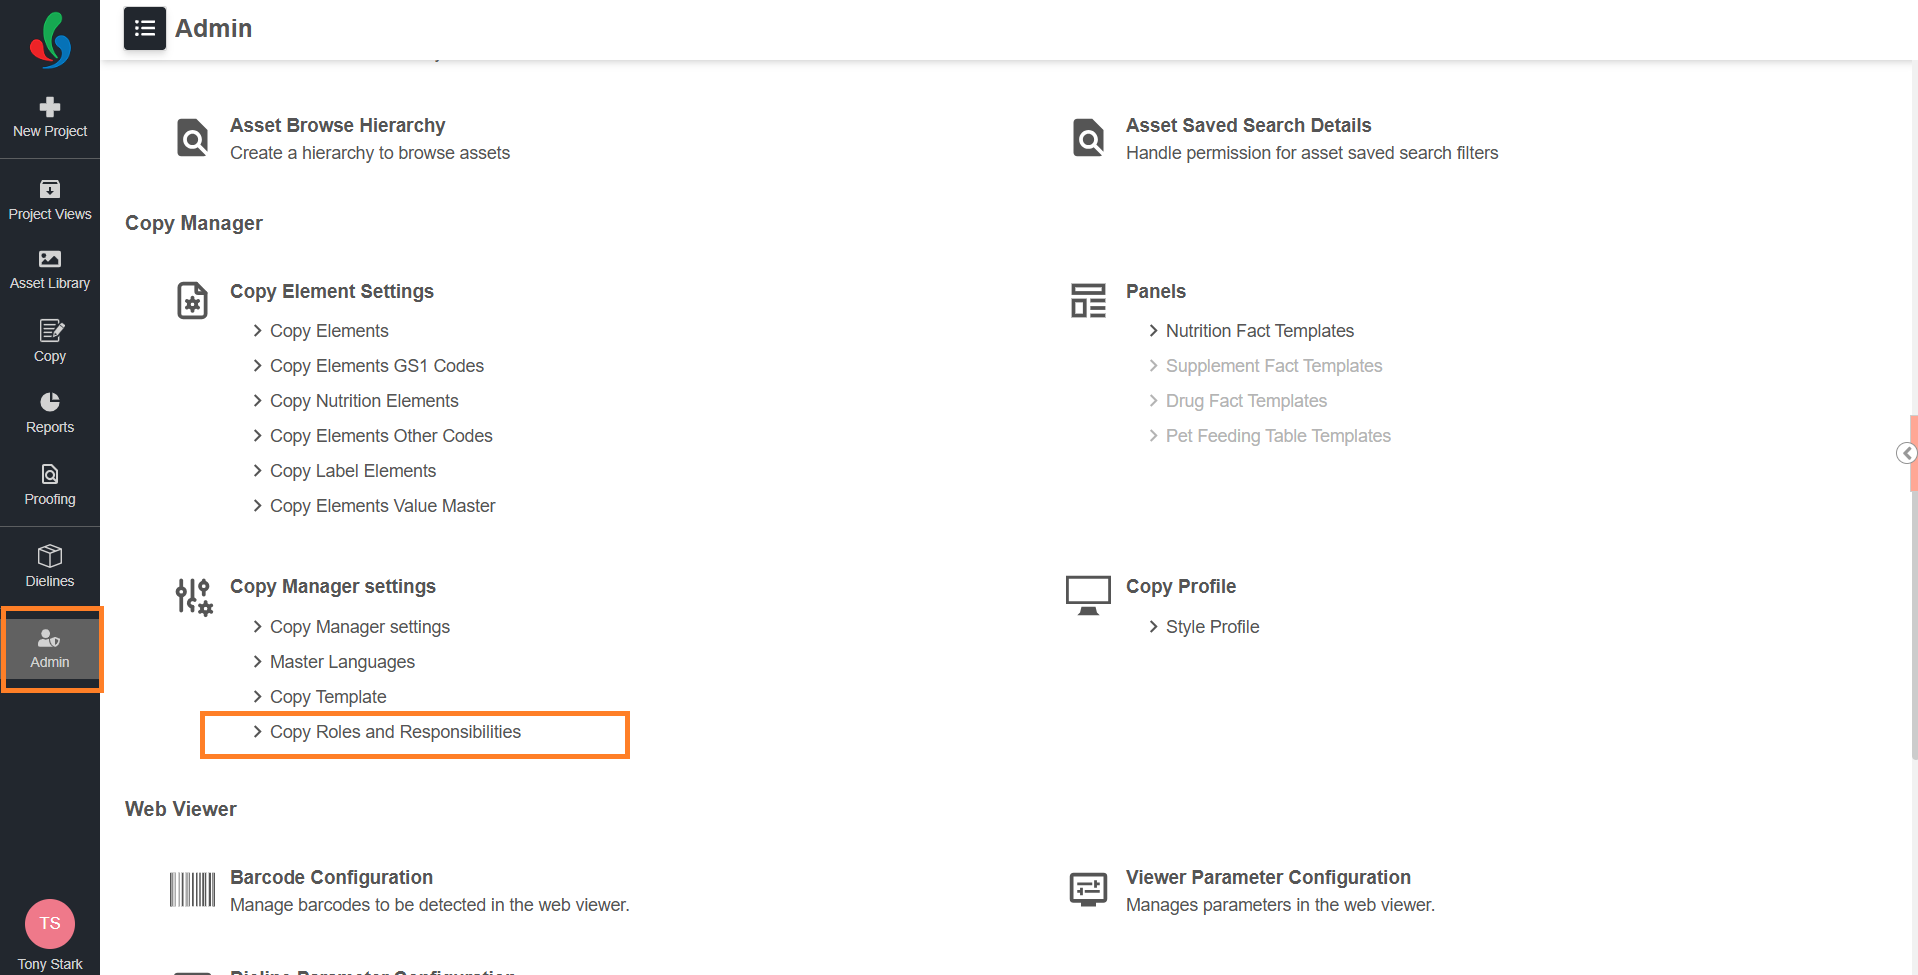
01. Access Copy Roles and Responsibilities
- Sign in to your ManageArtworks account.
- Navigate to the Admin module.
- Under Copy Manager Settings, select Copy Roles and Responsibilities.
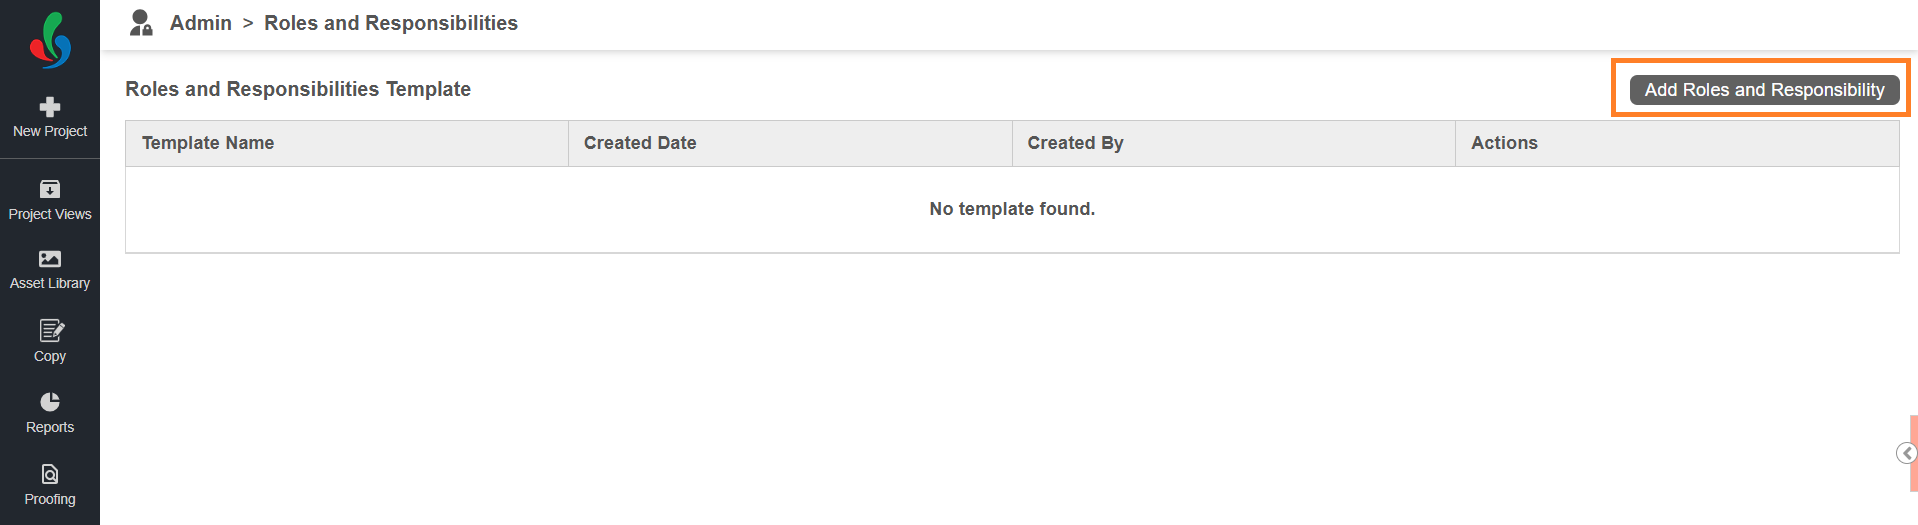
The Copy Roles and Responsibilities page displays all existing templates.
02. Create a New Role and Responsibility Template
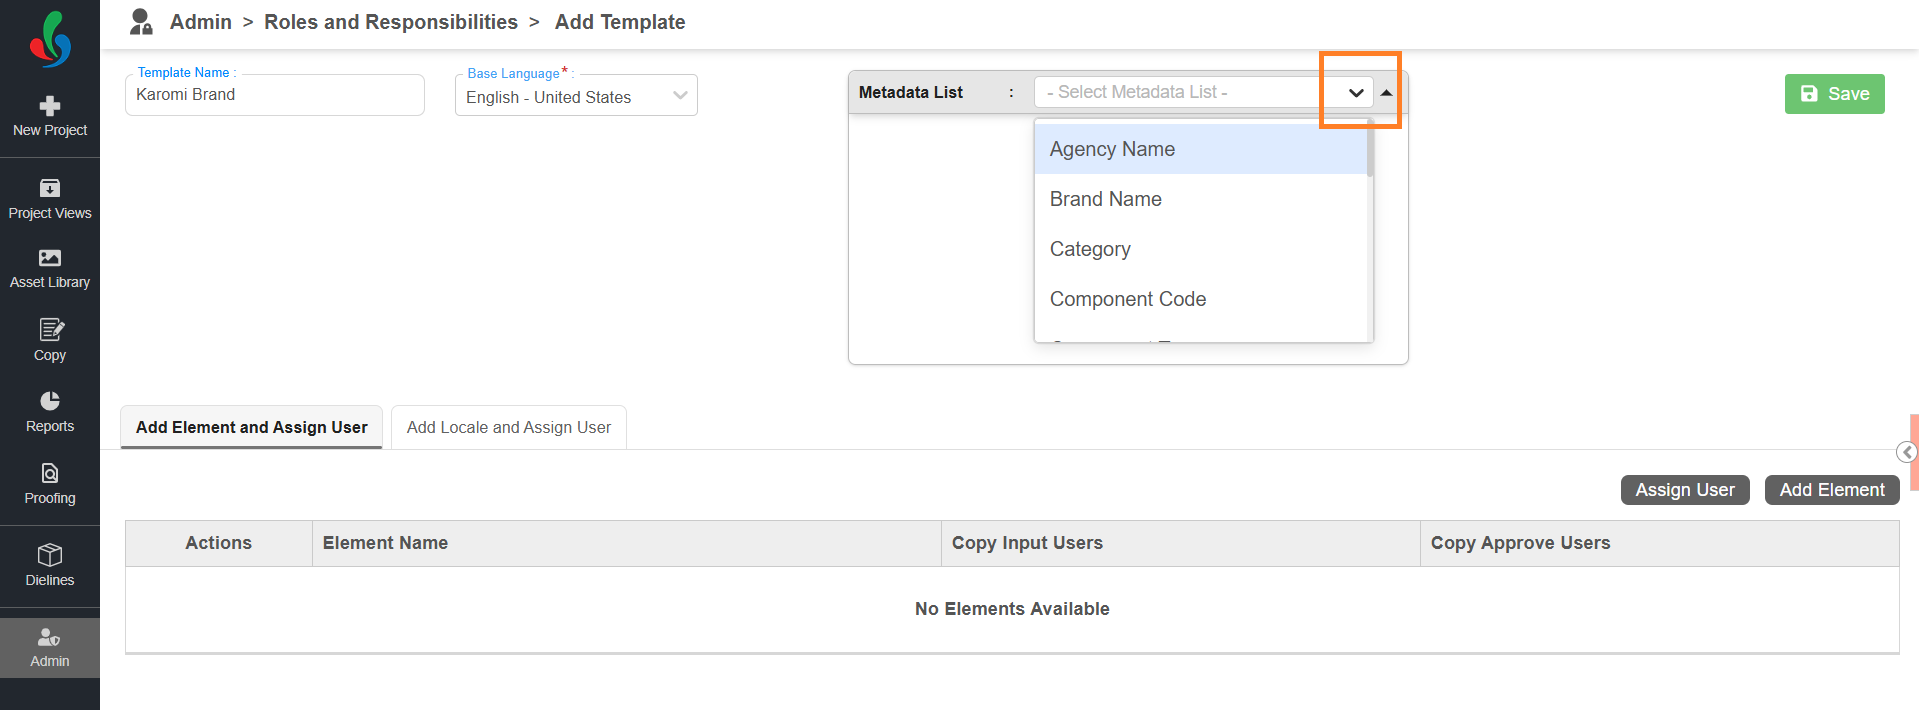
- Select Add Roles and Responsibility in the top-right corner. The system opens the Add Template page.
- Enter the Template Name.
- Select the desired base language using the Base Language drop-down menu.
 | Note: User assignments are imported into the project only when the project’s base language and metadata match the base language and metadata configured in the template. |
03. Configure Role and Responsibility
On the template configuration page, you can perform the following configurations:
- Associate Project Metadata
- Define the project metadata conditions that determine when the template should be applied during project execution.
- Add Copy Elements and Assign Participants
- Add the required copy elements and assign users responsible for copy input and copy approval. These users are assigned per copy element.
- Add Translation Languages and Assign Participants
- Add the required translation locales and assign users responsible for translation input and translation approval. Unlike copy elements, translation participants are assigned per locale rather than per element. During project execution, if a translation locale configured in the template is selected for an element and the project metadata matches the template configuration, the system automatically assigns the configured translation participants.
- Add the required translation locales and assign users responsible for translation input and translation approval. Unlike copy elements, translation participants are assigned per locale rather than per element. During project execution, if a translation locale configured in the template is selected for an element and the project metadata matches the template configuration, the system automatically assigns the configured translation participants.
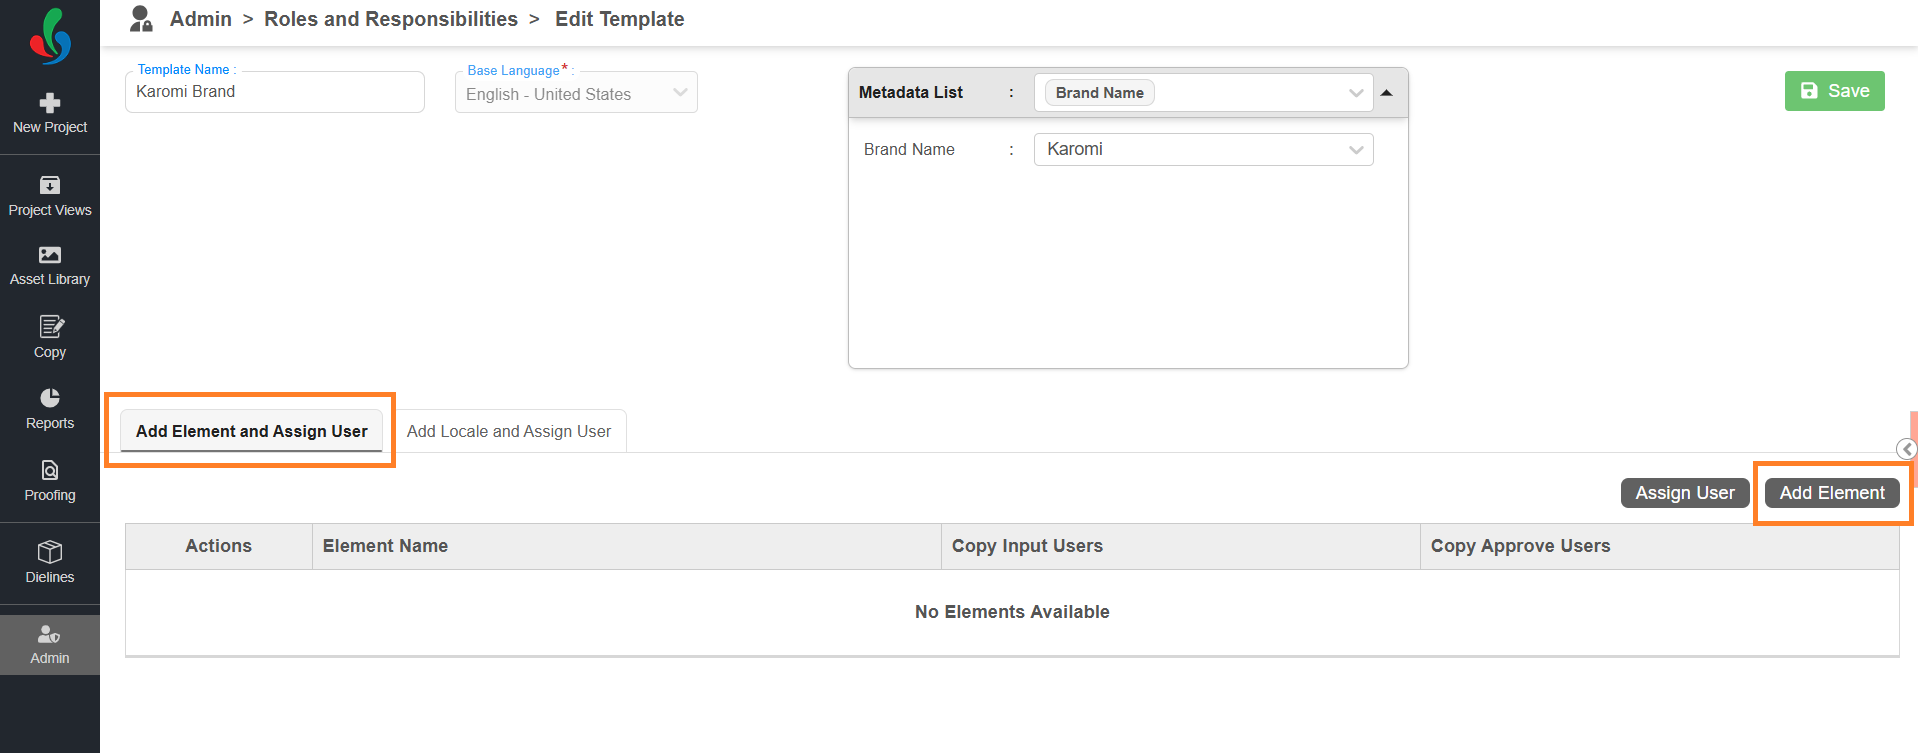
1. Add Metadata (Mandatory)
Metadata determines when the template should be applied during project execution. The system automatically loads the template only when the configured metadata conditions match the project metadata.
| Note: Configuring metadata is mandatory. If metadata is not configured, the system will not import participants into the project. Only Project Metadata fields with the Use as Collection property enabled are available for selection. |
To associate metadata:
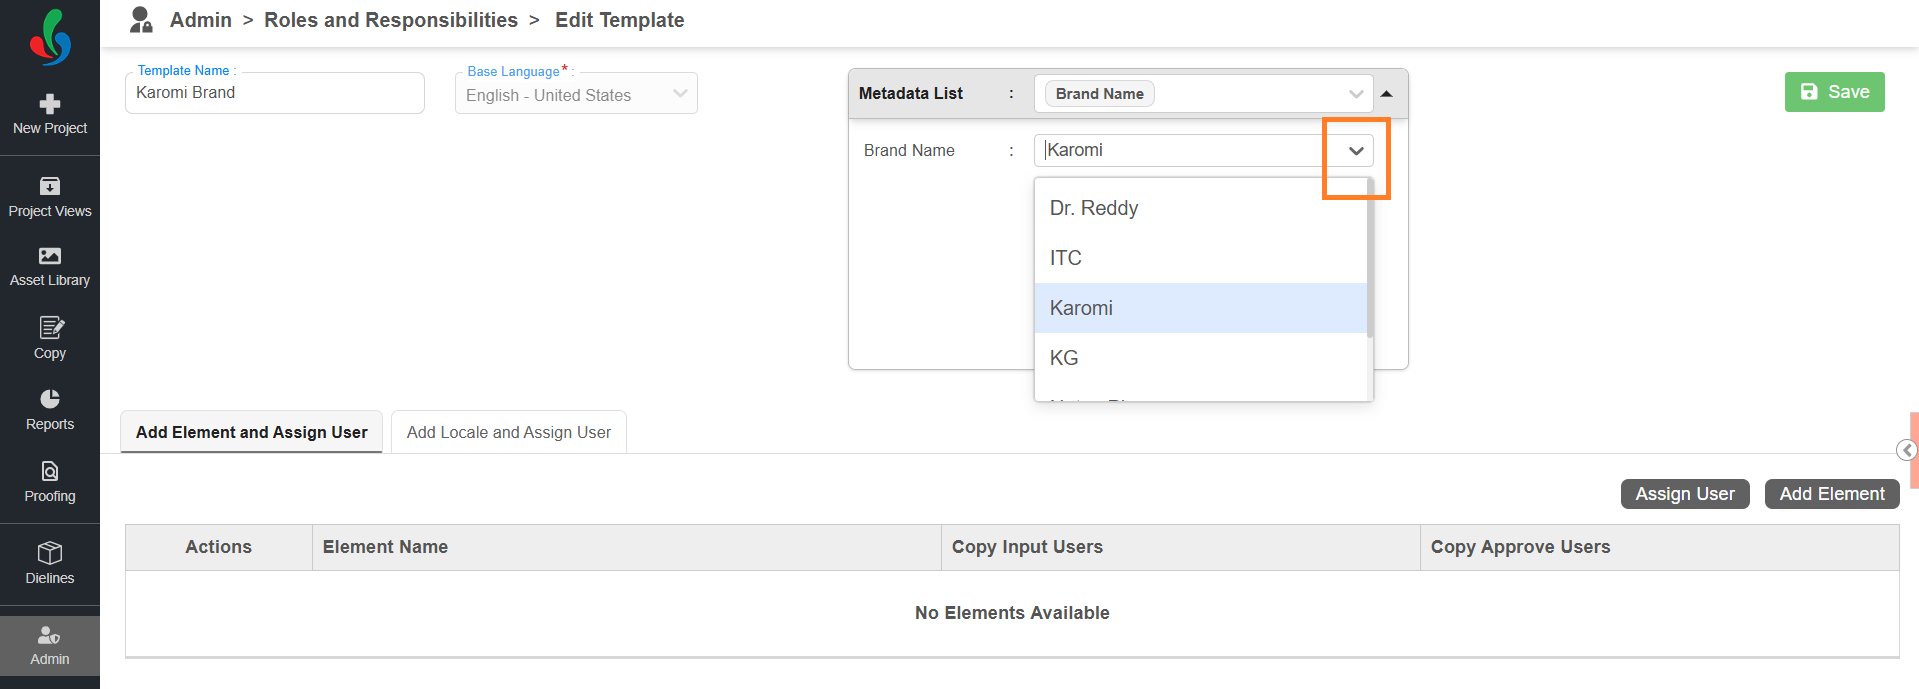
- Select the Metadata List drop-down menu.
- Select the required metadata field.
- Once selected, the metadata field appears below the Metadata List section.
- Select the appropriate value using the associated drop-down menu.
Note: If a metadata field is selected but no value is defined, it will not be considered for matching.
2. Add Copy Elements and Assign Participants
| Roles and Responsibilities Template Participant Behavior If users are configured for an element in Roles and Responsibilities settings:
Example: Note: Users can still modify participants later if required. |
- Make sure you are in the Add Element and Assign User tab.
- To Add Copy Elements:
- Select Add Element.
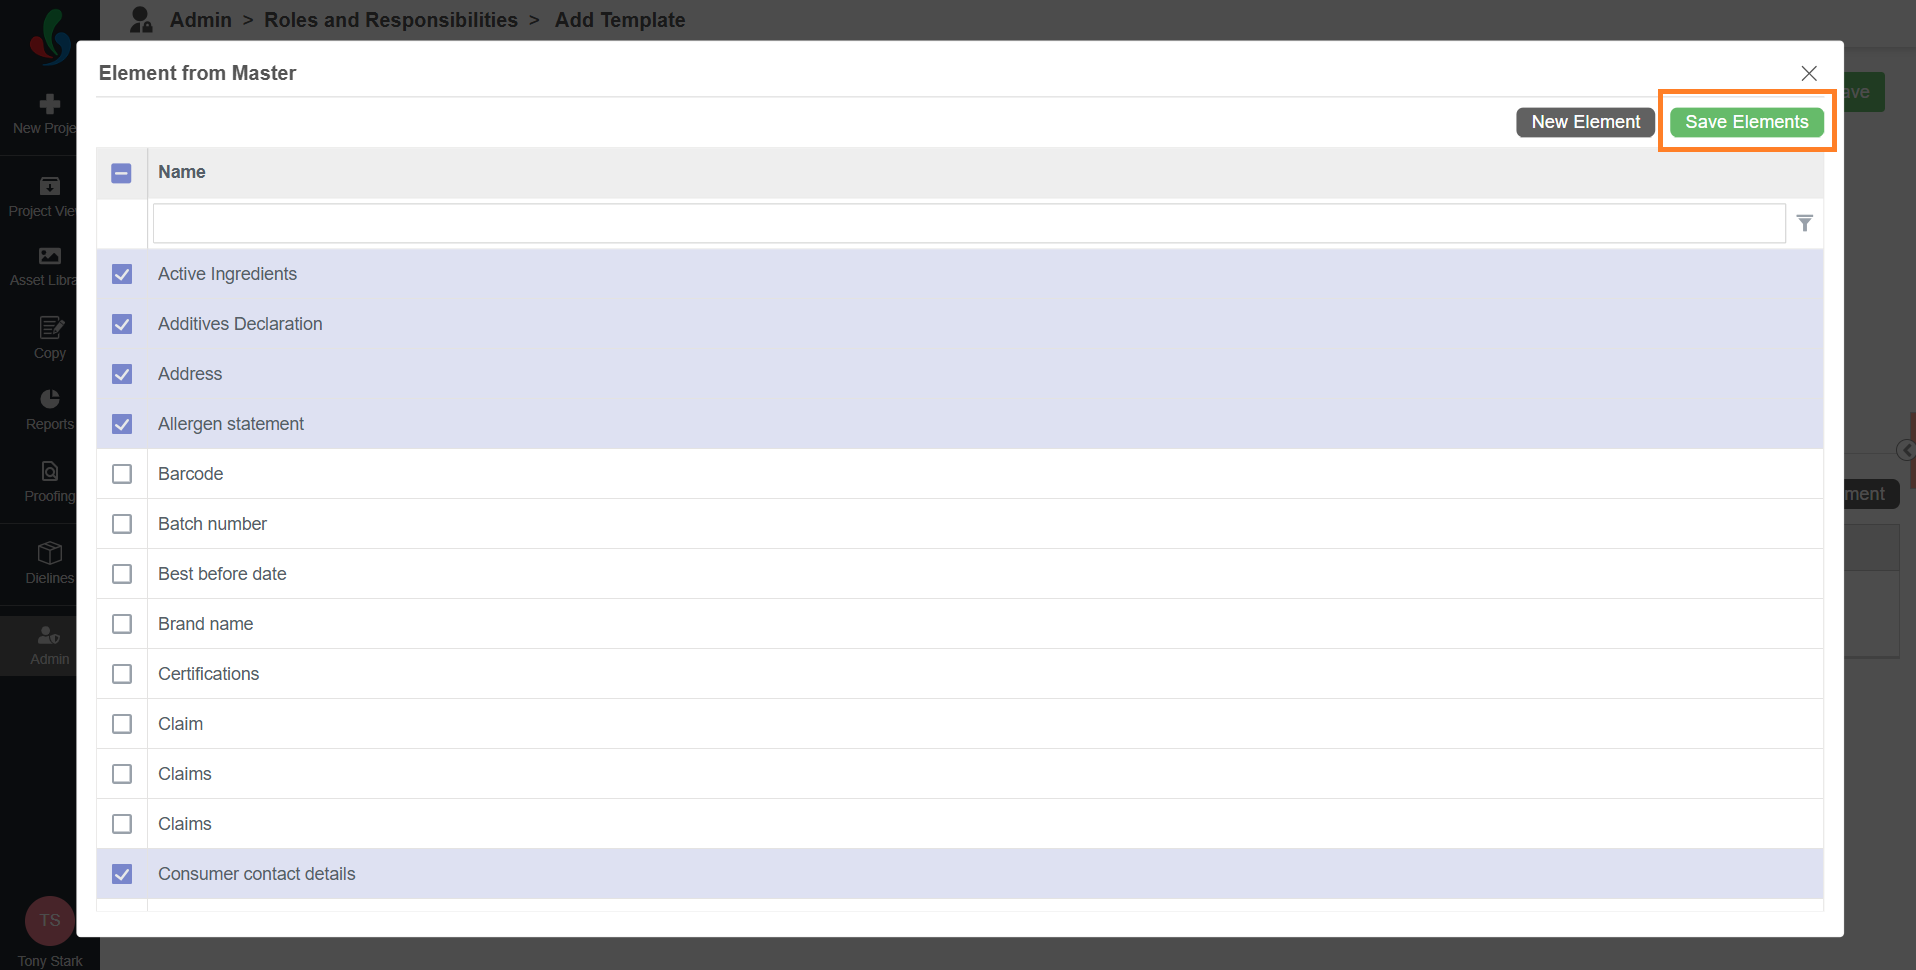
- A list of copy elements defined in Master Data appears.
Note: To manage Master Data elements, refer to the Copy Elements section. - Select the elements you want to include in the template.
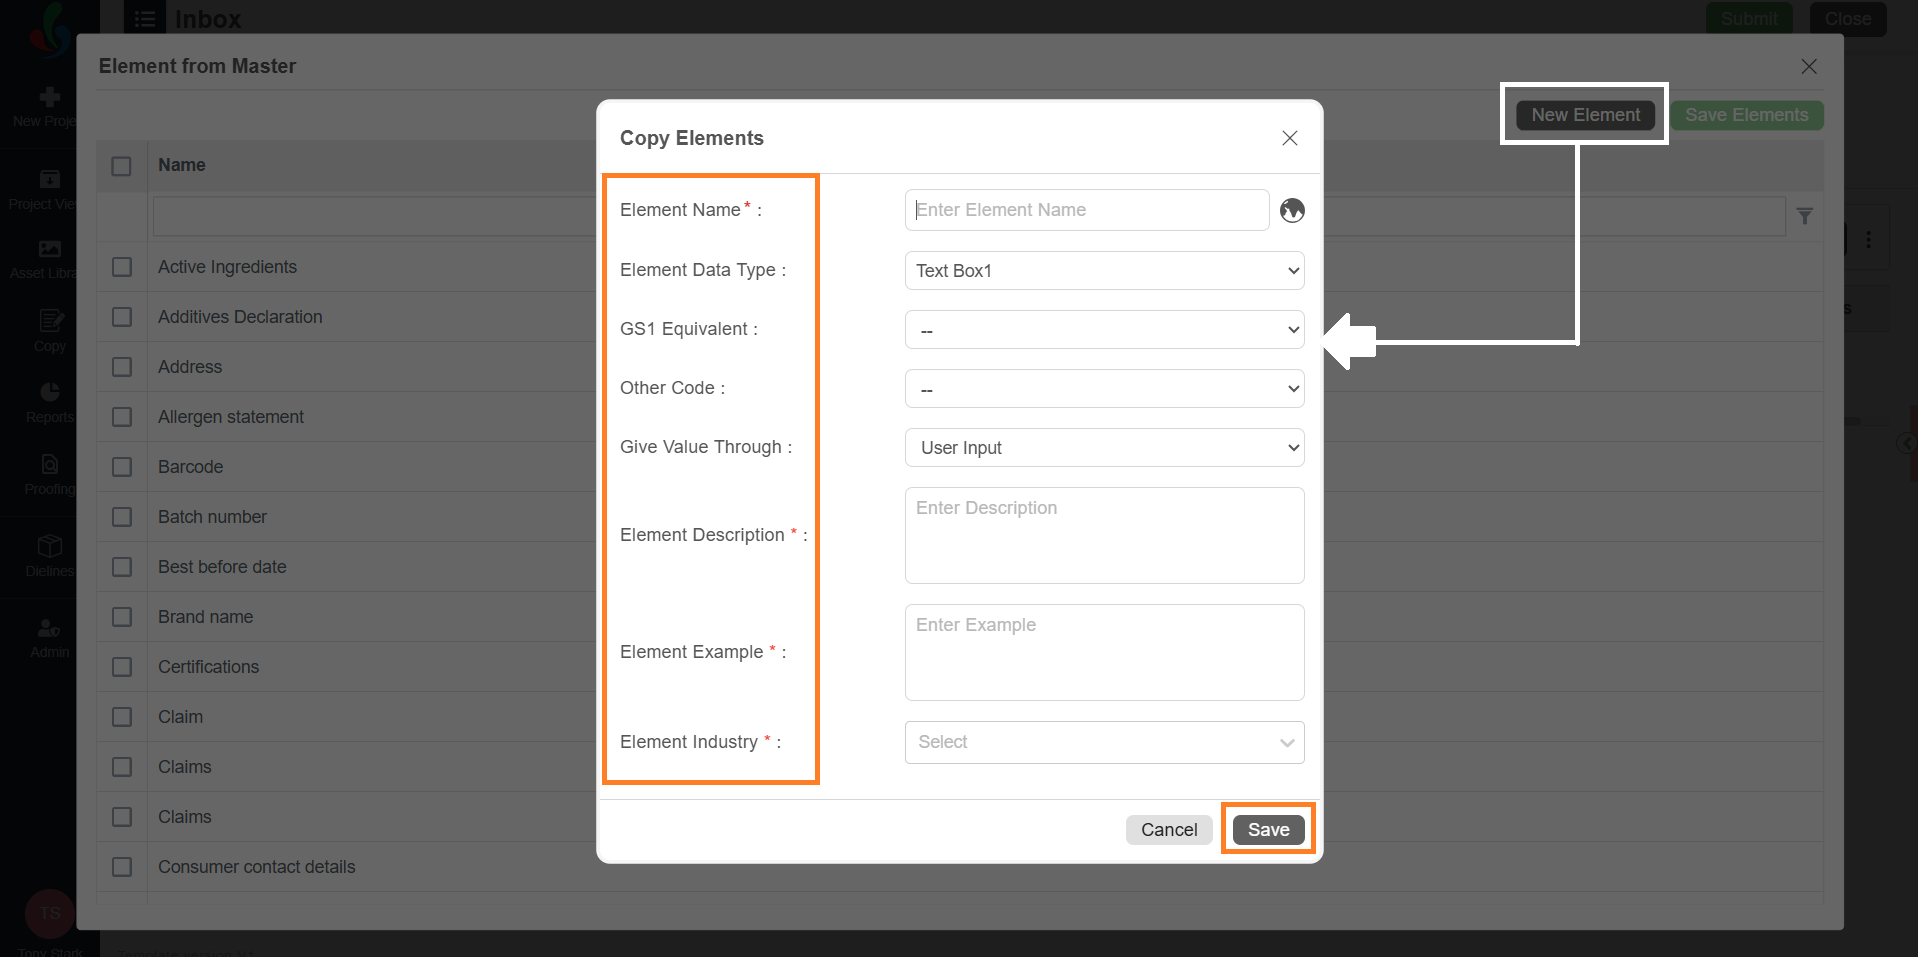
- If a required element is not available in the list, select New Element to create one:
- In the New Element popup, provide the following details:
Note: Fields such as GS1 Code, Other Code, and Priority are displayed only if they are enabled in Copy Manager Settings.- Element Name: Enter the name of the copy element. To add the name in another language, click the globe icon and enter the translated name in the appropriate language box.
- Element Data Type: Choose a suitable data type from the dropdown:
- Text Box1: For alphanumeric text entries.
- Nutrition Panel: For elements related to nutrition facts.
- Image: Use this if the element value should be an image (e.g., Barcode).
- Text Box1 + Text Box2: If you require two text inputs for the element (e.g., size with unit).
- GS1 Equivalent (optional): If applicable, select a corresponding GS1 code from the dropdown.
Note: Ensure the relevant GS1 code is already defined in the GS1 Master Data, or it won't appear in the dropdown. - Other Code (optional): If applicable, select a corresponding other code from the dropdown.
Note: Ensure the relevant Other Code is already defined in the Other Code Master Data, or it won't appear in the dropdown. - Give Value Through: Select a suitable option from the dropdown:
- User Input: Allows users to manually enter values.
- Value Master: Restricts users to select predefined values.
Note: The corresponding values must be configured under Copy Elements Value Master.
- Priority (optional): Set a numeric priority for the element.
- Element Description: Provide a brief description explaining the purpose or usage of the element. This helps users understand the element and supports copy extraction, compliance-related automated validations, and AI training. The description does not need to be exact; a brief or sample description is sufficient.
- Element Example: Provide a sample value for the element. This helps users understand the expected format and supports automated validation and AI training. The example does not need to be exact.
- Element Industry: Select the industry relevant to the element. This helps users contextualize the element and allows the system to apply industry-specific compliance checks, and AI training.
- Select Save to add the element to the system or master data.
- In the New Element popup, provide the following details:
- Select Add Element.
- Once all desired elements are selected, select Save Elements to add them to the template.
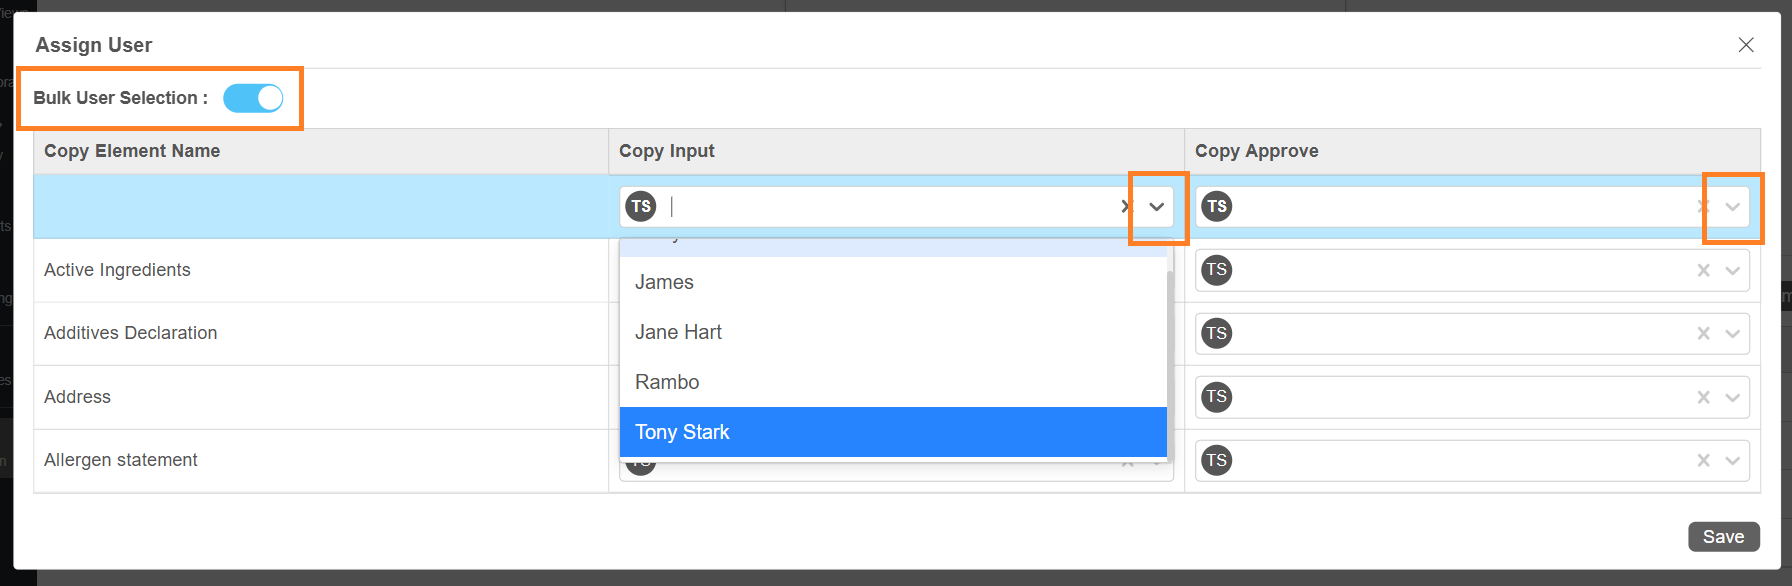
- To Assign Participants to Copy Elements:
- Select Assign Users.
- In the popup window, you’ll see all the added copy elements along with user selection fields for each task type.
- For each element, select the dropdown in the Copy Input and Copy Approve columns and select the appropriate users.
- Copy Input – the person who will fill in the content.
- Copy Approve – the person who will review and approve the content.
Note: You can select multiple user only for Copy Approval.
- Use Bulk User Assignment (If needed):
If you want to assign the same user to multiple elements quickly:- Toggle the Bulk User Selection button.
- Use the dropdown in the first row to assign a user to any of the following columns:
- Copy Input
- Copy Approval
- The selected user will be automatically applied to all corresponding elements in the list.
- After completing the user assignments, select Save to apply your configuration.


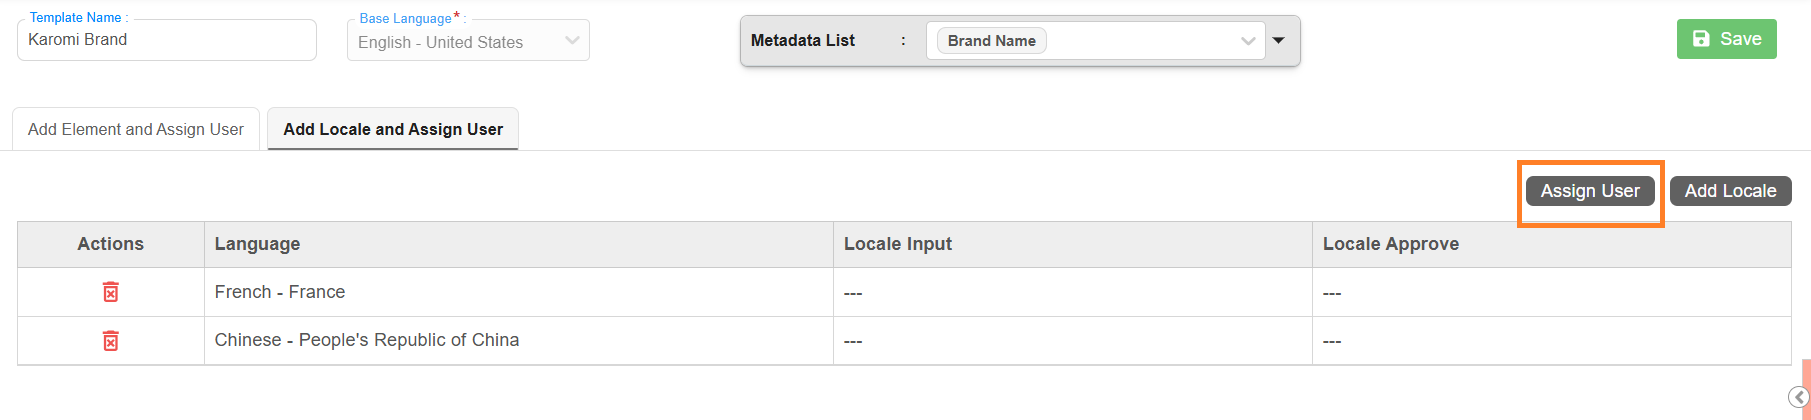
3. Add Translation Languages and Assign Translation Participants:
Unlike copy elements, users are assigned per locale, not per element. During runtime, if the configured translation is selected for an element and the project metadata matches the configured template, the system automatically assigns these translation participants.
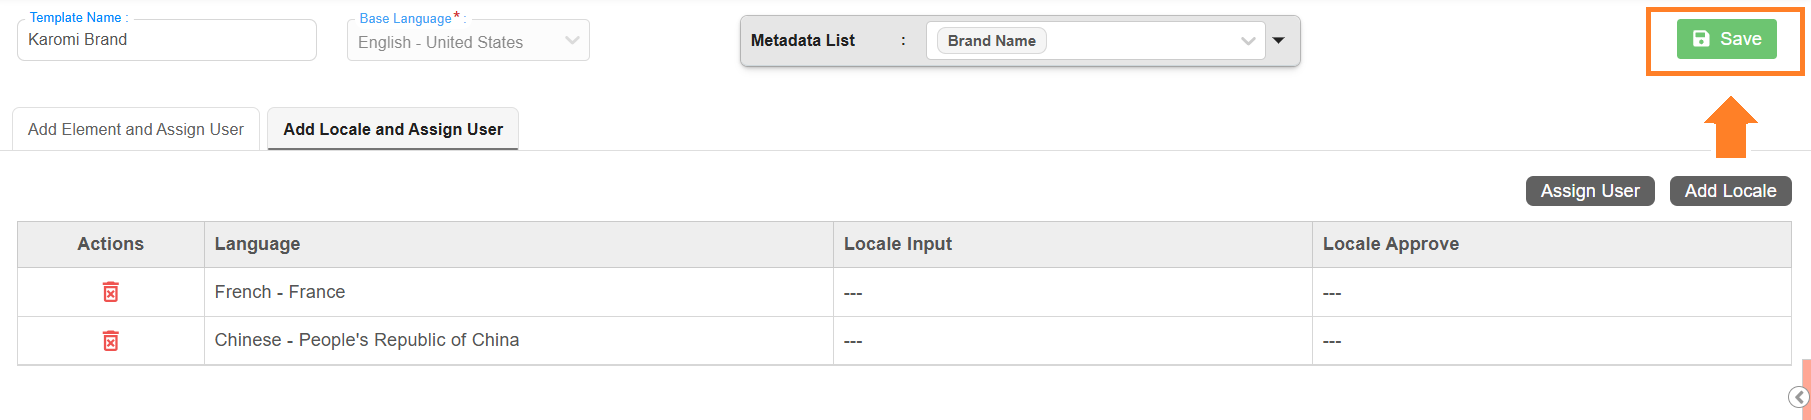
- Navigate to the Add Locale and Assign User tab.
- To Add translation Language:
- Select Add Locale.
- Select the desired locale.
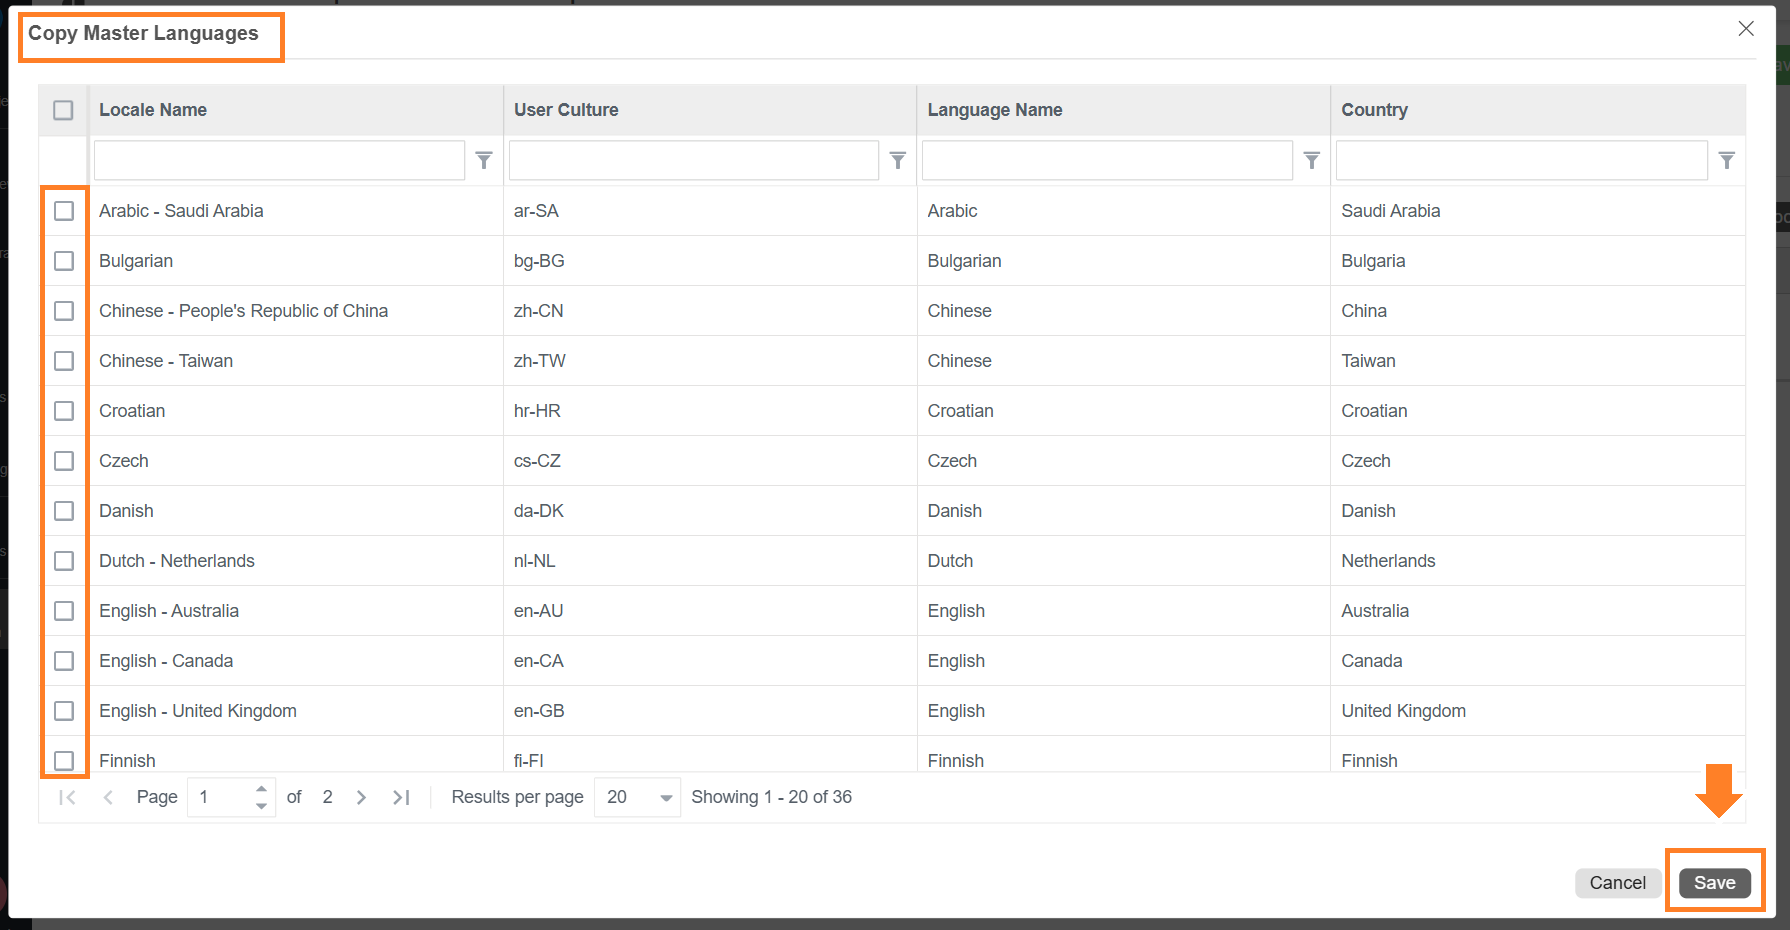
Note: If the required locale is not available, ensure the language is enabled in Master Language settings.
- Select Save to add the locale to the template.
- Select Add Locale.
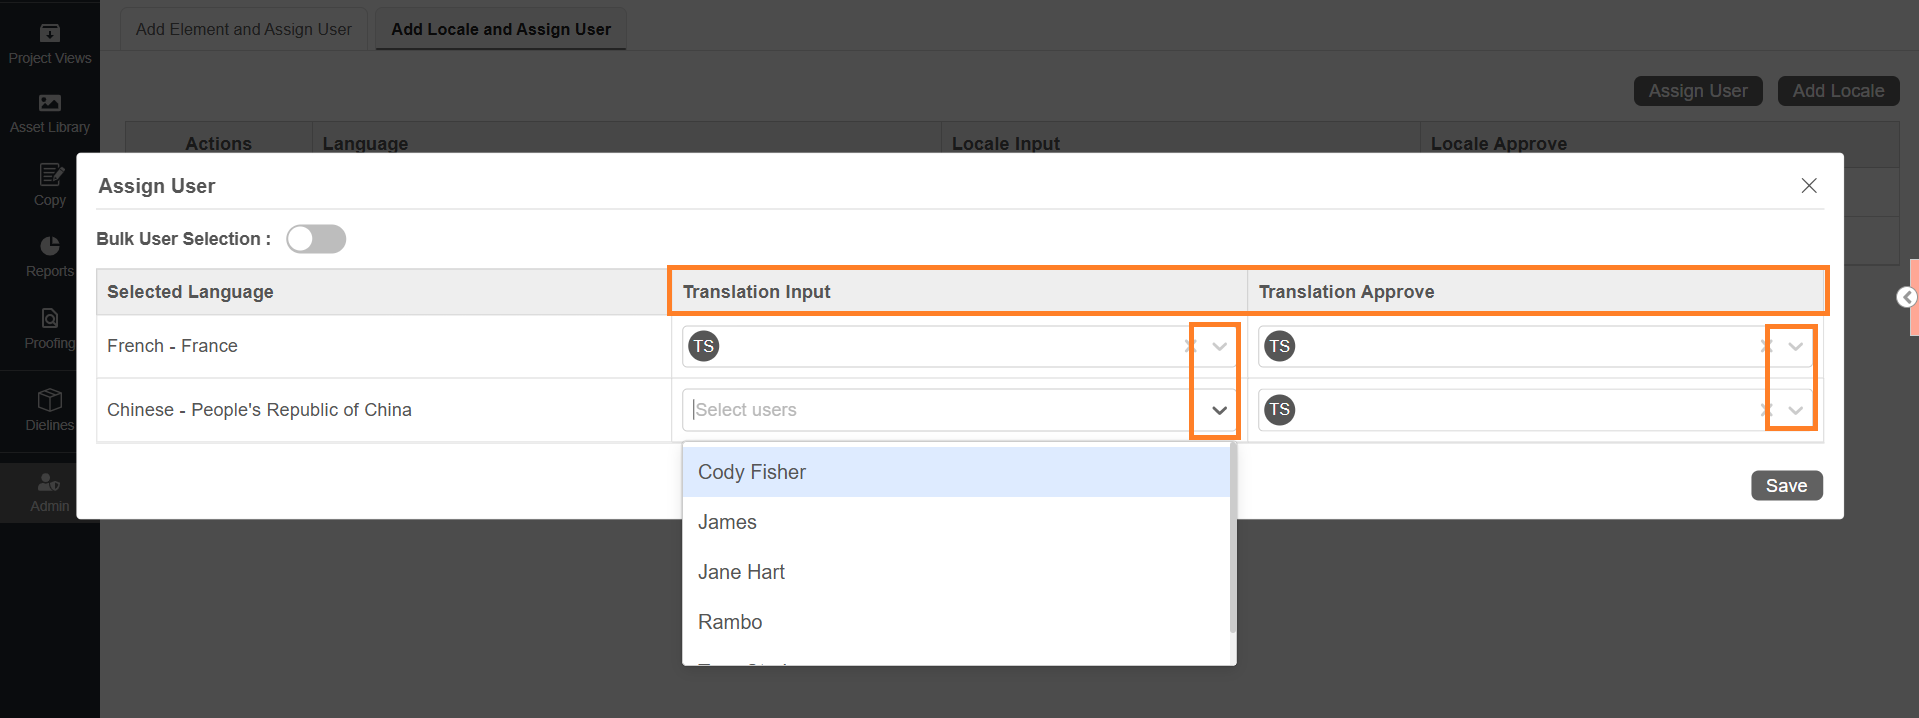
- To Assign Translation Users:
- Select Assign user.
- In the popup window, you’ll see all the added translation locale along with user selection fields for each translation task type.
- For each locale, select the dropdown in the Translation Input and Translation Approve columns and select the appropriate users.
- Translation Input – the person responsible for entering translated content.
- Translation Approve – the person responsible for reviewing and approving the translated content.
Note: You can select multiple user only for Translation Approve.
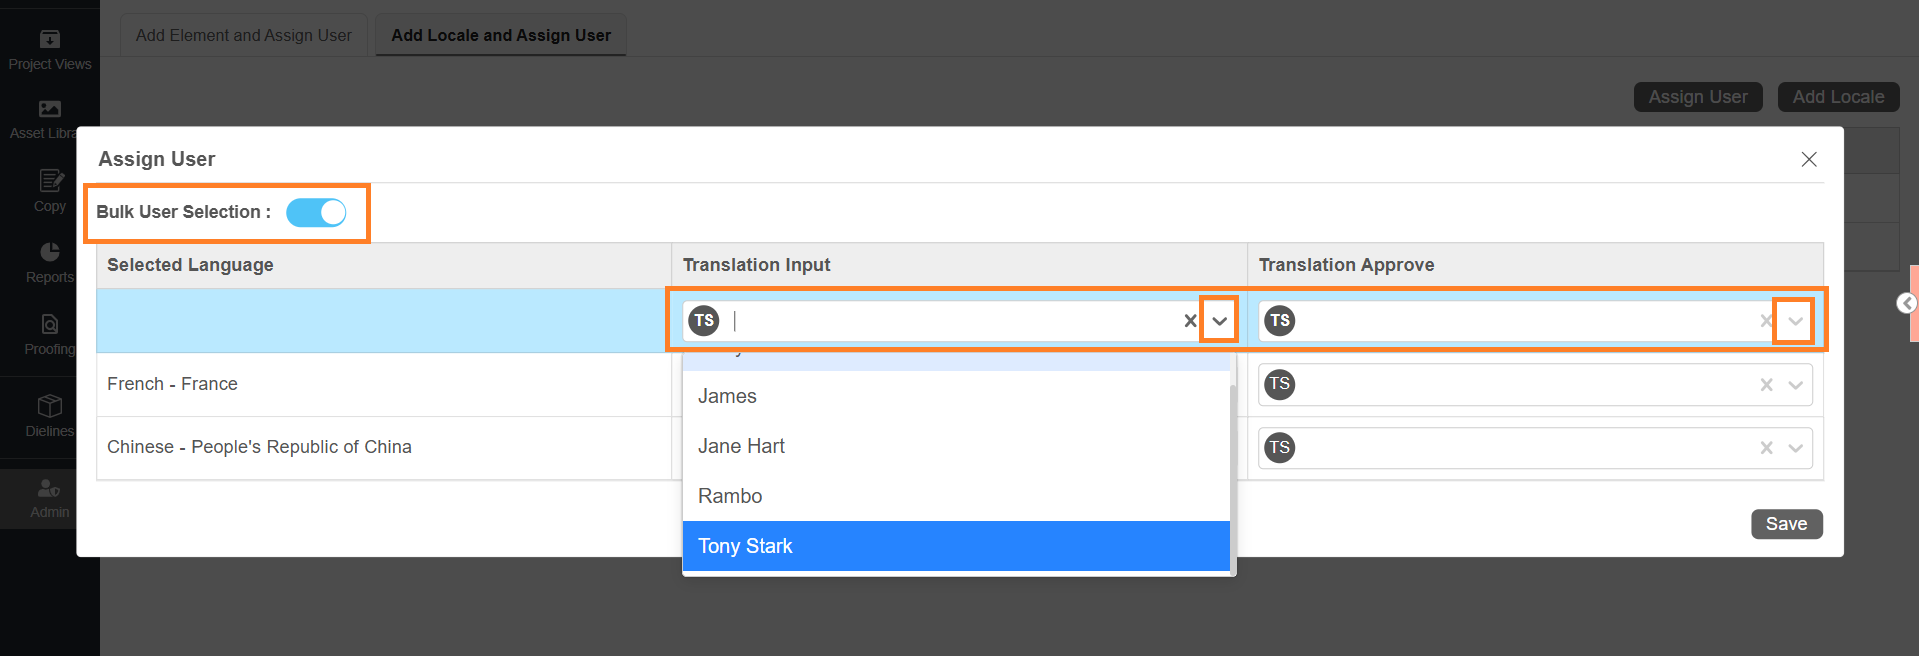
- Use Bulk User Assignment (If needed):
If you want to assign the same user to multiple elements quickly:- Toggle Bulk User Selection to On.
- Use the dropdown in the first row to assign a user to any of the following columns:
- Translation Input
- Translation Approval
- The selected user will be automatically applied to all corresponding elements in the list.
- Toggle Bulk User Selection to On.
- After completing the user assignments, select Save to apply your changes.
- Select Assign user.

04. Save the Template
- After completing all configurations:
- Select Save to add the Roles and Responsibilities template to the system.
05. Publish
In Roles and Responsibilities, publishing is handled automatically.
Once the template is saved, it becomes immediately available for use in projects. There is no separate Publish action required.
If you make changes to an existing template:
- The updates will apply only to projects where the copy element is added again after the modification.
- Changes will not automatically update projects that are already in progress.
If a template is no longer required, you can:
- Delete the template, or
- Make it inactive to prevent further usage.
- For more details, refer to Manage Copy Roles and Responsibilities.
Manage Copy Roles and Responsibilities