Fill a Checklists
How to Fill a Checklist
Once a checklist is configured for a task and the required file is uploaded, users can fill the checklist during task execution.
You can fill the checklist using either of the following options:
Fill Checklist from Files Tab
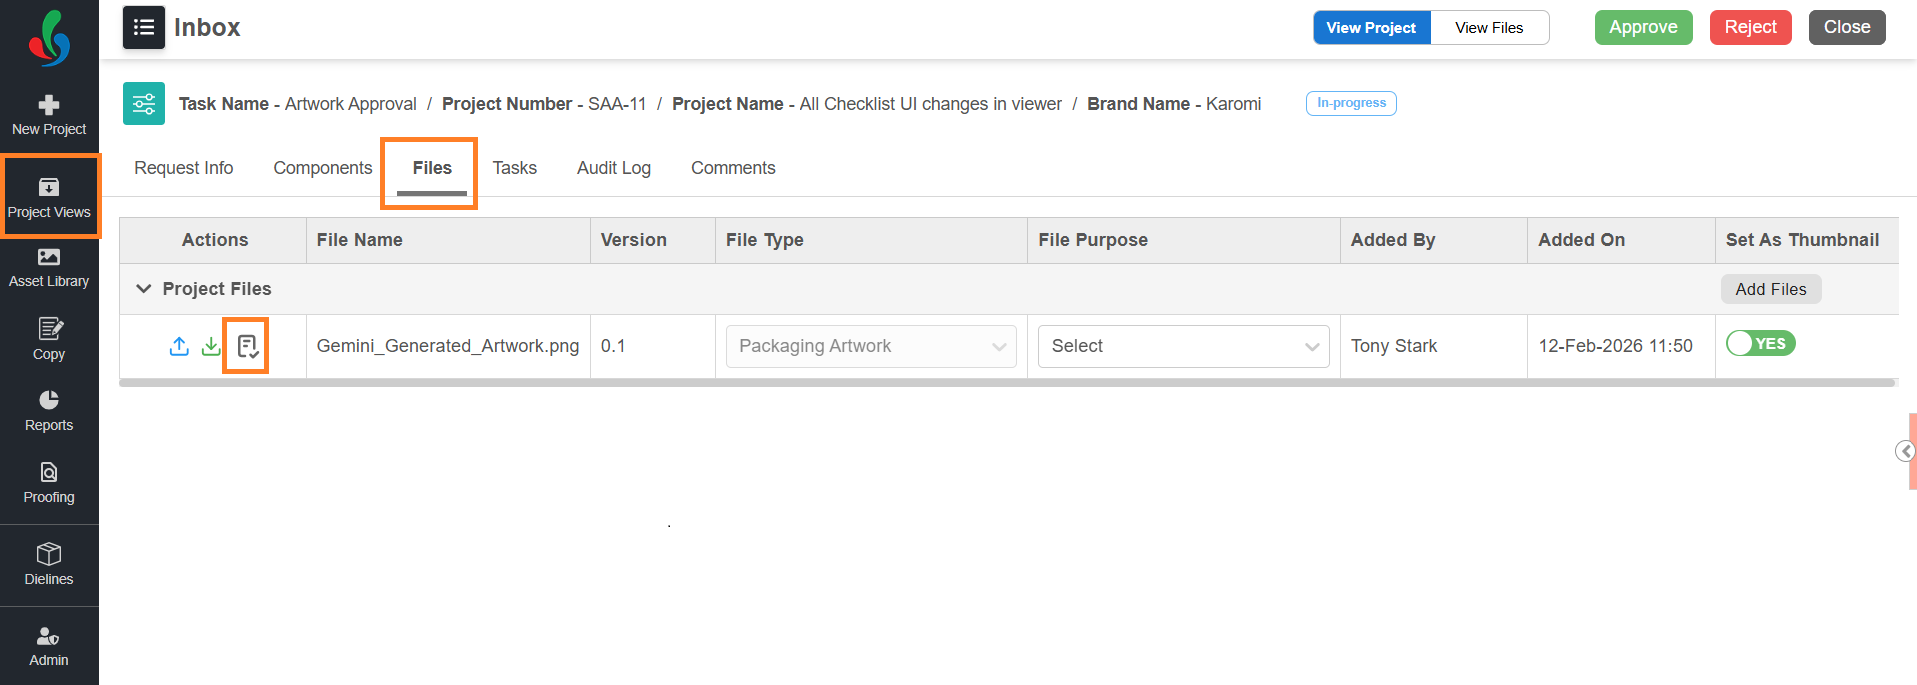
01. Access Checklist from Files Tab
- Sign in to your ManageArtworks account.
- Navigate to Project Views.
- Open the required project/task.
- Go to the Files tab.
- Select the Viewer Checklist icon associated with the file.
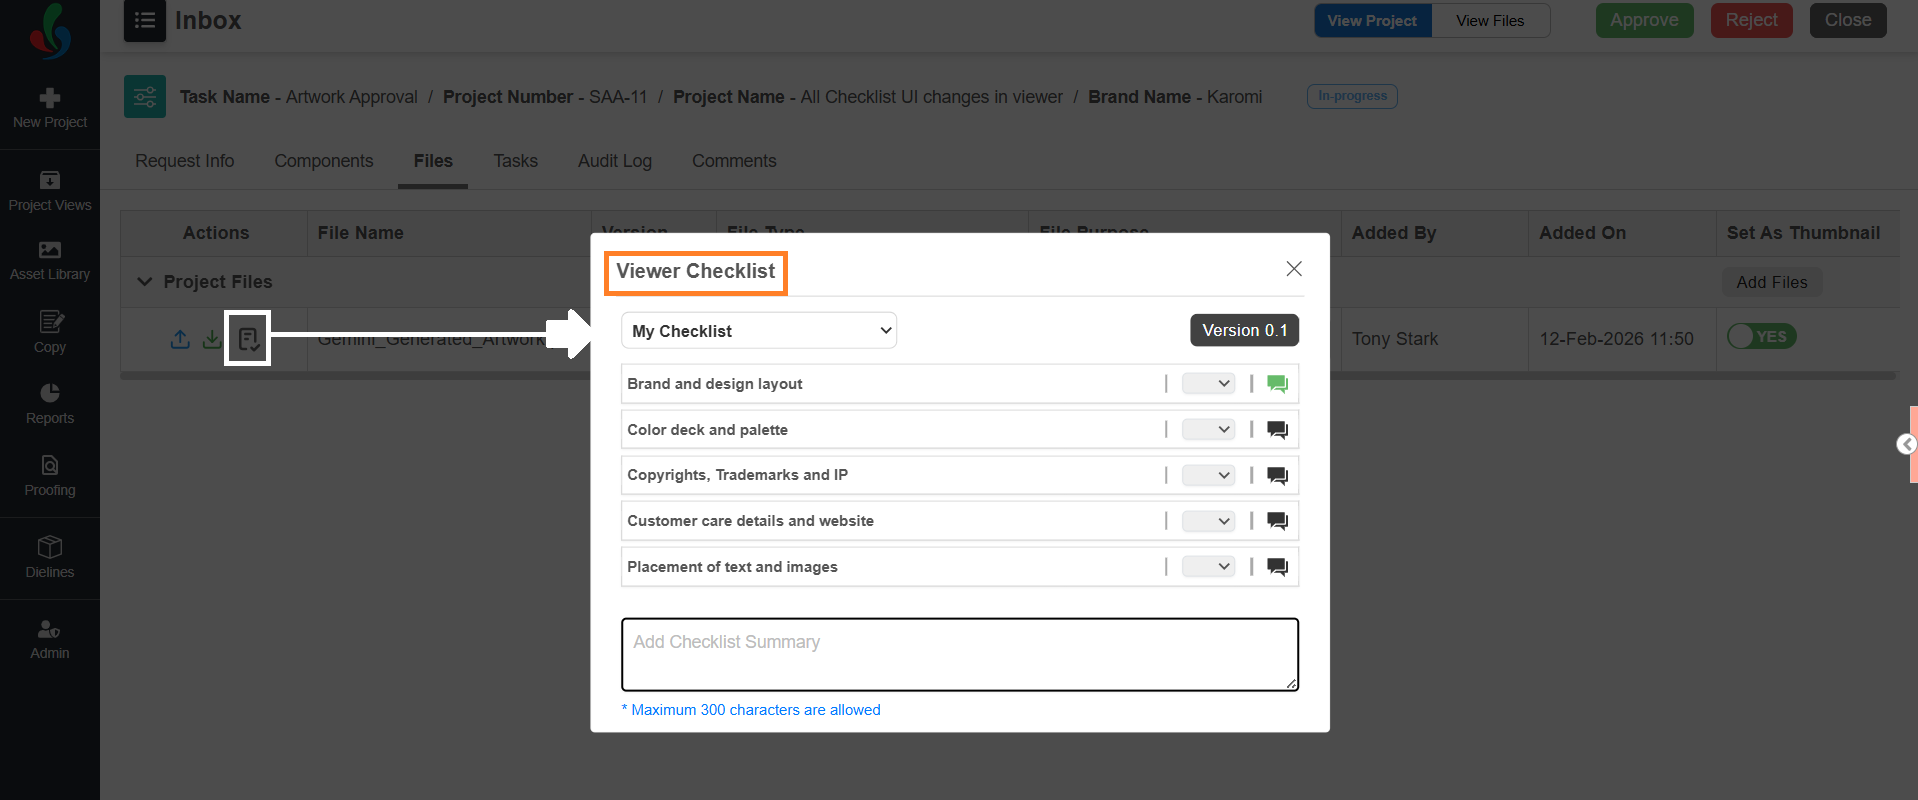
- The Viewer Checklist popup displays all checklist items associated with the task and file.
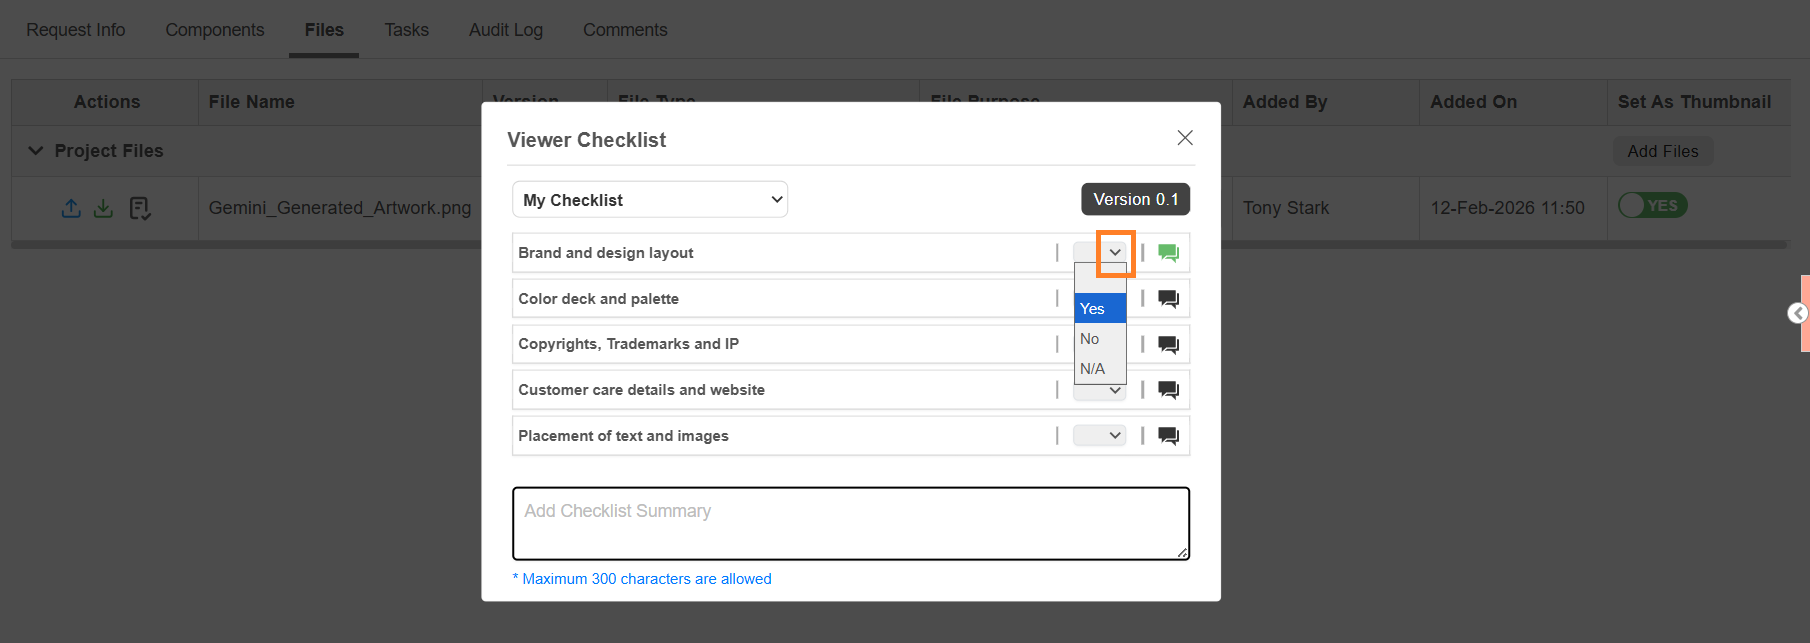
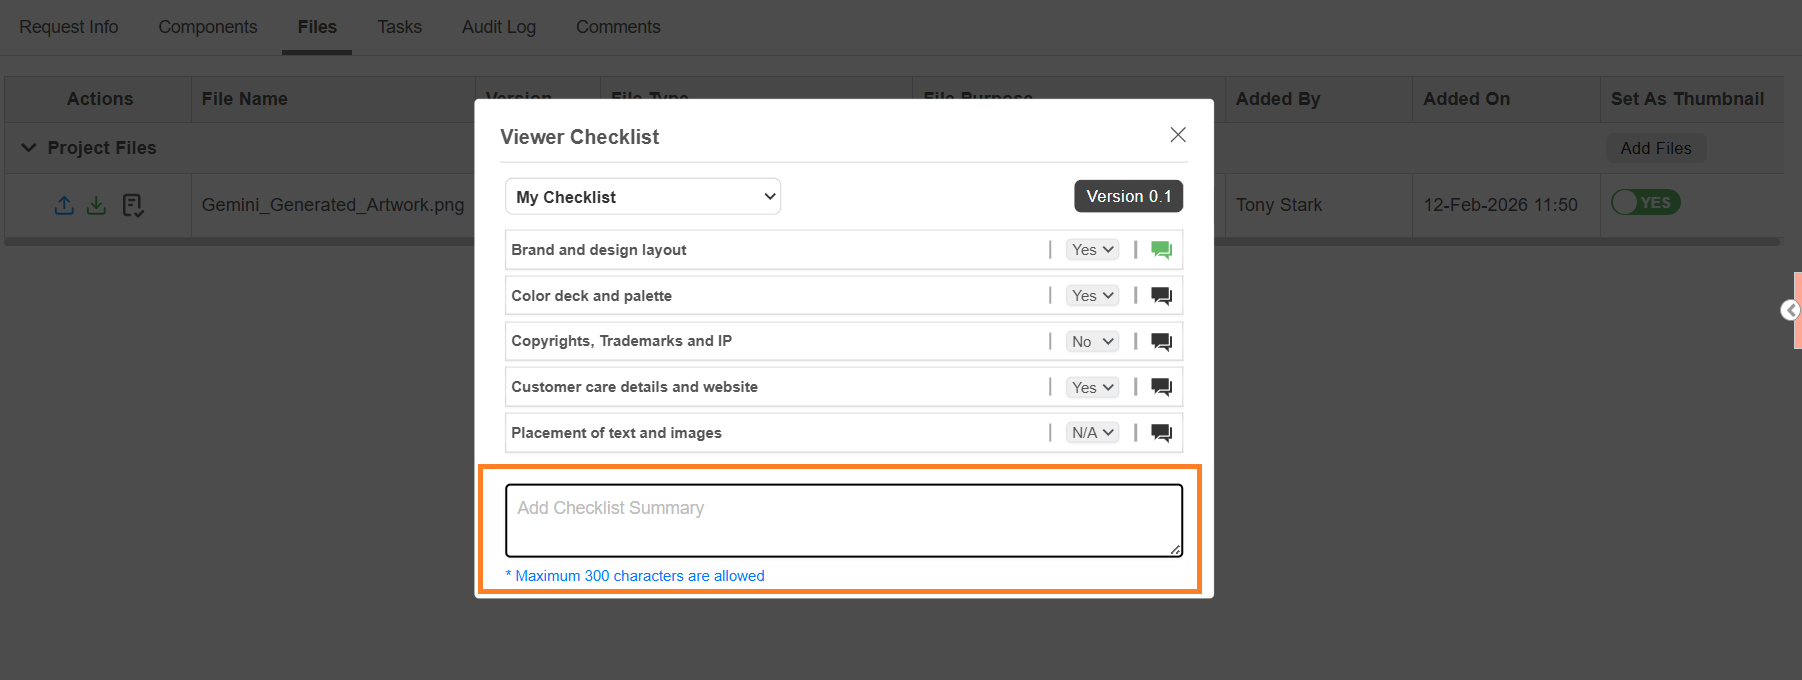
02. Provide Decision for Checklist Items
- For each checklist item:
- Select the dropdown.
- Choose the required decision:
- Approved (Yes)
- Rejected (No)
- Not Applicable (N/A)
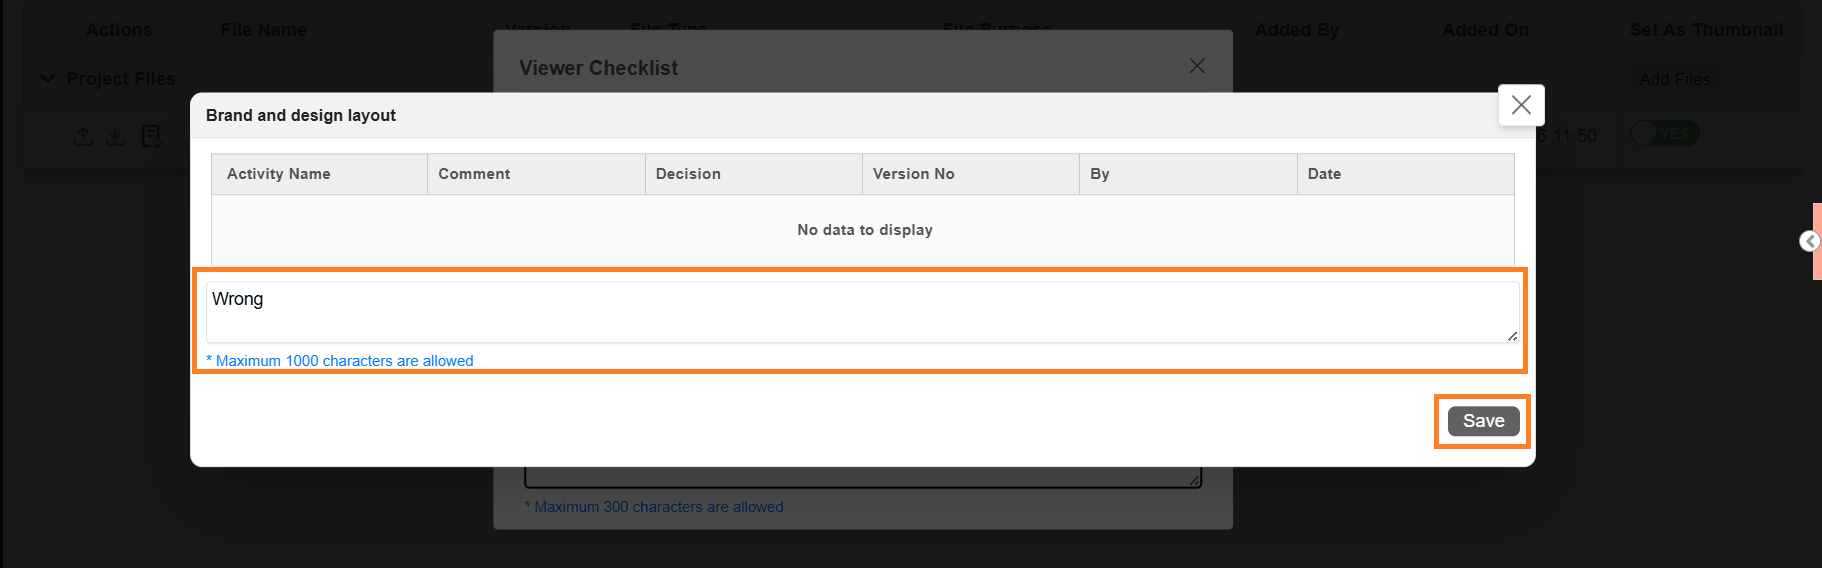
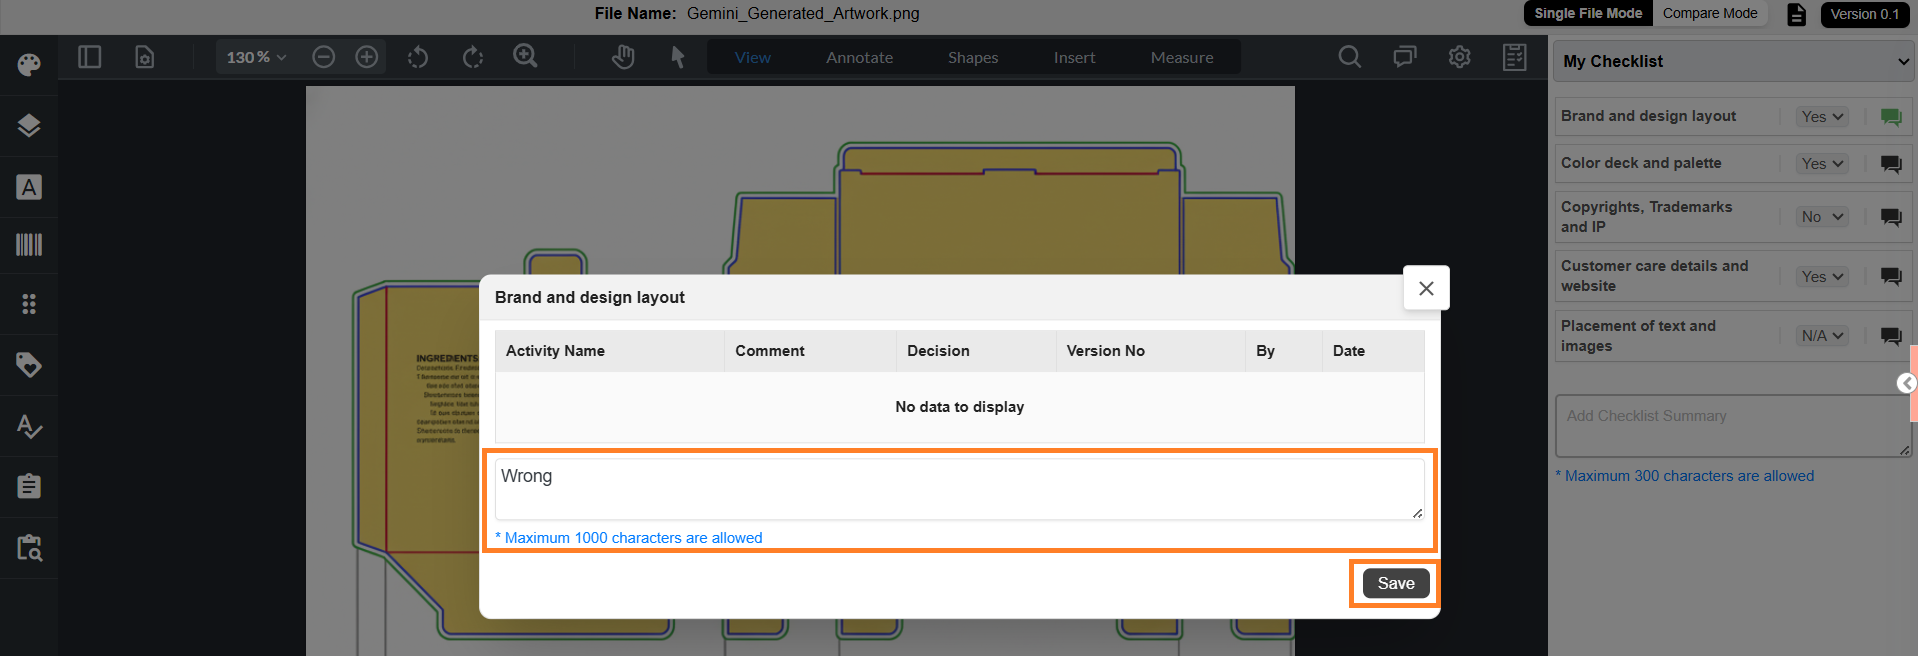
03. Add Comments to Checklist Items (Optional)
- If required, select the comment icon next to the checklist item.
- Enter your comments in the text box.
- Select Save.
- The comment icon turns green to indicate that comments have been added.
 | Note: Maximum 1000 characters allowed. Comments are added to the Comments tab of the project. Comments can be downloaded with artwork annotations (if configured in Viewer Parameter Configuration). |
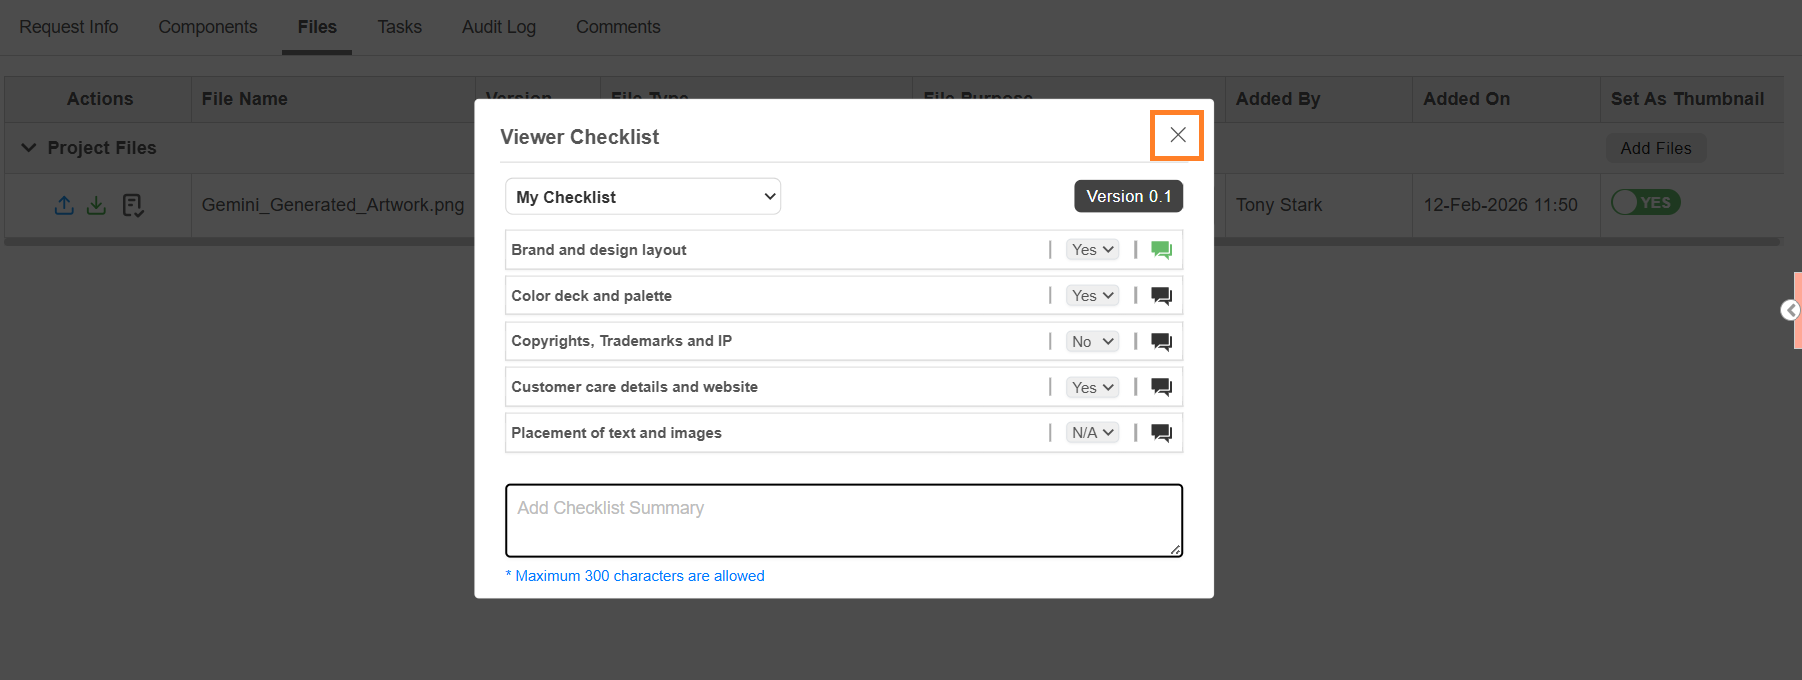
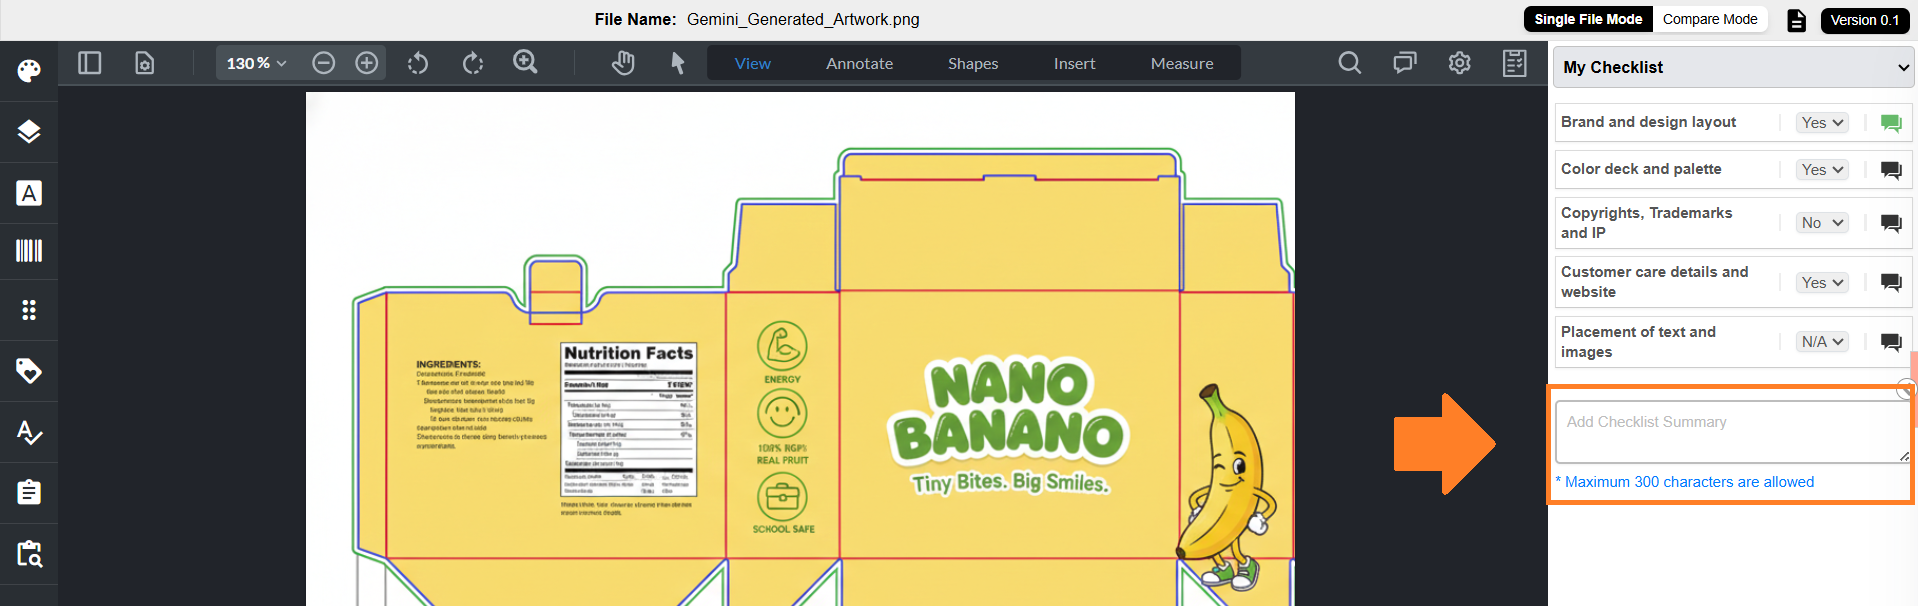
04. Add Checklist Summary (Optional)
Checklist Summary provides an overall summary of all checklist items.
| Note: In some cases, the checklist summary can be configured as mandatory. In such scenarios, users must enter a summary before completing the task. |
To enter checklist summary:
- Select the Checklist Summary text box.
- Enter the summary.
Note: Maximum 300 characters allowed.
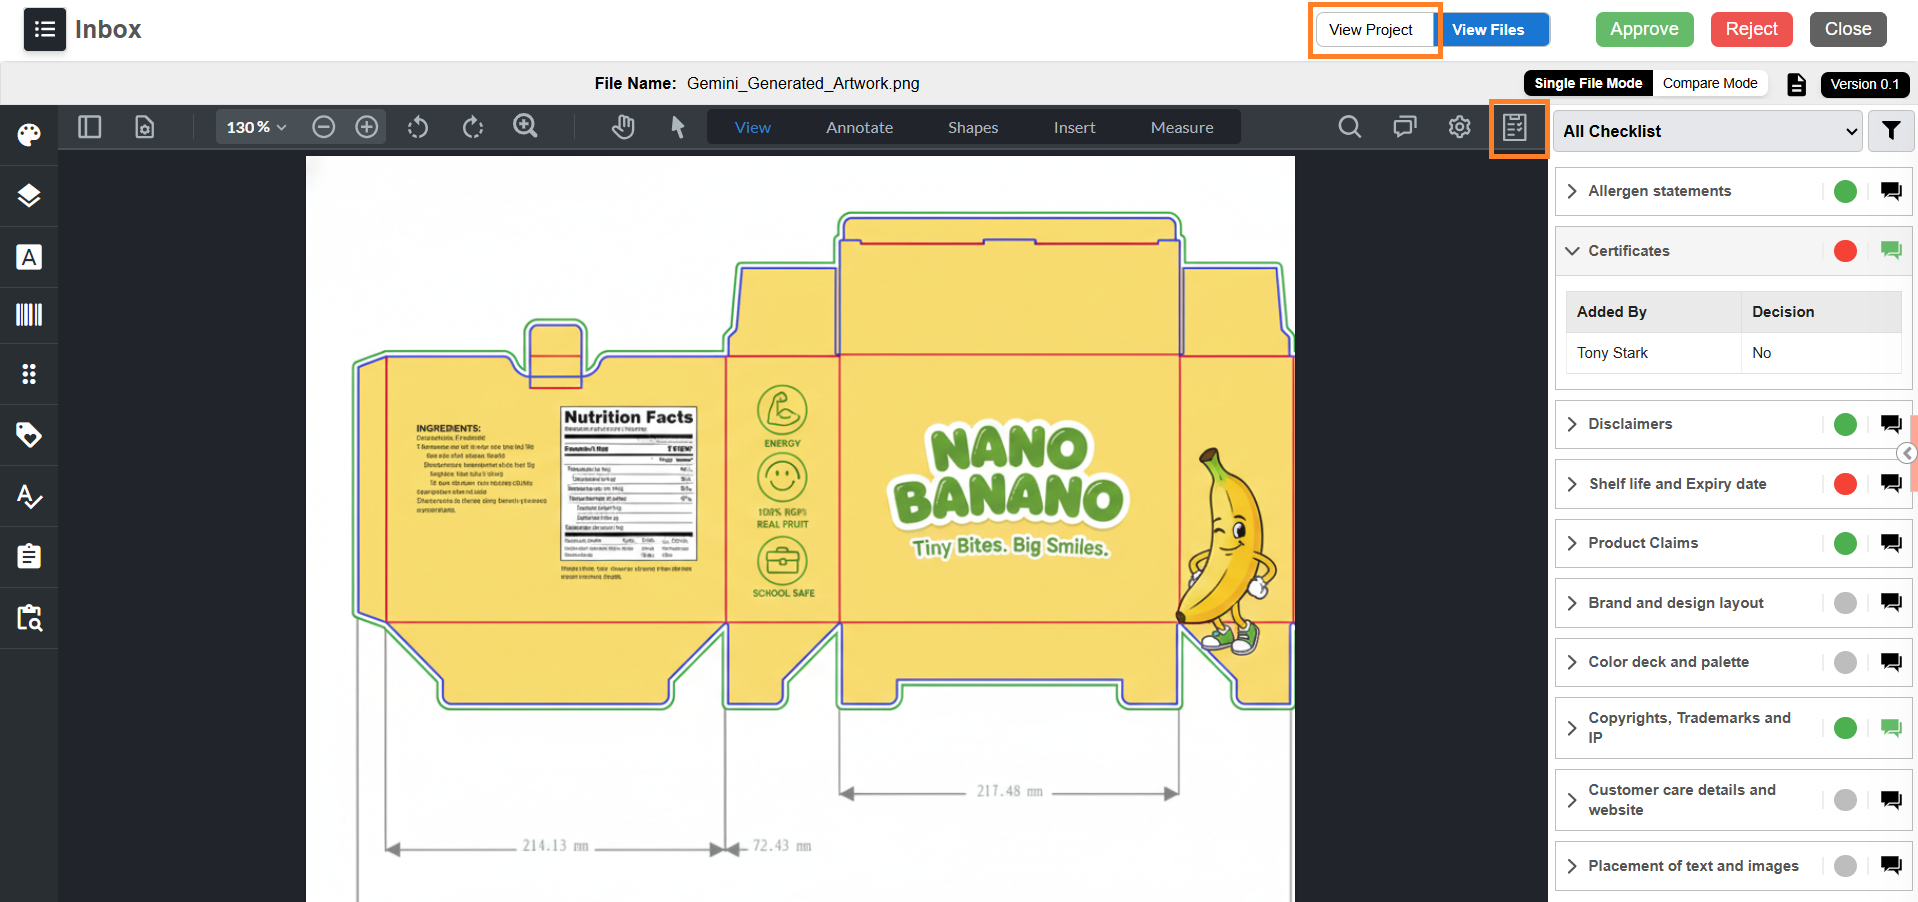
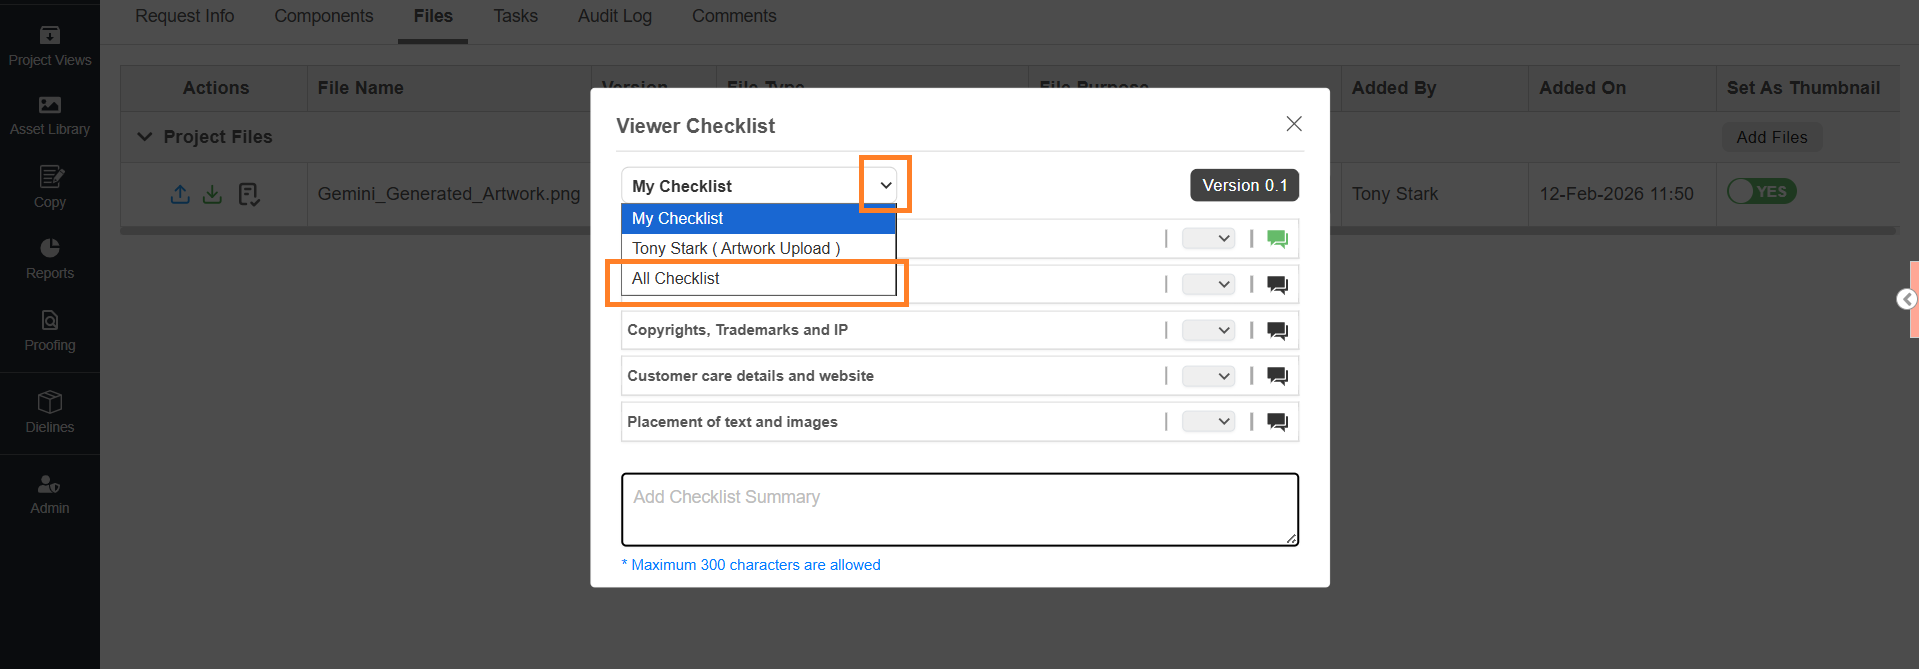
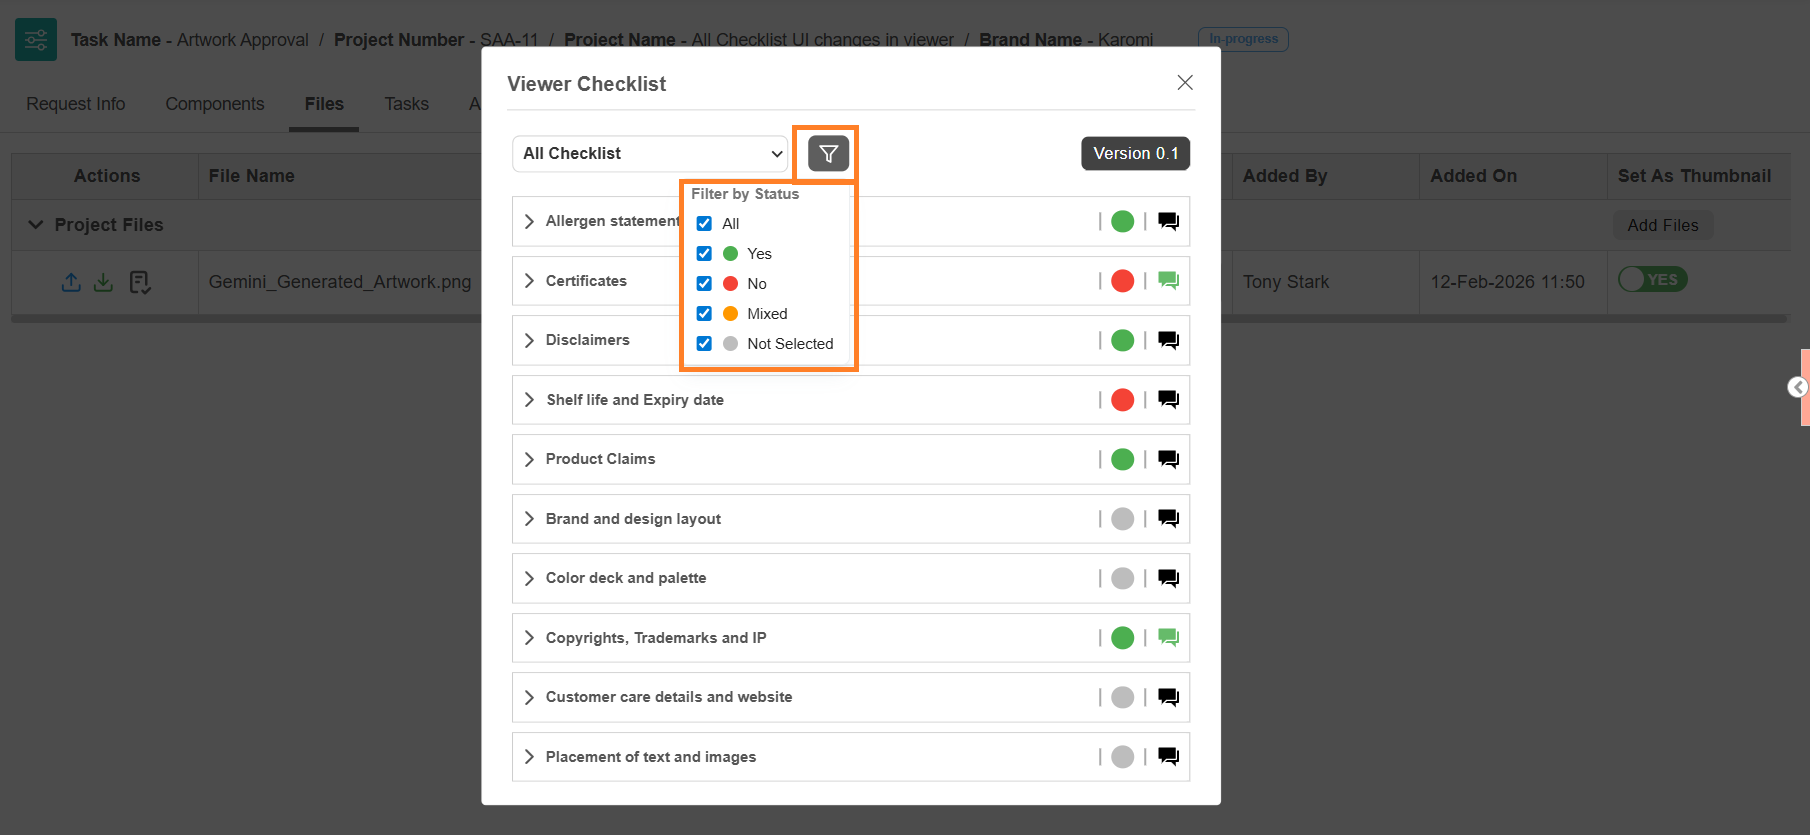
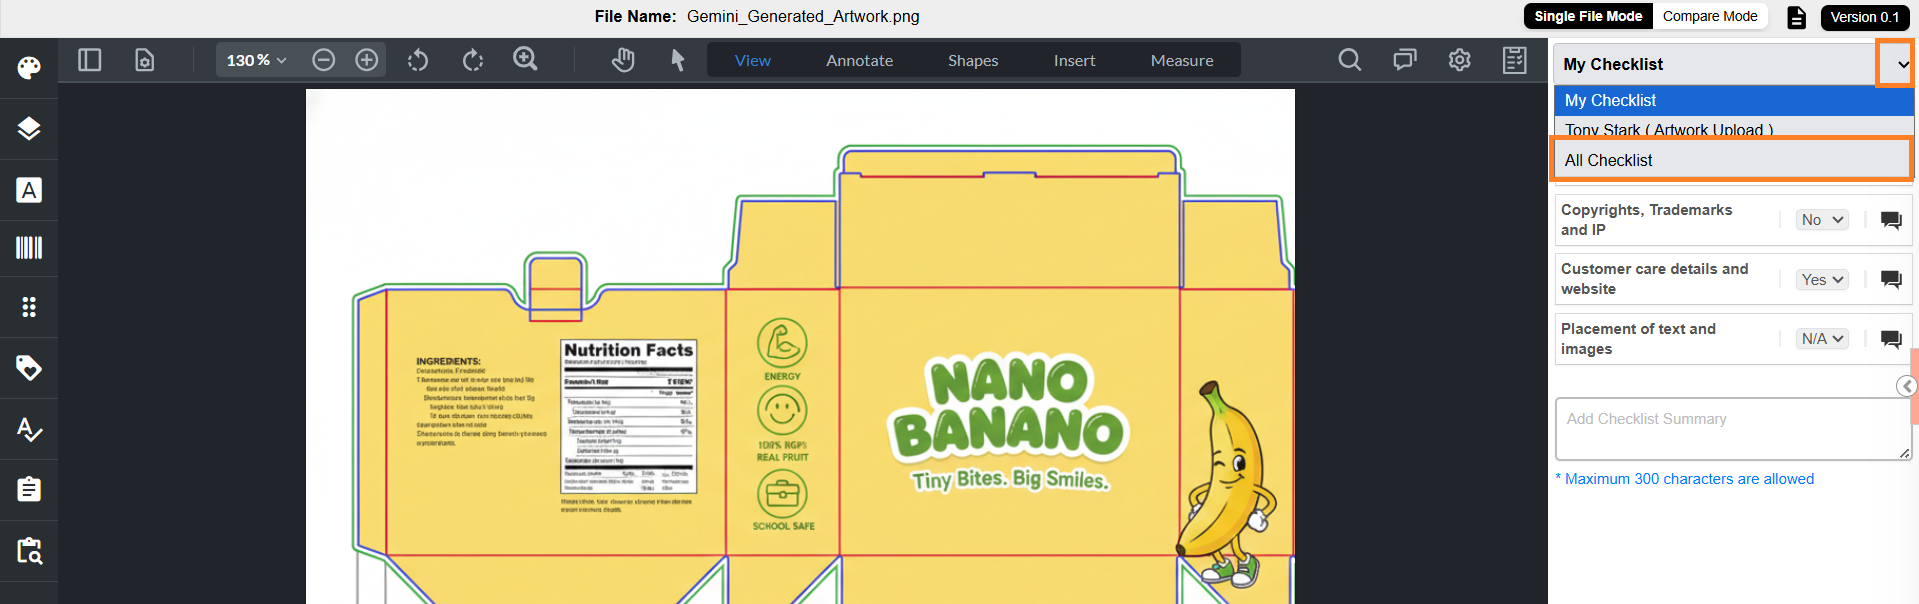
05. View All Checklist Items
This view displays all checklist items up to the current task, including items from previous tasks.
- Select the My Checklist dropdown.
- Choose All Checklist.
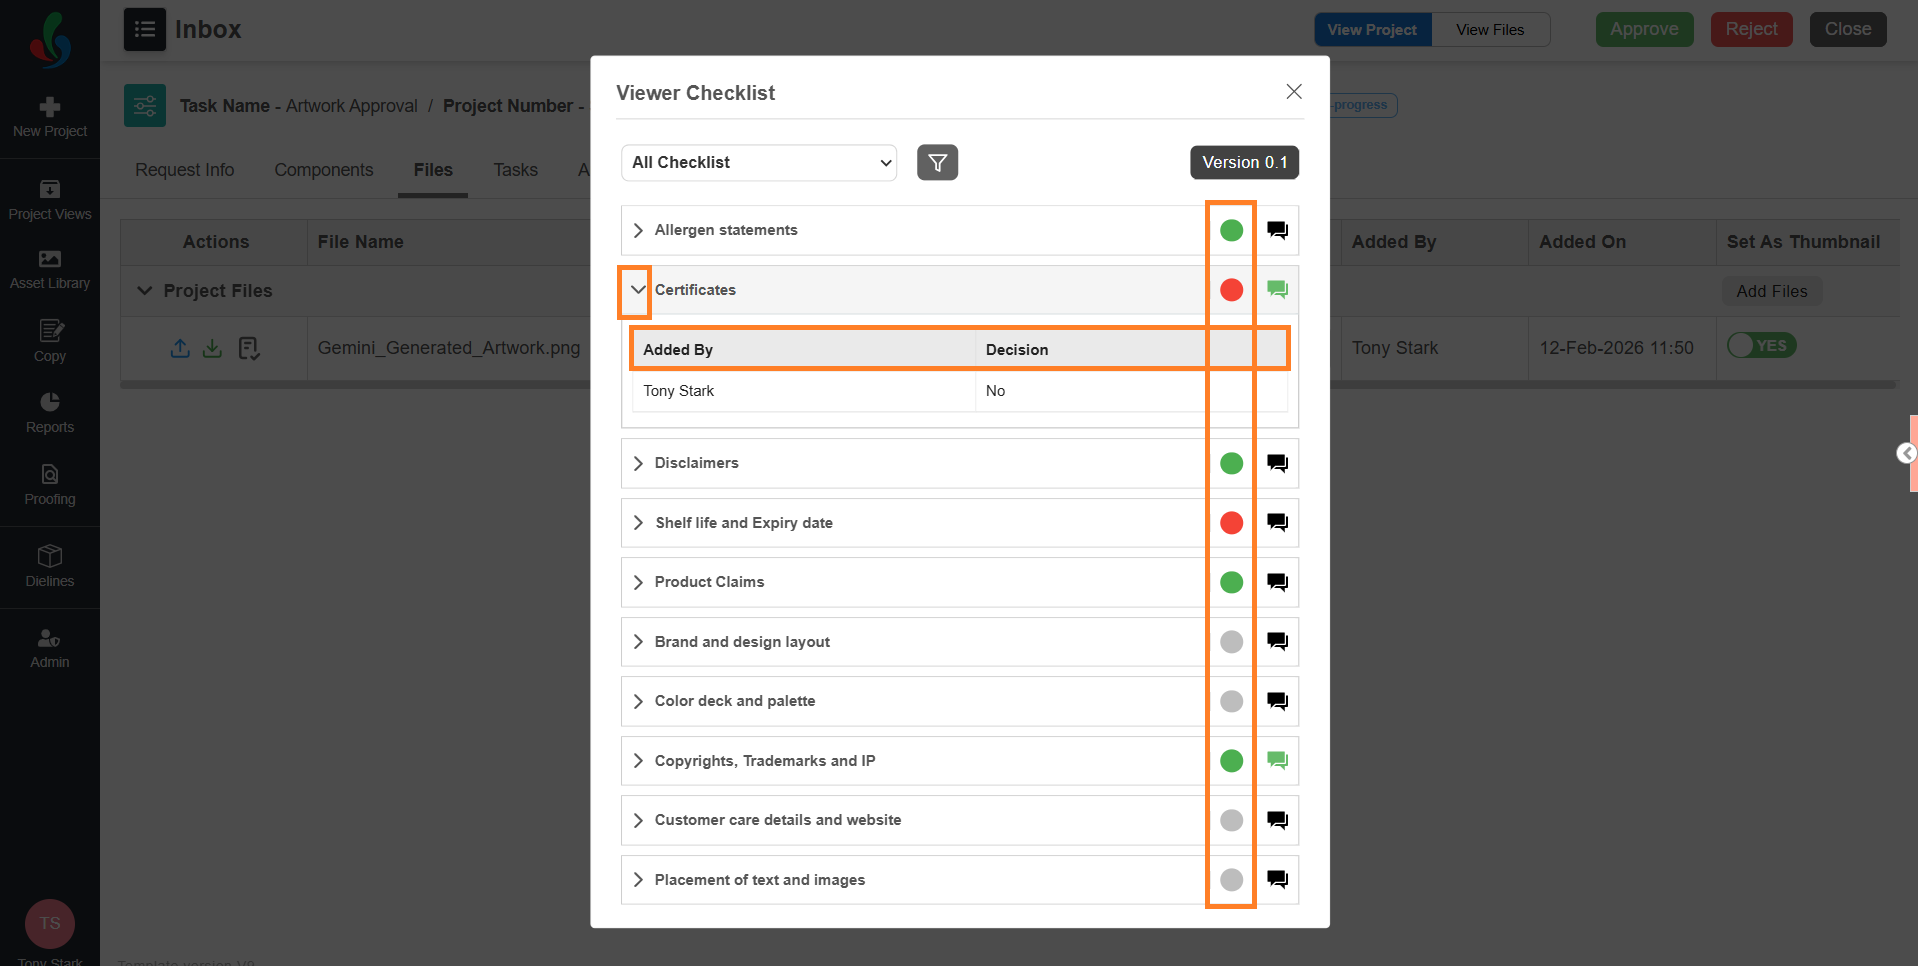
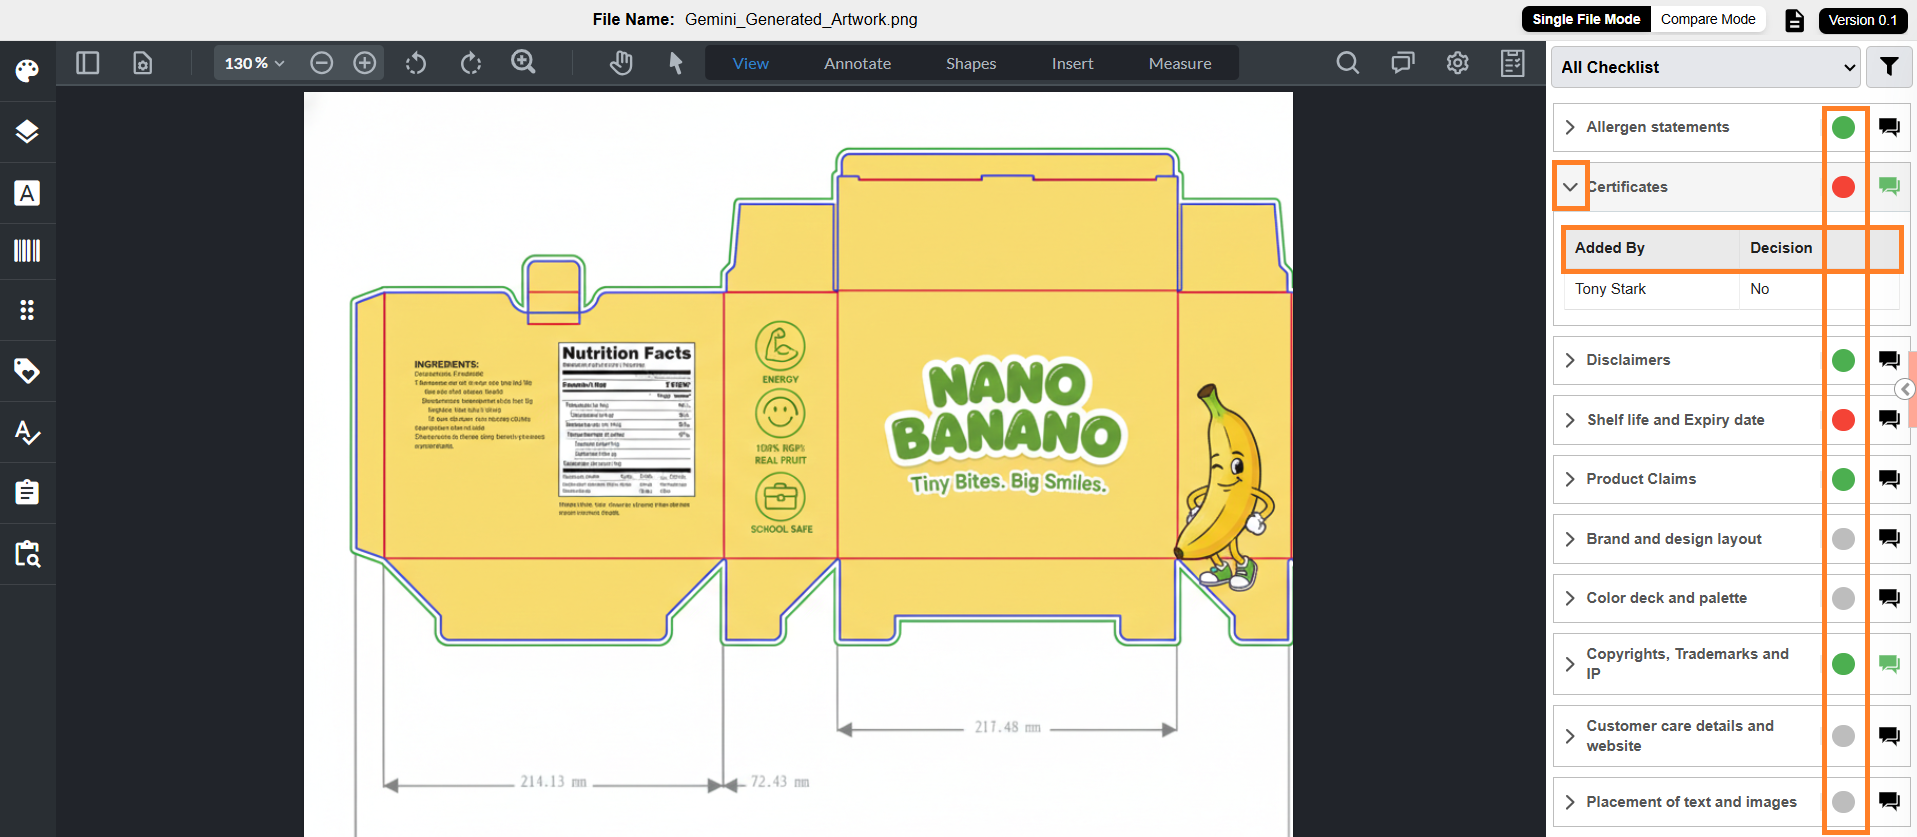
- Each checklist item displays a color indicator representing its status:
- Green: Marked as Yes or N/A
- Red: Marked as No
- Grey: No decision provided
- Orange (Mixed): Multiple users provided different decisions
- Each checklist item includes a decision details toggle.
- When expanded, it shows:
- Added By – User who provided the decision
- Decision – Selected value
Note: Decision details are shown only for the latest file version. Older version details are not displayed in the toggle
- To view older decisions, use the comment icon
- You can also, hover over the color indicator to view:
- Count of Yes
- Count of No
- Count of N/A
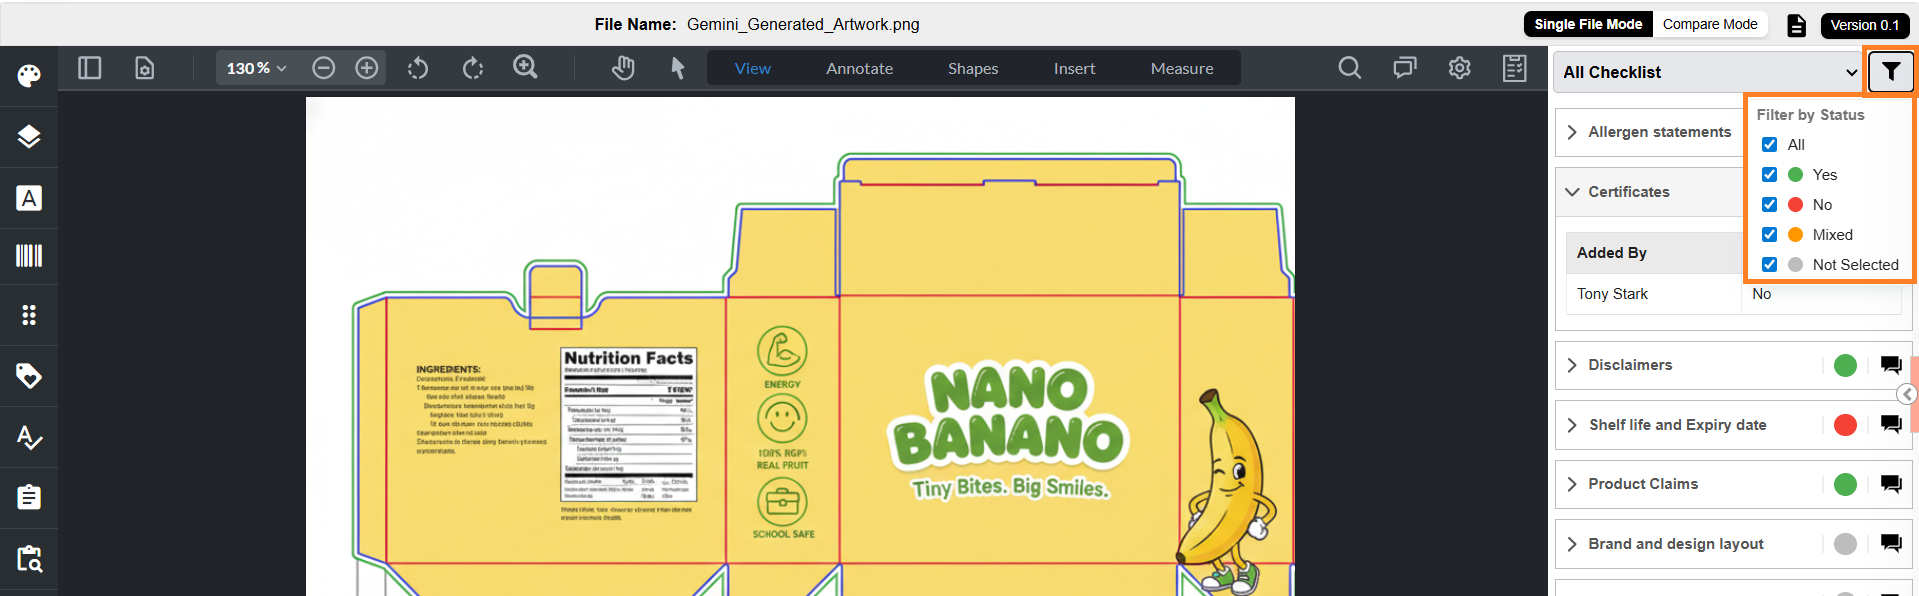
- You can filter checklist items based on status:
- All
- Yes
- No
- Mixed
- Not Selected
- By default, all statuses are selected.
06. Save
Once you have completed the checklist, close the Viewer Checklist pop-up. The system automatically saves your progress.
You can modify checklist responses until the task is completed. Once the task is completed, the checklist can no longer be edited.
Fill Checklist from Web Viewer
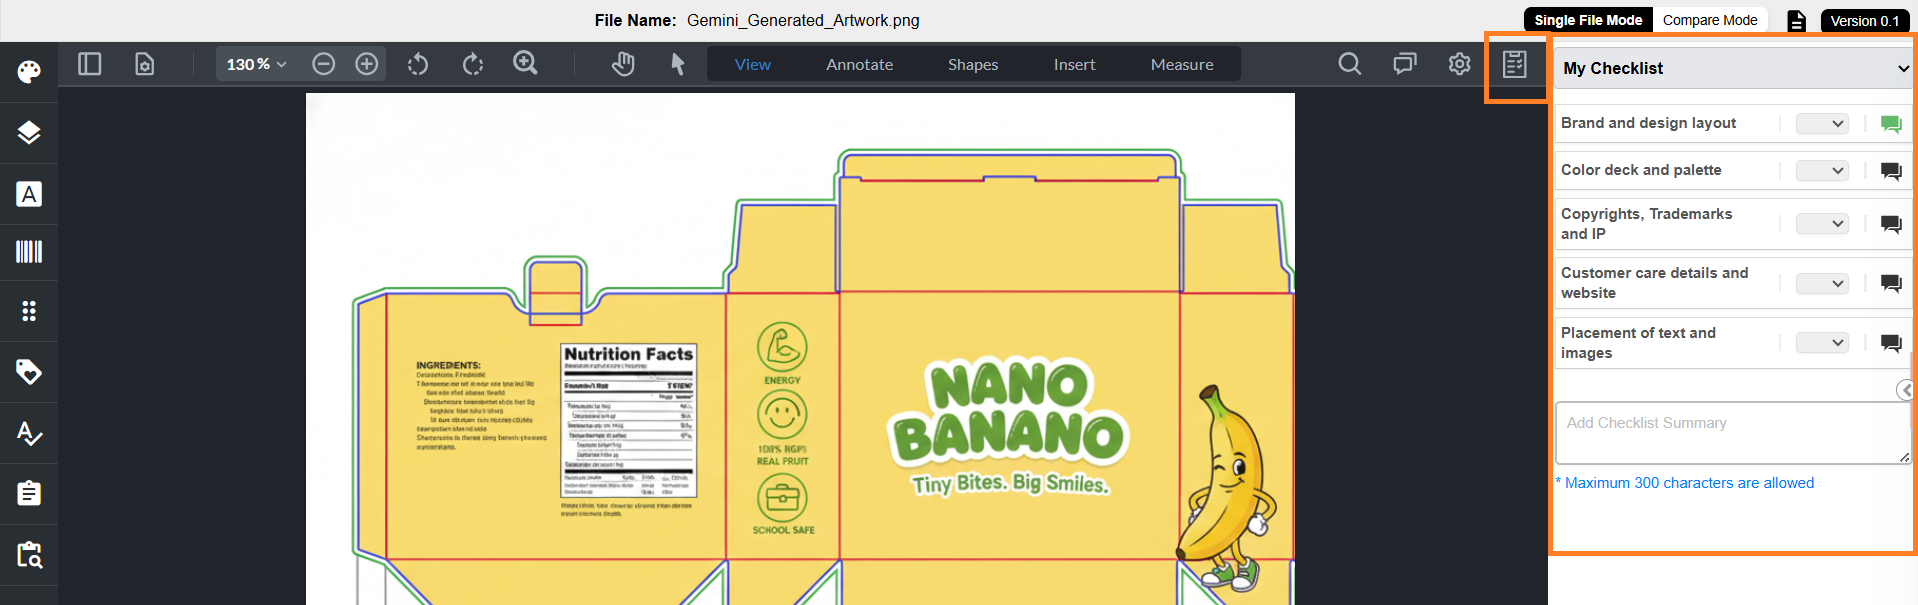
01. Access Checklist from Web Viewer
- Sign in to your ManageArtworks account.
- Navigate to Project Views.
- Open the required project/task.
- Go to the Files tab.
- Select the requited file to open the file in the Web Viewer.
- The checklist panel displays all checklist items associated with the task and file. All actions (decision selection, comments, summary, filtering) work the same as in the Files tab.
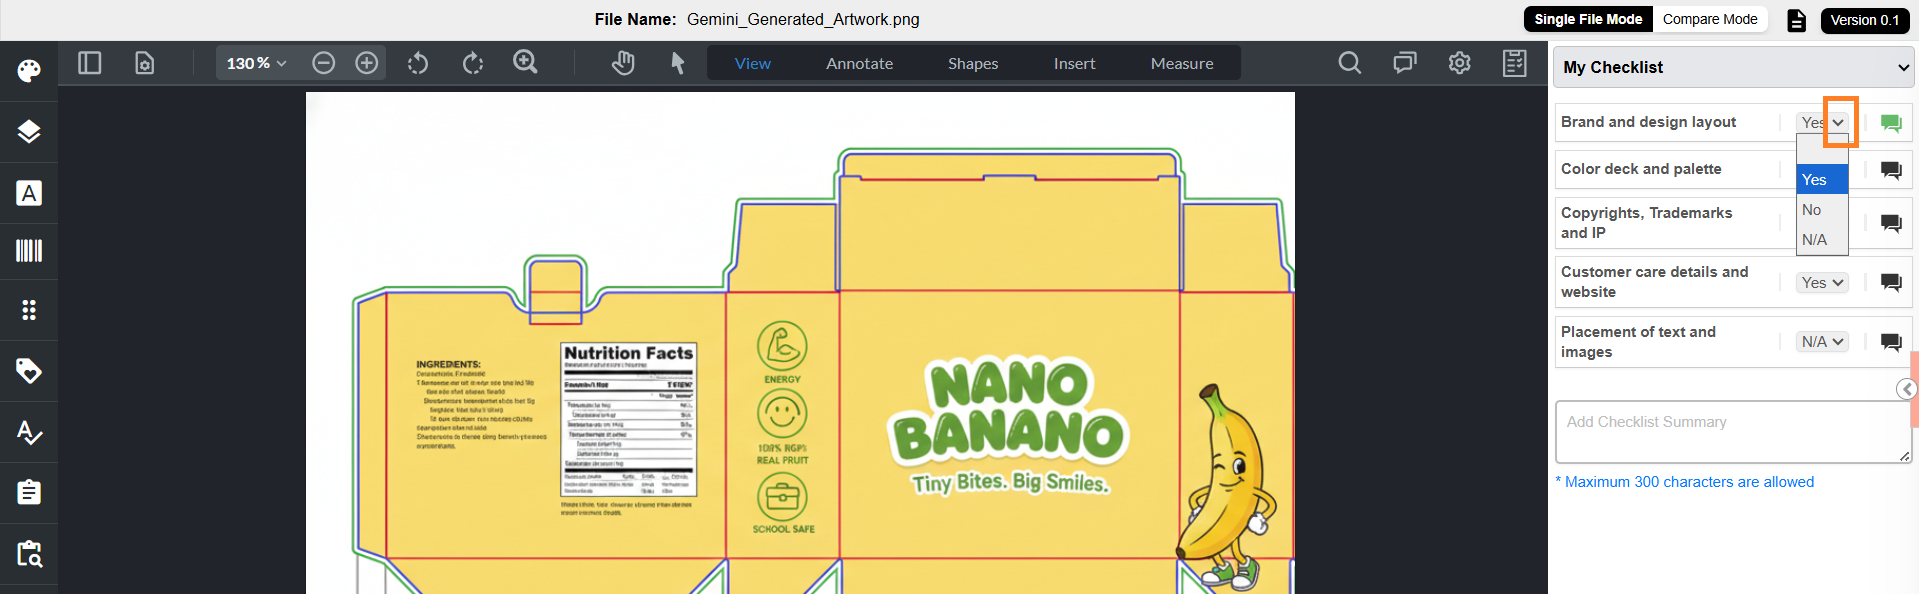
02. Provide Decision for Checklist Items
- For each checklist item:
- Select the dropdown.
- Choose the required decision:
- Approved (Yes)
- Rejected (No)
- Not Applicable (N/A)
03. Add Comments to Checklist Items (Optional)
- If required, select the comment icon next to the checklist item.
- Enter your comments in the text box.
- Select Save.
- The comment icon turns green to indicate that comments have been added.
| Note: Maximum 1000 characters allowed. Comments are added to the Comments tab of the project. Comments can be downloaded with artwork annotations (if configured in Viewer Parameter Configuration). |
04. Add Checklist Summary (Optional)
Checklist Summary provides an overall summary of all checklist items.
| Note: In some cases, the checklist summary can be configured as mandatory. In such scenarios, users must enter a summary before completing the checklist. |
To enter checklist summary:
- Select the Checklist Summary text box.
- Enter the summary.
Note: Maximum 300 characters allowed.
05. View All Checklist Items
This view displays all checklist items up to the current task, including items from previous tasks.
- Select the My Checklist dropdown.
- Choose All Checklist.
- Each checklist item displays a color indicator representing its status:
- Green: Marked as Yes or N/A
- Red: Marked as No
- Grey: No decision provided
- Orange (Mixed): Multiple users provided different decisions
- Each checklist item includes a decision details toggle.
- When expanded, it shows:
- Added By – User who provided the decision
- Decision – Selected value
Note: Decision details are shown only for the latest file version. Older version details are not displayed in the toggle
- To view older decisions, use the comment icon
- You can also, hover over the color indicator to view:
- Count of Yes
- Count of No
- Count of N/A
- You can filter checklist items based on status:
- All
- Yes
- No
- Mixed
- Not Selected
- By default, all statuses are selected.
06. Save
Once you have completed the checklist, close the checklist panel by selecting the Checklist icon or navigate back to the project by selecting View Project. The system automatically saves your progress.
You can modify checklist responses until the task is completed. Once the task is completed, the checklist can no longer be edited.