Checklists
A Checklist helps ensure that all required quality checks are completed for a task.
 | Note: In ManageArtworks, checklists are associated only with the file type, even though they are configured at the task level. If a checklist is configured for a task but the corresponding file type is not uploaded in that task, the checklist will not appear. 💡Tip: To avoid this limitation, configure the same checklist file type as a required file for the task. This ensures that users cannot submit the task unless the required file is uploaded. Once the file is uploaded, the checklist becomes available. |
How to Configure Checklists
Configuring checklists involves the following steps:
- Configure Error Codes (Optional)
- Configure Checklist Items
- Configure Checklist Groups
- Configure Checklist Groups to Tasks
01. Configure Error Codes (Optional)
Error Codes help categorize and track issues identified during checklist validation. An Error Code represents a specific type of issue or non-compliance detected when reviewing artwork or files. By associating an error code with a checklist item, reviewers can record the exact reason when a checklist item fails. This helps standardize issue reporting and enables better analysis of recurring issues across projects.
Example Use Cases
- Regulatory Error – Required regulatory information is missing.
- Barcode Error – Barcode is not placed according to guidelines.
- Font/Type Error – Text size does not meet compliance requirements.
When a reviewer marks a checklist item as failed, the corresponding error code helps clearly identify the issue and can also be used in reports and analysis.
The system includes several default error codes that represent common validation issues. You can modify these codes or create new ones based on your business requirements.
 | For instructions on creating or modifying error codes, refer to Configure Checklist Error Codes. |
02. Configure Checklist Items
Checklist Items represent the individual quality control checks performed during file review. Each checklist item defines a specific validation that must be verified before a task can be completed. These items act as the master data for checklist validation and can be reused across multiple checklist groups.
Example Use Cases
- Is barcode present in the artwork?
- Is brand typography followed in the artwork?
- Is there a spelling mistakes?
The system provides several default checklist items for common validation scenarios. You can modify these items or create additional checklist items to match your business requirements.
| For instructions on creating or modifying checklist items, refer to Configure Checklist Items. |
03. Configure Checklist Groups
Checklist Groups allow you to organize multiple checklist items into a single reusable checklist set. Instead of assigning individual checklist items to tasks, ManageArtworks allows you to assign checklist groups. This makes it easier to manage and apply multiple validation checks to workflow tasks.
Example Use Cases
You may create different checklist groups for different processes, such as:
- Artwork Review Checklist
- Regulatory Compliance Checklist
- Pre-Press Validation Checklist
In ManageArtworks, only checklist groups can be linked to tasks, not individual checklist items.
| For instructions on creating checklist groups, refer to Configure Checklist Groups. |
04. Configure Checklist Groups to Tasks
Once a checklist group is created, it can be assigned to tasks within a workflow template. When a checklist group is configured for a task, the checklist items within that group will be available for reviewers during task execution.
Before assigning a checklist group to a task, ensure that the required checklist group has already been created.
| For instructions on assigning checklist groups to tasks, refer to Create/Edit Workflow Template. |
05. Checklist Behavior During Task Execution
Once a checklist group is configured for a task, users can view and complete the checklist during task execution.
When a file is uploaded in the configured task, users can access the checklist associated with the corresponding file type. Users can then review each checklist item and record the results as part of the task completion process.
| Note: If the configured checklist file type is not uploaded in the task, the checklist will not be displayed. |
How to Fill a Checklist
Once a checklist is configured for a task and the required file is uploaded, users can fill the checklist during task execution.
You can fill the checklist using either of the following options:
Fill Checklist from Files Tab
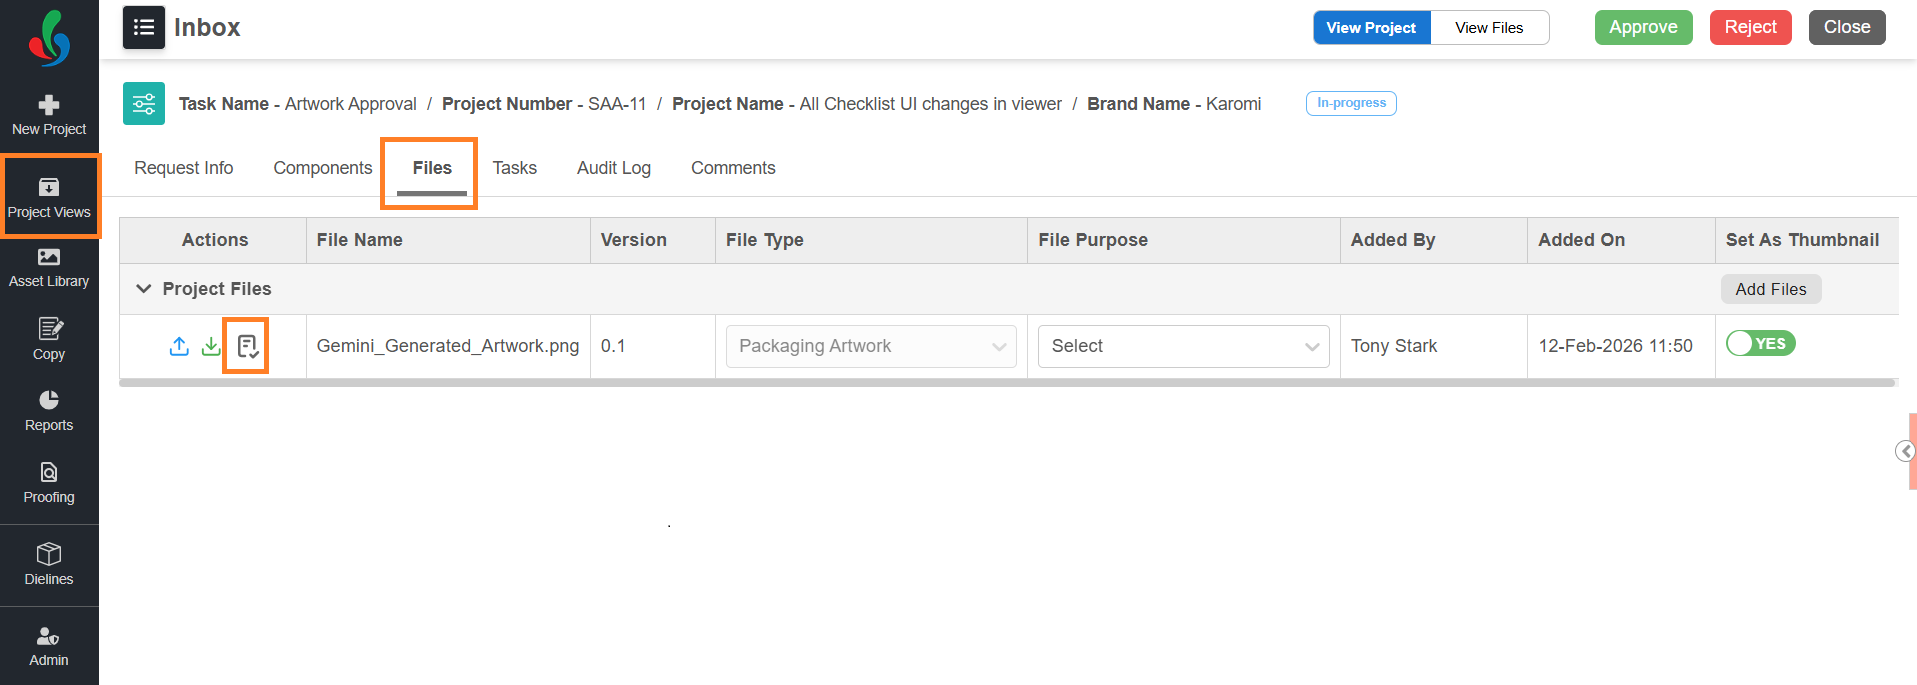
01. Access Checklist from Files Tab
- Sign in to your ManageArtworks account.
- Navigate to Project Views.
- Open the required project/task.
- Go to the Files tab.
- Select the Viewer Checklist icon associated with the file.
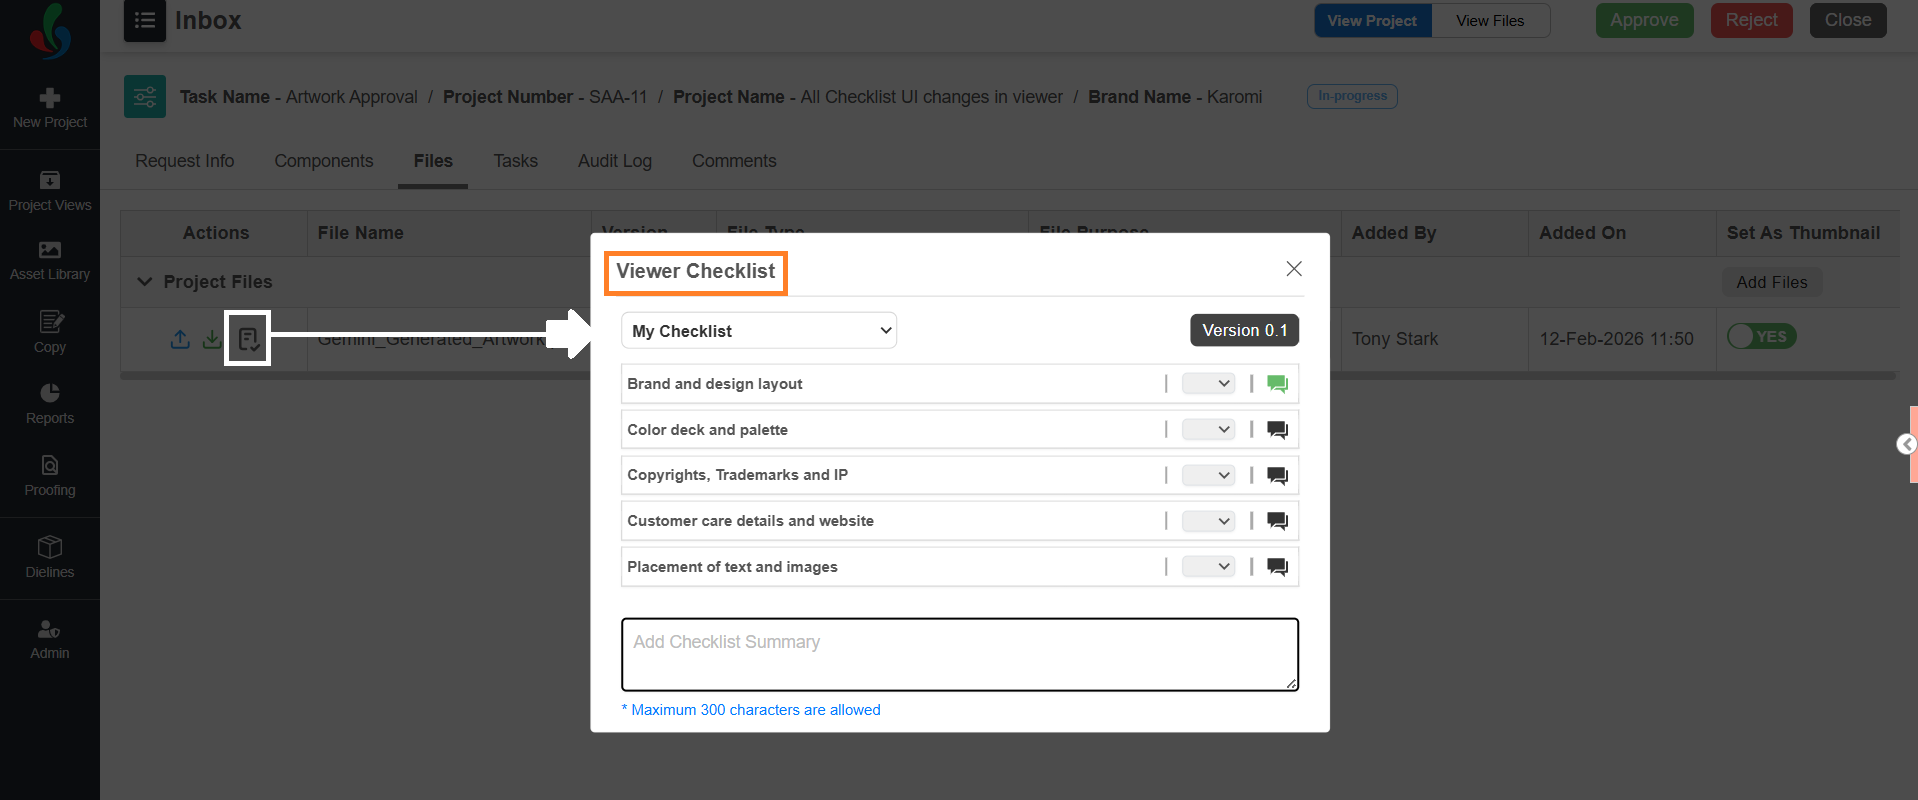
- The Viewer Checklist popup displays all checklist items associated with the task and file.
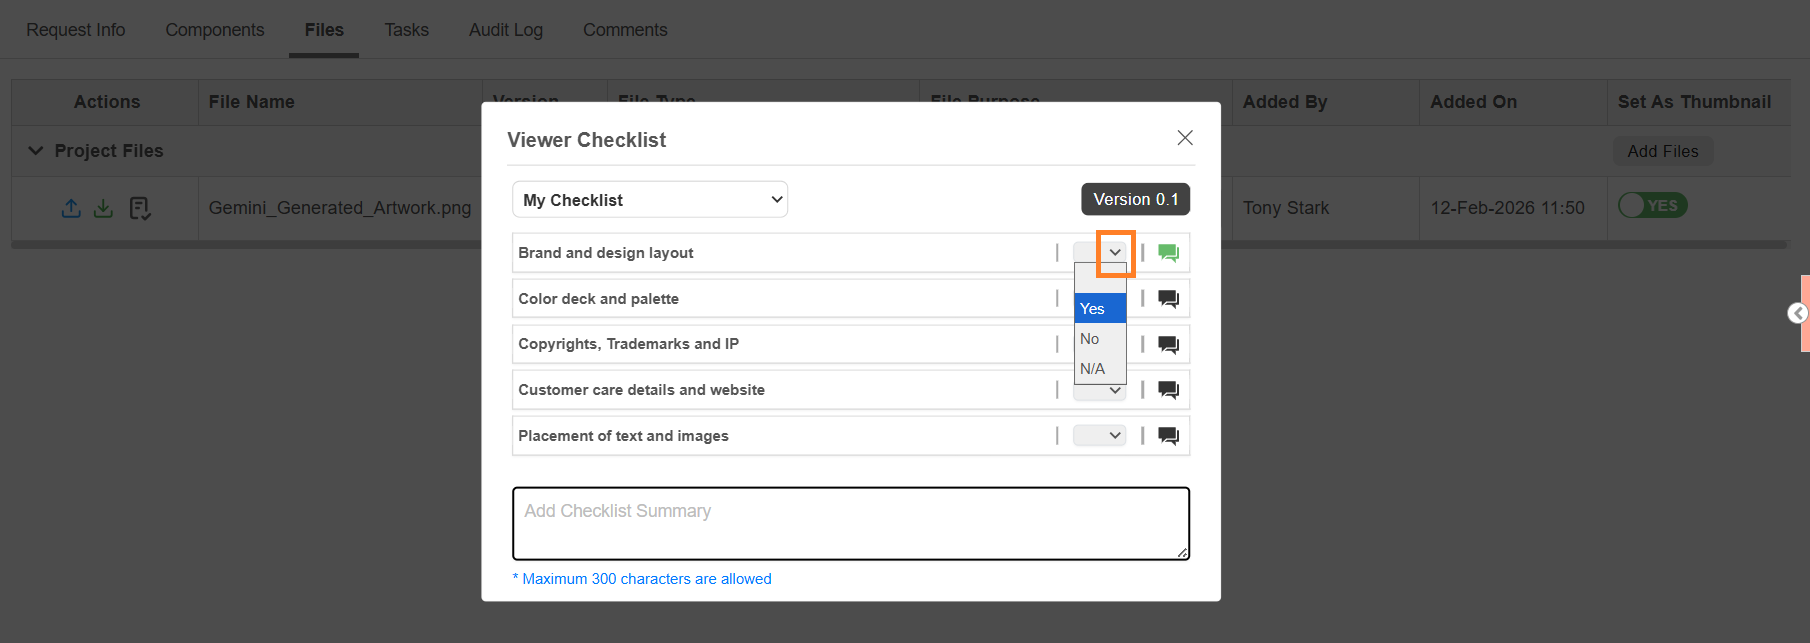
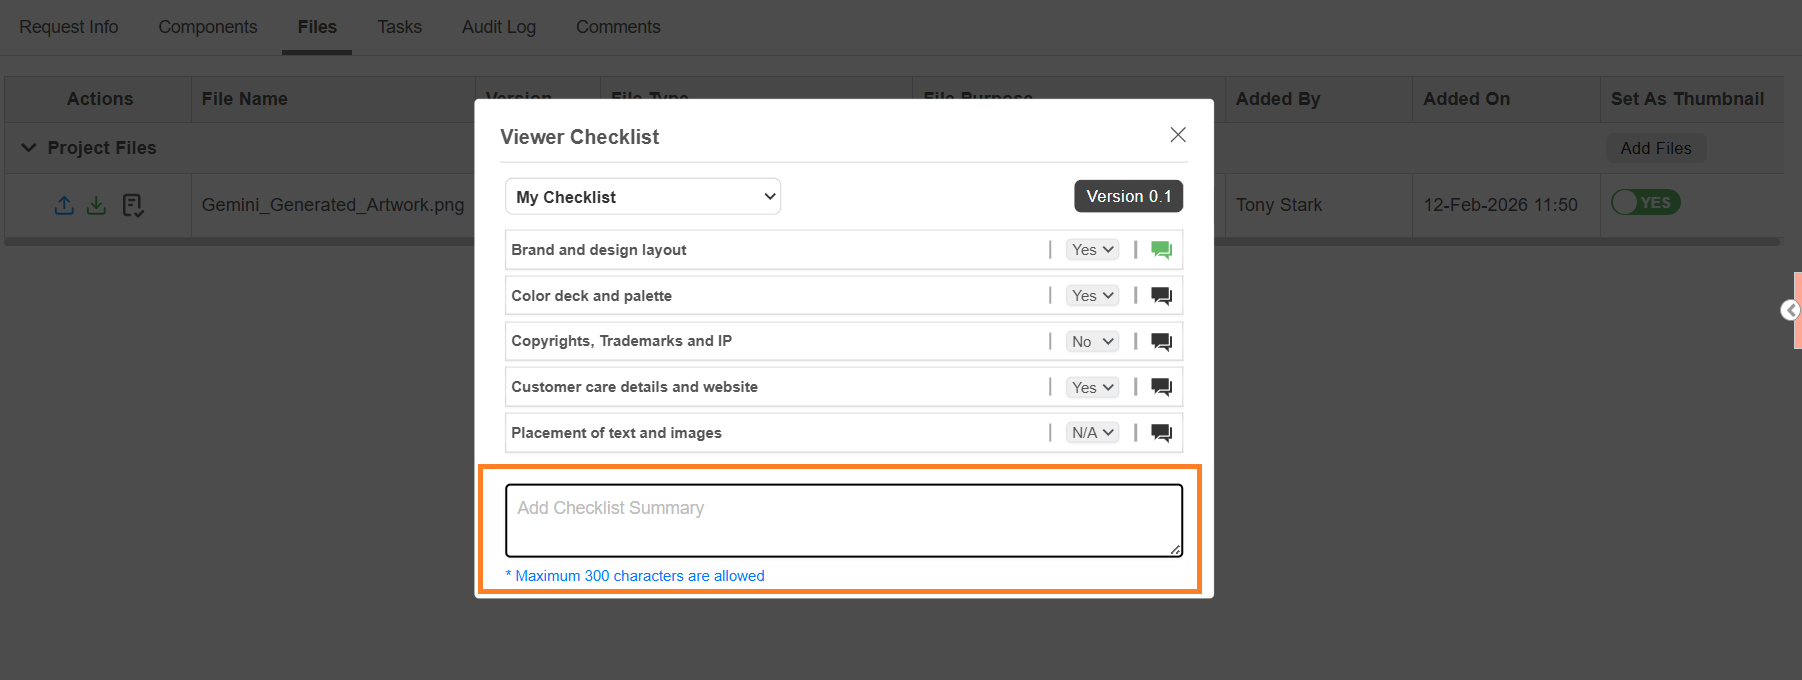
02. Provide Decision for Checklist Items
- For each checklist item:
- Select the dropdown.
- Choose the required decision:
- Approved (Yes)
- Rejected (No)
- Not Applicable (N/A)
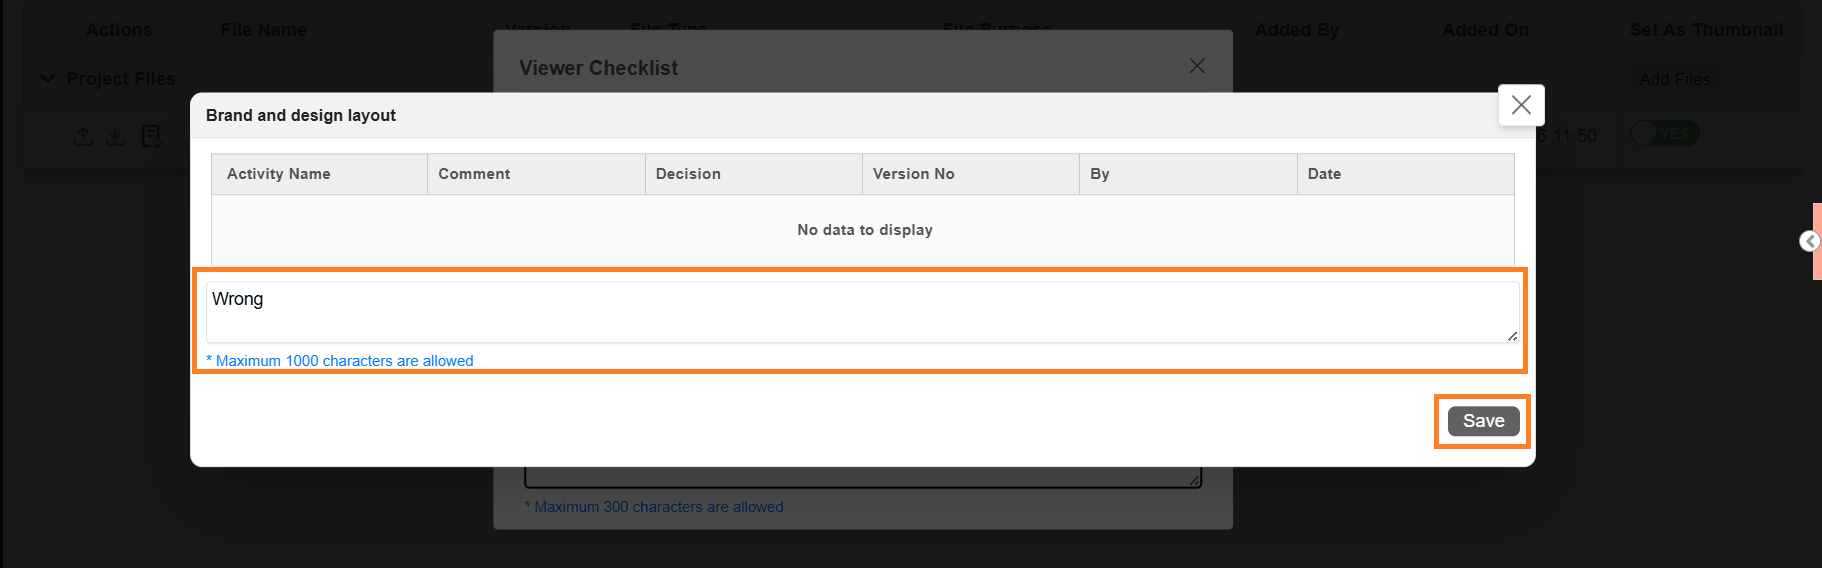
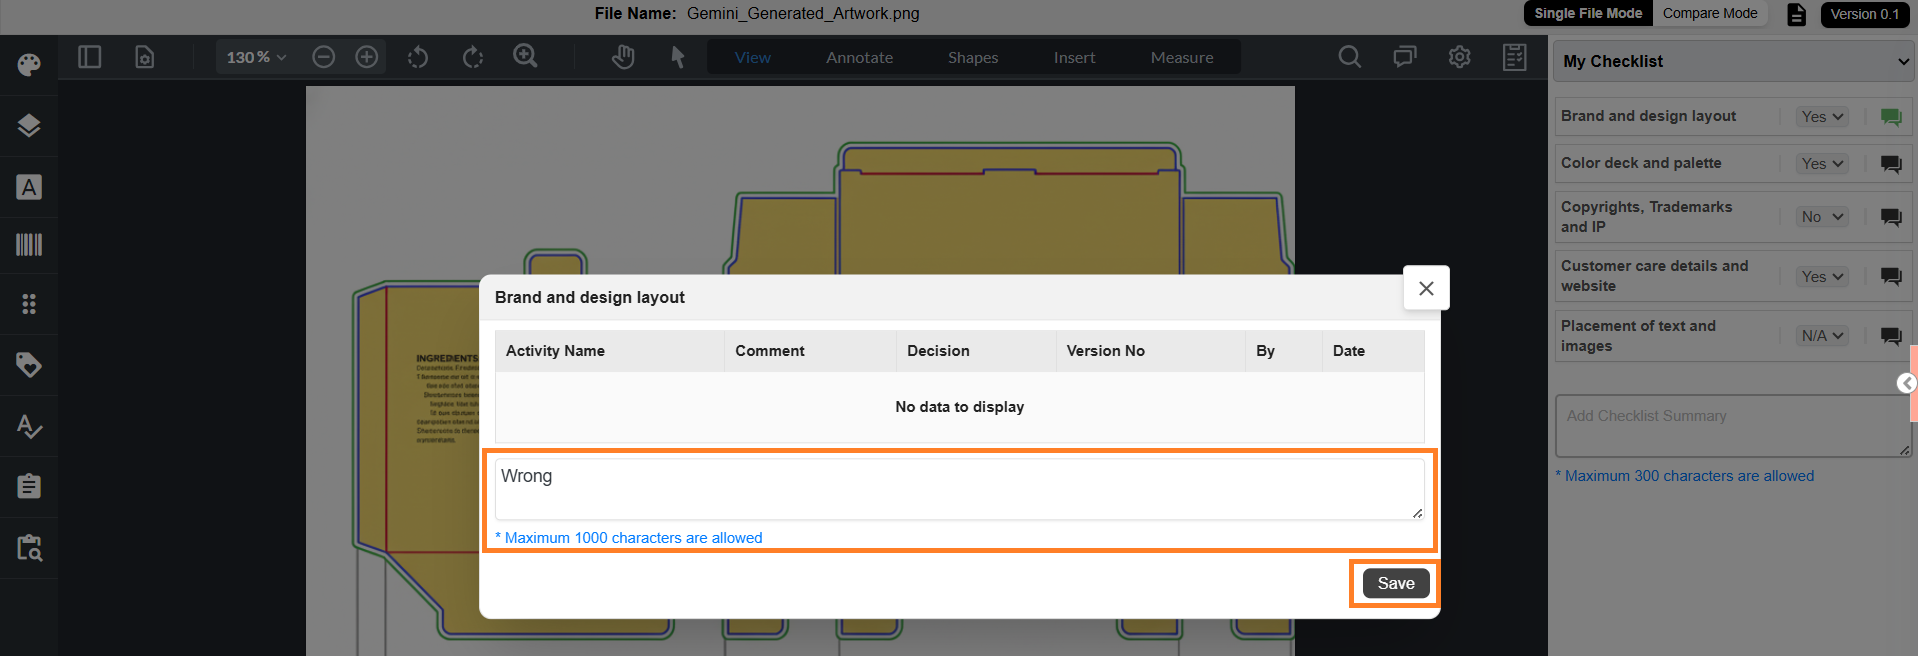
03. Add Comments to Checklist Items (Optional)
- If required, select the comment icon next to the checklist item.
- Enter your comments in the text box.
- Select Save.
- The comment icon turns green to indicate that comments have been added.
| Note: Maximum 1000 characters allowed. Comments are added to the Comments tab of the project. Comments can be downloaded with artwork annotations (if configured in Viewer Parameter Configuration). |
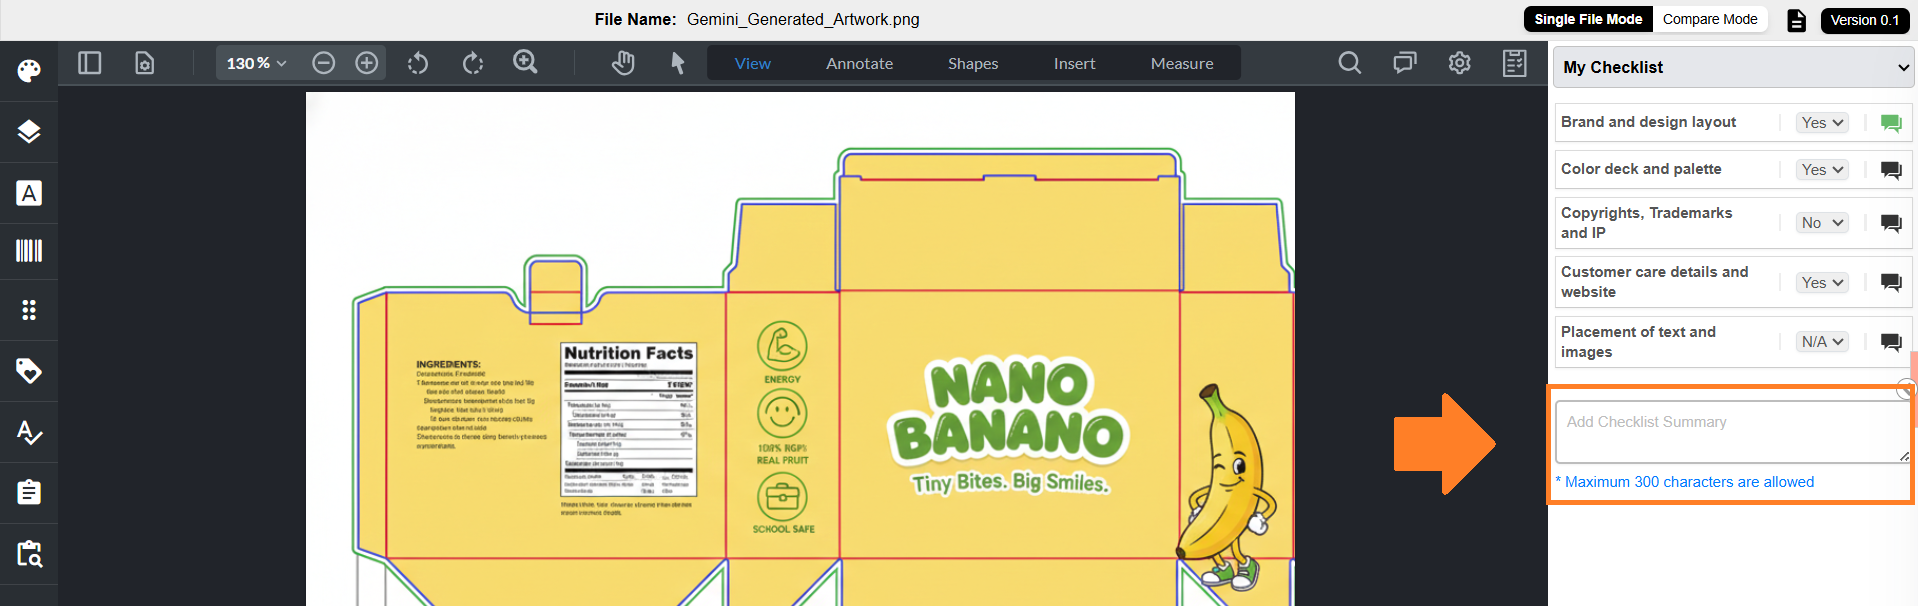
04. Add Checklist Summary (Optional)
Checklist Summary provides an overall summary of all checklist items.
| Note: In some cases, the checklist summary can be configured as mandatory. In such scenarios, users must enter a summary before completing the task. |
To enter checklist summary:
- Select the Checklist Summary text box.
- Enter the summary.
Note: Maximum 300 characters allowed.
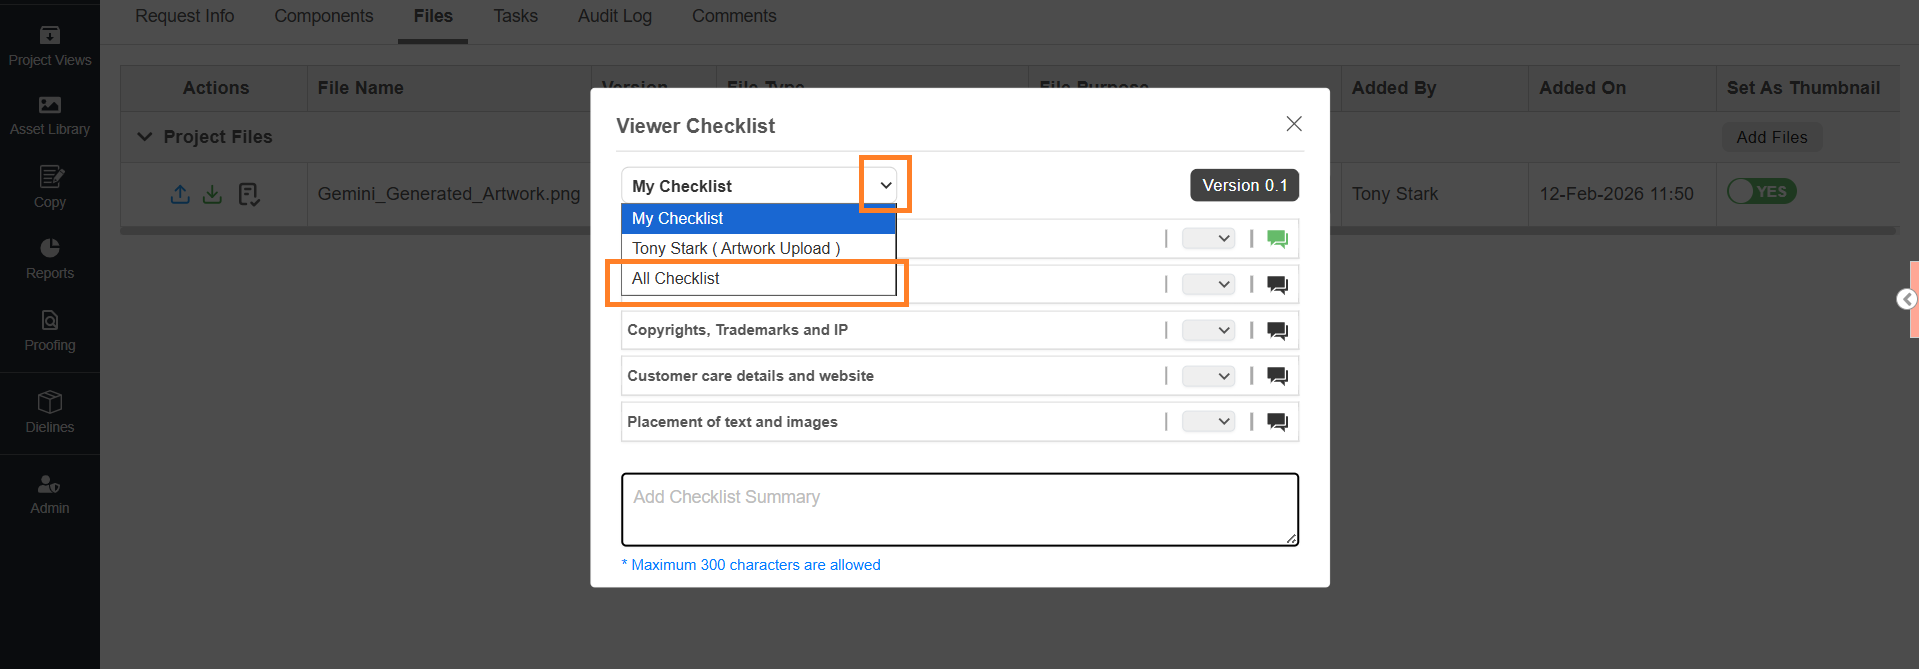
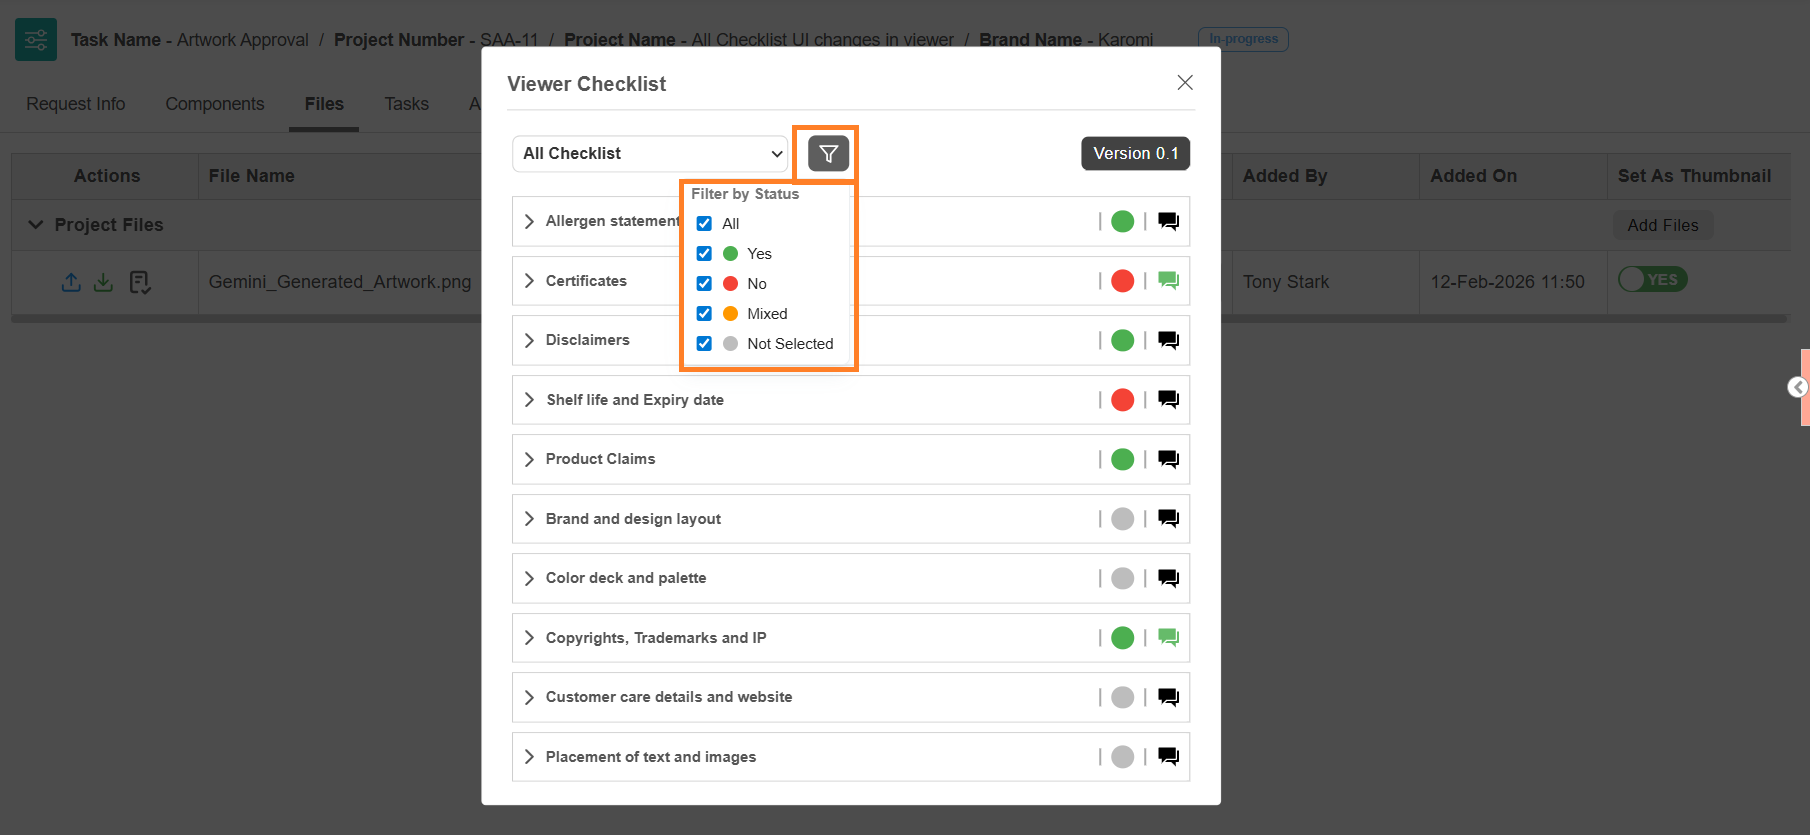
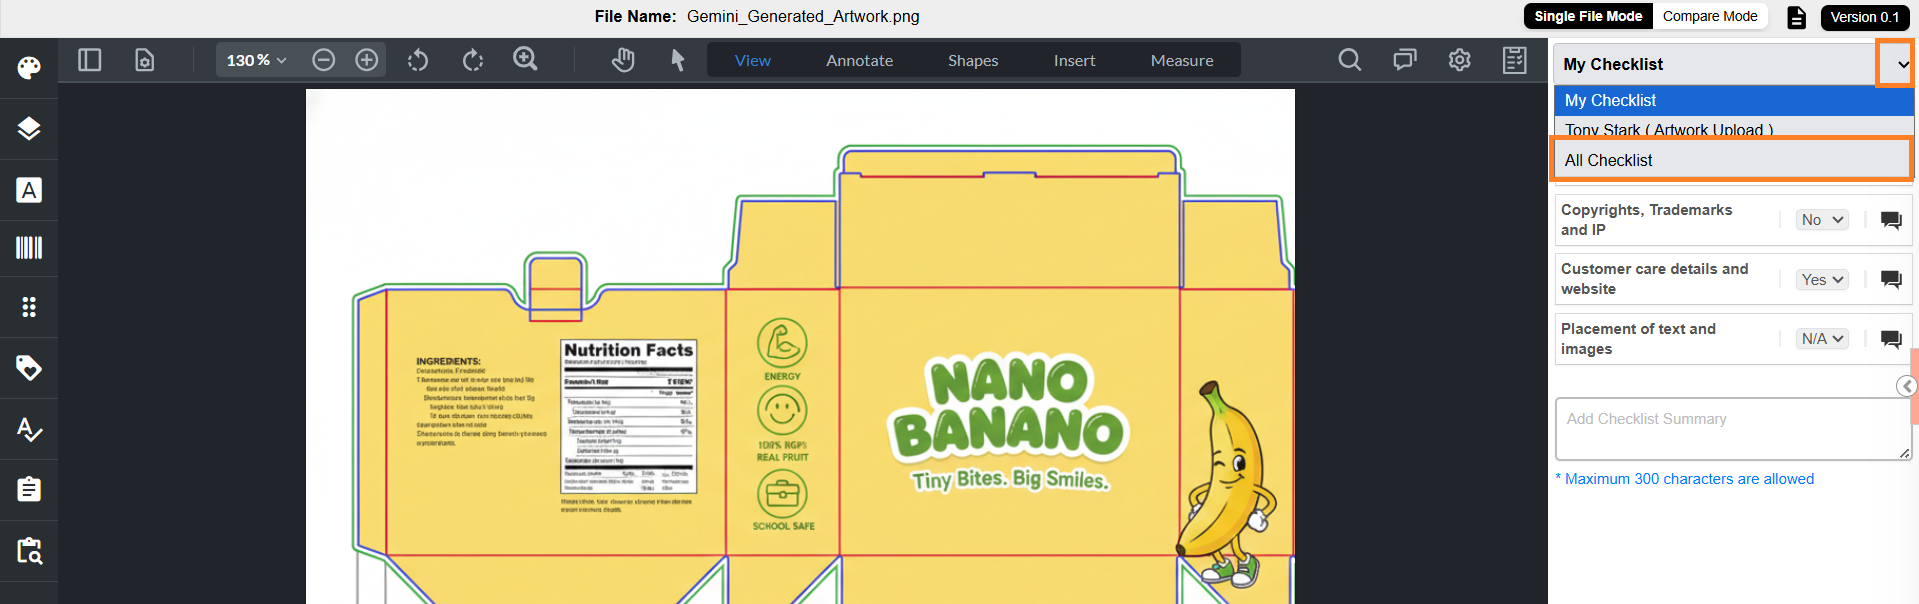
05. View All Checklist Items
This view displays all checklist items up to the current task, including items from previous tasks.
- Select the My Checklist dropdown.
- Choose All Checklist.
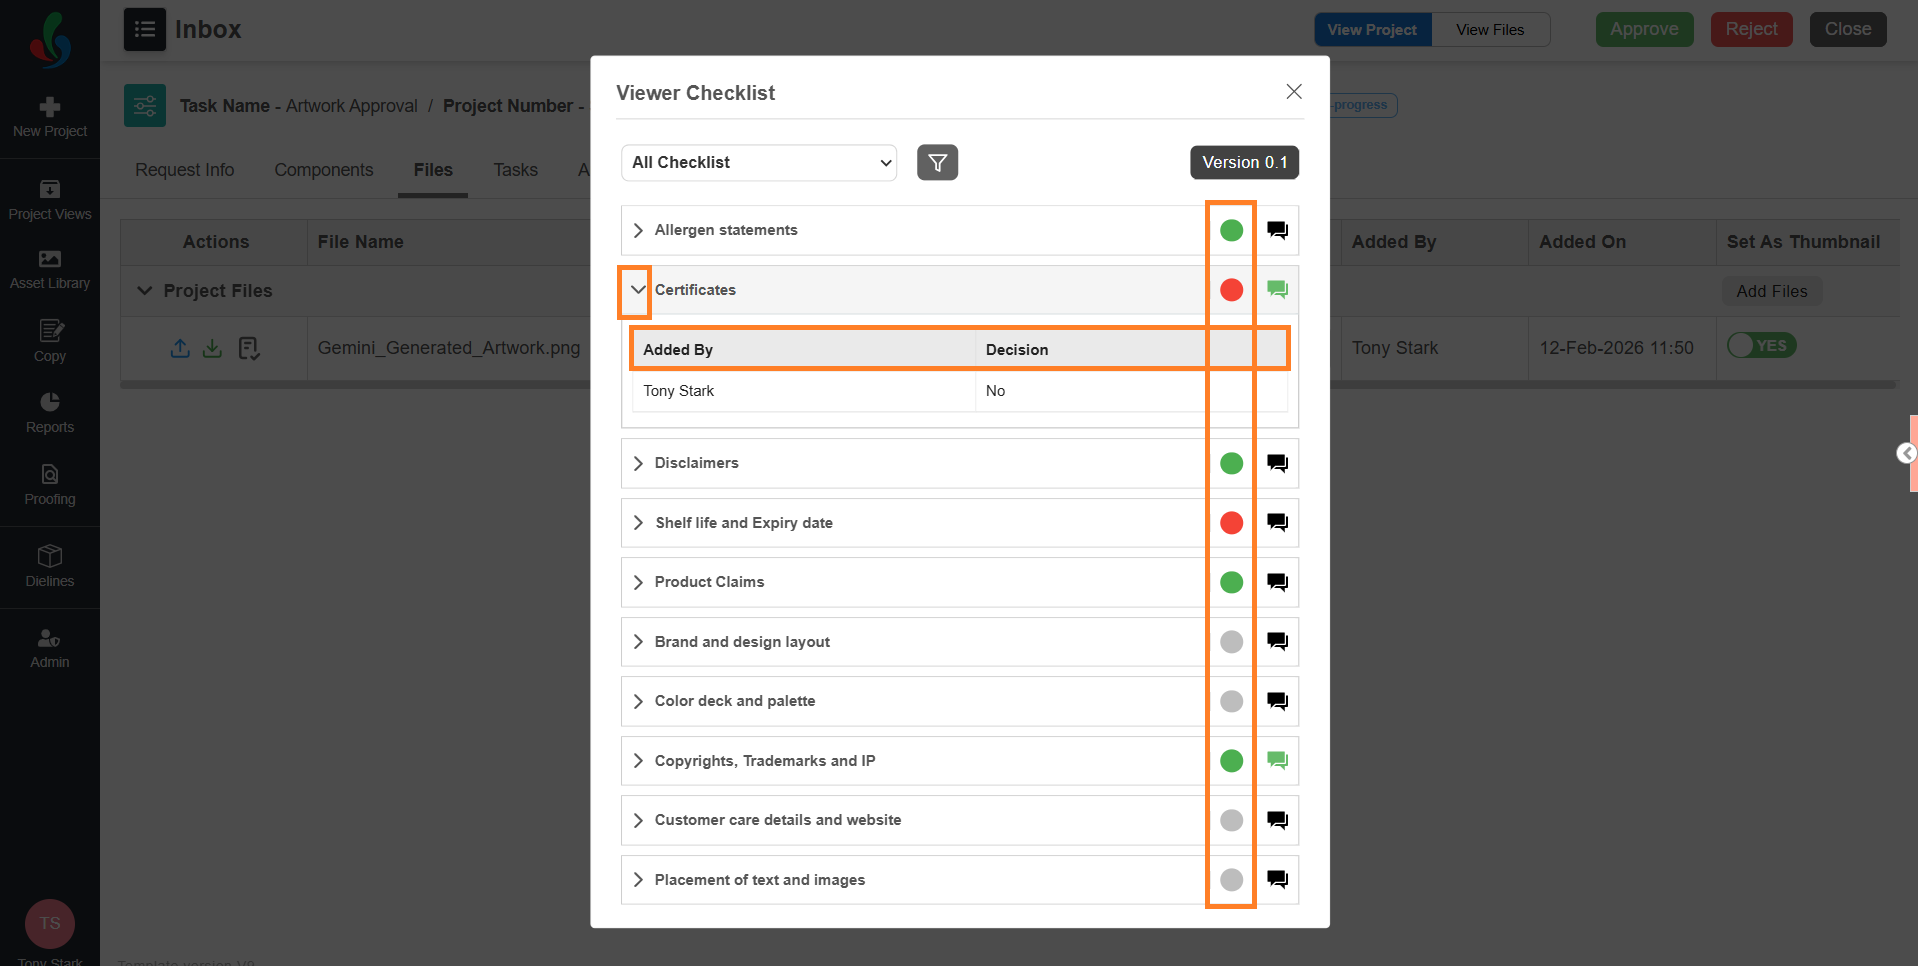
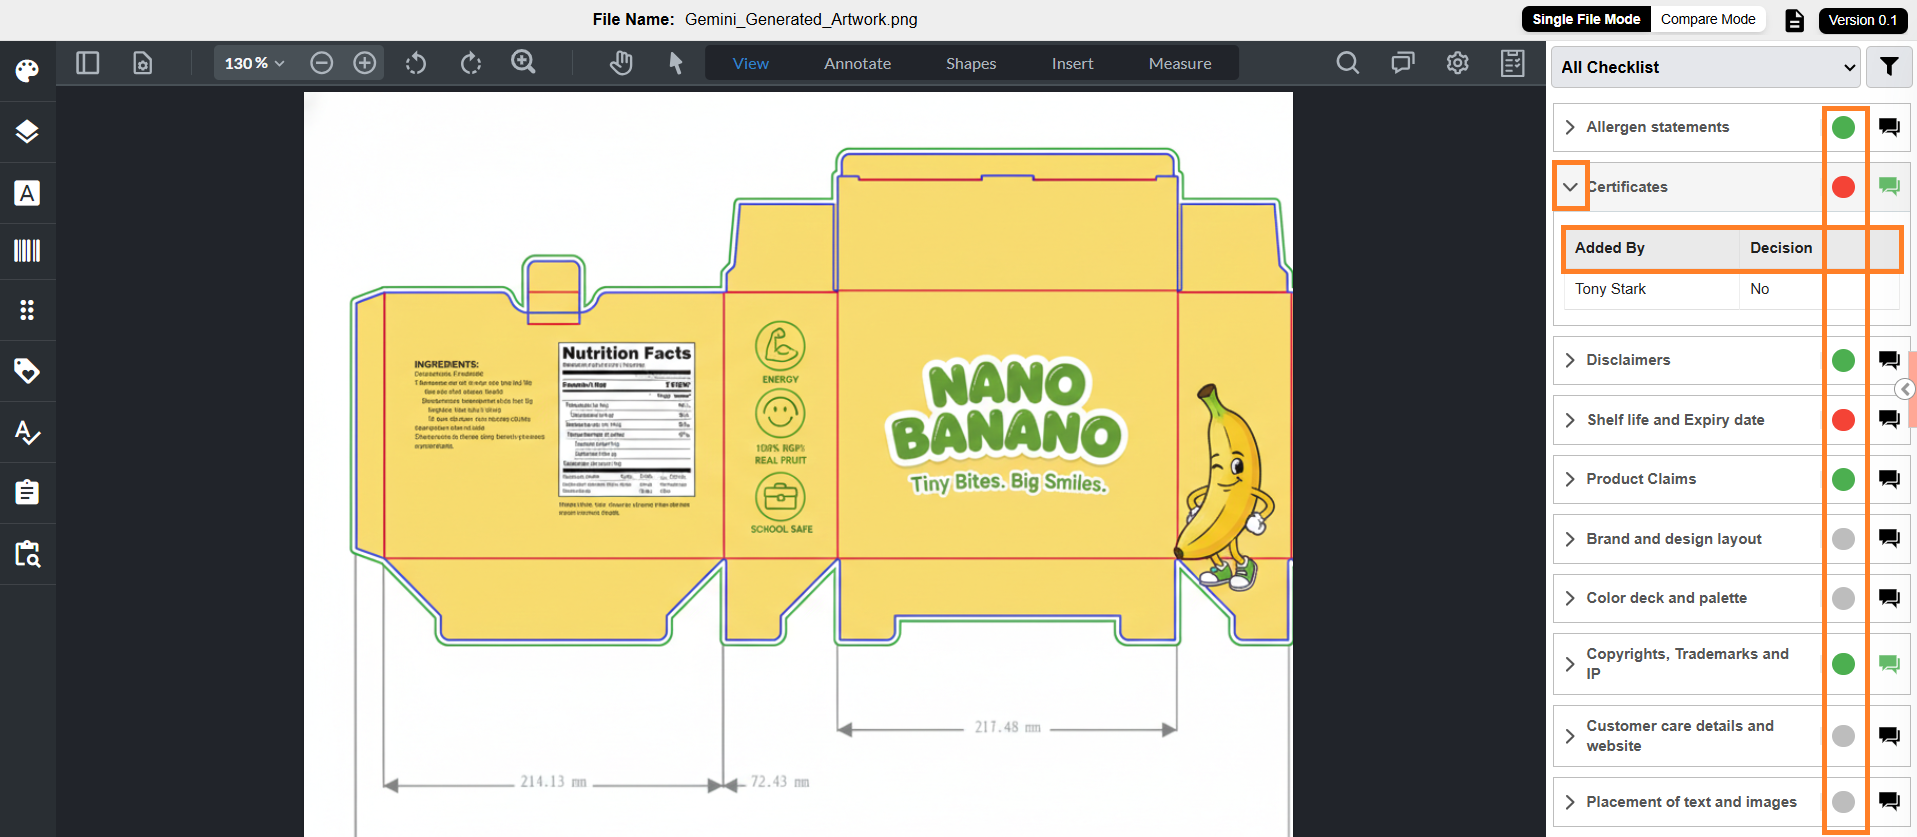
- Each checklist item displays a color indicator representing its status:
- Green: Marked as Yes or N/A
- Red: Marked as No
- Grey: No decision provided
- Orange (Mixed): Multiple users provided different decisions
- Each checklist item includes a decision details toggle.
- When expanded, it shows:
- Added By – User who provided the decision
- Decision – Selected value
Note: Decision details are shown only for the latest file version. Older version details are not displayed in the toggle
- To view older decisions, use the comment icon
- You can also, hover over the color indicator to view:
- Count of Yes
- Count of No
- Count of N/A
- You can filter checklist items based on status:
- All
- Yes
- No
- Mixed
- Not Selected
- By default, all statuses are selected.
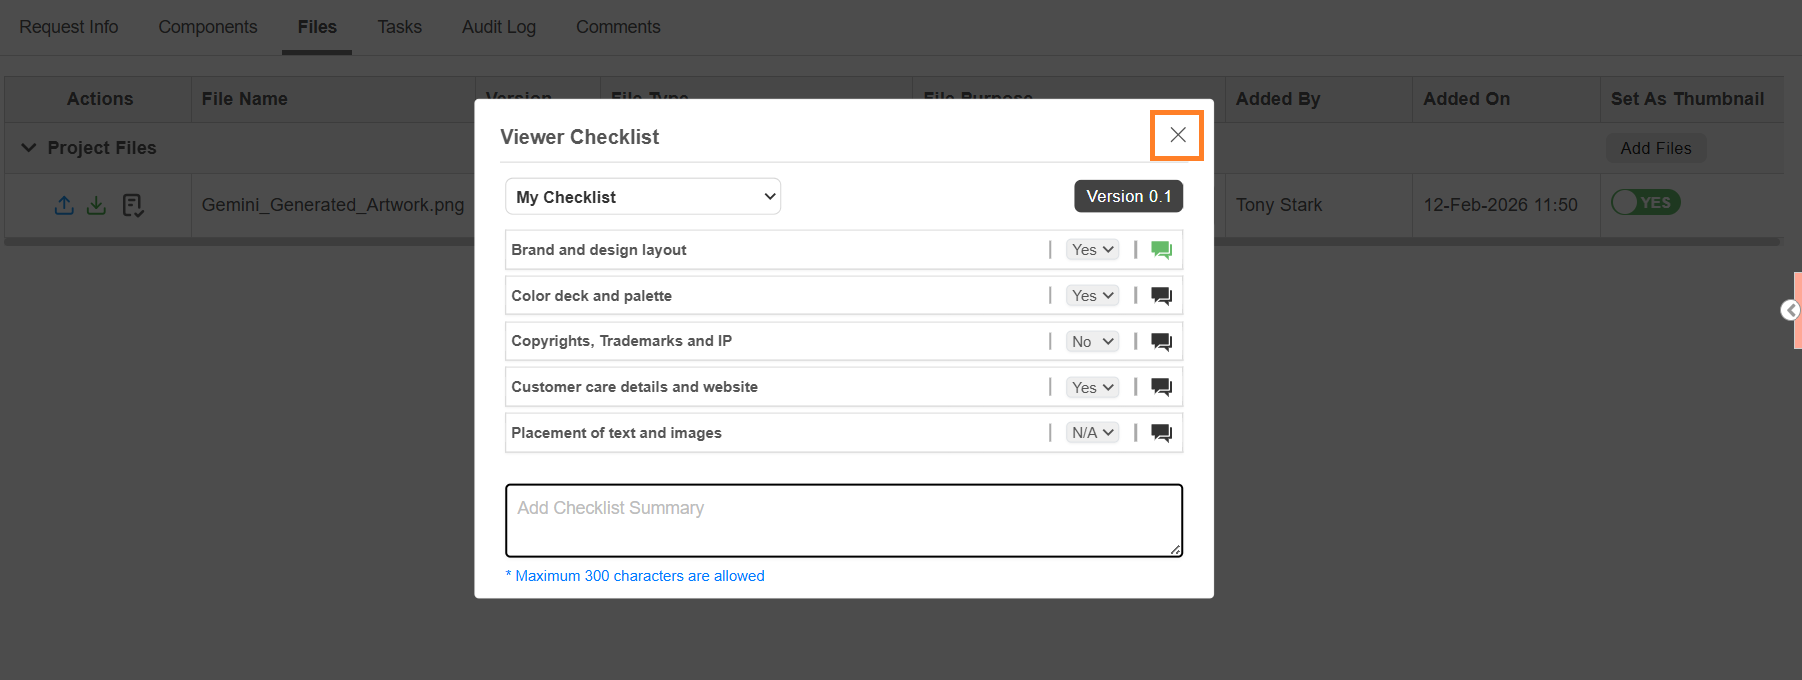
06. Save
Once you have completed the checklist, close the Viewer Checklist pop-up. The system automatically saves your progress.
You can modify checklist responses until the task is completed. Once the task is completed, the checklist can no longer be edited.
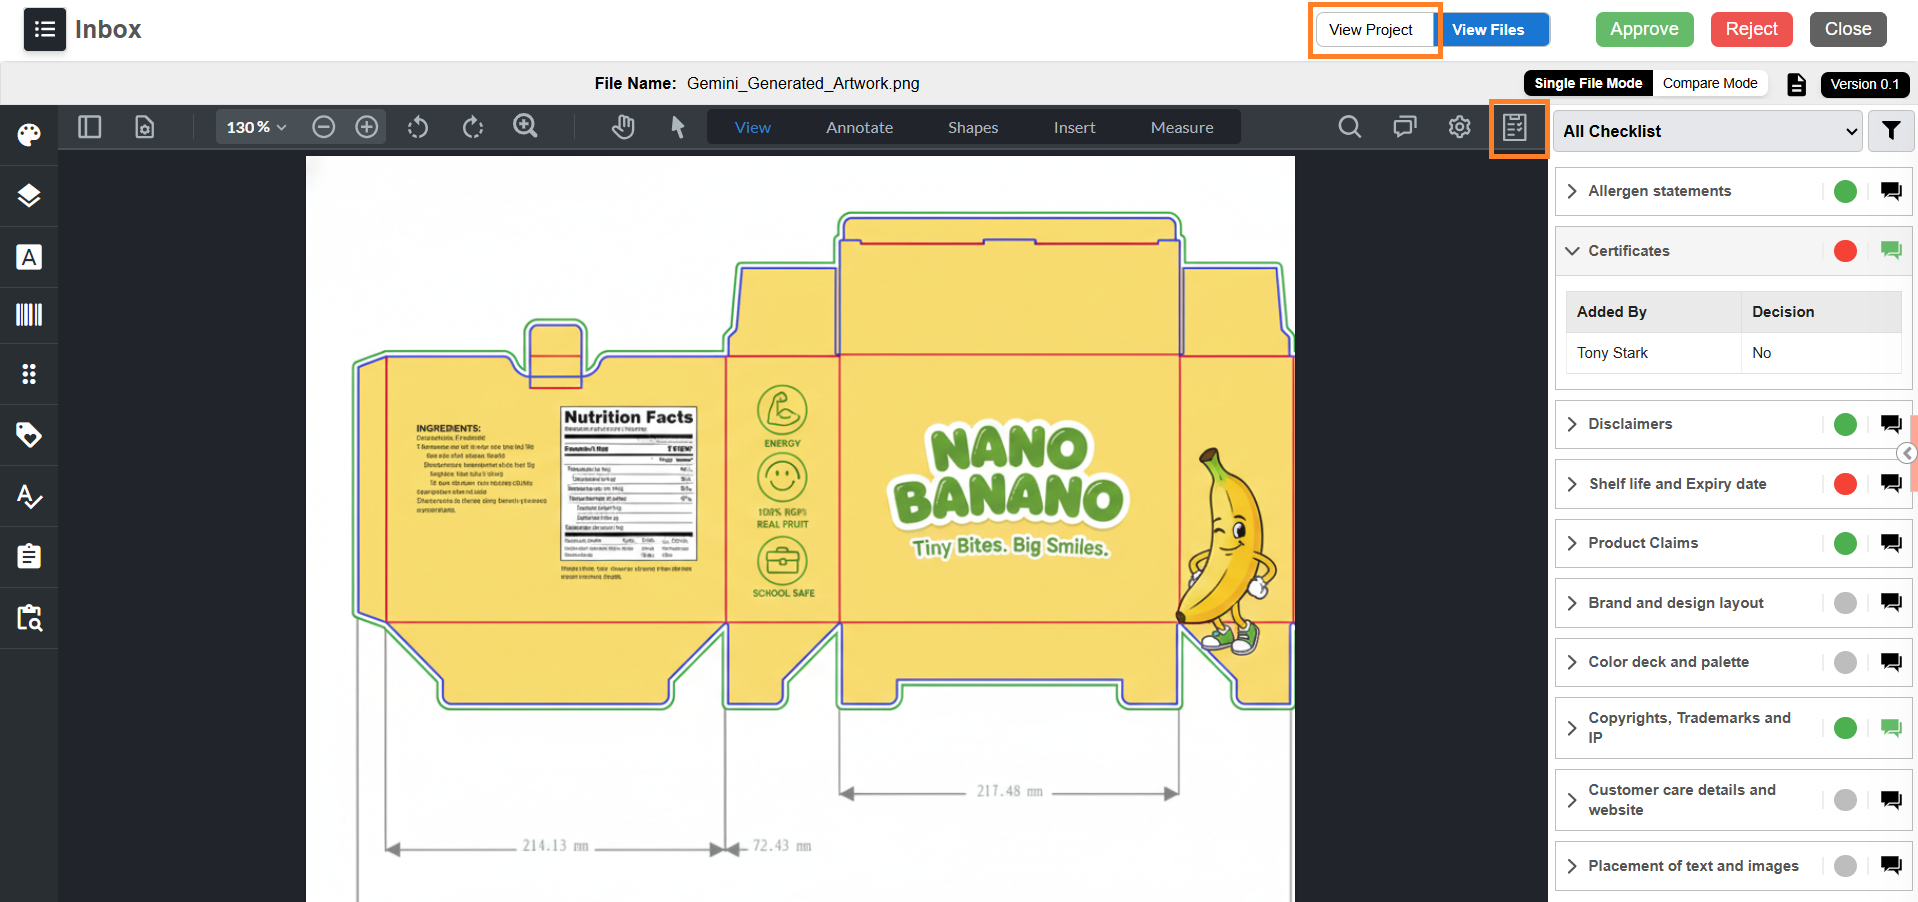
Fill Checklist from Web Viewer
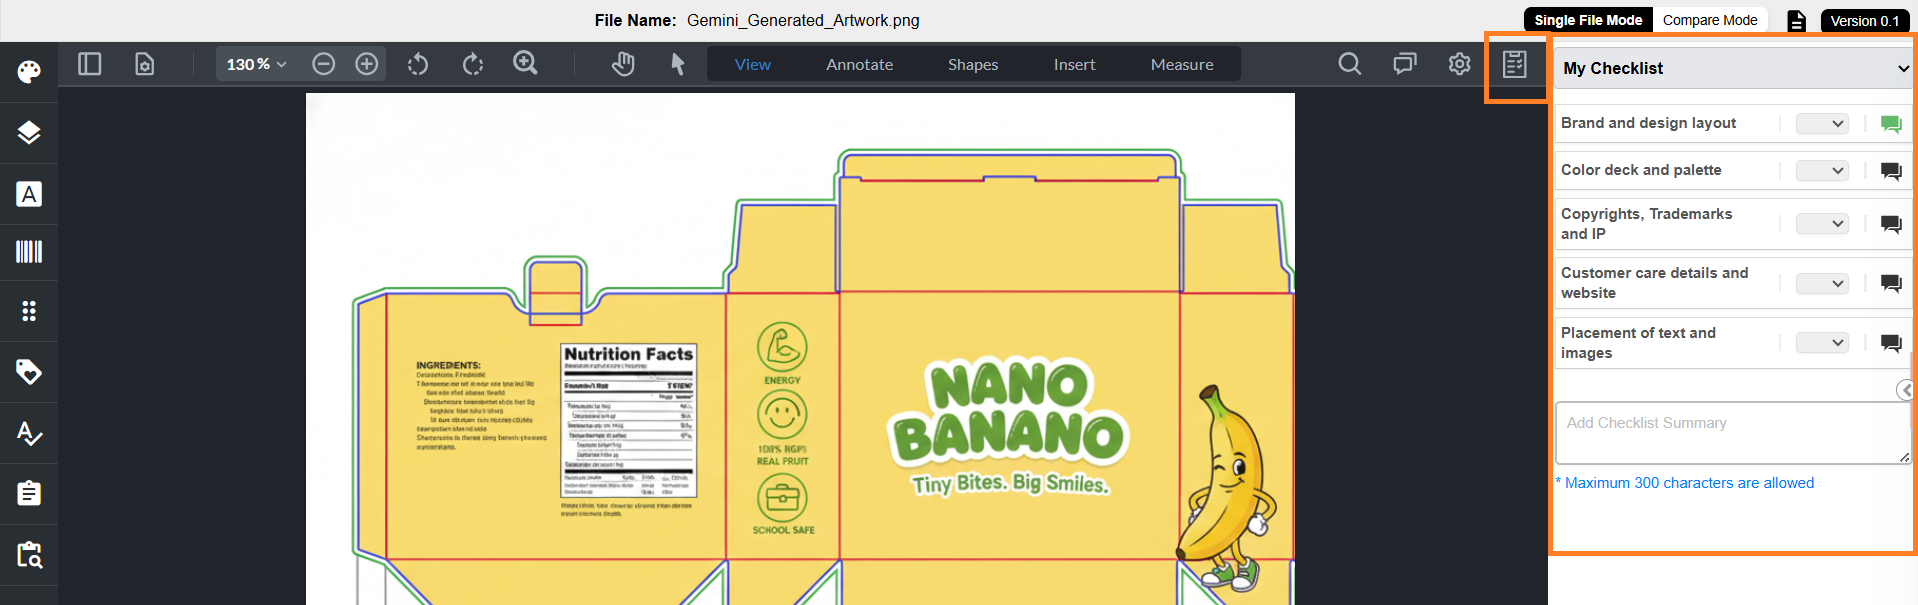
01. Access Checklist from Web Viewer
- Sign in to your ManageArtworks account.
- Navigate to Project Views.
- Open the required project/task.
- Go to the Files tab.
- Select the requited file to open the file in the Web Viewer.
- The checklist panel displays all checklist items associated with the task and file. All actions (decision selection, comments, summary, filtering) work the same as in the Files tab.
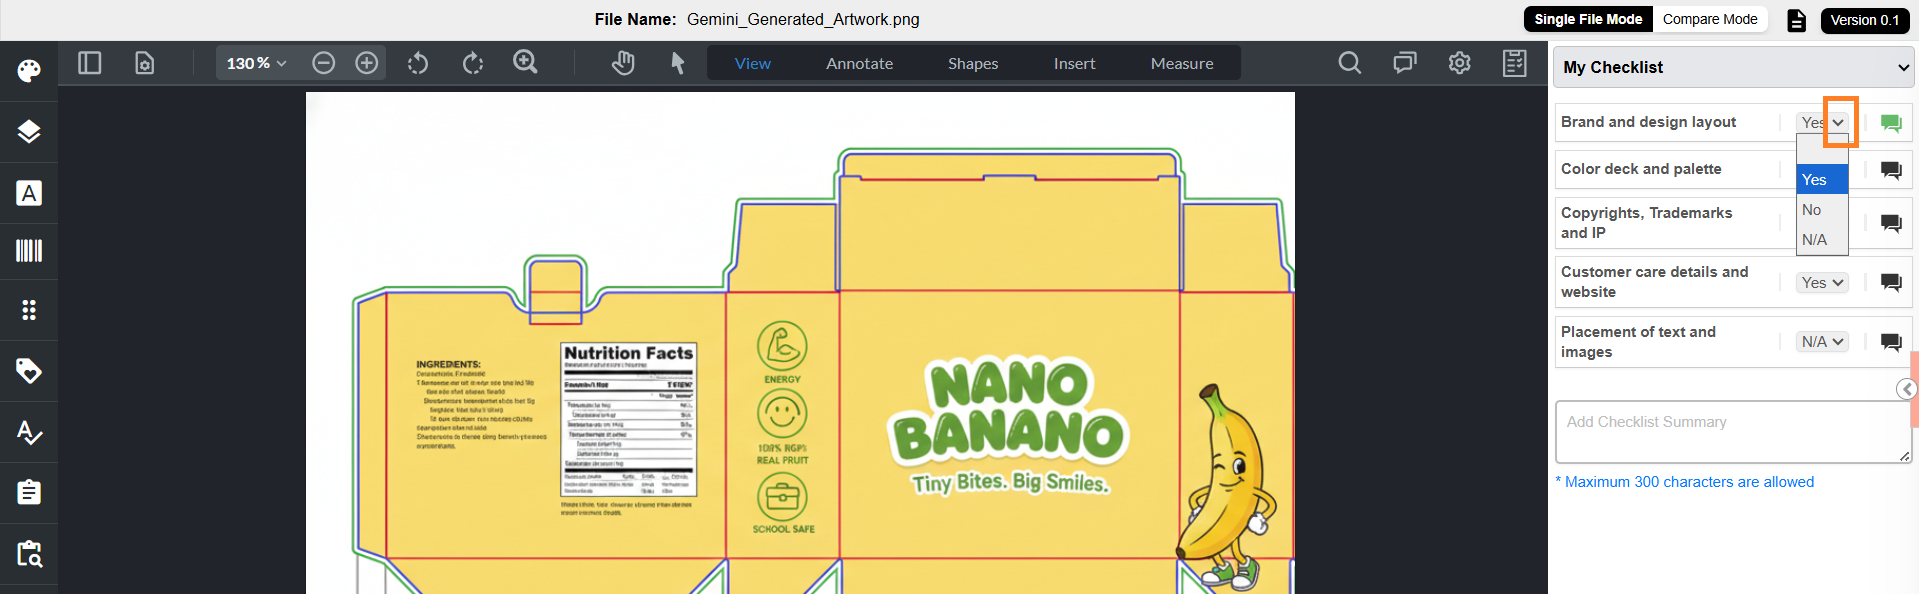
02. Provide Decision for Checklist Items
- For each checklist item:
- Select the dropdown.
- Choose the required decision:
- Approved (Yes)
- Rejected (No)
- Not Applicable (N/A)
03. Add Comments to Checklist Items (Optional)
- If required, select the comment icon next to the checklist item.
- Enter your comments in the text box.
- Select Save.
- The comment icon turns green to indicate that comments have been added.
| Note: Maximum 1000 characters allowed. Comments are added to the Comments tab of the project. Comments can be downloaded with artwork annotations (if configured in Viewer Parameter Configuration). |
04. Add Checklist Summary (Optional)
Checklist Summary provides an overall summary of all checklist items.
| Note: In some cases, the checklist summary can be configured as mandatory. In such scenarios, users must enter a summary before completing the checklist. |
To enter checklist summary:
- Select the Checklist Summary text box.
- Enter the summary.
Note: Maximum 300 characters allowed.
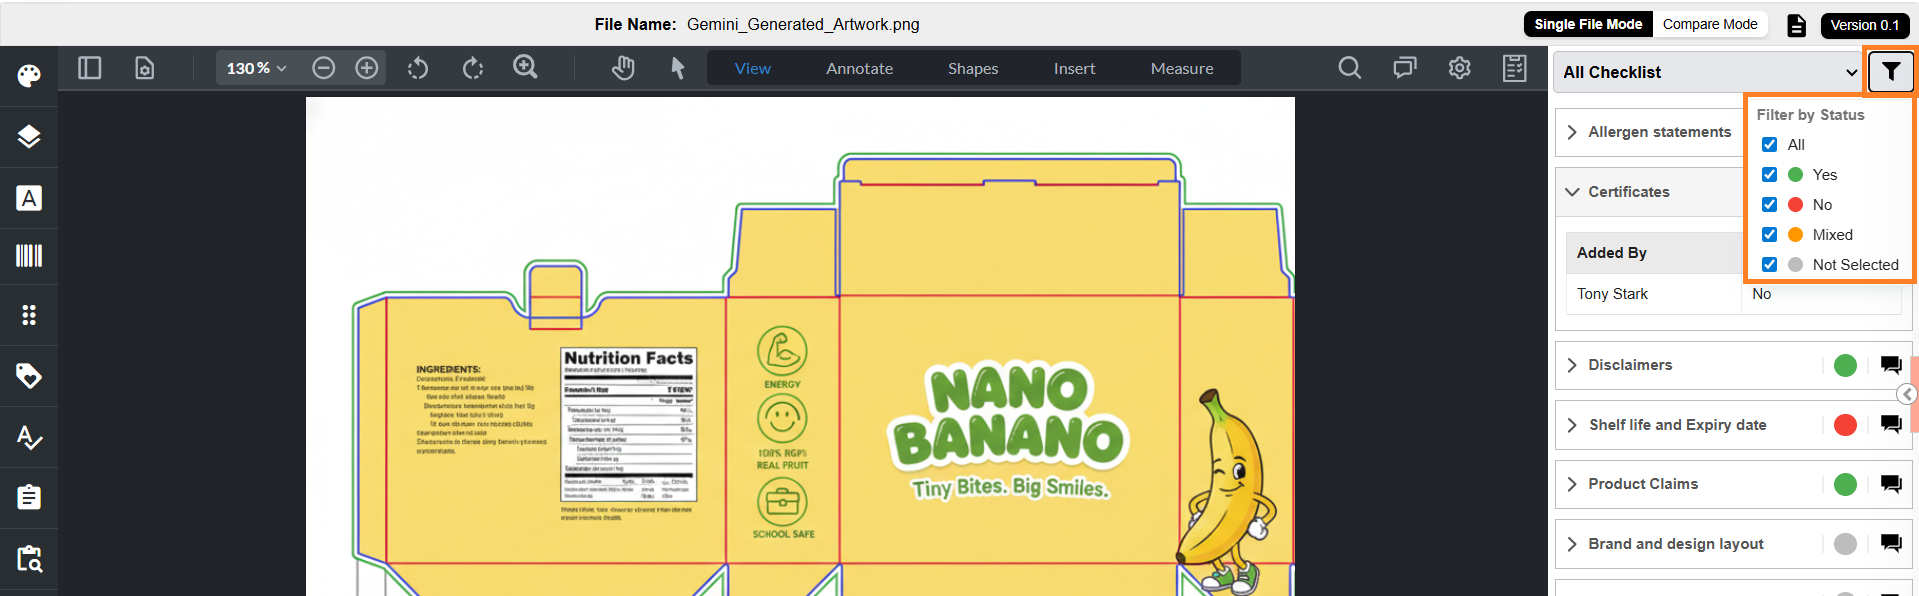
05. View All Checklist Items
This view displays all checklist items up to the current task, including items from previous tasks.
- Select the My Checklist dropdown.
- Choose All Checklist.
- Each checklist item displays a color indicator representing its status:
- Green: Marked as Yes or N/A
- Red: Marked as No
- Grey: No decision provided
- Orange (Mixed): Multiple users provided different decisions
- Each checklist item includes a decision details toggle.
- When expanded, it shows:
- Added By – User who provided the decision
- Decision – Selected value
Note: Decision details are shown only for the latest file version. Older version details are not displayed in the toggle
- To view older decisions, use the comment icon
- You can also, hover over the color indicator to view:
- Count of Yes
- Count of No
- Count of N/A
- You can filter checklist items based on status:
- All
- Yes
- No
- Mixed
- Not Selected
- By default, all statuses are selected.
06. Save
Once you have completed the checklist, close the checklist panel by selecting the Checklist icon or navigate back to the project by selecting View Project. The system automatically saves your progress.
You can modify checklist responses until the task is completed. Once the task is completed, the checklist can no longer be edited.