Perform Compliance Check in Web Viewer
The Compliance Check tool in the Web Viewer allows you to validate artwork elements against predefined compliance profiles. It highlights whether required elements are present in the artwork and shows compliance results based on the configured validation rules.
How to Perform a Compliance Check
01. Access the Compliance Check Tool
- Sign in to your ManageArtworks account.
- Open the required artwork file in the Web Viewer.
Note: Ensure that Copy property is enabled for the selected asset/file type. - Select the Compliance Check tool from the toolbar.
 | Note: The Compliance Check tool is available only when opening artwork from Workflow or Asset Library module. It is not available when accessing files through the Proofing module. |
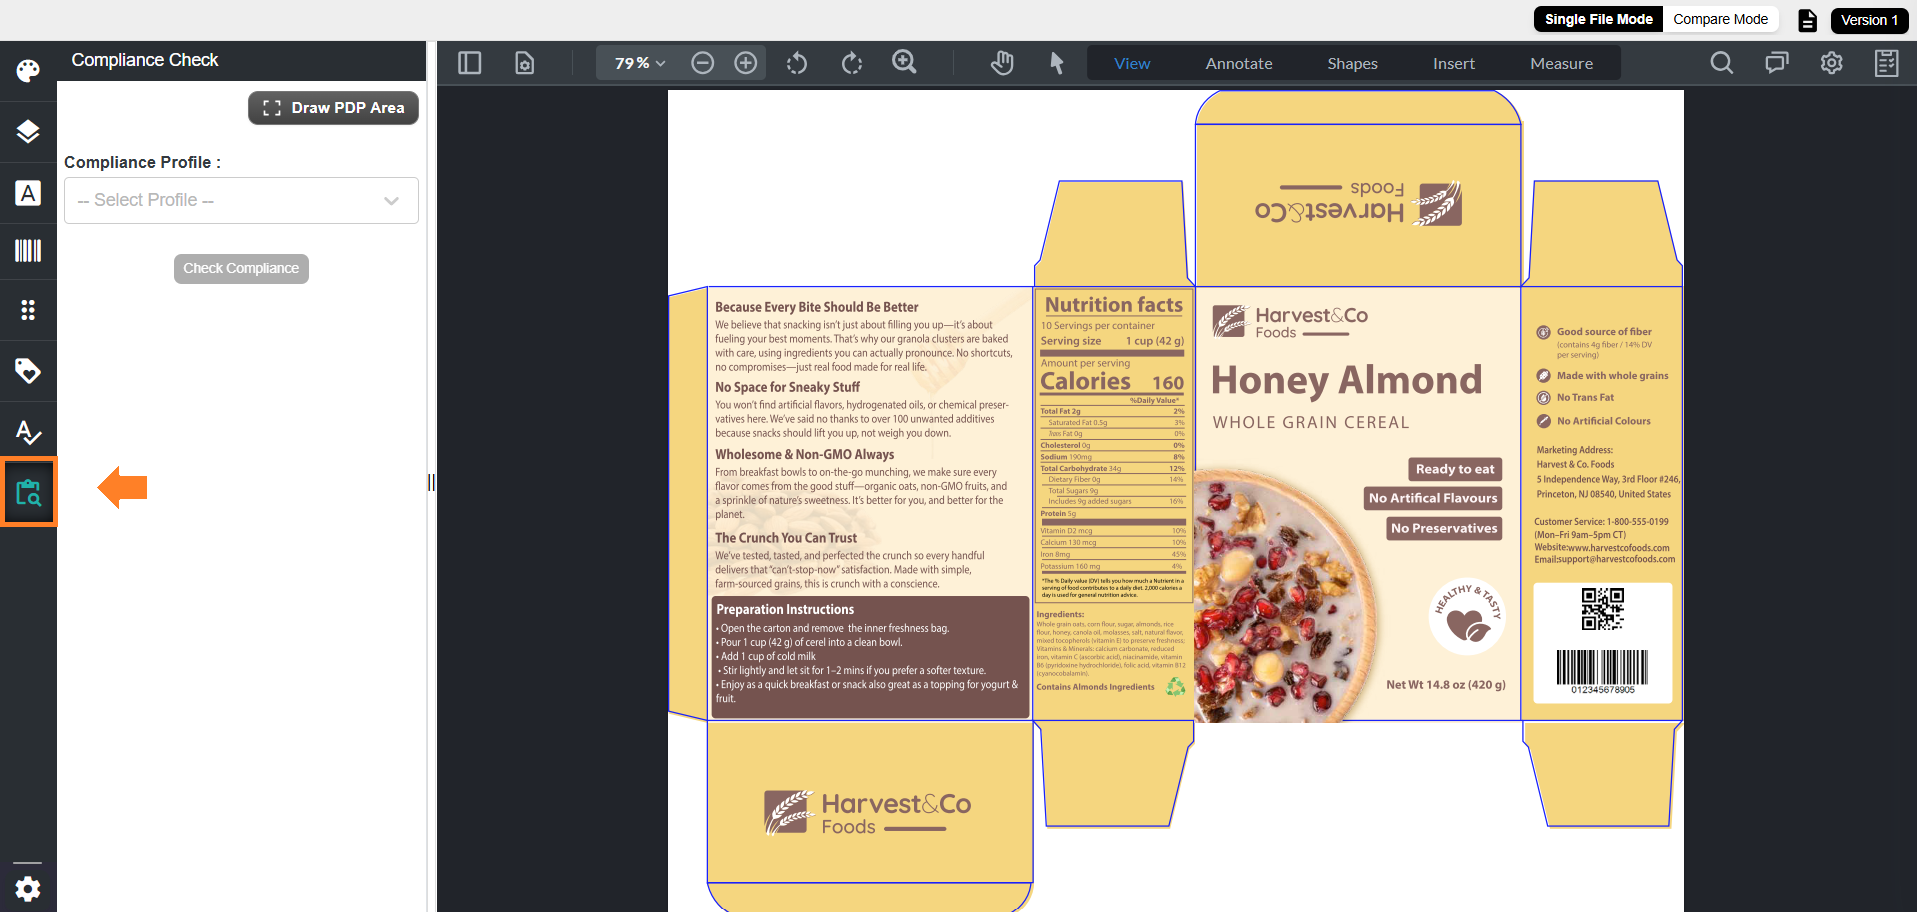
02. Select Compliance Check
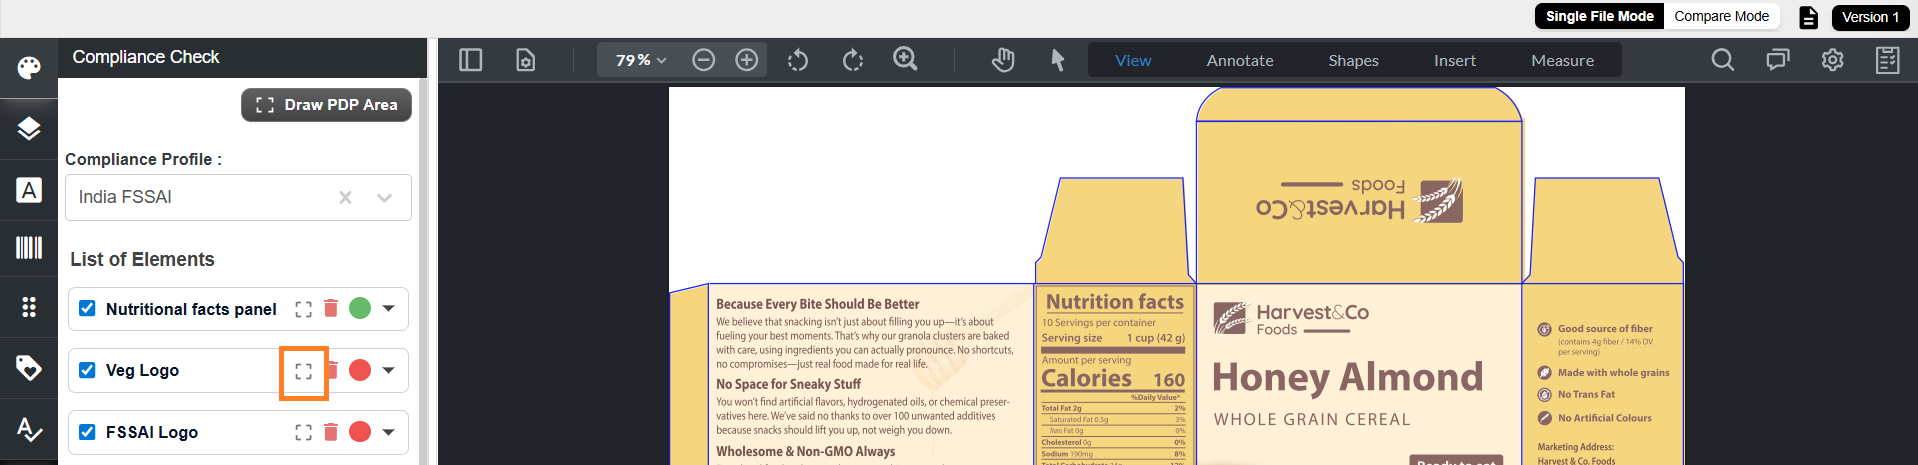
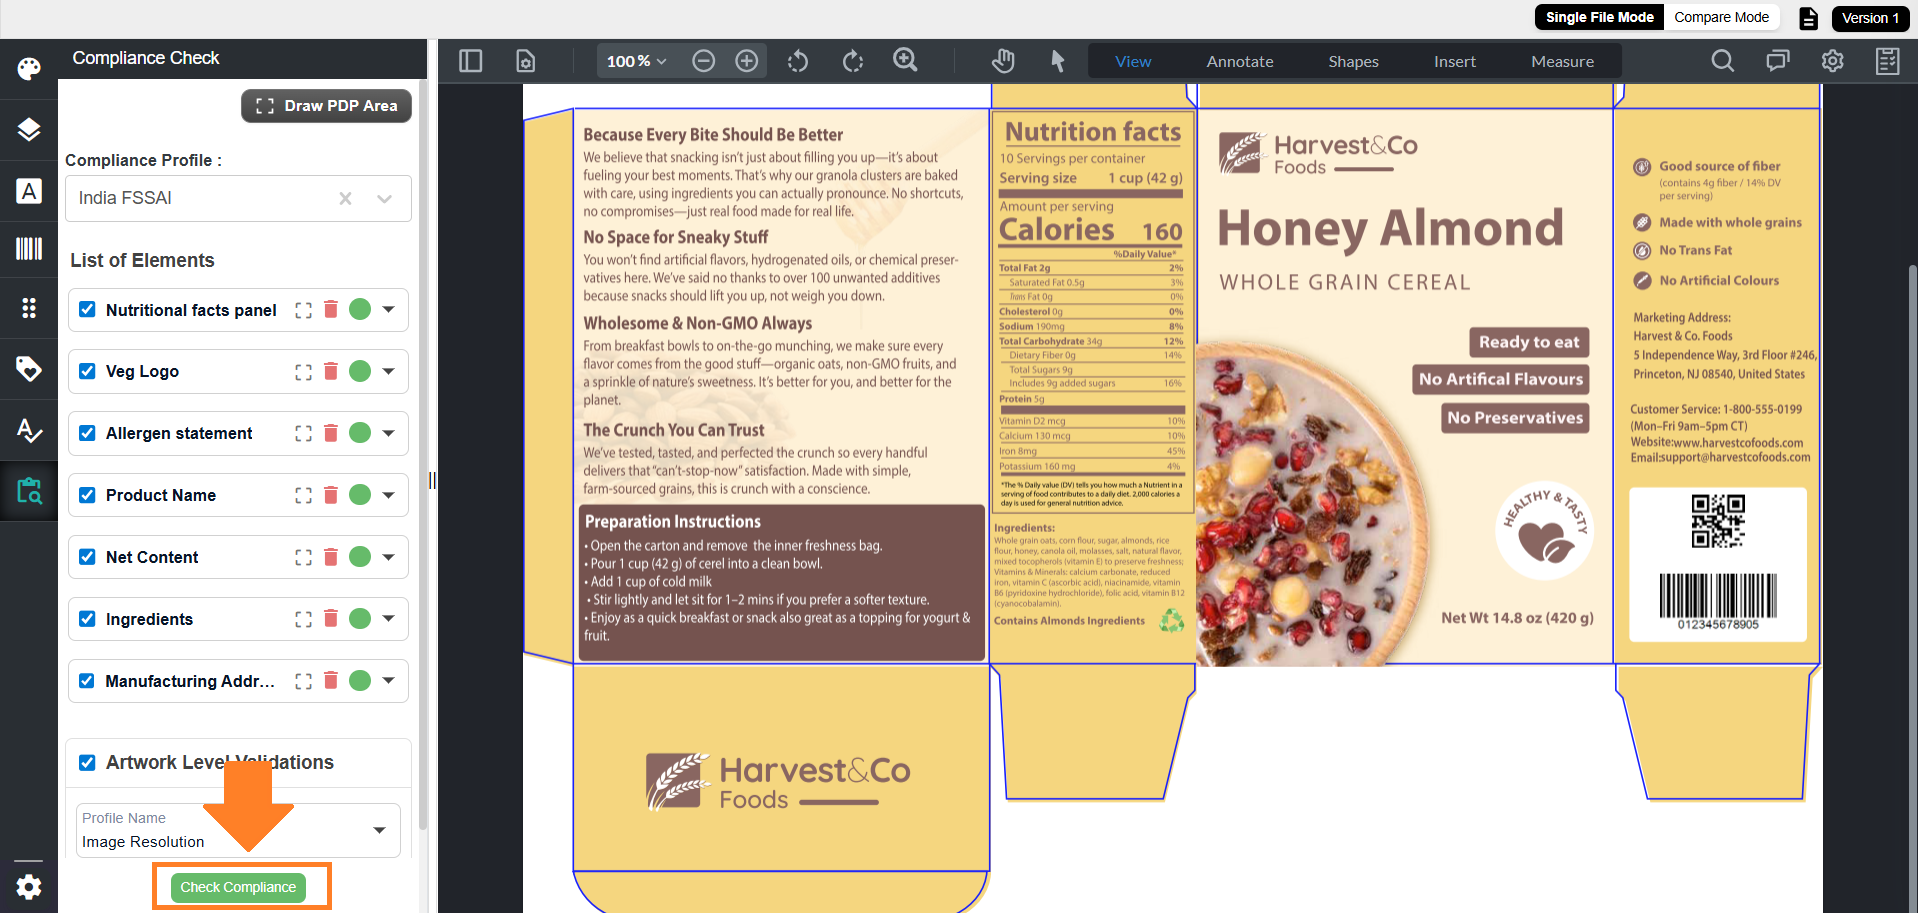
- Select a compliance profile from the Compliance Profile drop-down list.
Note: If the required profile is not listed, ensure it is available in Compliance Profile settings. - The system displays all elements configured in the selected profile.
- Review the element status using color indicators:
- Red filled circle – Element is not present in the artwork
- Green filled circle – Element is present in the artwork

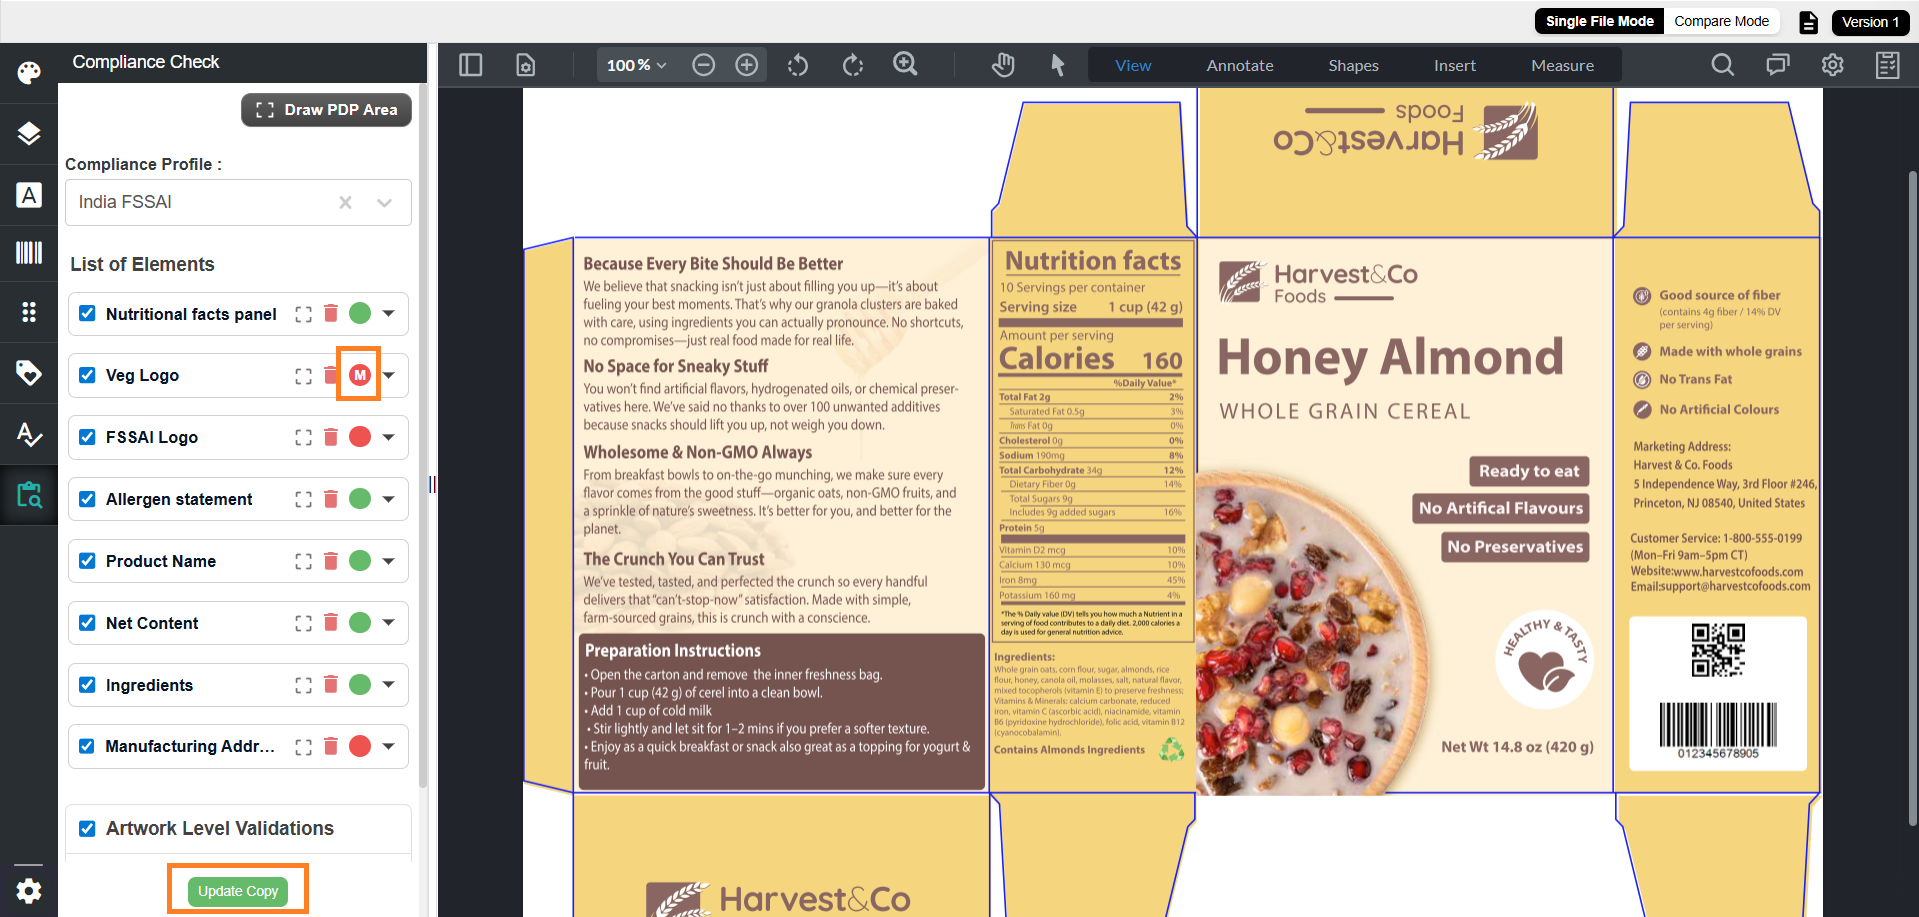
03. Manually Mark Missing Elements (If Needed)
If an element is detected as “not available” even though it exists in the artwork, you can manually specify its region:
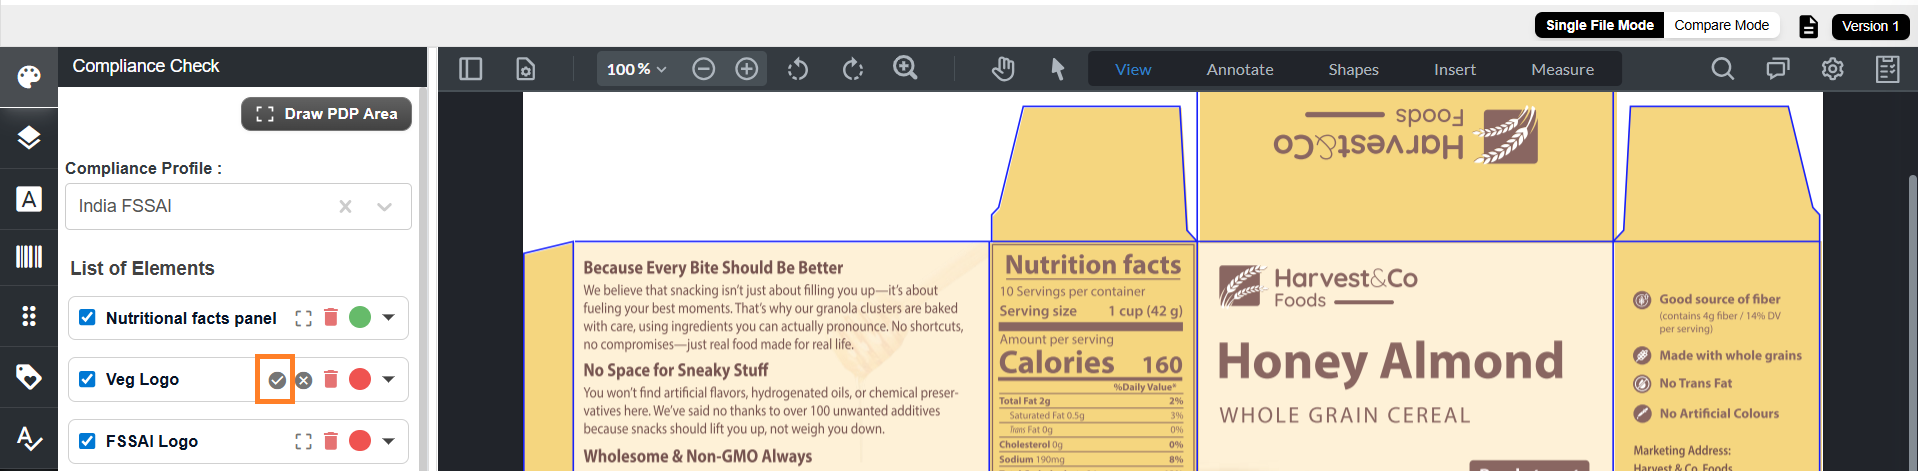
- Select the Mark Region icon for the element.
- Draw a bounding box around the element in the artwork.
- Select the Submit icon to confirm. The element status updates to indicate manual mapping.
- Select Update Copy to confirm the element.
- The element status changes from red filled circle to green filled circle.
04. Include or Exclude Elements in the Compliance Check
You can control which elements are included in the compliance check during the current session.
- To exclude an element temporarily:
- Clear the checkbox associated with the element.
- To include the element again, select the checkbox.
- To remove an element completely from the current session:
- Select the delete icon associated with the element.
Note: This removes the element only for the current session. It does not update the compliance profile.
- Select the delete icon associated with the element.
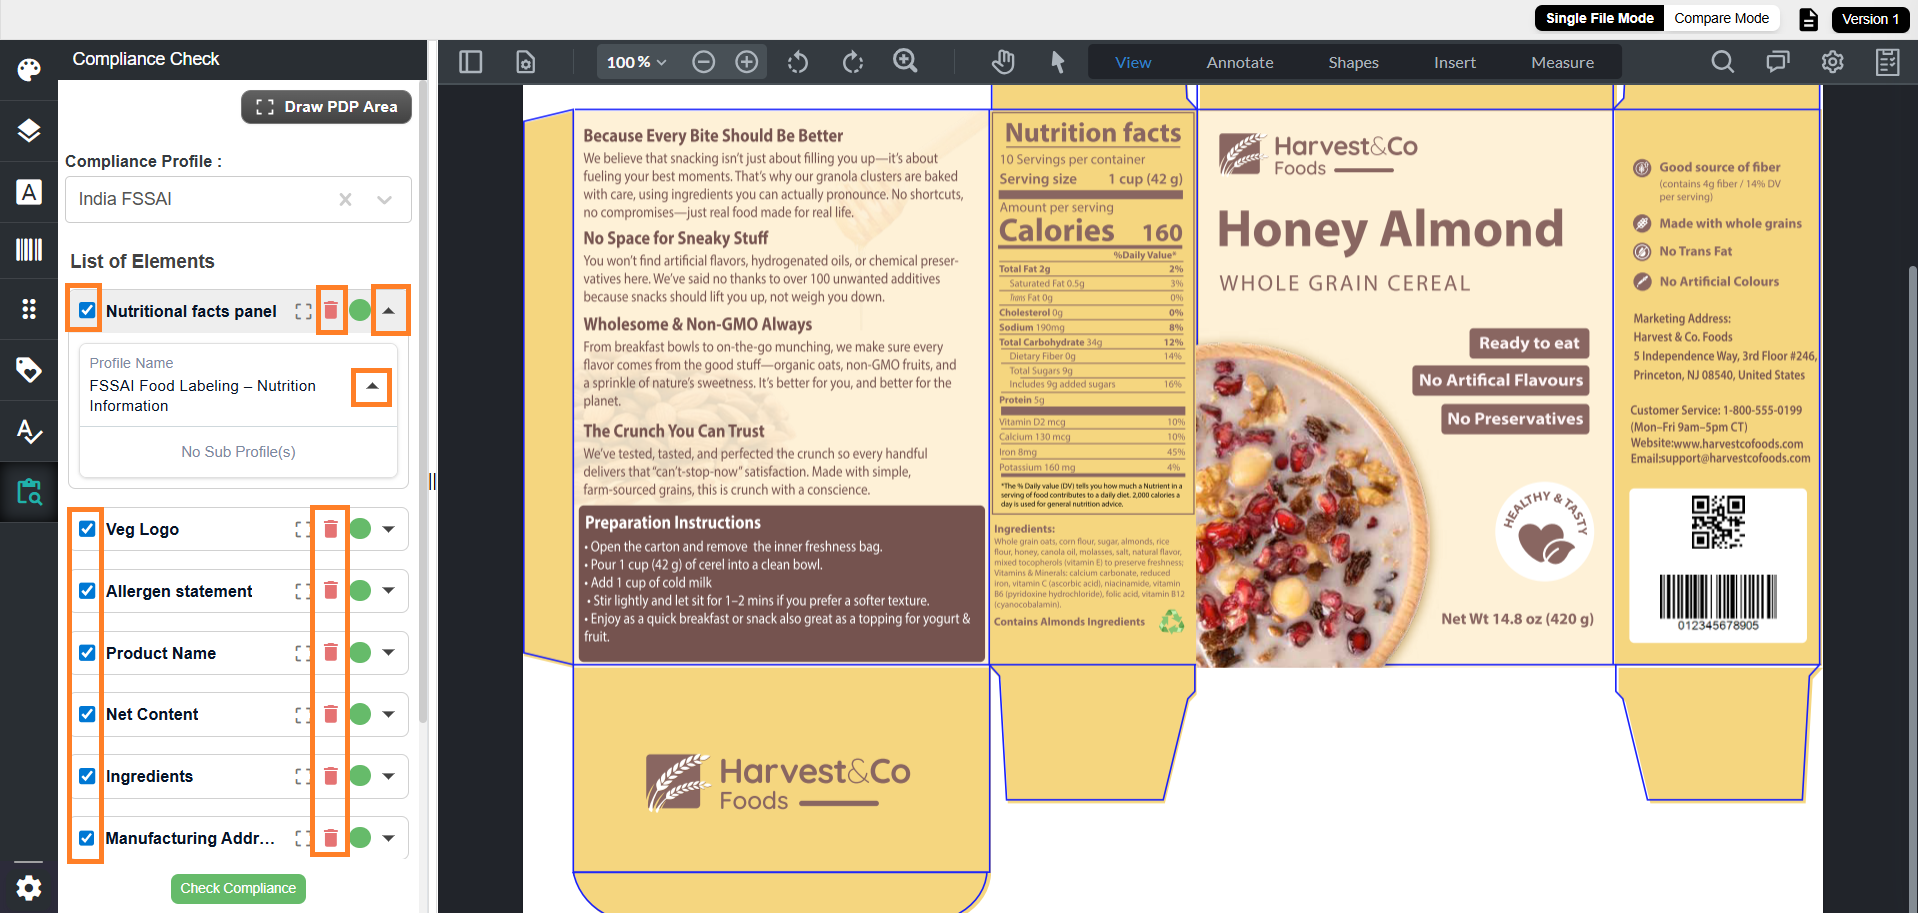
- To view assigned validation rules:
- Expand the element using the expand icon for the element.
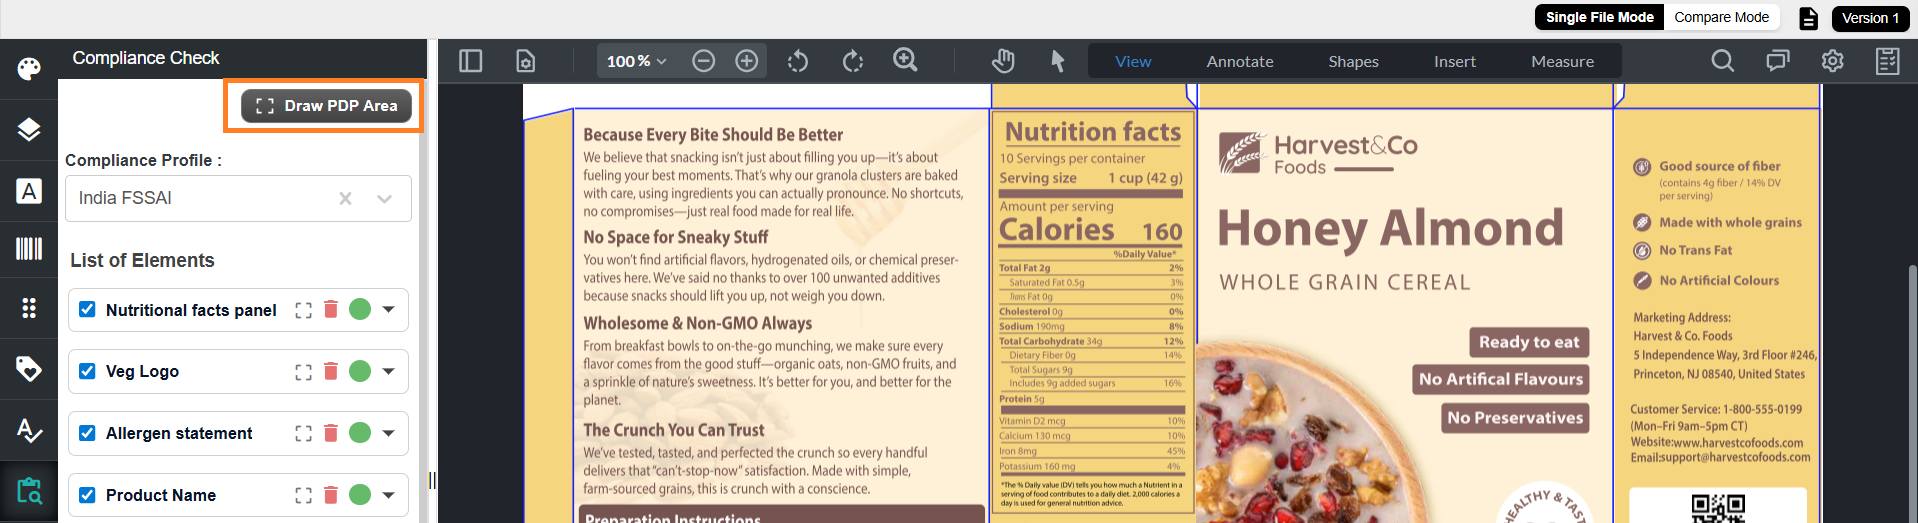
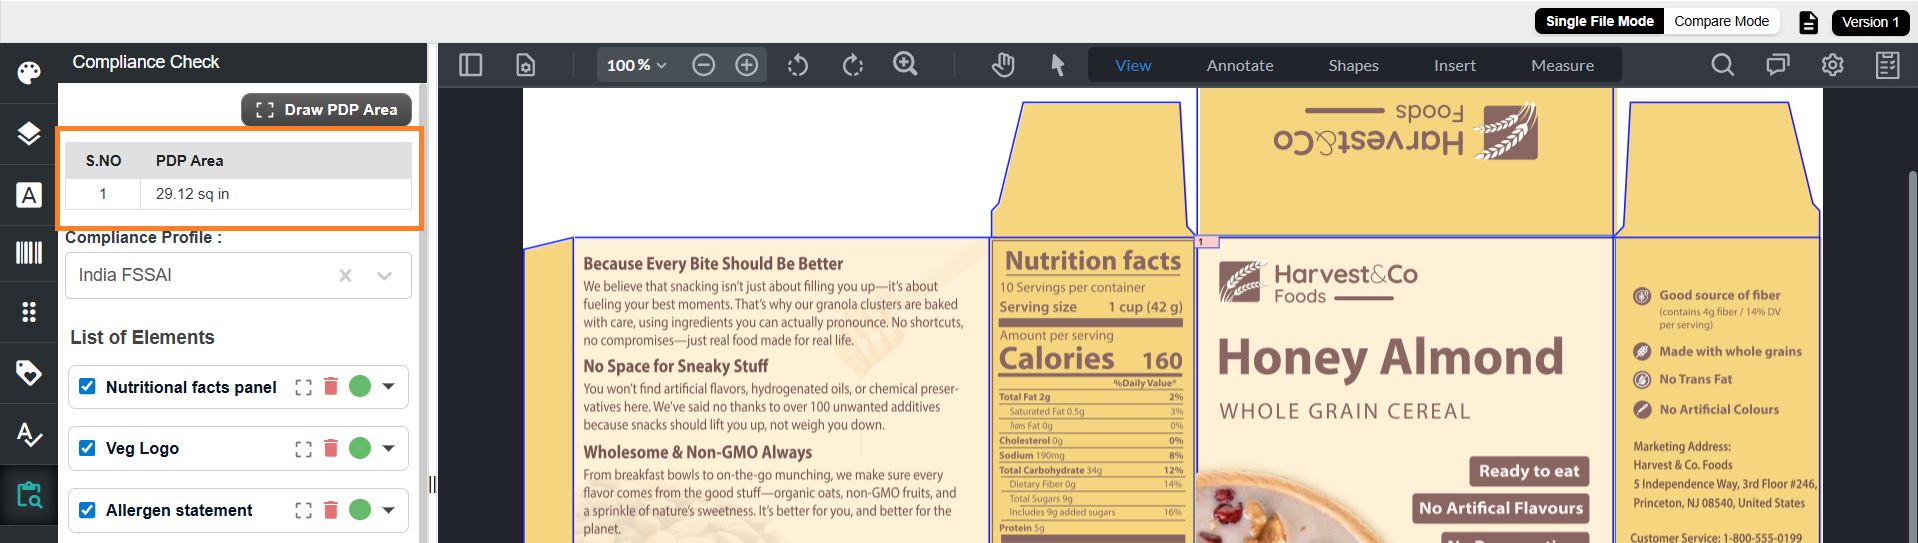
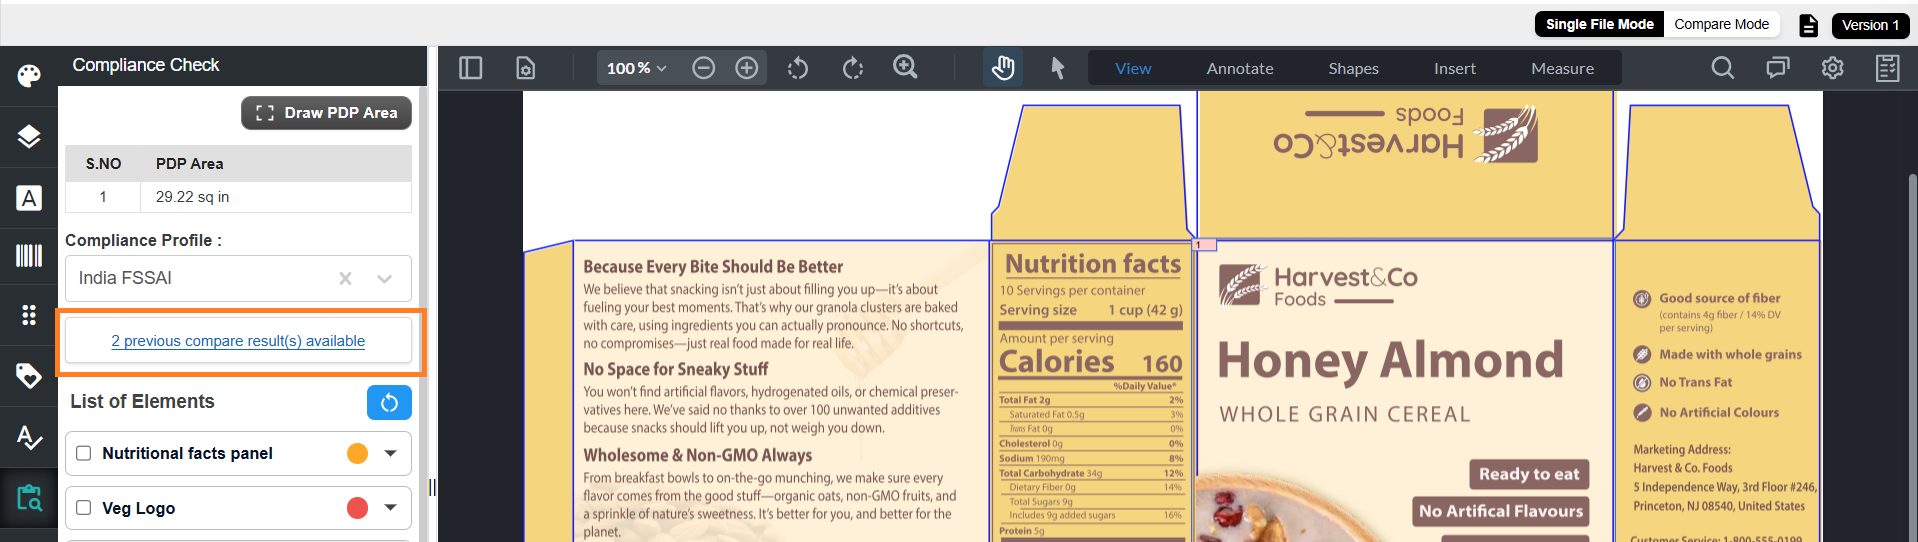
05. Specify the Principal Display Panel (PDP) Area
- Select Draw PDP Area.
- Draw the PDP area directly on the artwork.
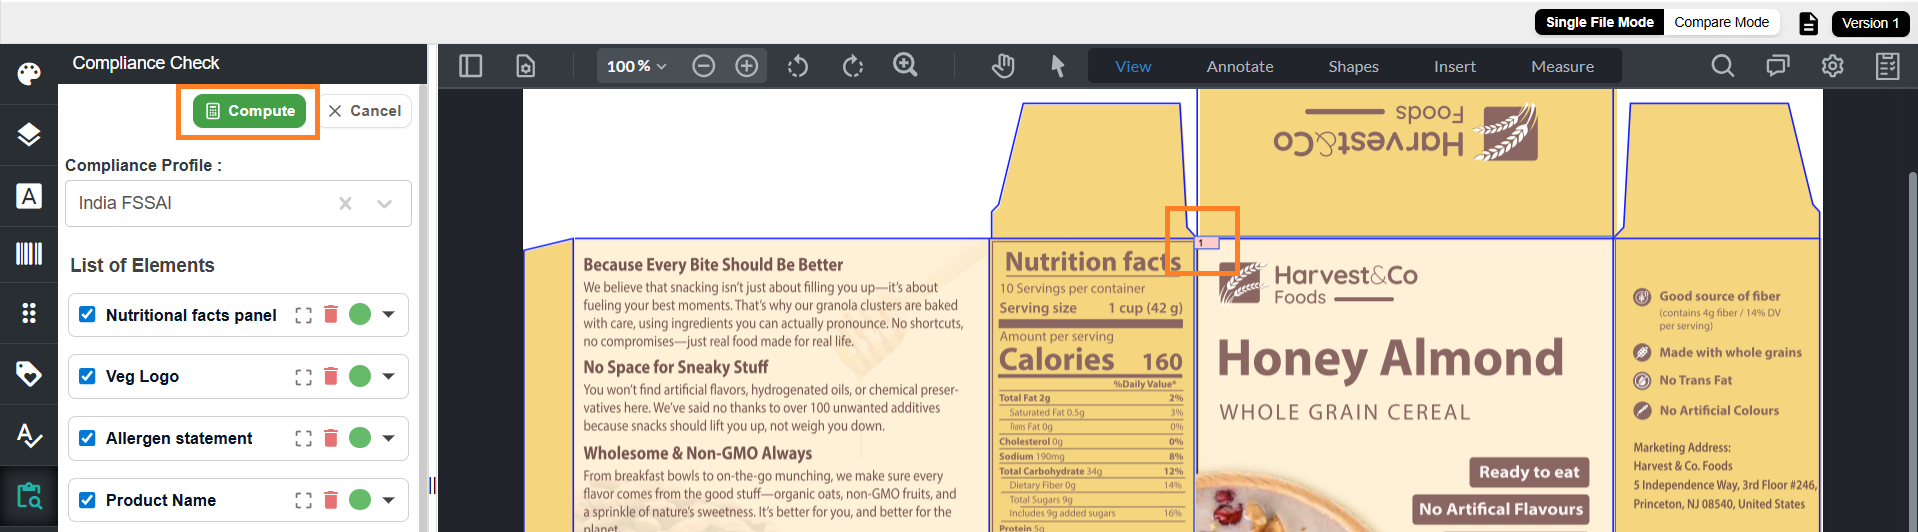
- Select Compute.
- The system calculates and displays the PDP area in square inches.
Note: The computed PDP area cannot be modified. - For more information, refer to the PDP section.
06. Run the Compliance Check
- Select Check Compliance.
- The system validates all elements against the rules defined in the selected Compliance Profile.
- Results are displayed with color-coded indicators for quick review.
07. View Compliance Check Results
Compliance check results are displayed using color-coded indicators for quick review. Each element may have multiple validations, and the overall status is based on the combined result of those validations.
Element Status
| Status | Description |
|---|---|
| Green filled circle | All validations passed |
| Orange filled circle | One or more validations failed, while others passed |
| Red filled circle | All validations failed |
Validation Status
| Status | Description |
|---|---|
| Green unfilled circle | Passed |
| Red unfilled circle | Failed |
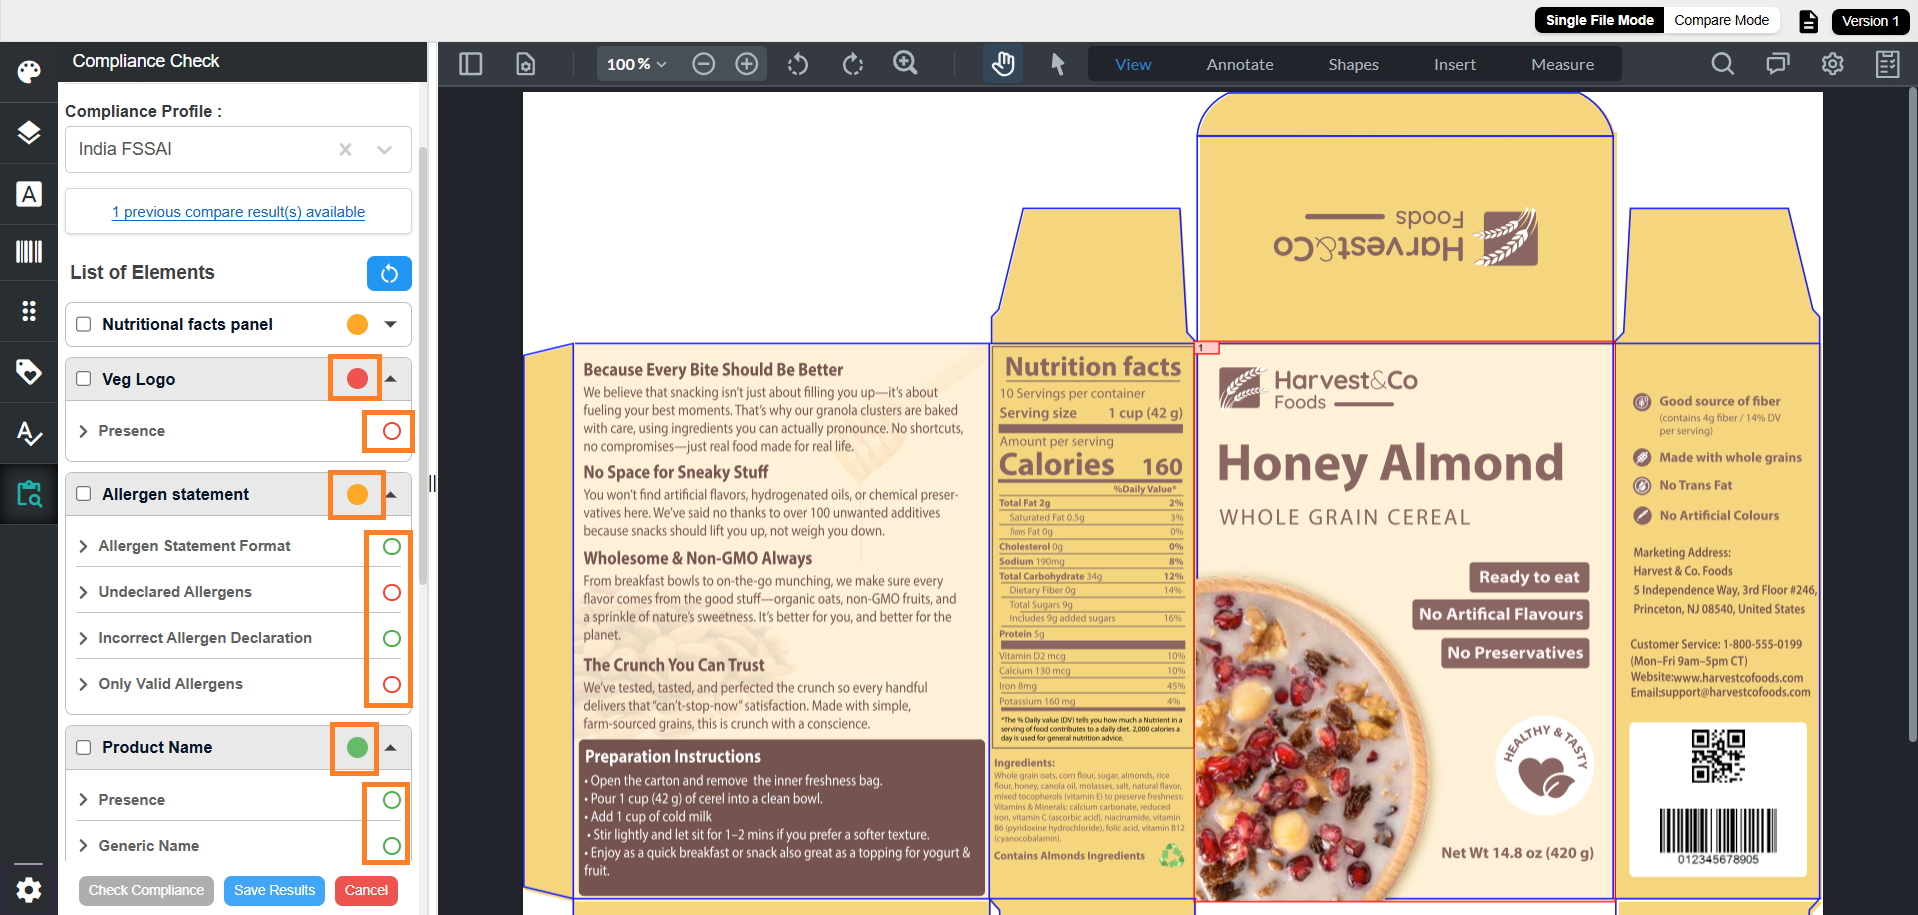
Example
For the Allergen Statement element, validations may include:
- Allergen Statement Format
- Undeclared Allergens
- Incorrect Allergen Declaration
- Only Valid Allergens
| Scenario | Result |
|---|---|
| All validations pass | Element is marked Green |
| Some validations fail | Element is marked Orange |
| All validations fail | Element is marked Red |
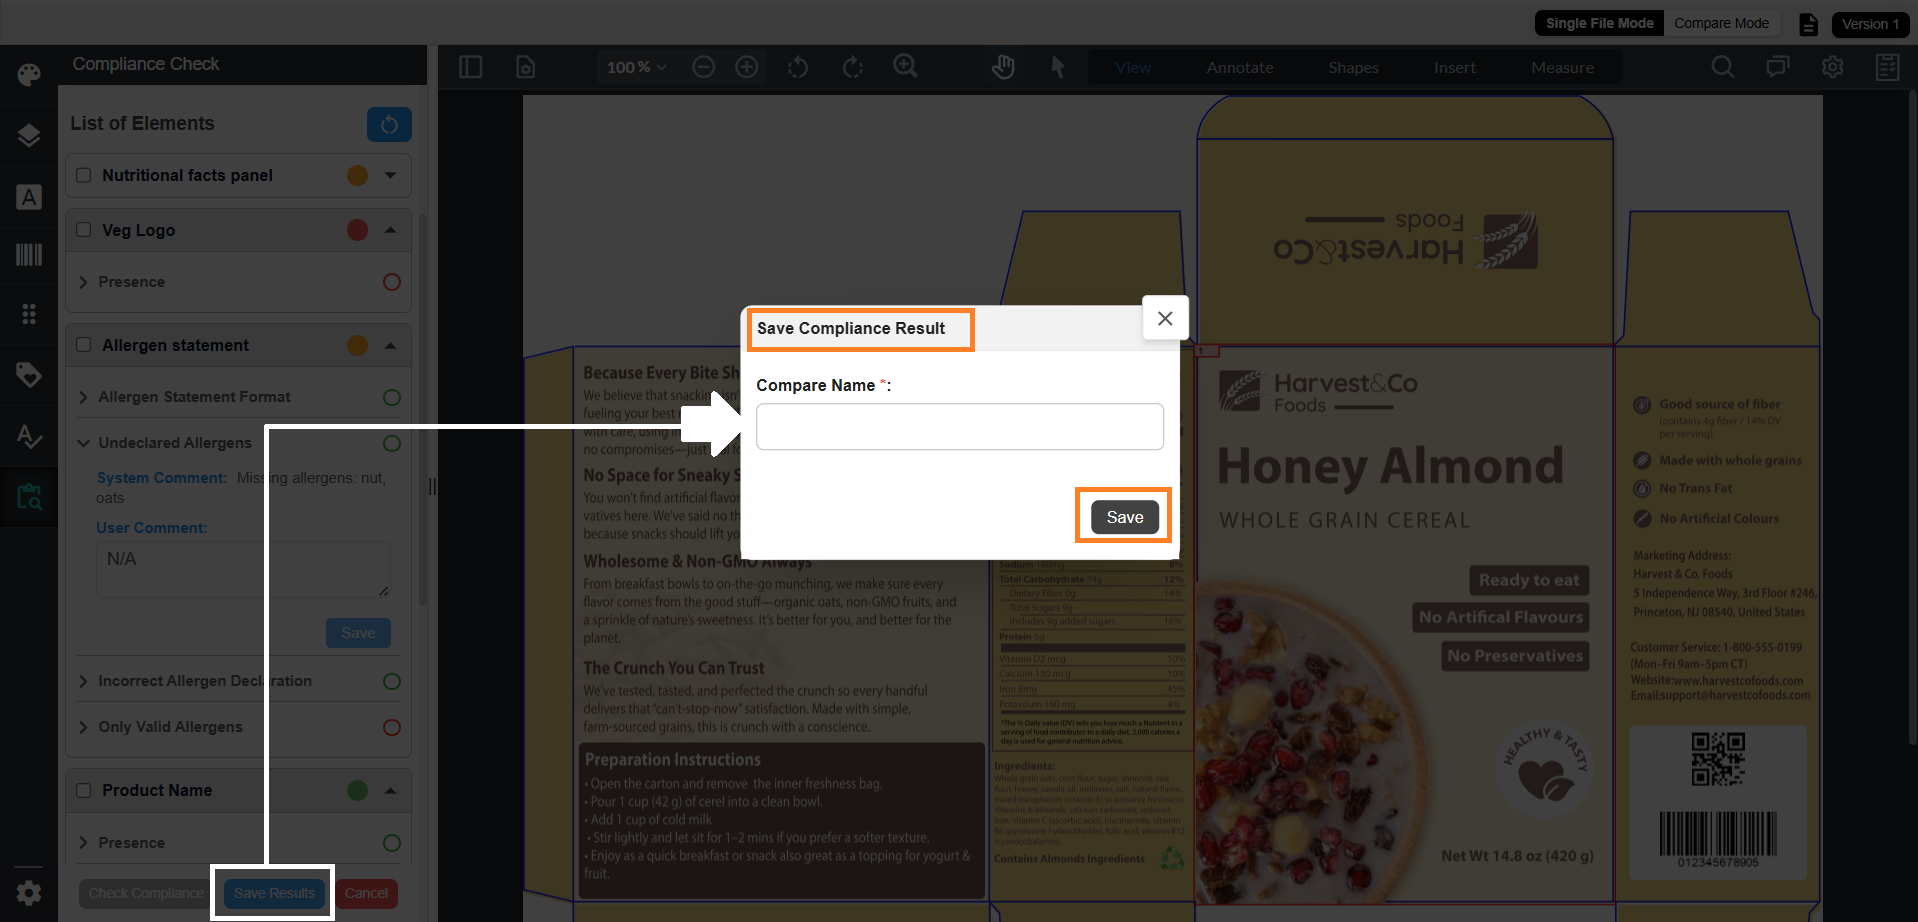
Edit Validation Results (If Required)
If a validation result is incorrect, you can update the status of the validation manually:
| Action | Description |
|---|---|
| Edit false positive | Select the green unfilled circle to change it to red |
| Edit false negative | Select the red unfilled circle to change it to green |
After updating the status:
- Enter a comment in the User Comment field
- Select Save
The comment is saved and will be available in the Compliance Report for offline proofreading.
08. Save and Share Results (Optional)
Once you are satisfied with the compliance results, you can save and share them for future reference or collaboration.
Save Compliance Results
- Select Save Results at the bottom of the Compliance panel.
- The Save Compliance Result dialog is displayed.
- Enter a unique name in the Compare Name field.
Note: Duplicate names are not allowed. - Select Save to store the results.
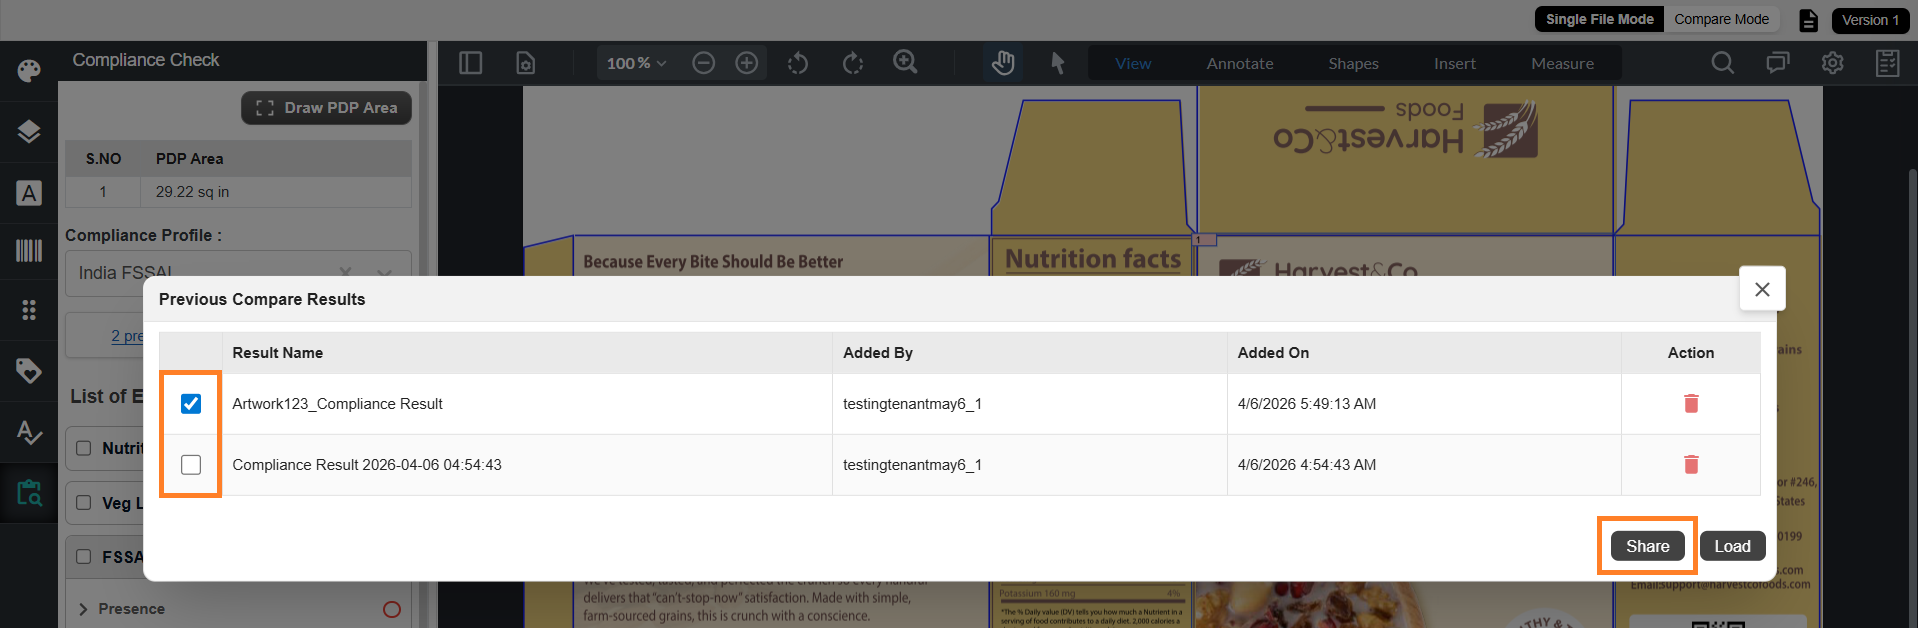
Access Previous Compliance Results
- If results are saved, a link is displayed after compliance profile section:
“X previous compare result(s) available”- X indicates the number of saved results
- If no results are available, this option is not displayed.
Load Previous Results
- Select “X previous compare result(s) available”.
- The Previous Compare Results dialog is displayed with saved results.
- Select the required result.
- Select Load to load the result.
Note: Only one result can be loaded at a time.

Share Compliance Results
- In the Previous Compare Results dialog, select one or more results.
- Select Share.
- The Share Compare Results dialog is displayed.
- In Add User to Share With:
- Enter recipient email IDs
- You can add multiple users
- If required, enter comments in the Comments field.
- Select Share to send the results.
Note: Multiple results can be shared at the same time.