
Configure Compliance Profile
A Compliance Profile allows you to group validation rules into a single profile that can be used to run compliance checks in the Web Viewer.
By default, the system provides out-of-the-box compliance profiles with pre-configured validation checks. You can edit these profiles or create new ones based on your requirements.
Add a Compliance Profile
01. Access Compliance Profile
- Sign in to your ManageArtworks account.
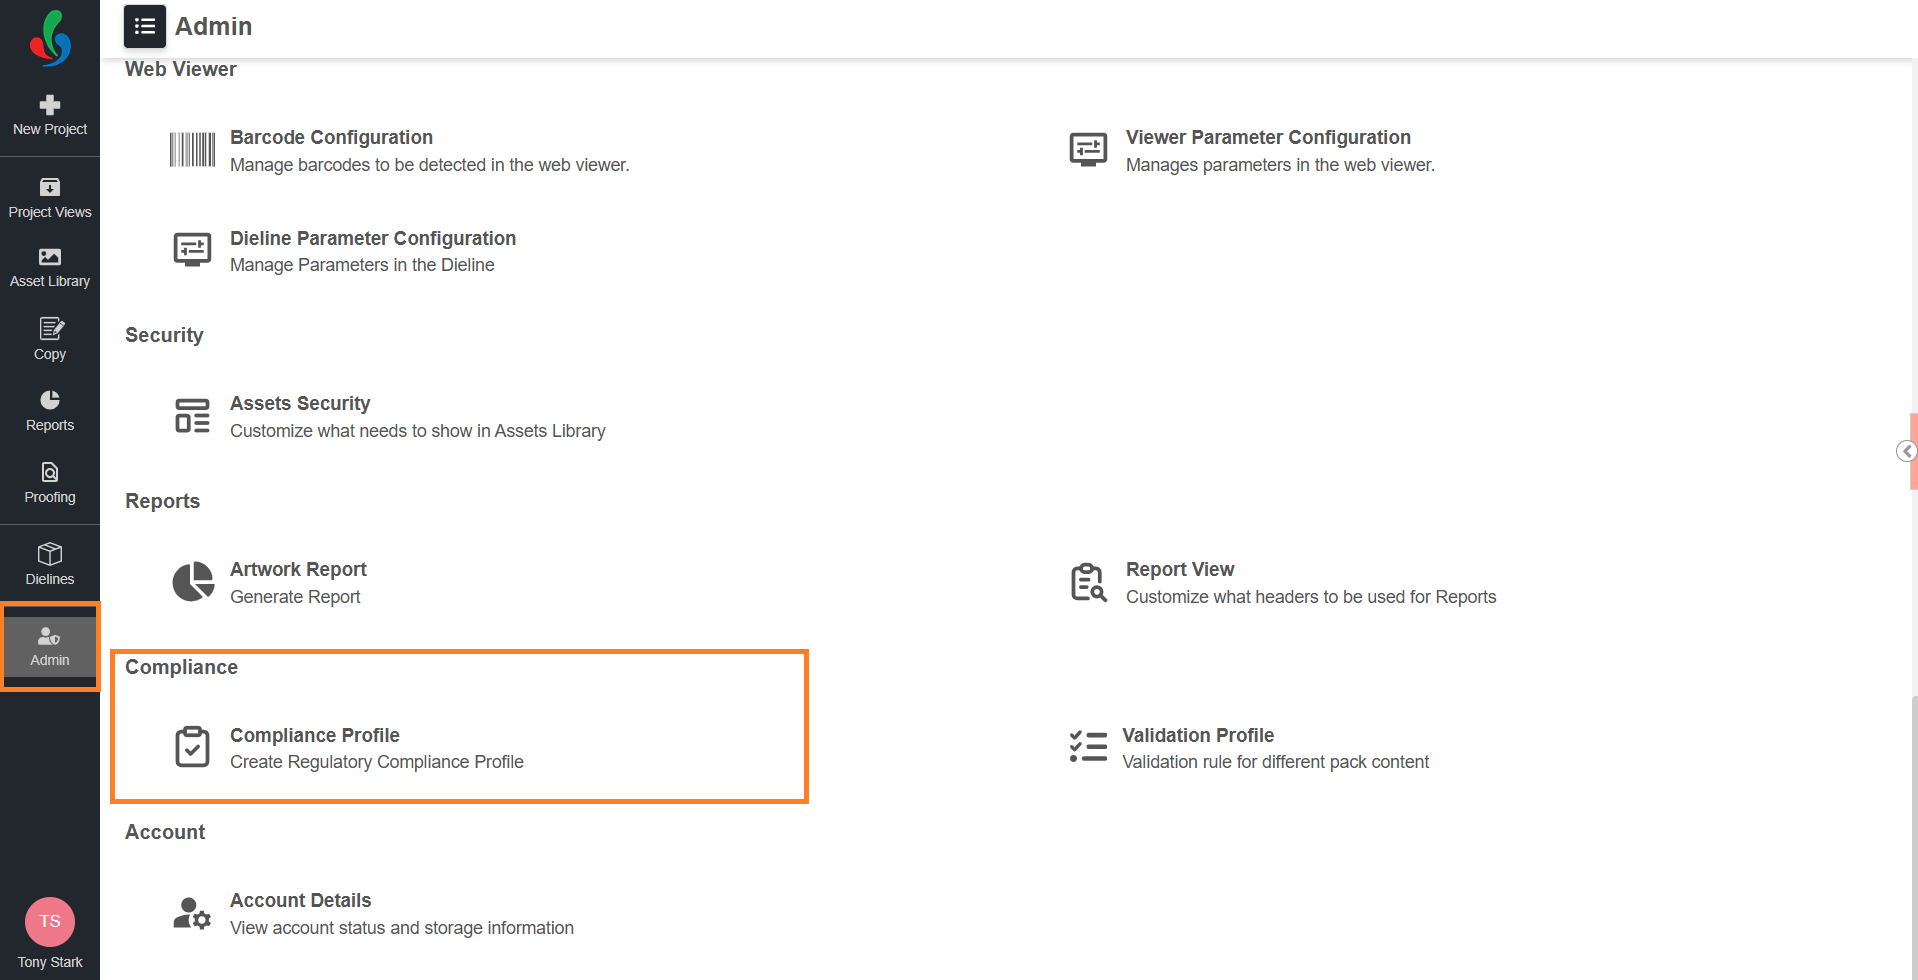
- Navigate to the Admin module.
- Under Compliance, select Compliance Profile.
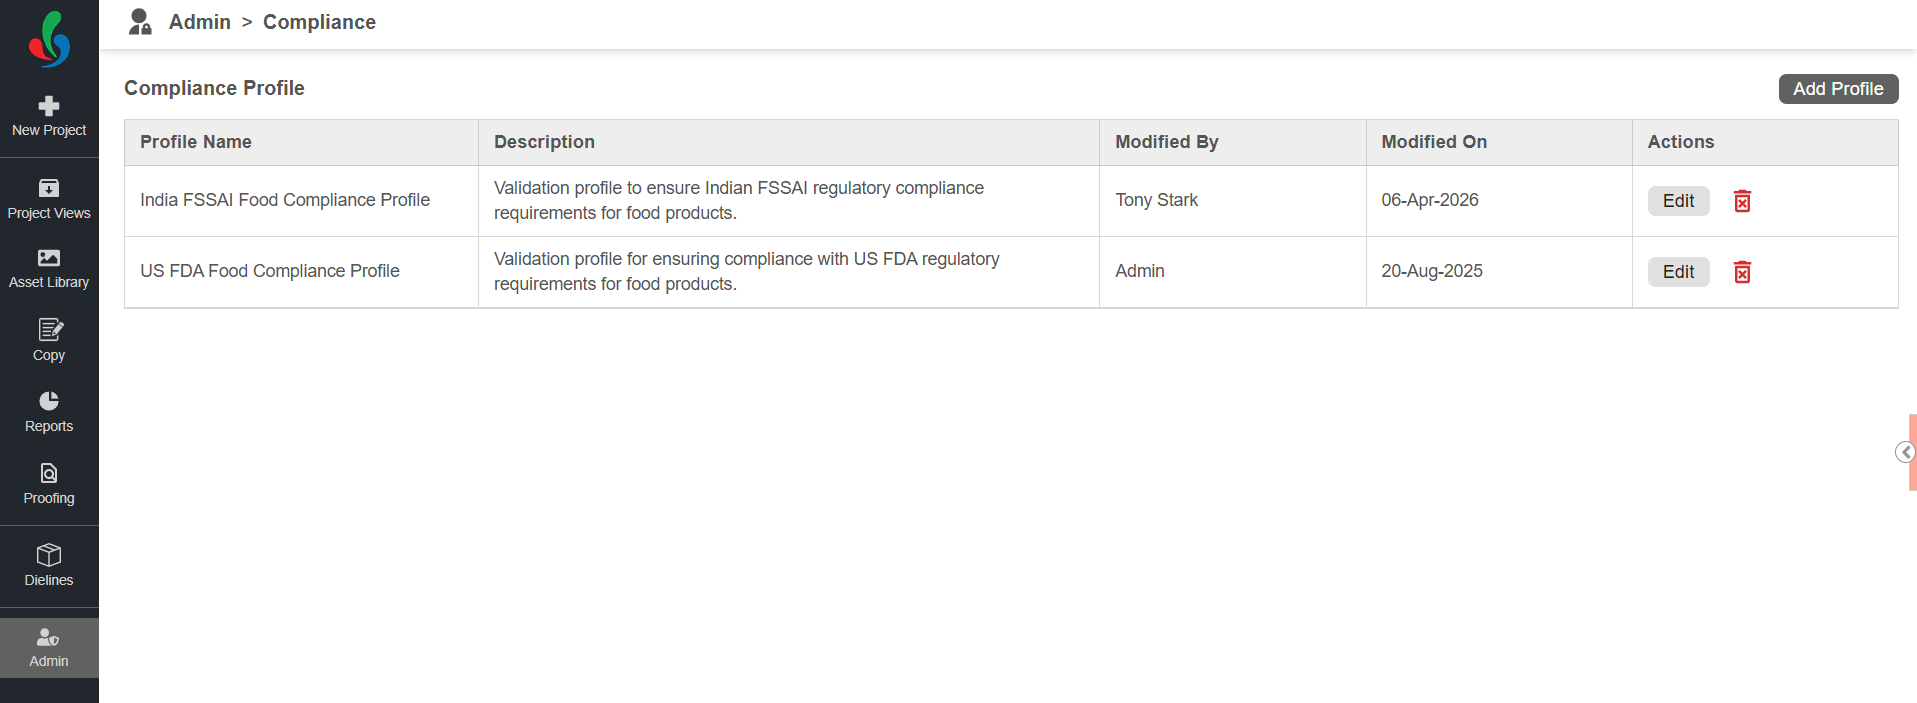
The Compliance Profile page displays a list of available profiles.
02. Create a Compliance Profile
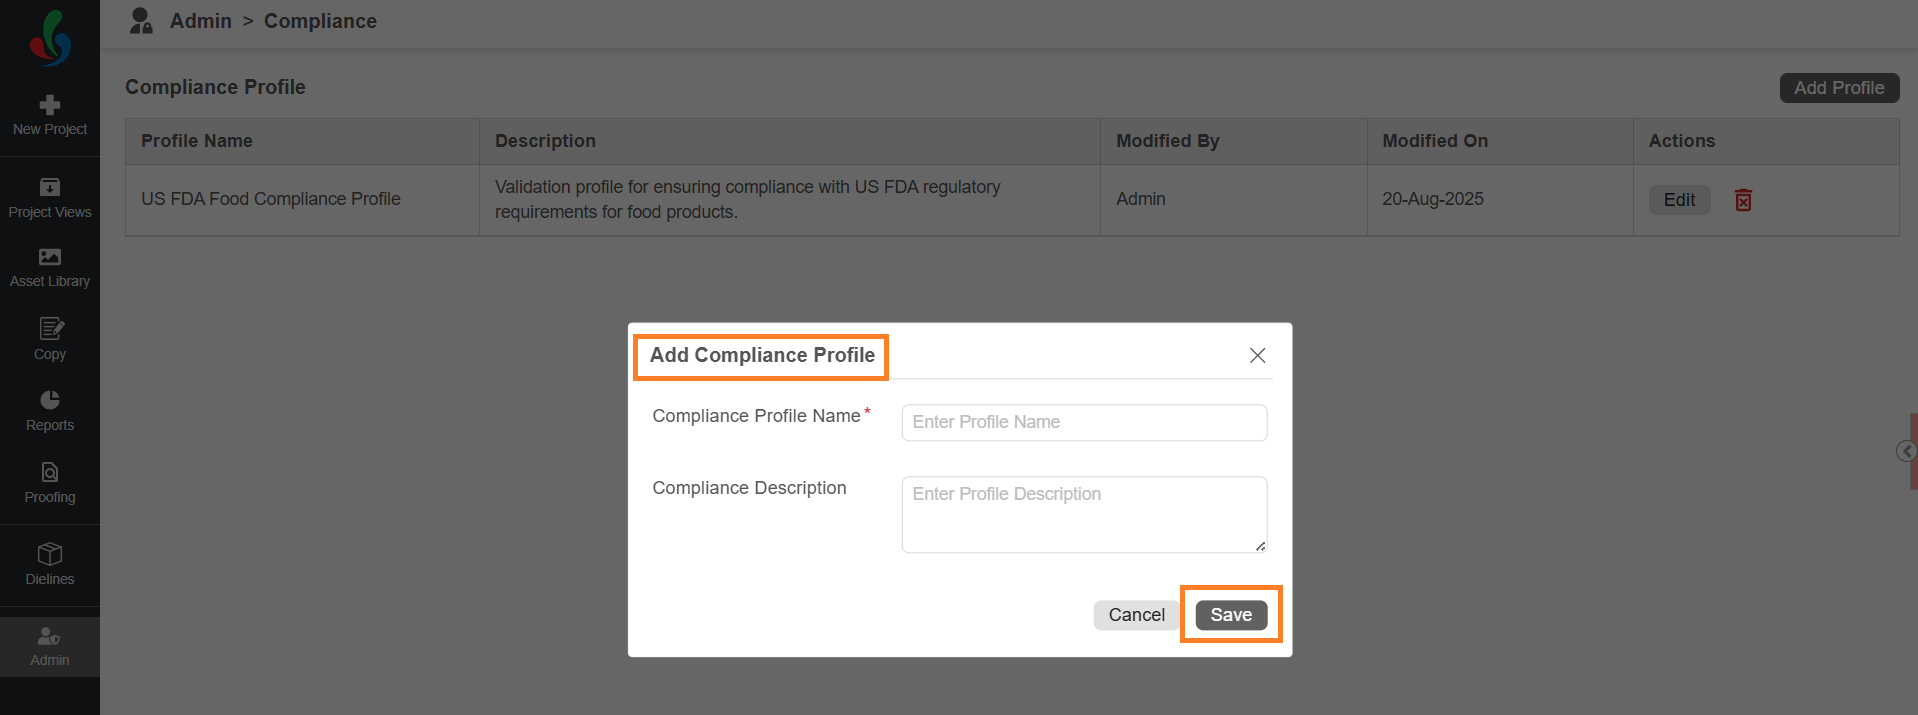
- Select Add Profile.
- In the Add Compliance Profile dialog:
- Enter a name in Compliance Profile Name (for example, India FSSAI Food Compliance Profile).
- Enter a description in Compliance Description.
- Select Save to add the profile.
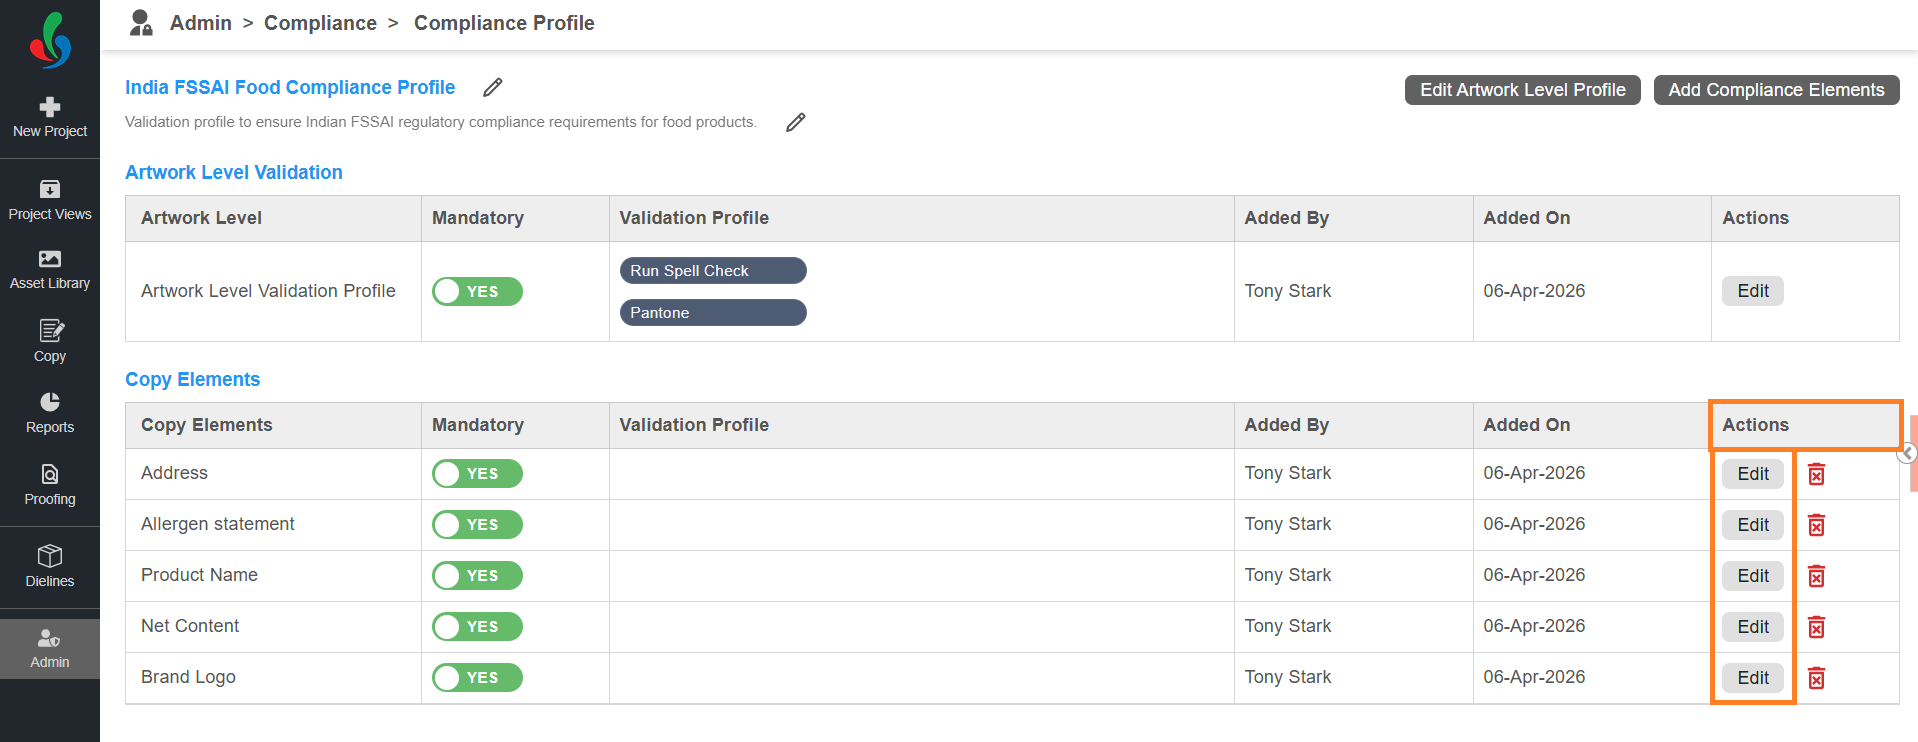
03. Configure the Compliance Profile
- Select Edit in the Actions column for the required compliance profile.
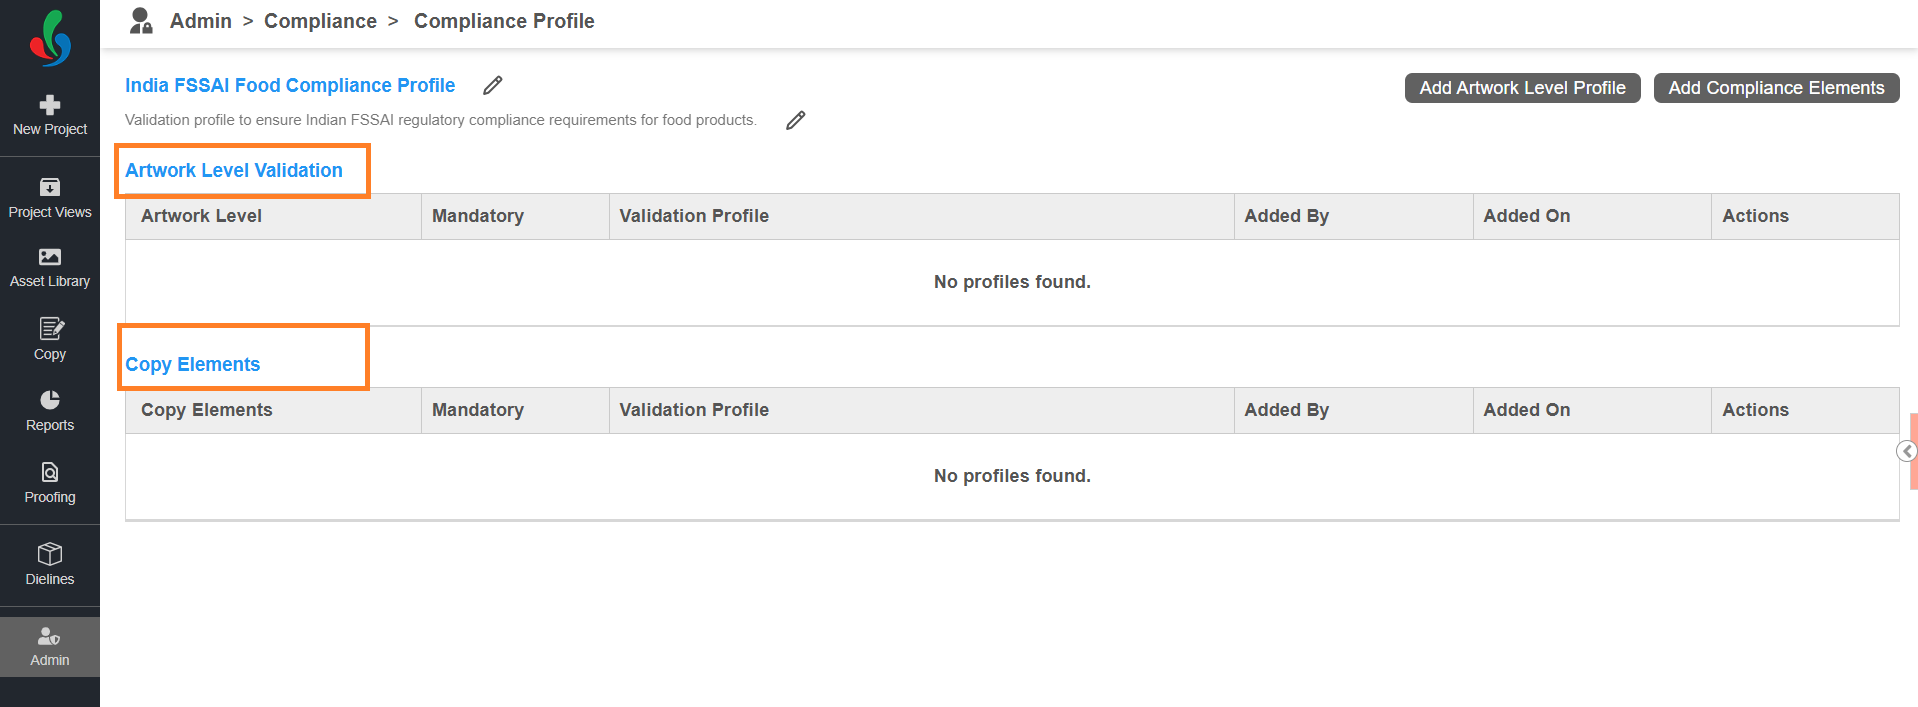
- The compliance profile consists of two sections:
- Artwork Level Validation – Lists general validation types that apply to the overall artwork.
- Copy Elements – Lists pre-configured and configurable validation types that apply to specific elements.
- Add General Validation:
- Select Add Artwork Level Profile.
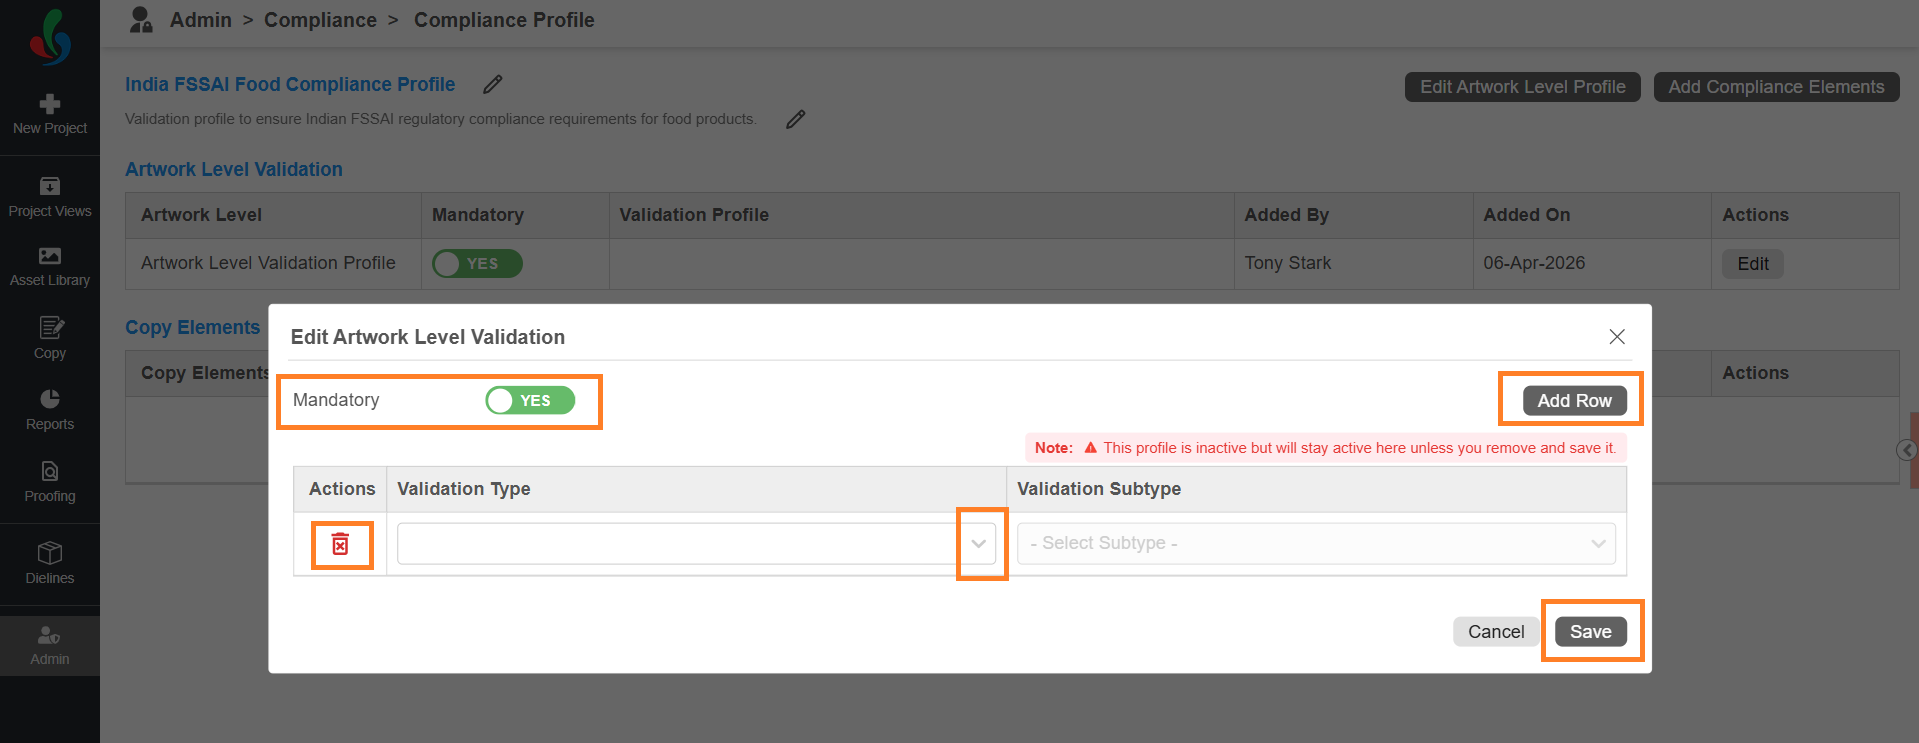
- In the Edit Artwork Level Validation dialog:
- Mandatory Toggle (Optional) (Enabled by default)
Enable or disable (Yes/No) the toggle as required.
Note: When enabled, users cannot exclude this validation during compliance checks. - Select Add Row.
- Select a validation type from the Validation Type list.
Note: Each row allows only one validation type. To add more, select Add Row again. - To remove a validation, select the delete icon in the Actions column for the validation.
- Mandatory Toggle (Optional) (Enabled by default)
- Select Save to add the general validations to the compliance profile.
- Select Add Artwork Level Profile.
- Add Pre-Configured and/or Configurable Validation Type:
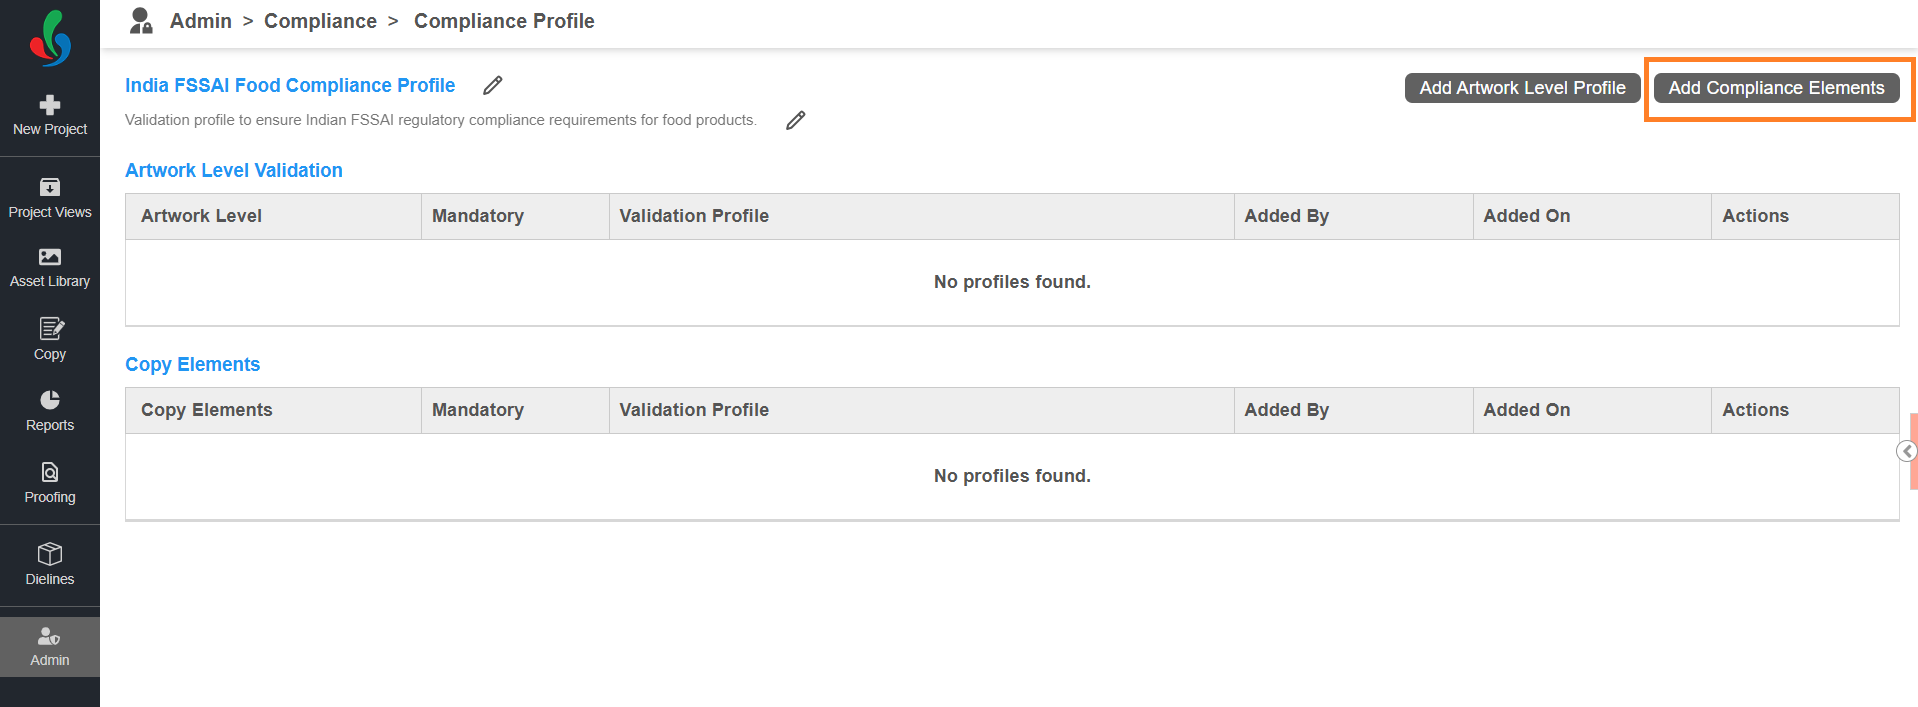
- Add Copy Elements:
- Select Add Compliance Elements.
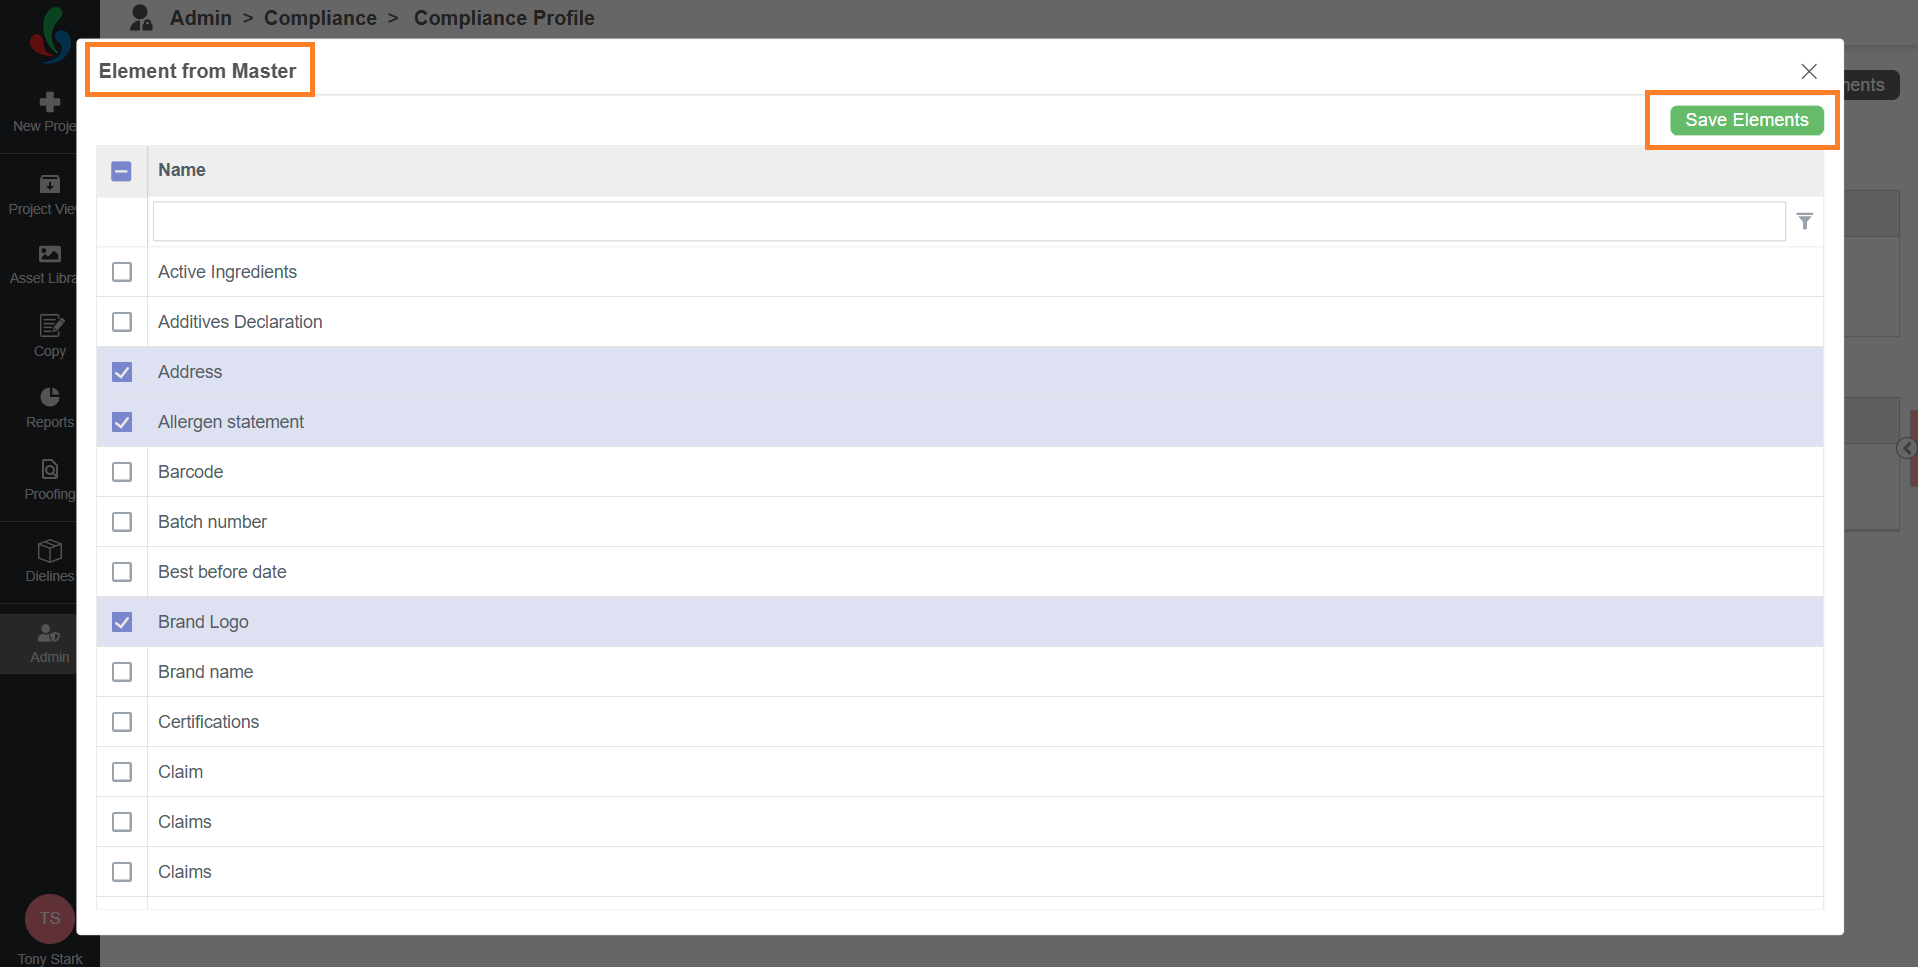
- In the Element from Master dialog:
- Select the required elements from the list.
- Ensure you select the correct elements for validation. For example, to validate allergen information, select the Allergen Statement element.
- Select Save Elements to add the selected elements to the compliance profile.
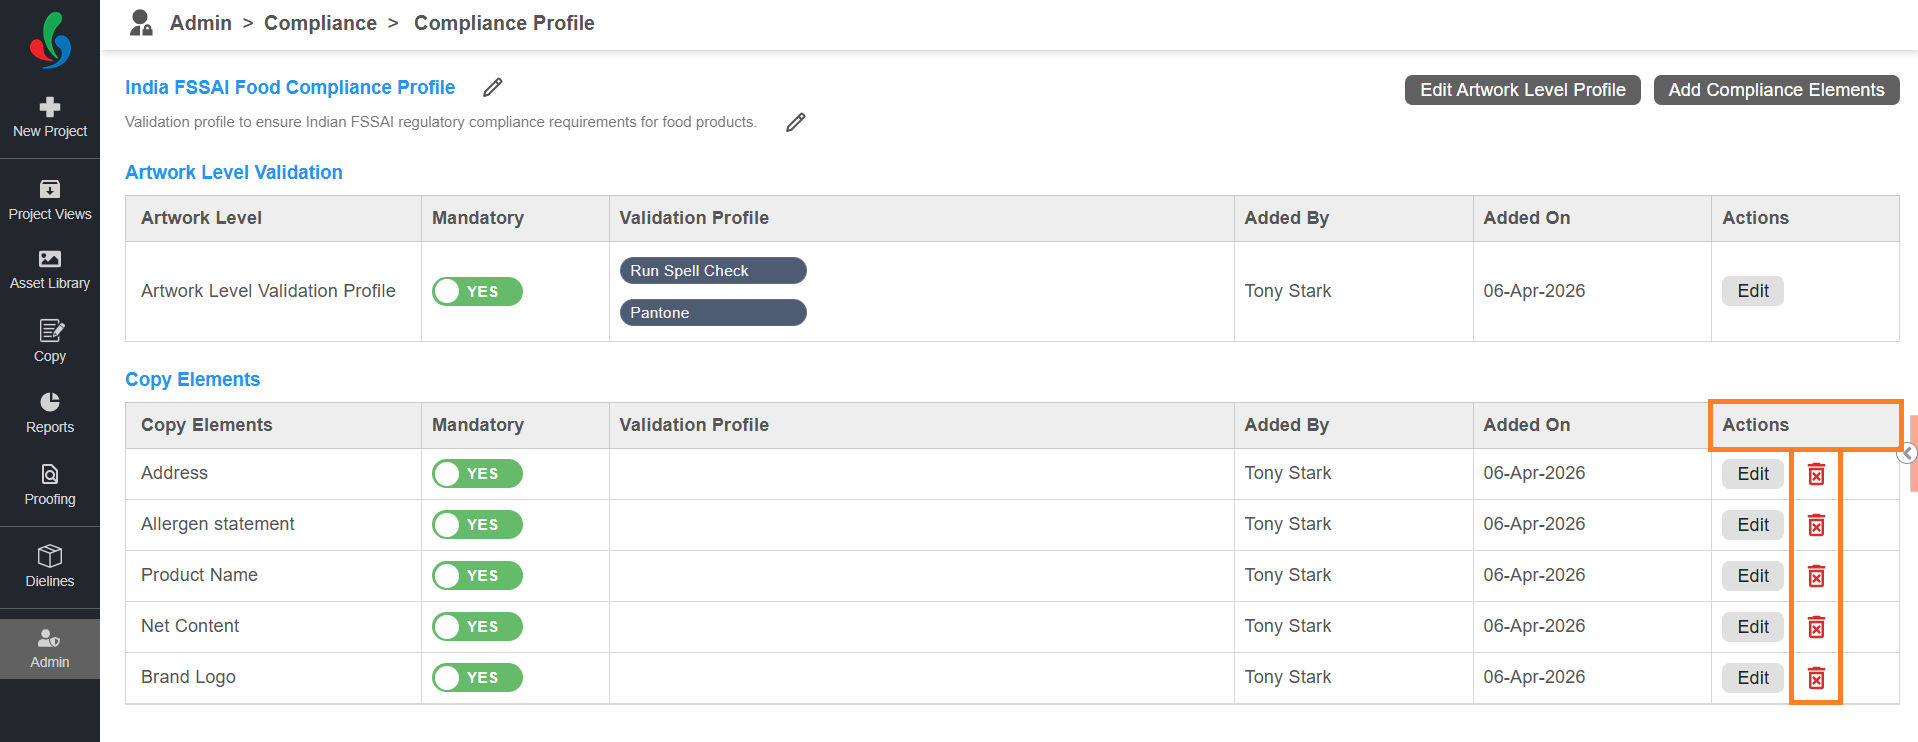
- To remove the added element, select the Delete icon in the Actions column for the elemnt.
- Select Add Compliance Elements.
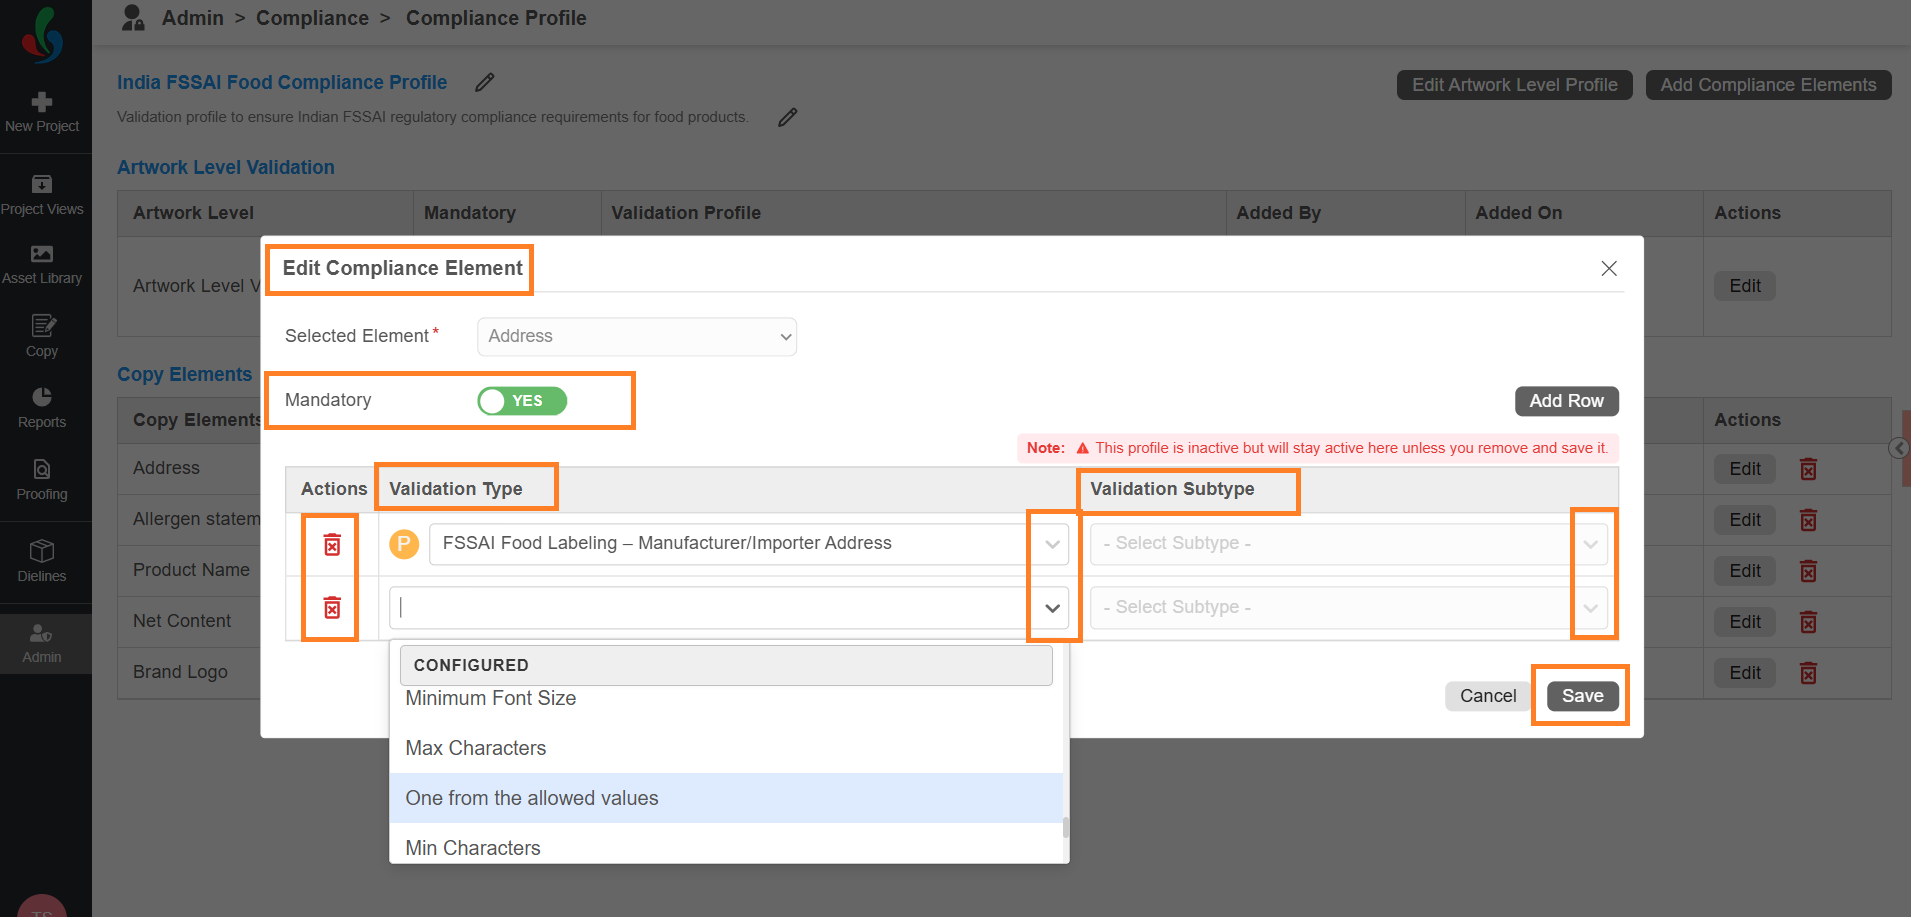
- Assign Validation Rules to Elements
- Select Edit in the Actions column for the required copy element.
- In the Edit Compliance Element dialog:
- Select Add Row.
- Select a validation profile from the Validation Type drop-down list.
- If applicable, select a validation check from the Validation Subtype drop-down list.
Note: Pre-configured validation types do not require a validation subtype. - Each row allows only one validation type and subtype. To add more, select Add Row again.
- To remove a validation, select the Delete icon in the Actions column for the validation.
- Select Save to assign the validation rules to the selected element.
- Repeat these steps to assign validation rules to all required elements.
- Select Edit in the Actions column for the required copy element.
- Add Copy Elements:

04. Save and Publish
In Compliance Profile, saving and publishing are handled automatically.
Once you configure the profile, it is auto-saved and immediately available for use in projects. There is no separate Publish action required.
If you make changes to an existing profile:
- The updates will apply only to compliance checks where the profile is used after the modification.
- Changes will not automatically update compliance checks that are completed.