
Manage Imported Dielines
As your team imports custom dielines, the library needs occasional housekeeping — a clearer name here, a better thumbnail there, or removing a model no one uses. The Dieline Import page in the Admin module lists every imported dieline so you can keep the custom library accurate and easy to search.
How to Manage Imported Dielines
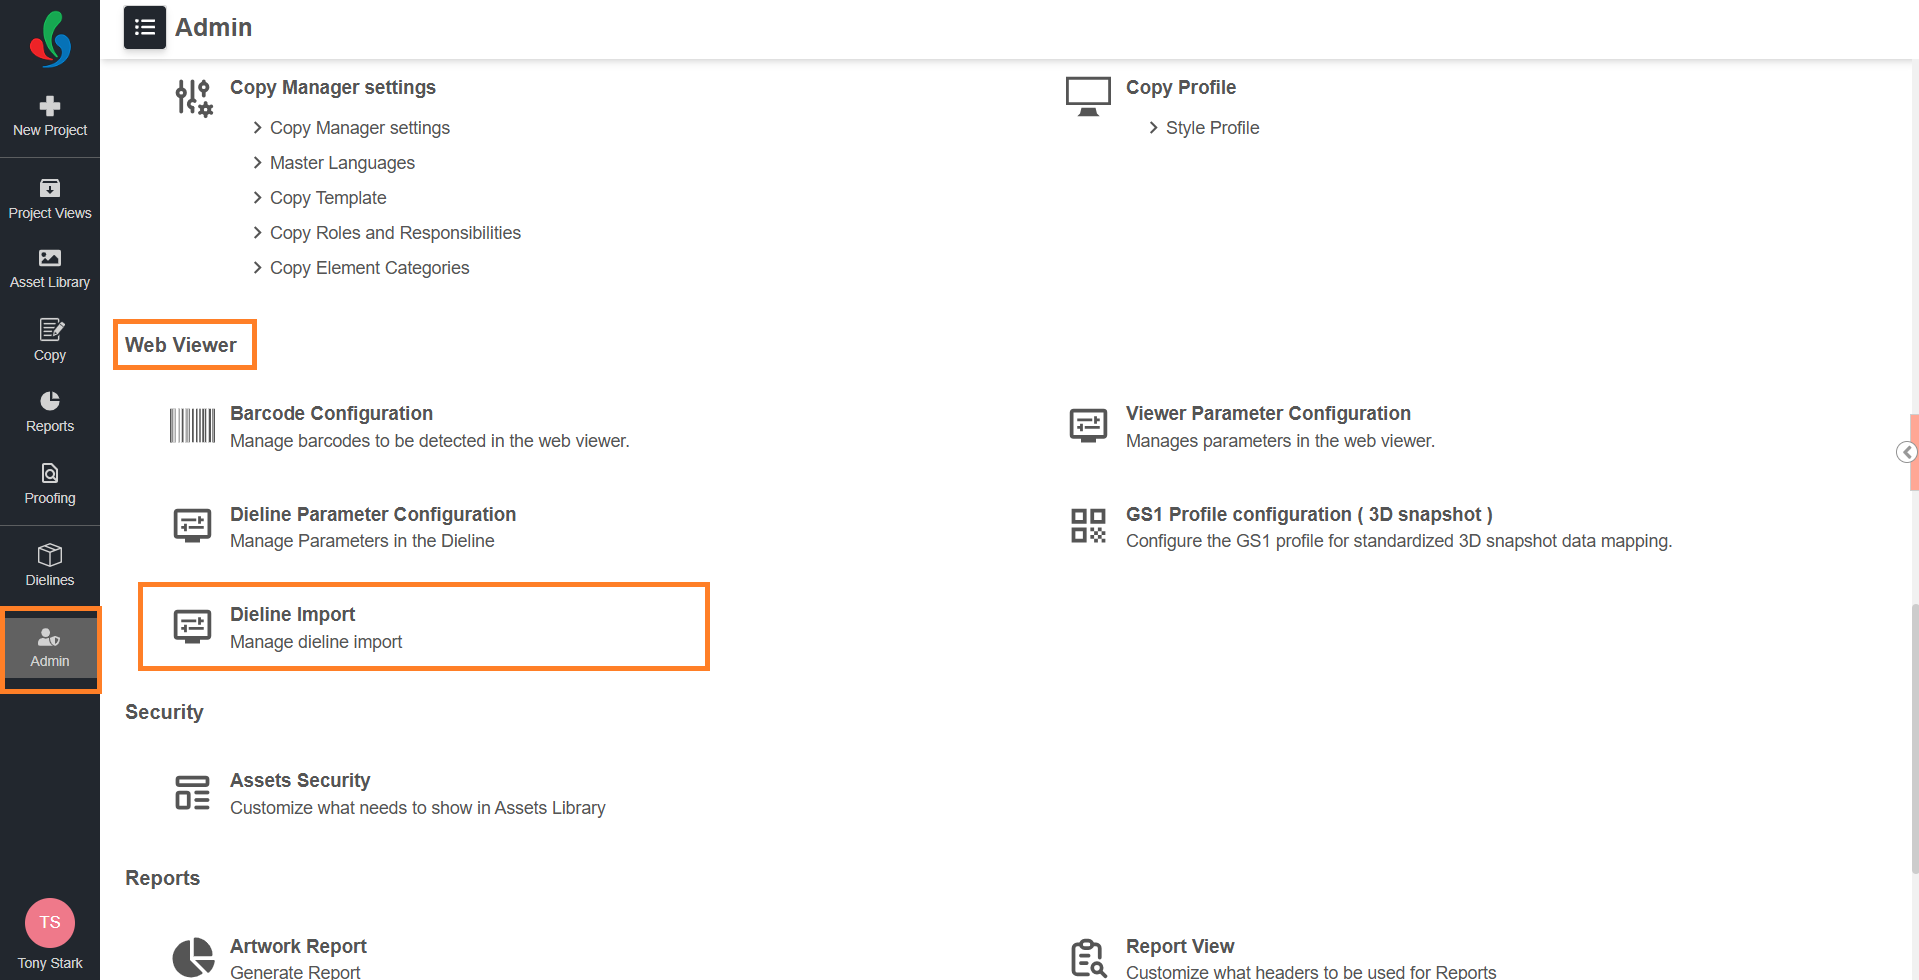
01. Access Dieline Import
- Sign in to your ManageArtworks account.
- Navigate to the Admin module.
- Under Web Viewer, select Dieline Import.
02. Edit the Details
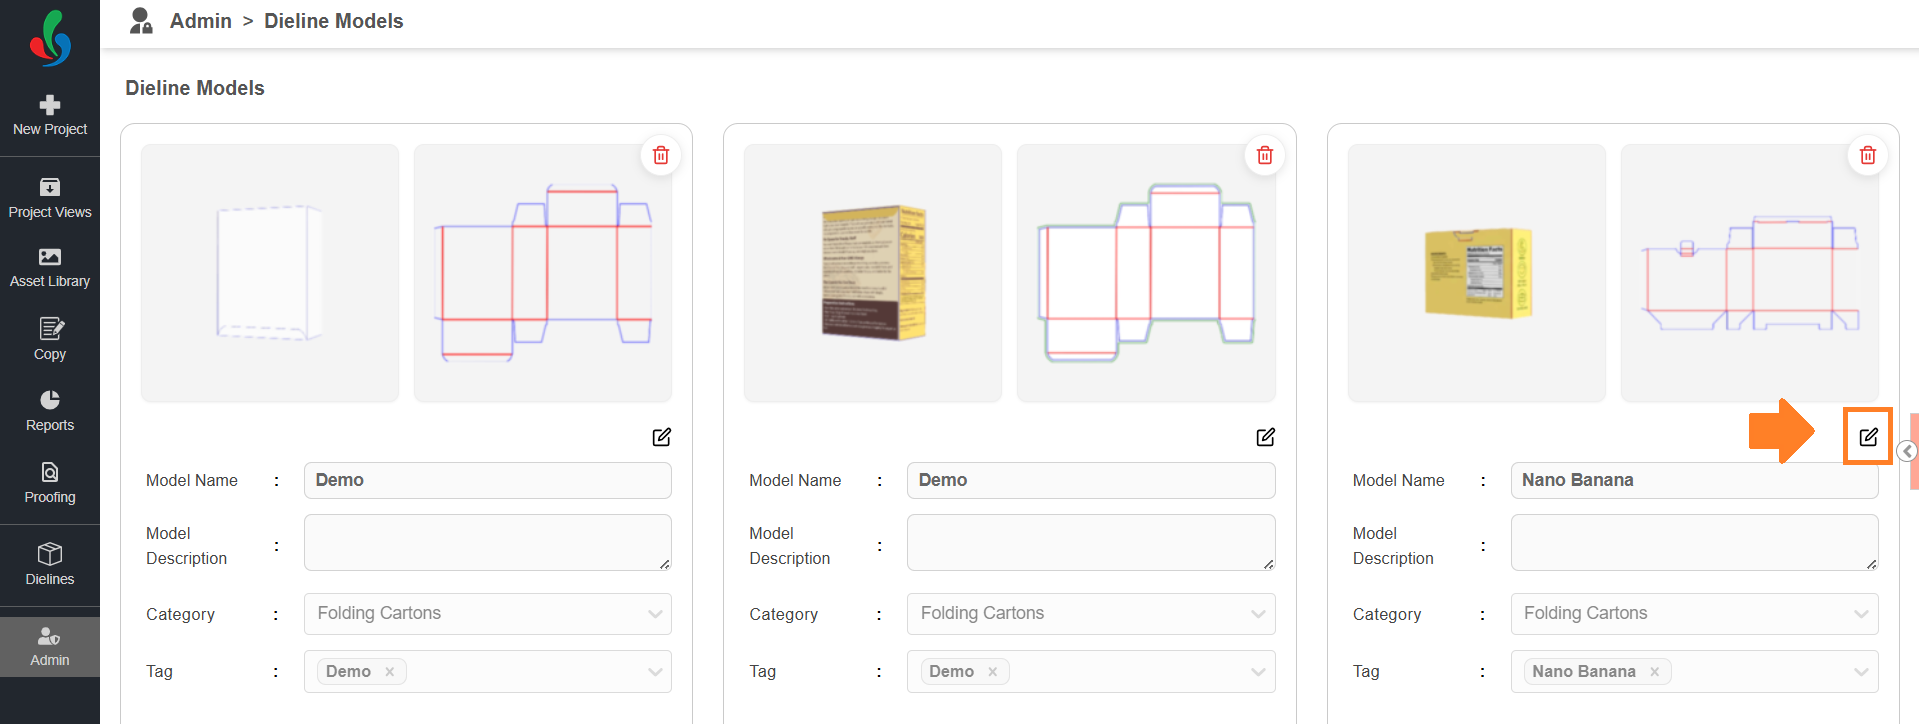
- Locate the required dieline.
- Select the Edit icon.
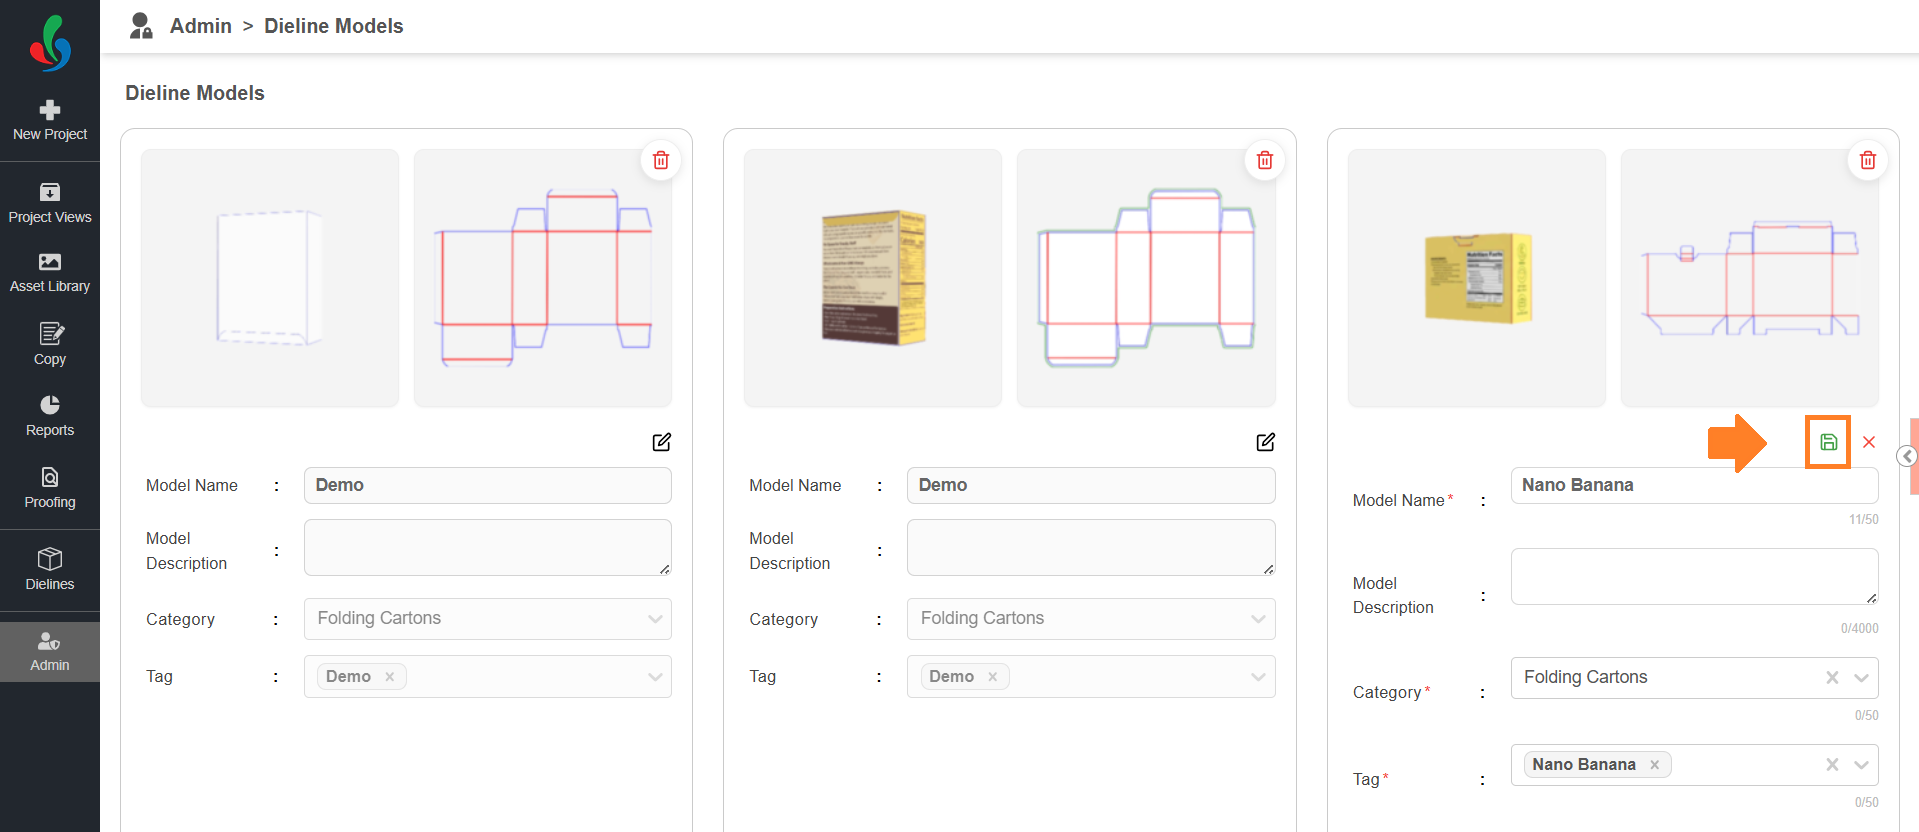
- Update the Model Name, Model Description, Category, or Tag as required.
- Select the Save icon. The changes are applied to the Dieline Library.
03. Update the Thumbnails
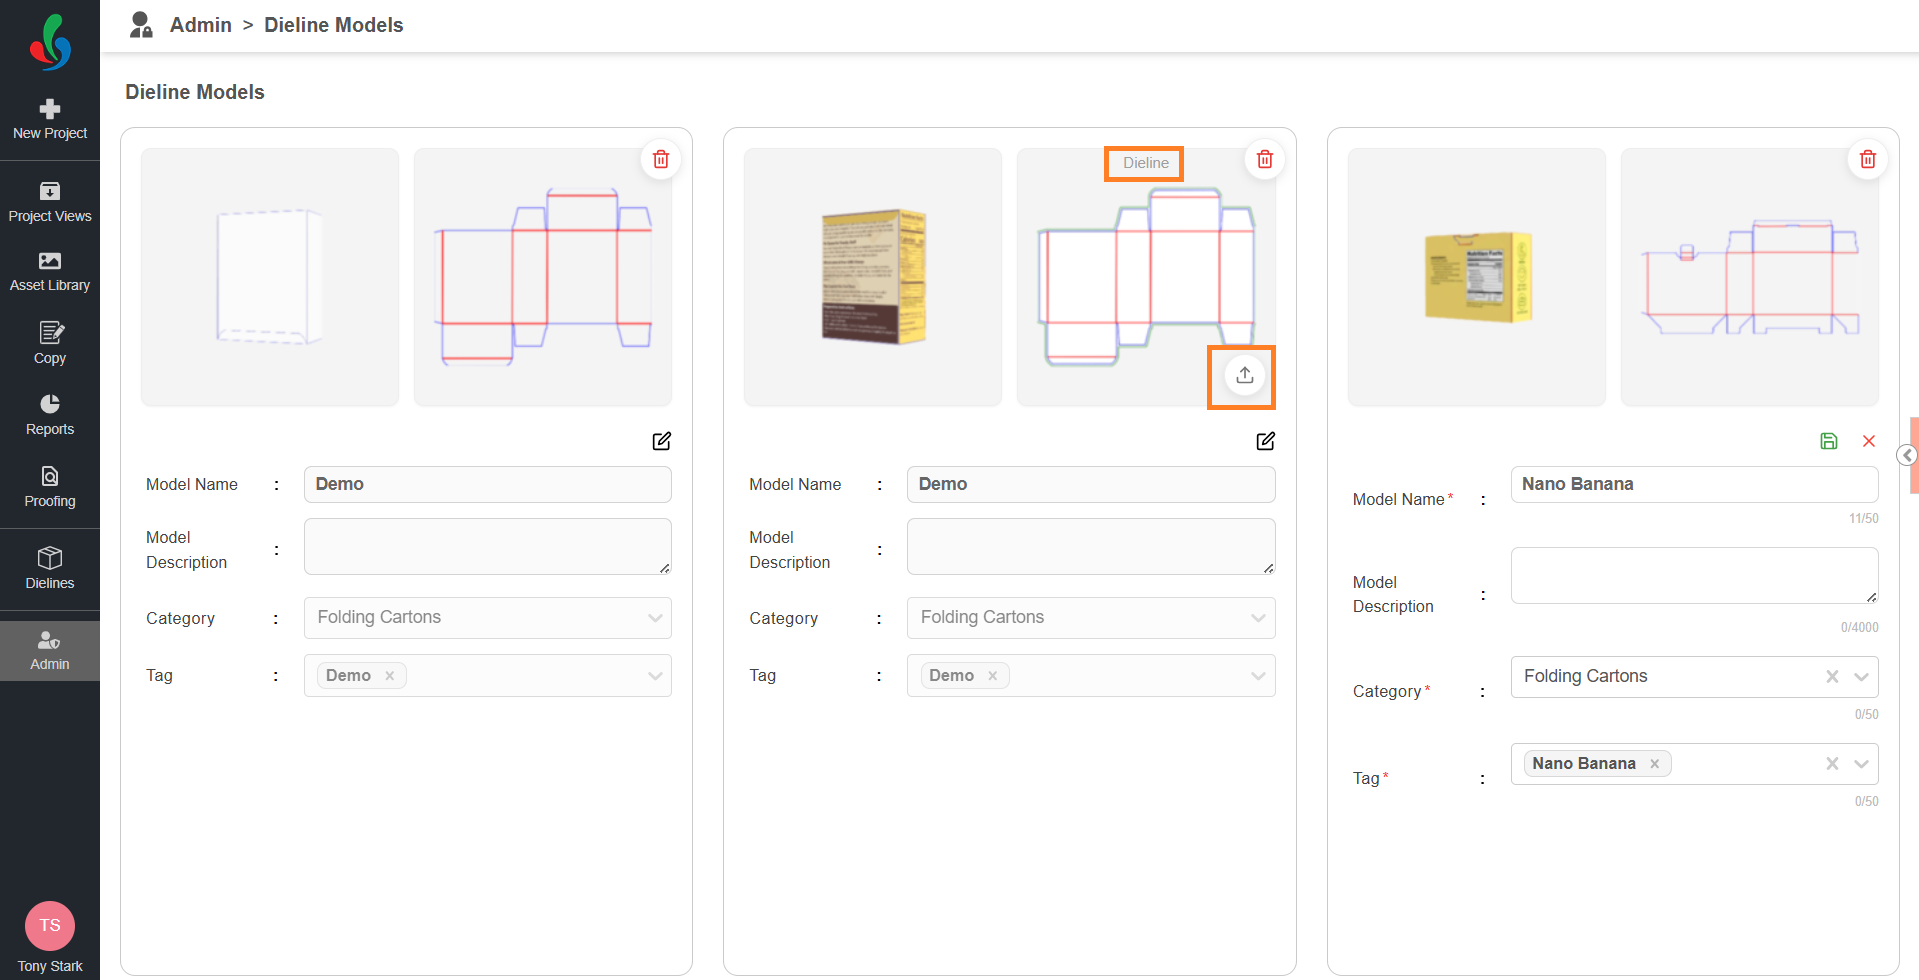
- Hover over the model or dieline thumbnail.
- Select the Upload icon.
- Browse to the required image and select Open. The thumbnail is updated.
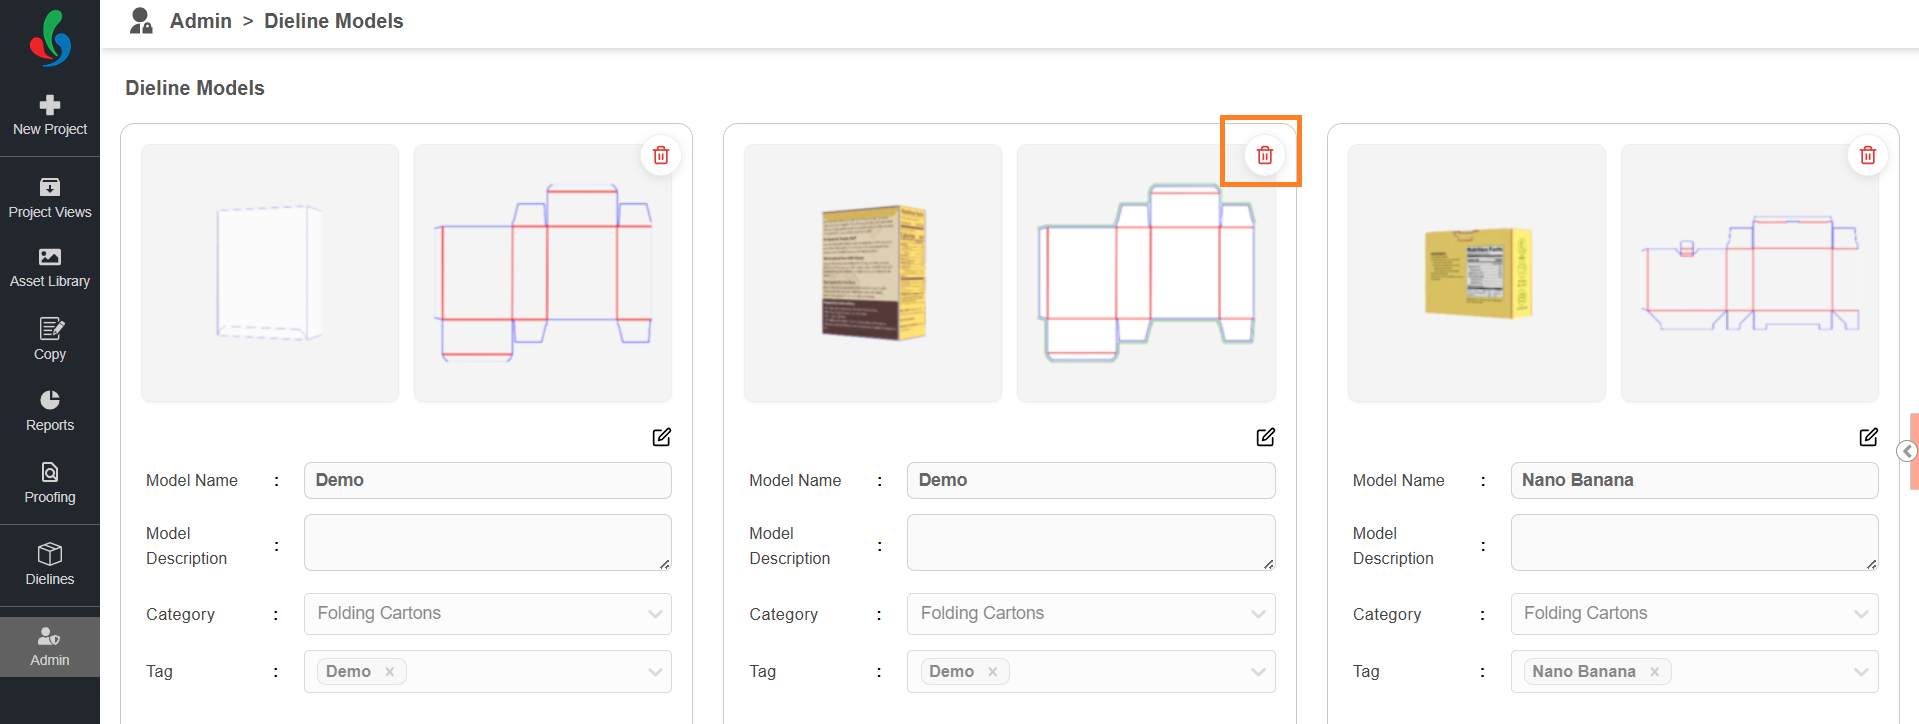
04. Delete an Imported Dieline
 | Note: Deleting an imported dieline is permanent and cannot be undone. |
- Locate the required dieline.
- Select the Delete option.
- Confirm the deletion in the confirmation prompt. The dieline is removed from the library, and any assets associated with it are unlinked.
Related Articles
- For more information on importing a custom dieline, refer to Import a Custom Dieline.