Revise Published Copy and Track Versions
When approved copy has to change — a regulatory update, a new claim, a corrected manufacturer address — revise the published copy rather than starting from scratch. The revision opens with the published content already in place, so you change only what is actually changing, and the copy publishes as the next version when the project completes.
Revising never alters the copy that is already published. Every earlier version stays available in full, and each copy element inside a version carries its own version number, so you can see which content changed since the last release and which has stayed the same.
Versions are assigned by the system. You do not create or number them yourself.
Types of Copy Versions
Copy Manager keeps two kinds of version:
| Version | What it applies to |
|---|---|
| Copy sheet version | The published copy sheet as a whole. It moves to the next version each time the copy is revised and published. |
| Copy element version | An individual copy element on that copy sheet. It moves to the next version only when that element's own content changes. |
 | Note: Because the two are counted differently, a copy sheet at Version 2 can contain elements that are still at Version 1. |
Copy Sheet Versions
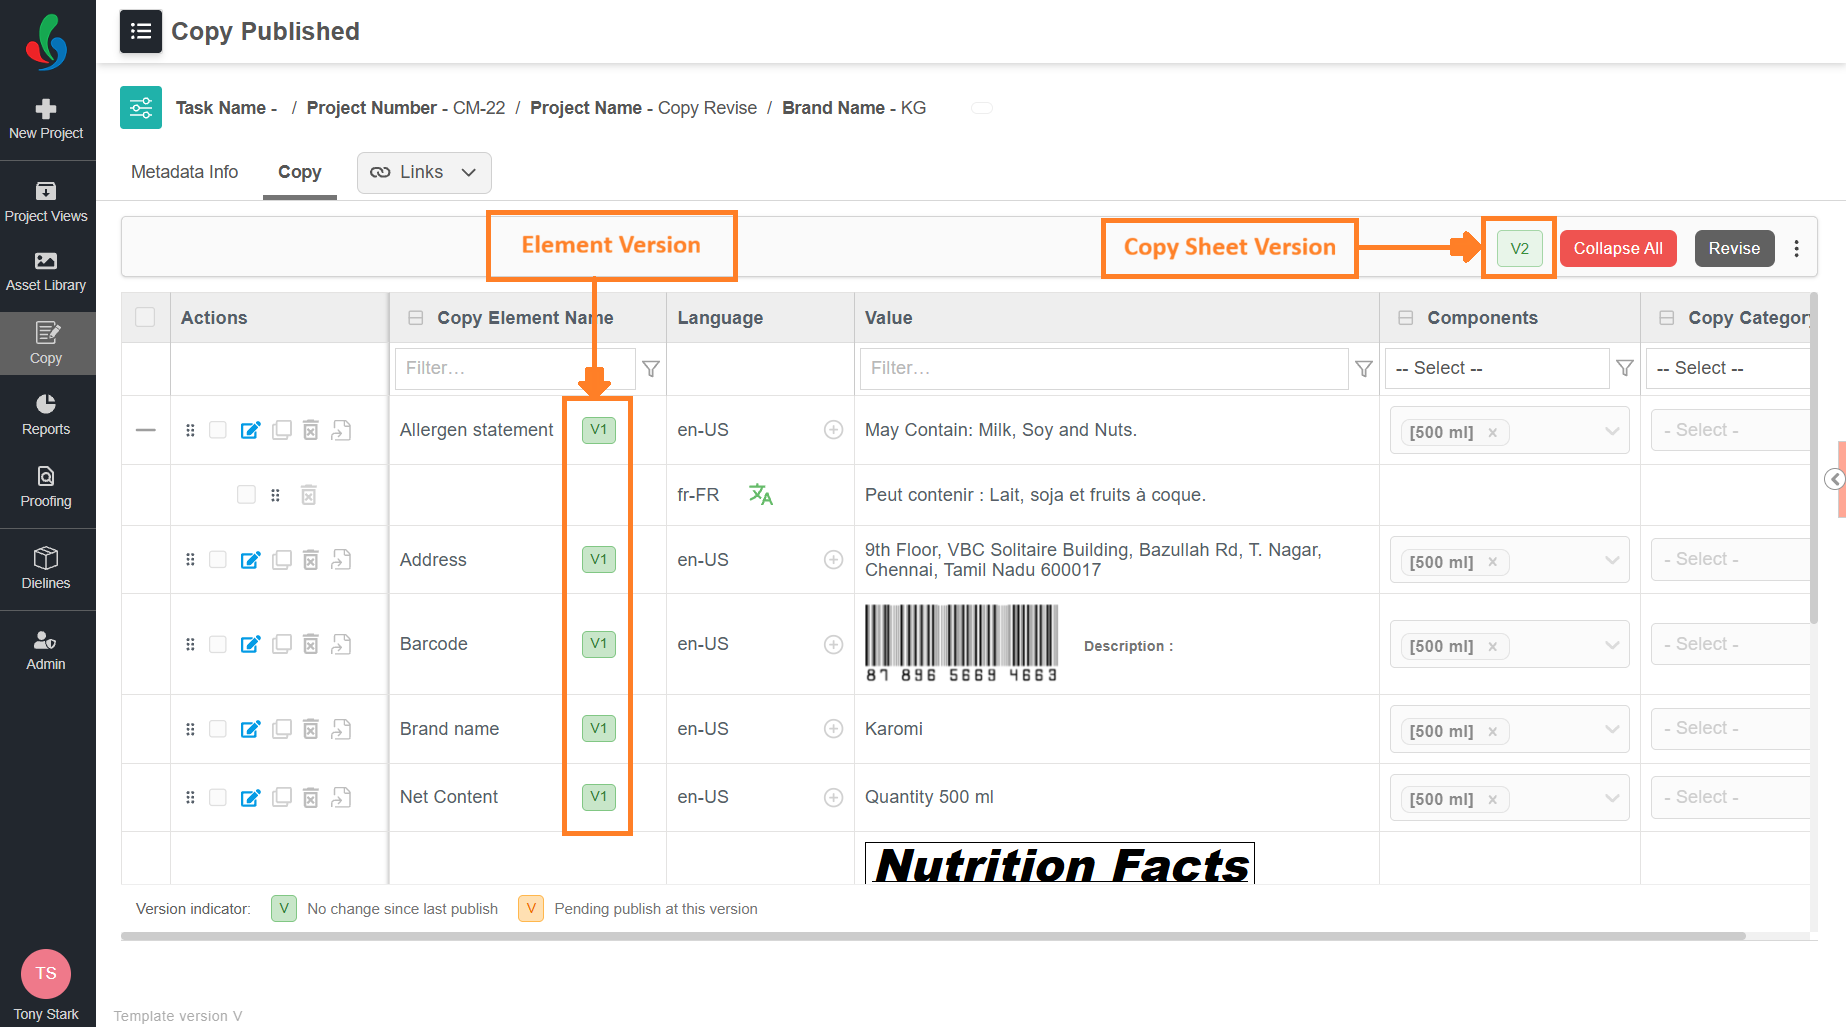
A copy sheet version number is assigned when the copy is published.
Each revision of a copy publishes as the next version of that copy: Version 1 is the first release, Version 2 is the revision that followed it, and so on. The copy sheet version increases with every revision that is published, whether or not the copy content changed.
View the Version of a Published Copy
- Sign in to your ManageArtworks account.
- Hover over the Copy module.
- Select Published Copy.
- Locate the required published copy in the list.
- The Version column shows the version number of each published copy.
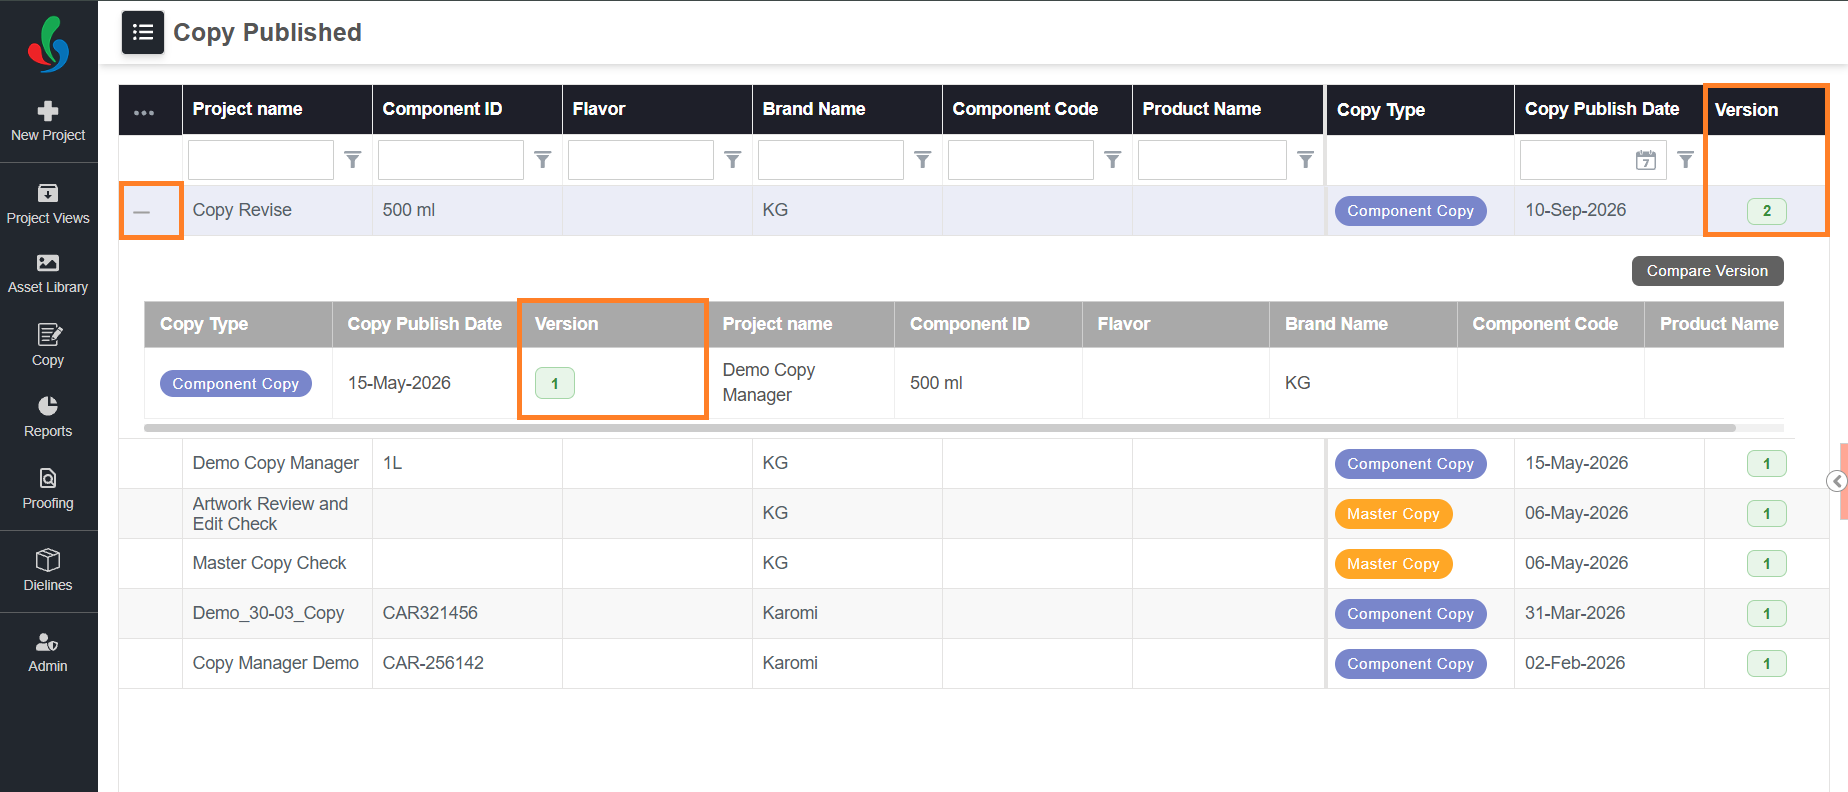
- If the copy has more than one version, select the plus (+) icon in the first column of the row.
- The panel lists every other published version of that copy. Select a row to open that version's copy sheet, or select Compare Version at the top of the panel to see what changed between two versions. Compare Version is available only when the copy has more than one published version. For more information, refer to Compare Copy Versions.
Copy Element Versions
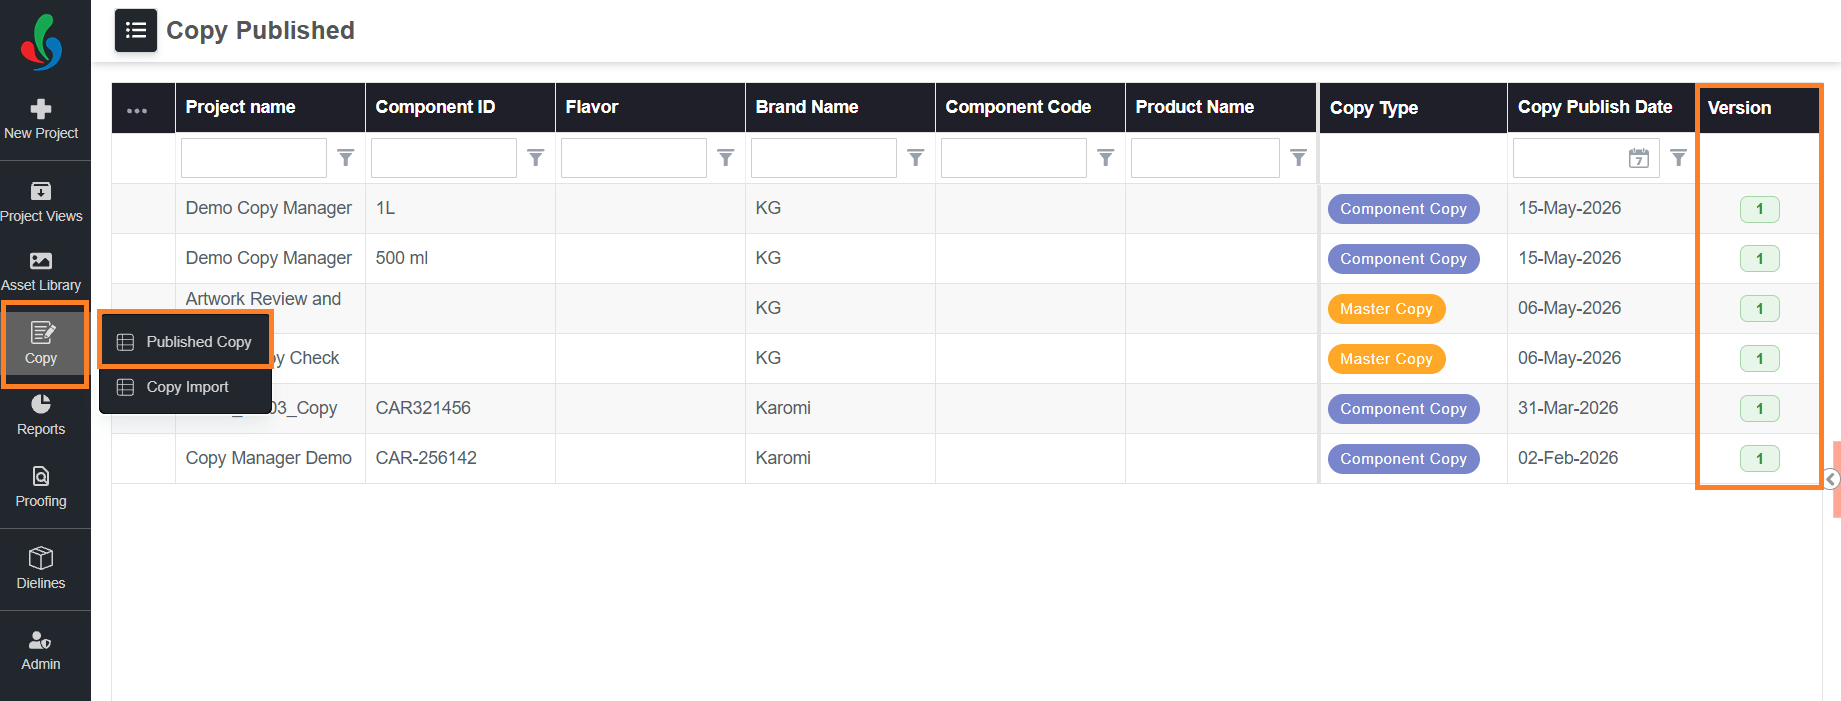
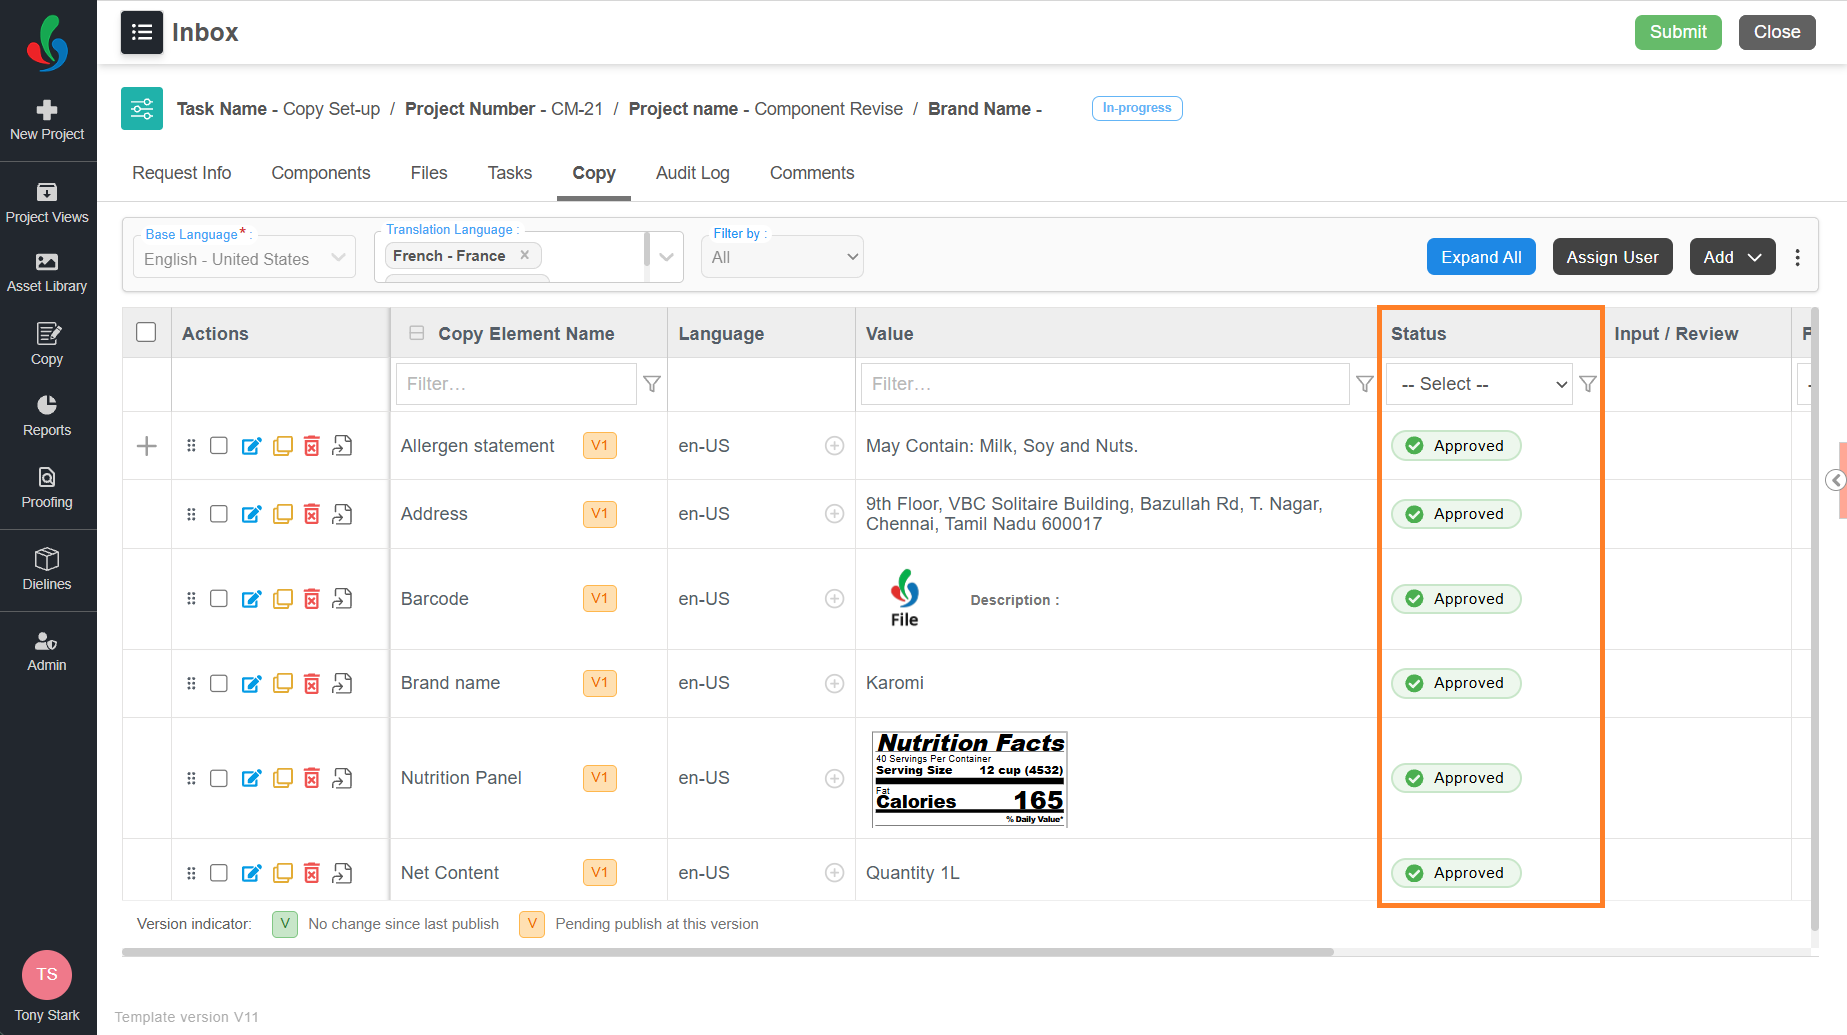
A version badge appears next to each element name on the copy sheet. The number is the element's version, and the colour is its state.
| Colour | State |
|---|---|
| Green | The element is published. |
| Orange | The element is in progress. The number is the version it will publish at. |
So a green V1 is an element published at version 1.
A published element turns orange again when you revise it, and turns green again when the copy is published.
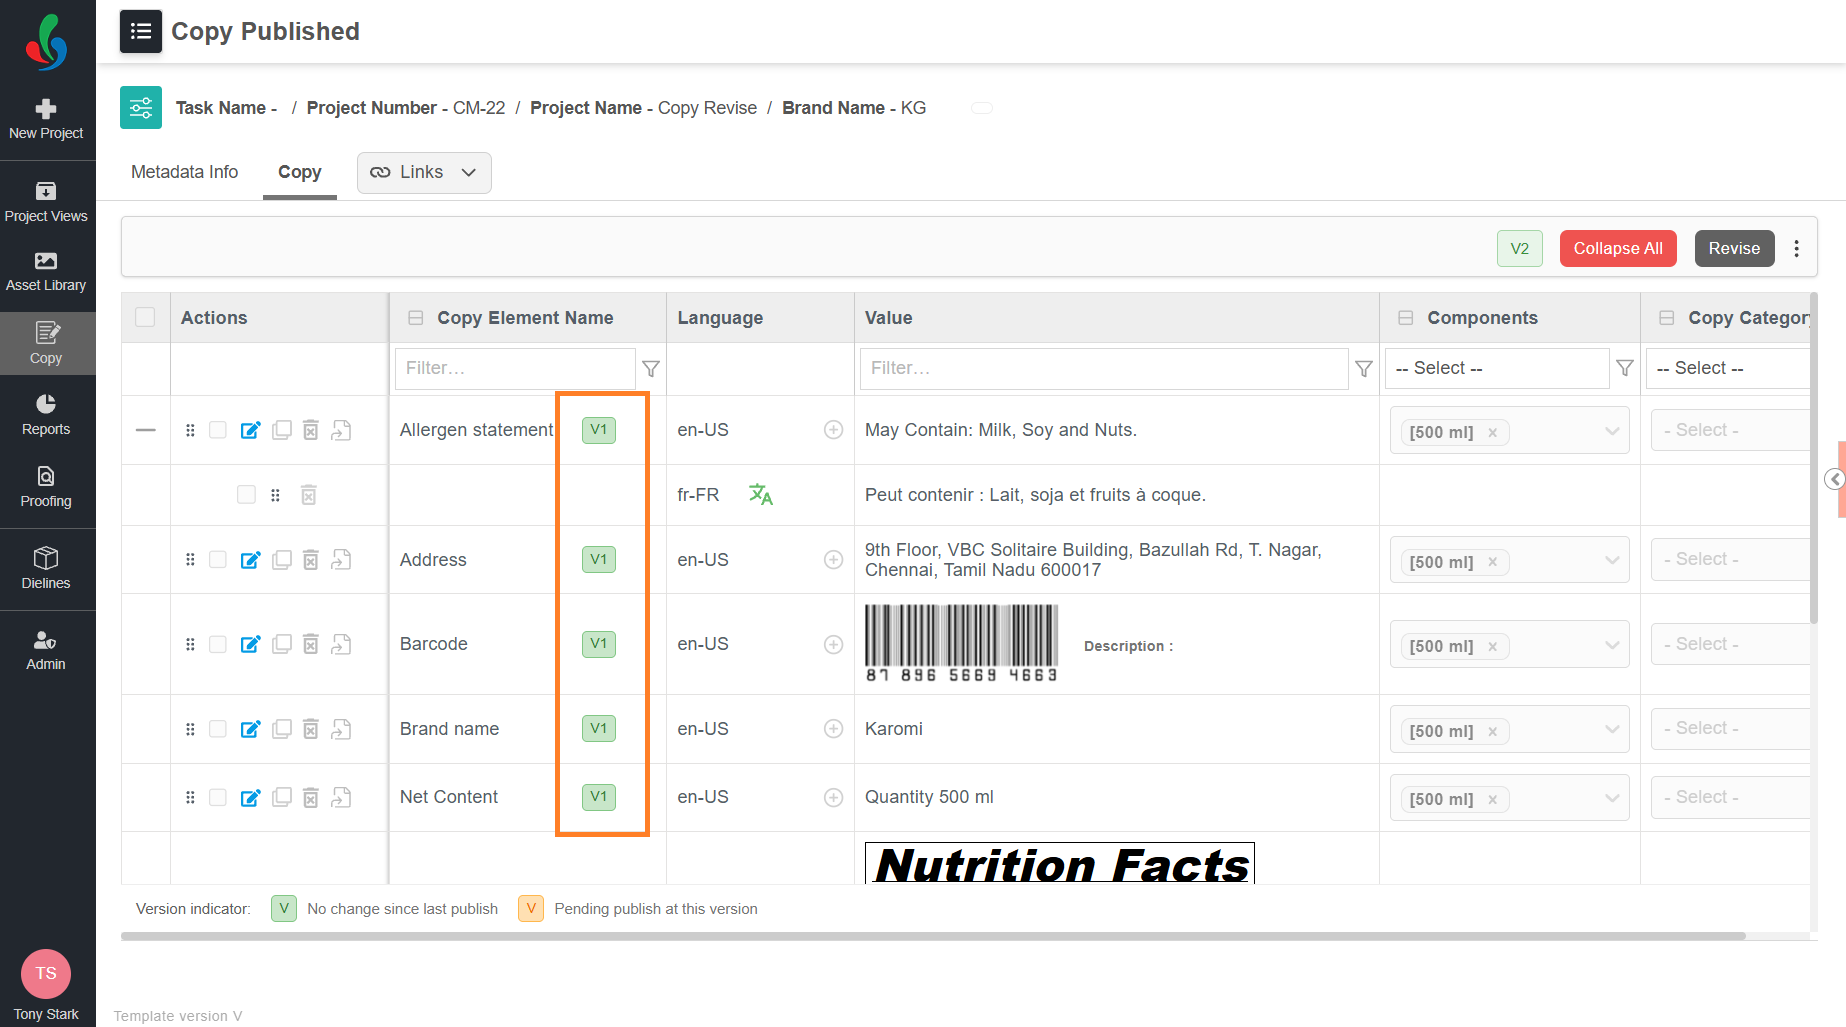
An element moves to the next version when any of the following changes:
- The Value.
- The Copy Category.
- The Priority.
- The Instruction.
- The Languages (locales) the element is translated into.
Unchanged elements keep the version they already have, so a single copy sheet can legitimately contain elements at different versions.
Ways to Revise Published Copy
There are three ways to revise a copy in Copy Manager:
- From the Published Copy Sheet: Open the published copy from Copy > Published Copy and select Revise. ManageArtworks creates a revision project for that copy. Refer to Revise a Copy from Published Copy.
- From the Components Tab: In a project you are already working in, use Component Revise to bring in the published copy of one or more components. Refer to Revise a Copy from Components Tab.
- Based on Unique Fields: For revising a copy sheet based on Unique Fields, refer to Revise Copy Sheet Using Unique Fields.
The difference between the first two is how much is carried over. Revising from the published copy sheet brings in the request information and the components as well as the copy sheet. Component Revise brings in the copy sheet only, so you fill in the rest of the project details yourself.
In both, the published copy elements arrive as Approved. You revise only the elements that are changing, and add any new elements the copy needs.
Revise a Copy from Published Copy
| Note: The revision flow needs a workflow template configured for it. Until a revise workflow template is configured, the Revise button inside the copy sheet is disabled. Make sure a template is selected for Copy Revise Template in Copy Manager Settings. |
- Sign in to your ManageArtworks account.
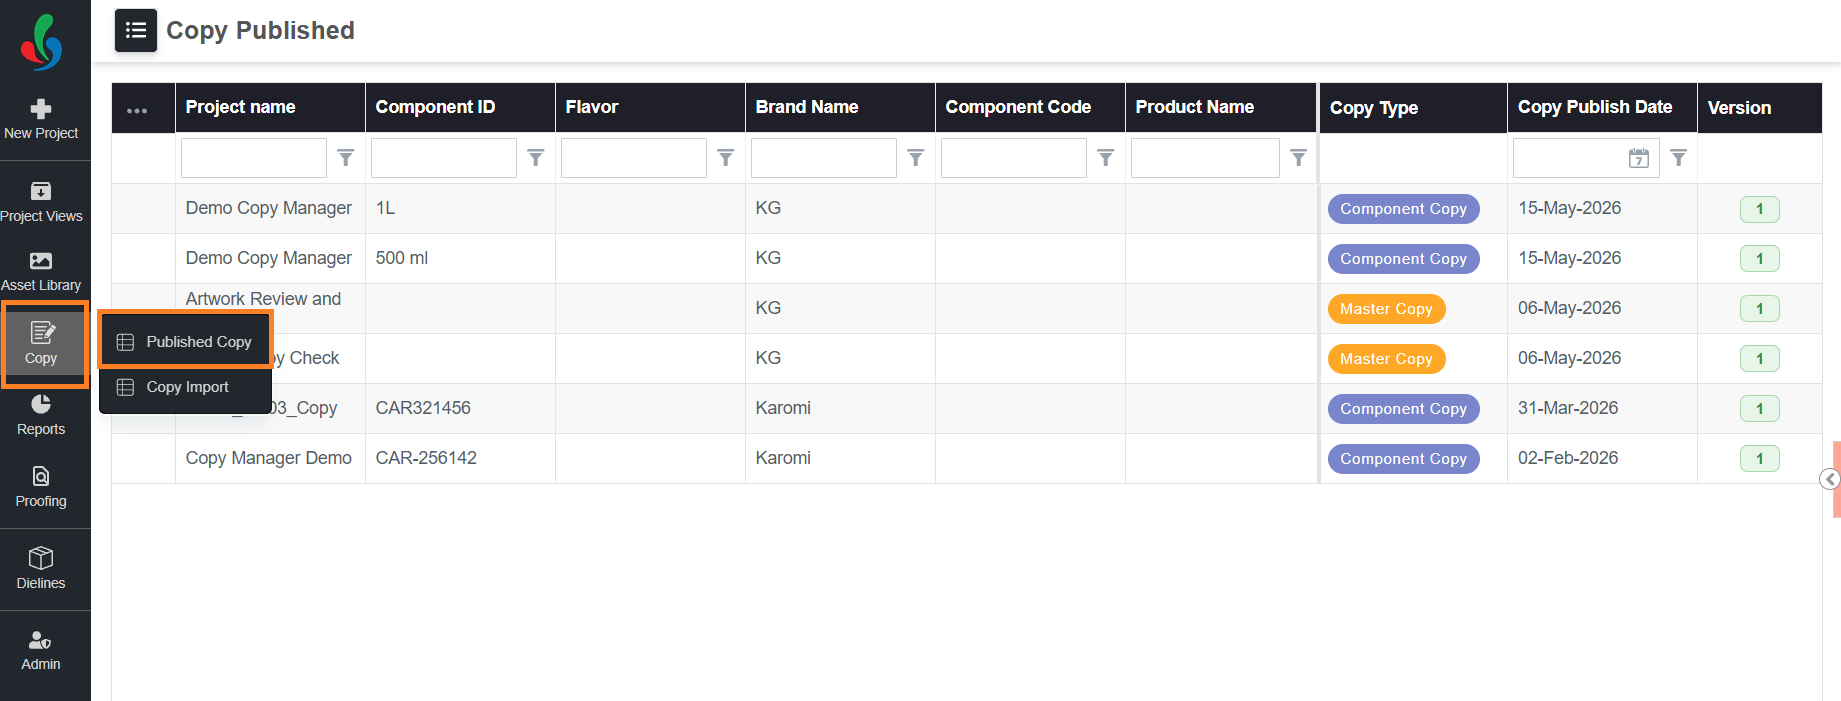
- Hover over the Copy module.
- Select Published Copy.
- Select the required copy. The copy sheet opens in read-only mode.
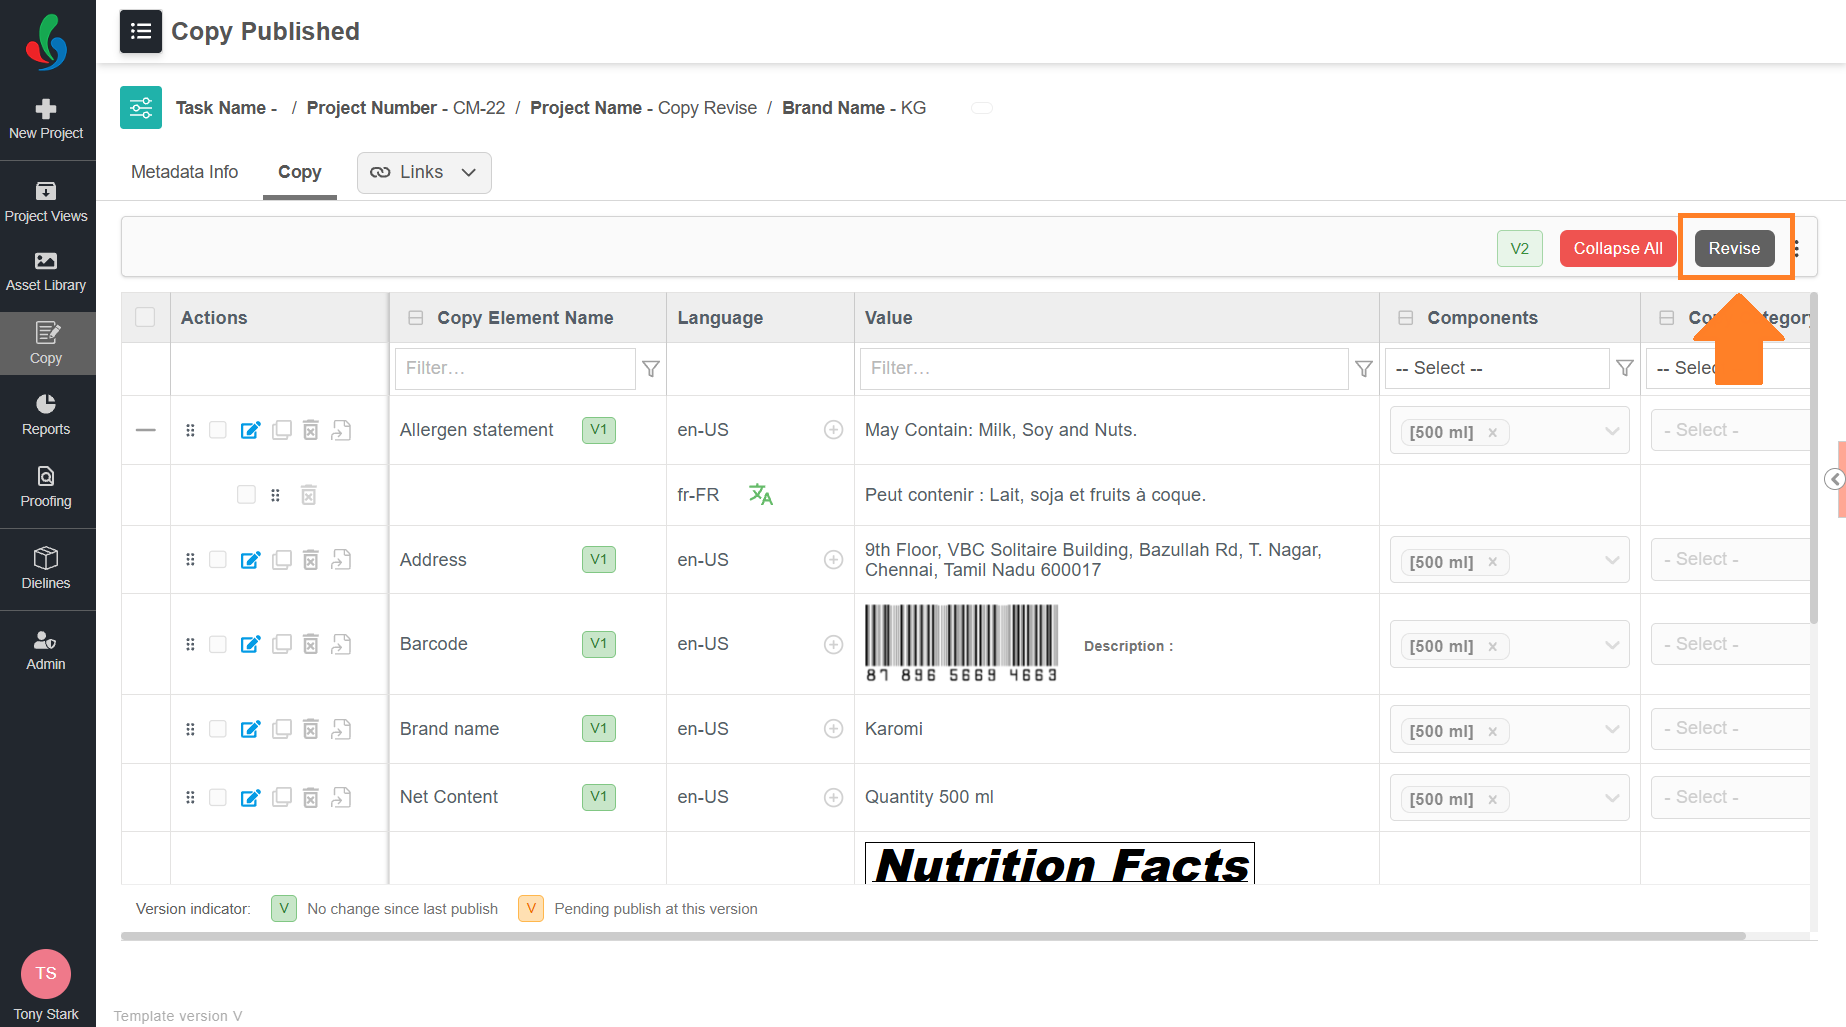
- Select Revise. The system takes you to the initiation screen.
Note: Revise is available only on the latest published version of a copy. If you opened an earlier version, the button is not displayed — go back and select the latest copy version.
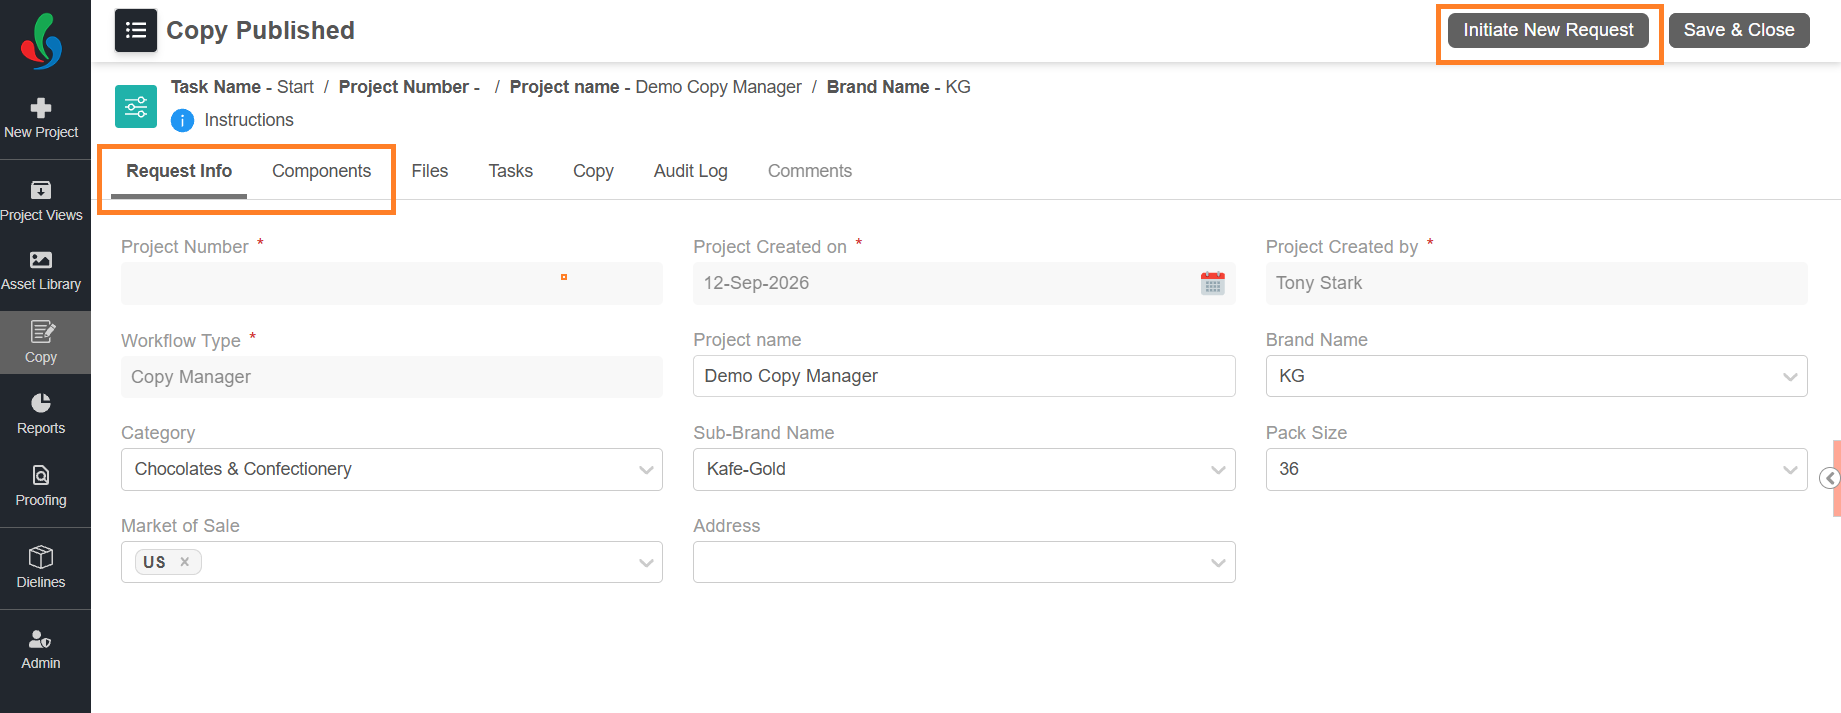
- The project and component information of the published copy is carried into the new project, and the copy sheet is displayed for reference until the project is initiated.
- What is carried over depends on the copy you revise:
- If you revise a Component Copy, only that component's copy is carried over. If the configured revise template is a master copy template, the component details are dropped.
- If you revise a Master Copy, no component details are shown.
- You can view the flow of the template from the Tasks tab.
- Complete the project initiation.
- After initiation, you can work on the configured tasks from the template as usual. For more information on the copy tasks and their typical workflow, refer to Manage Copy Through Project Workflows.
- The copy is published, and the revision takes effect, only after the project is completed — that is when Version 1 becomes Version 2.
| Note: Make sure the publish setting is enabled for the revise template. In the revision flow the copy is published only after the project completes, even when the publish setting is enabled for an earlier task. In the normal copy flow the copy is published as soon as the task configured for copy publish completes. |
Revise a Copy from Components Tab
Use this option to revise a copy when you do not want the other details, such as the project and component information, carried over. This route is also more flexible about templates: revising from published copy uses only the template configured for the revise flow, whereas Component Revise works with any template configured for copy.
| Note: You cannot revise a Master Copy with this method, and Component Revise is available only after the project is initiated. Initiate the project based on Component Copy template before you start. |
- Sign in to your ManageArtworks account.
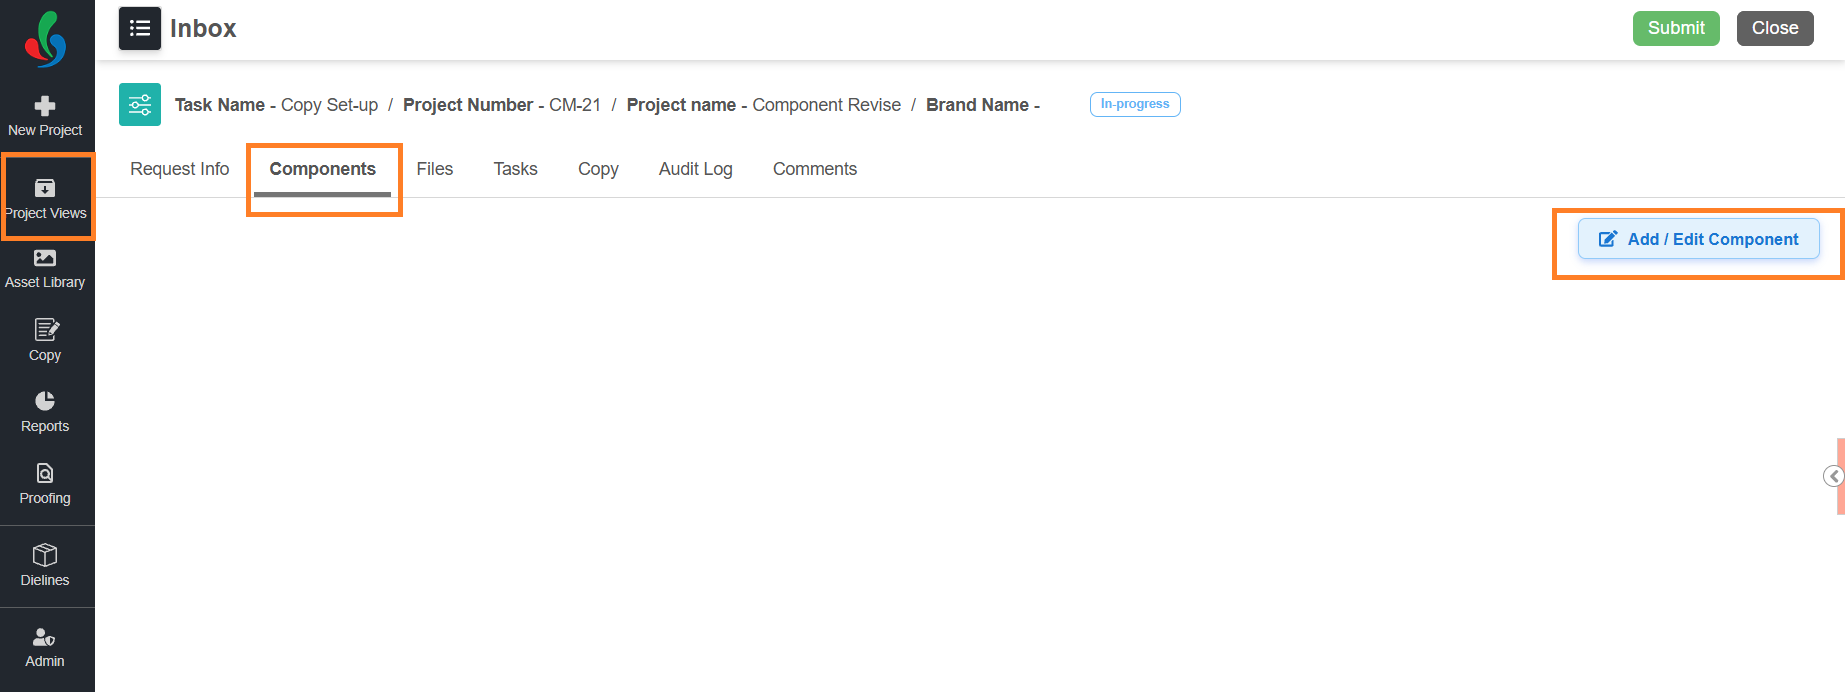
- Select the Project Views module.
- Open the initiated copy task or project.
- Go to the Components tab.
- Select Add / Edit Component.
- Select Component Revise, and then select Load Copy Published Components.
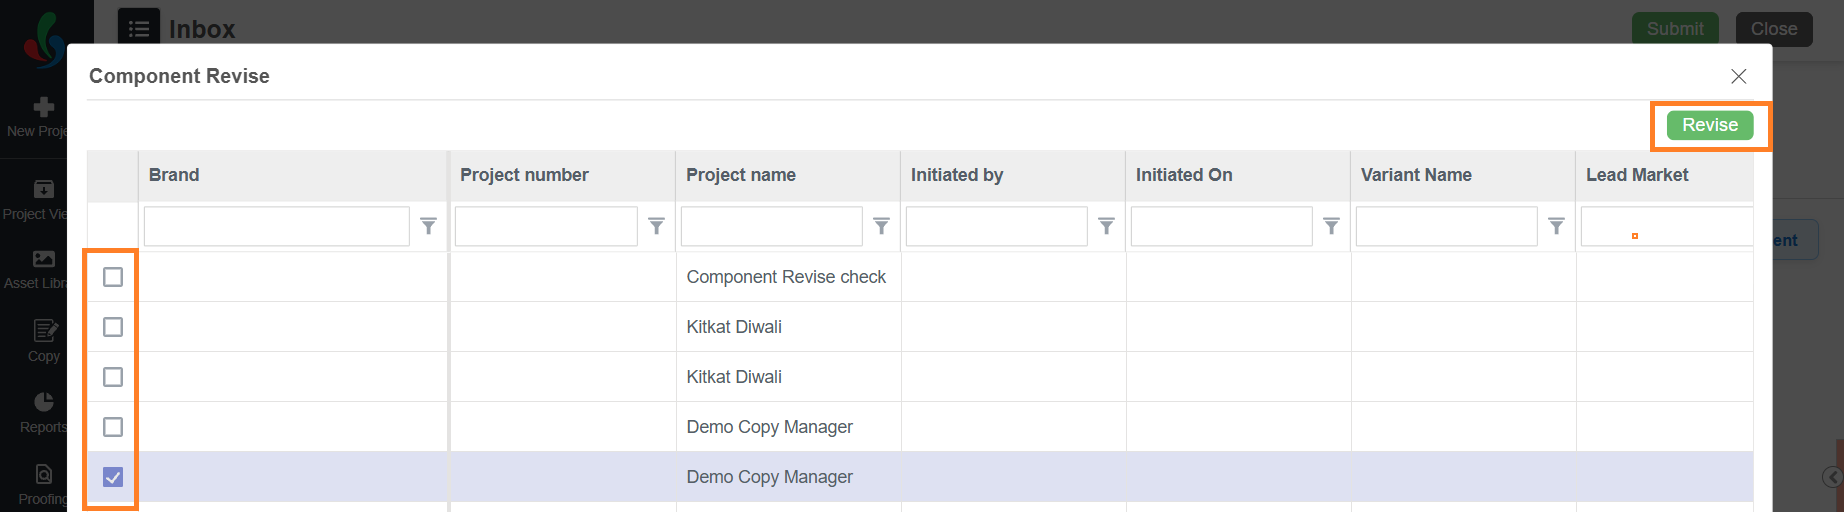
- In the Component Revise dialog, select the required components.
- Select Revise. The copy elements of the selected components are added to the copy sheet as Approved, and the users who already approved them are kept.
Note: The components you select must have the same base language as the project you are working in. If they do not, the elements are not added and a message tells you to select components with the same base language.
- You can now work on the imported elements through the configured tasks from the template as usual. For more information on the copy tasks and their typical workflow, refer to Manage Copy Through Project Workflows.
- The copy is published, and the revision takes effect, only after the project is completed — that is when Version 1 becomes Version 2.

| Note: Make sure the publish setting is enabled for the revise template. In the revision flow the copy is published only after the project completes, even when the publish setting is enabled for an earlier task. In the normal copy flow the copy is published as soon as the task configured for copy publish completes. |
Related Articles