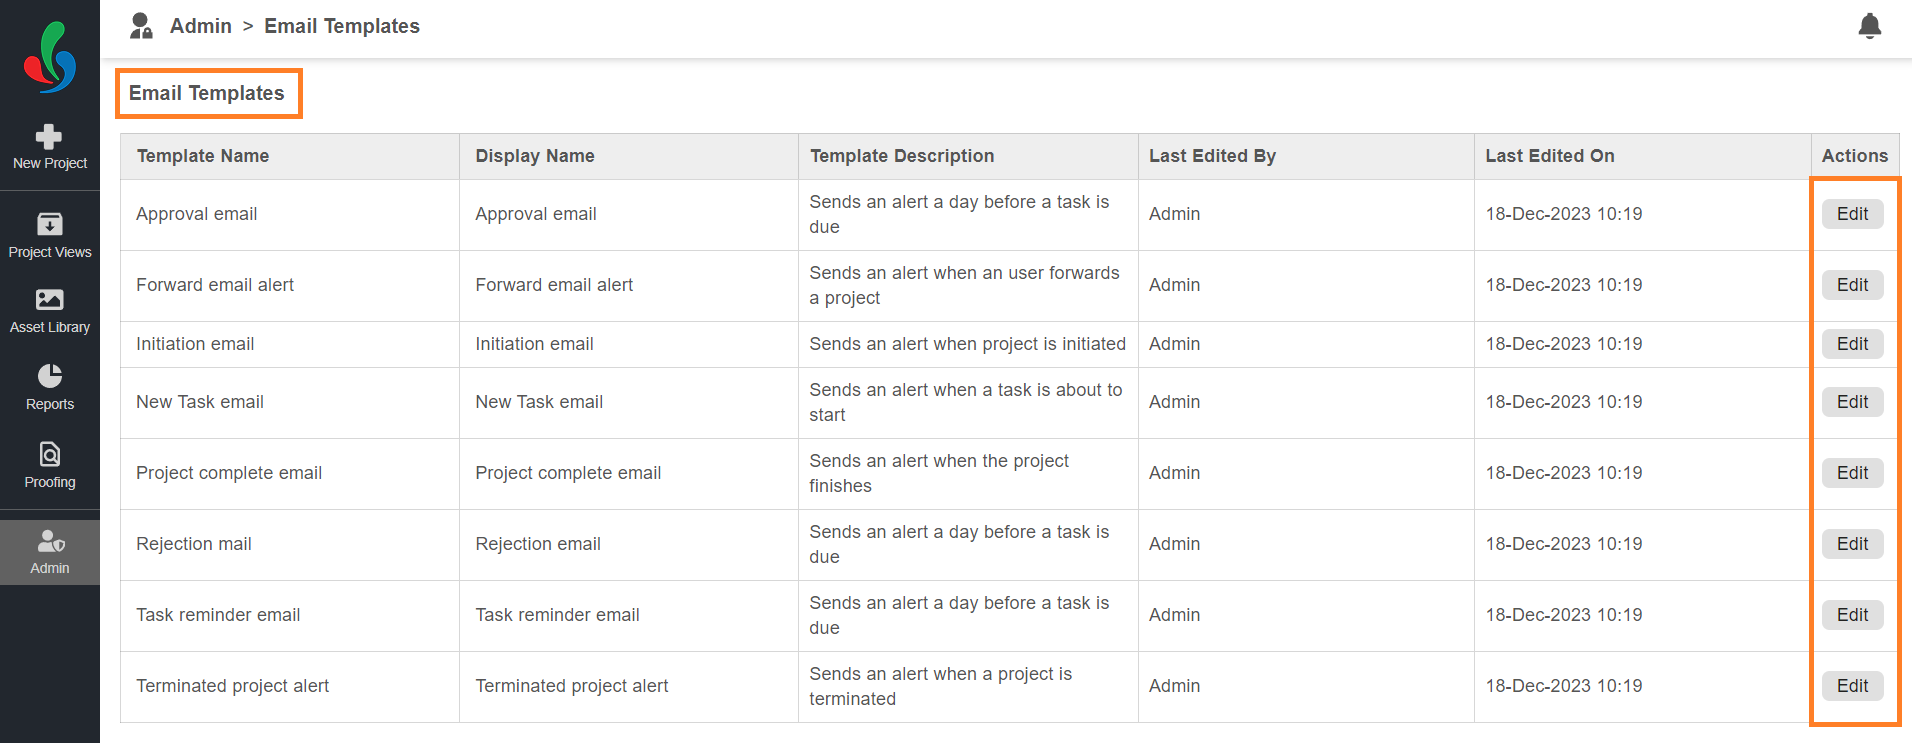
Customize Email Alerts
Streamline communication and keep your team in the loop with ManageArtworks powerful Email Templates. These predefined templates automatically trigger email alerts at key project milestones, ensuring everyone receives timely and relevant updates.
Predefined Email Templates for Every Stage:
- Approval Email: Trigger automatic emails when tasks are approved.
- Forward Email Alert: Notify recipients when a request is forwarded.
- Initiation Email: Kick-off projects smoothly with an email sent upon workflow initiation.
- New Task Email: Alerts users when a new task is about to commence.
- Project Complete Email: Sent upon the completion of a workflow.
- Rejection Email: Trigger automatic emails when tasks are rejected.
- Task Reminder Email: Sends a reminder when a task becomes overdue.
- Terminated Project Alert: Notifies users when a request is terminated.
How do I customize the email alerts?
01. Access Email Templates
- Log in to your ManageArtworks account.
- Select the Admin module.
- Click the Email Templates tab.

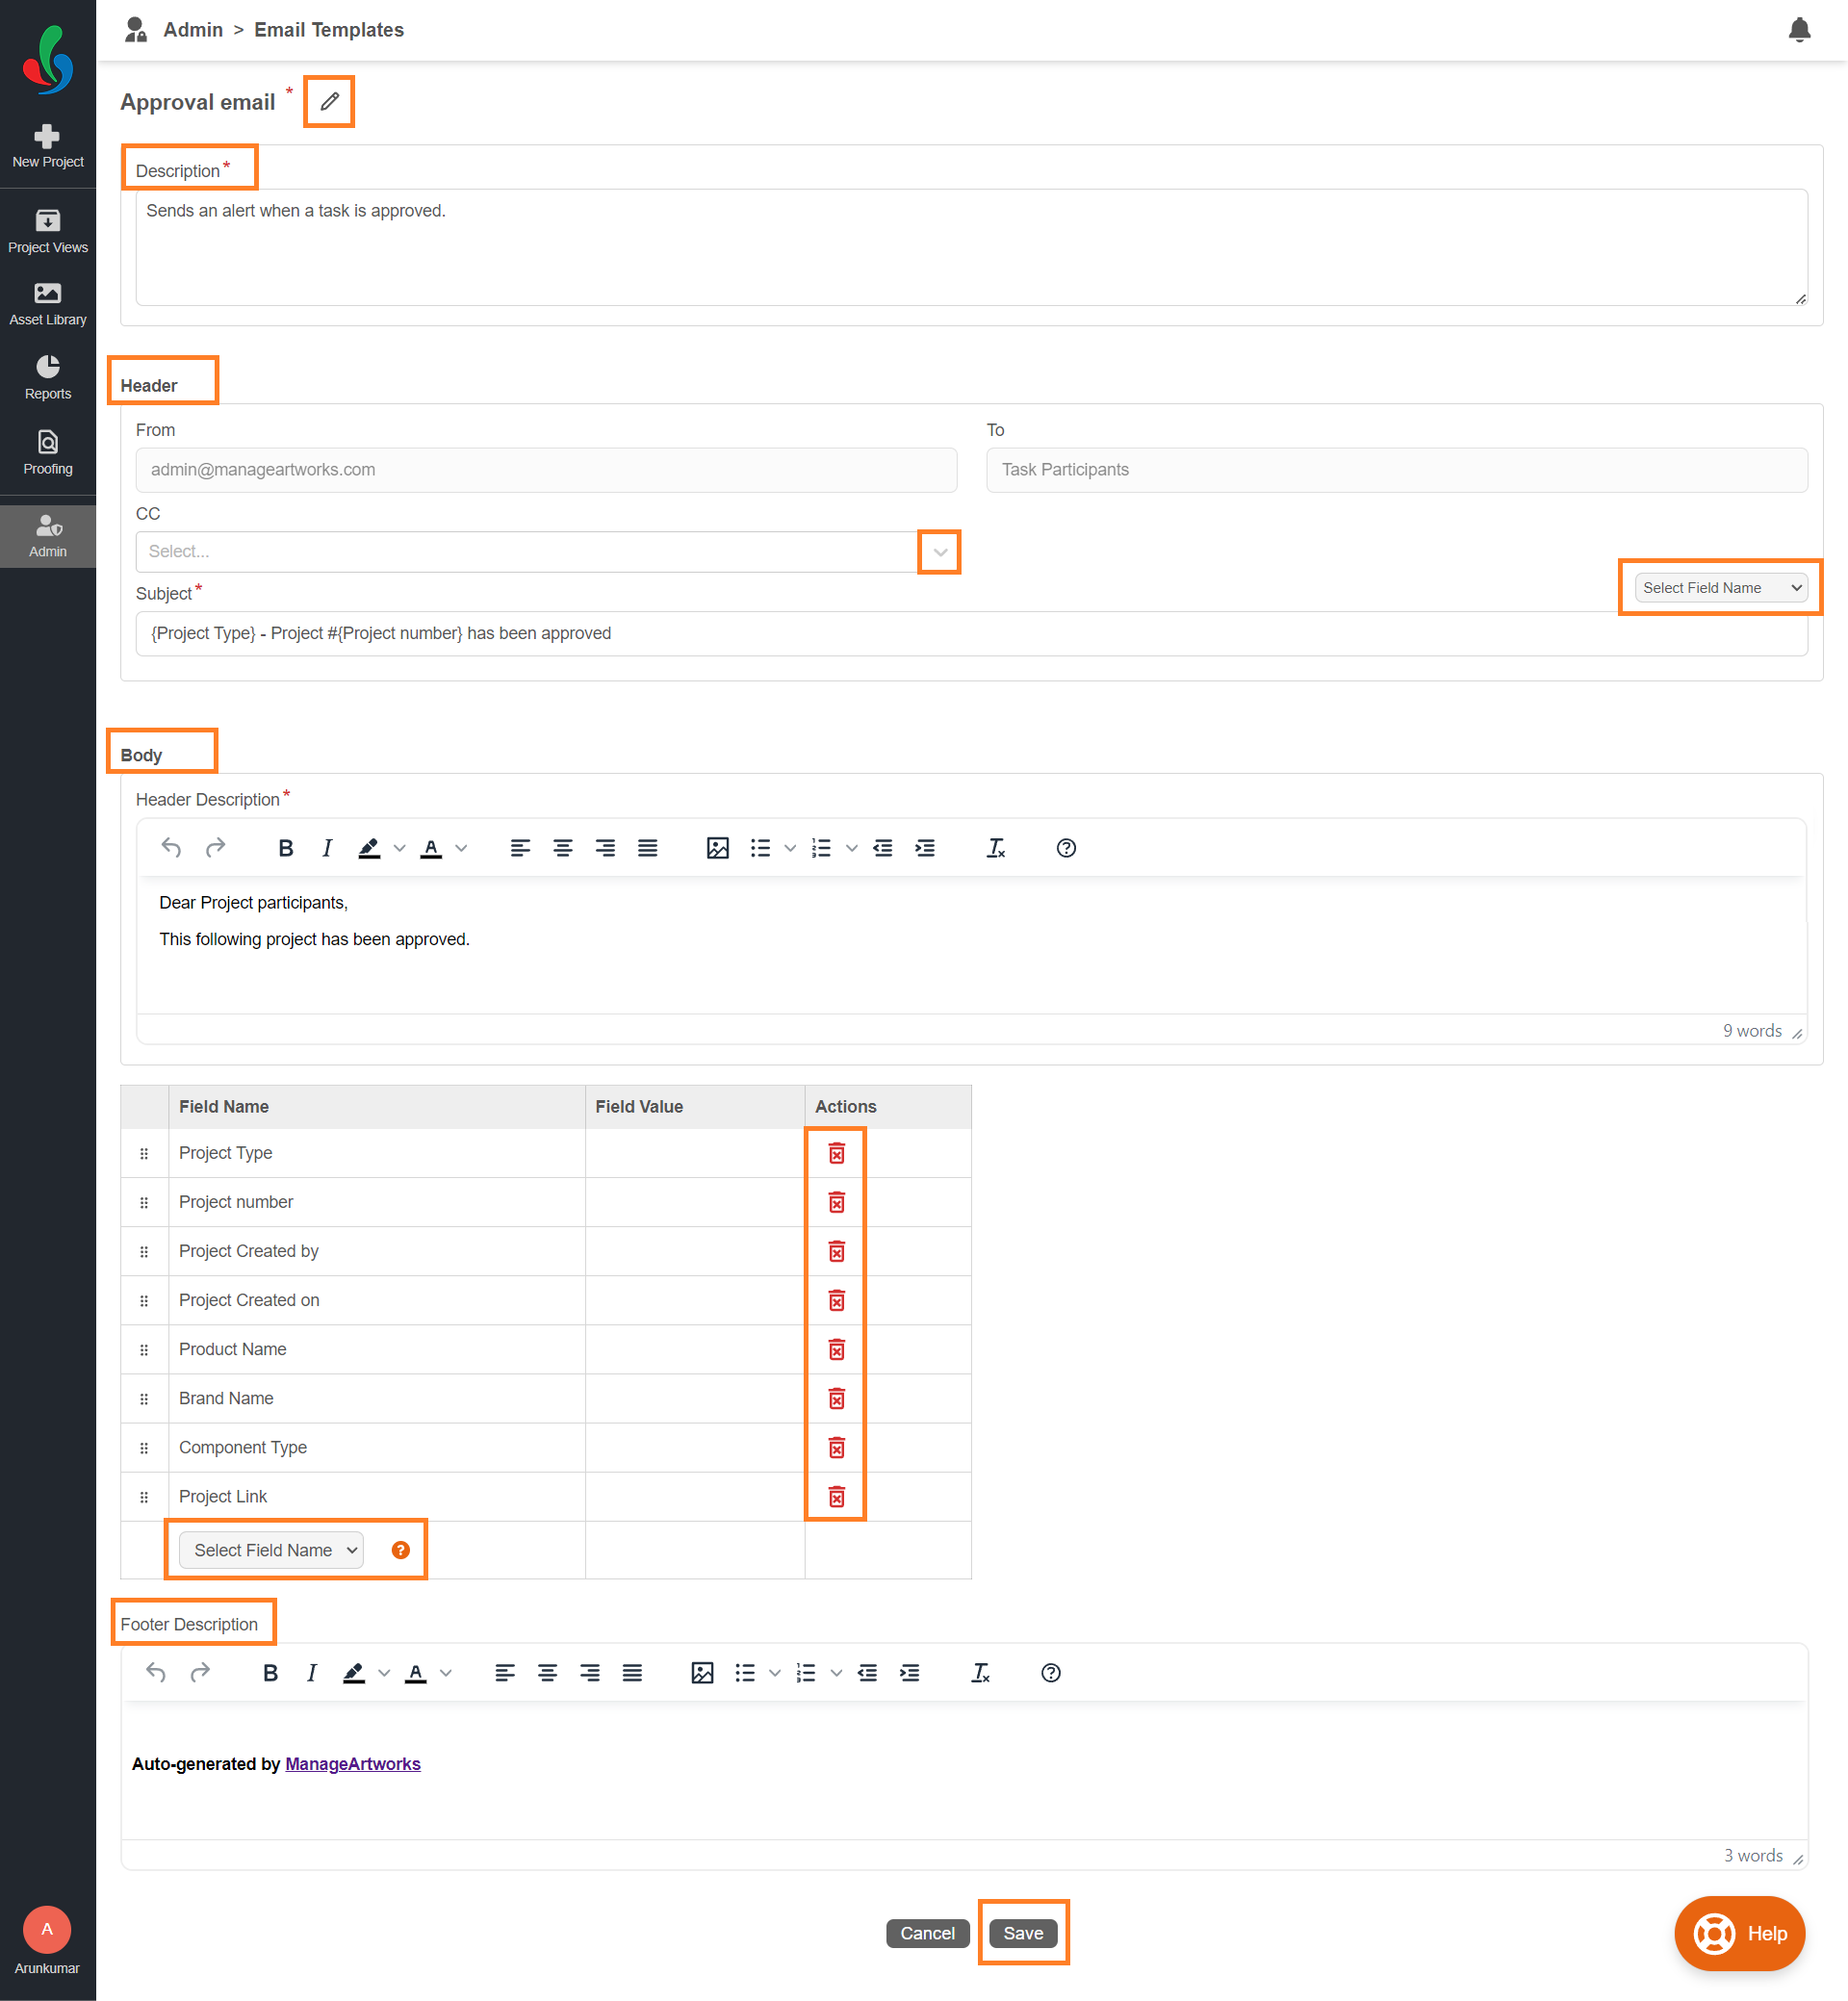
02. Customize Email Template
While creating new templates isn't available, you can fully customize existing ones to perfectly reflect your communication style and project needs.
- Click the "Edit" button in the action column associated with your desired email template.
- Click the edit icon next to the template name and enter a descriptive name (e.g., Approve Email).
- Compose the Message:
- Description: Provide a clear overview of the template's purpose.
- Header:
- Customize the "CC" list by adding or removing recipients.
- Tailor the "Subject" line to accurately reflect the email's content.
- Add relevant field names to the subject line using the "Select Field Name" option.
- Body:
- Provide a clear header description and use the available formatting tools to personalize the email content.
- Customize the fields of the email body by adding the desired field(s) through the "Select Field Name" option.
- Delete unnecessary field names using the delete button in the action column.
- The email will dynamically display the specific values associated with the chosen field names, ensuring recipients have the necessary details.
- Footer: Edit the footer text to add a professional and consistent closing to your emails.
- Save Your Changes:
- Click the "Save" button to apply your customizations.