Start a New Project
 | Note: Starting a new project follows a similar process in both the Growth and Enterprise plans. However, certain tabs and configurations differ between the two. For details on starting a new project in the Enterprise Plan, refer to [Start a New Project (Enterprise Plan)]. This article focuses on starting a new project in the Growth plan. For more information on all ManageArtworks plans, click here. |
How do I start a new project, attach files and assigns tasks to users?
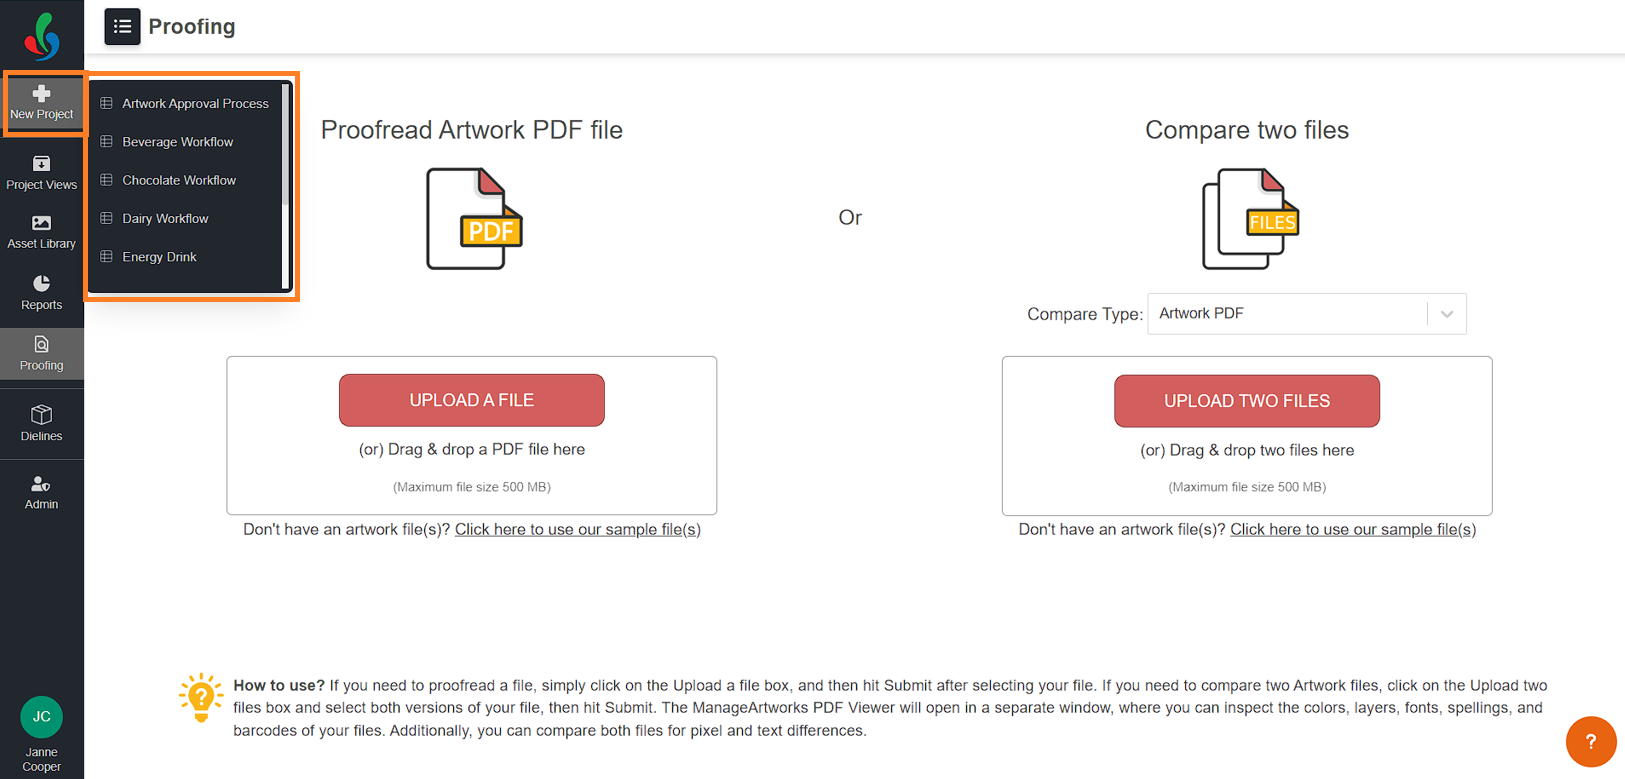
01. Access the Project Templates
- Log in to your ManageArtworks account.
- Hover over the "New Project" button on the left pane.
- A menu will display available workflow templates.
Note: Only users assigned to the start activity can view and select templates. - Choose the template that aligns with your project's needs.
02. Configure the Project Details
- The new project page presents six tabs for customization:
- Request Info
- Files (Optional)
- Tasks
- Audit Log
- Comments
- Dieline (Add-on)
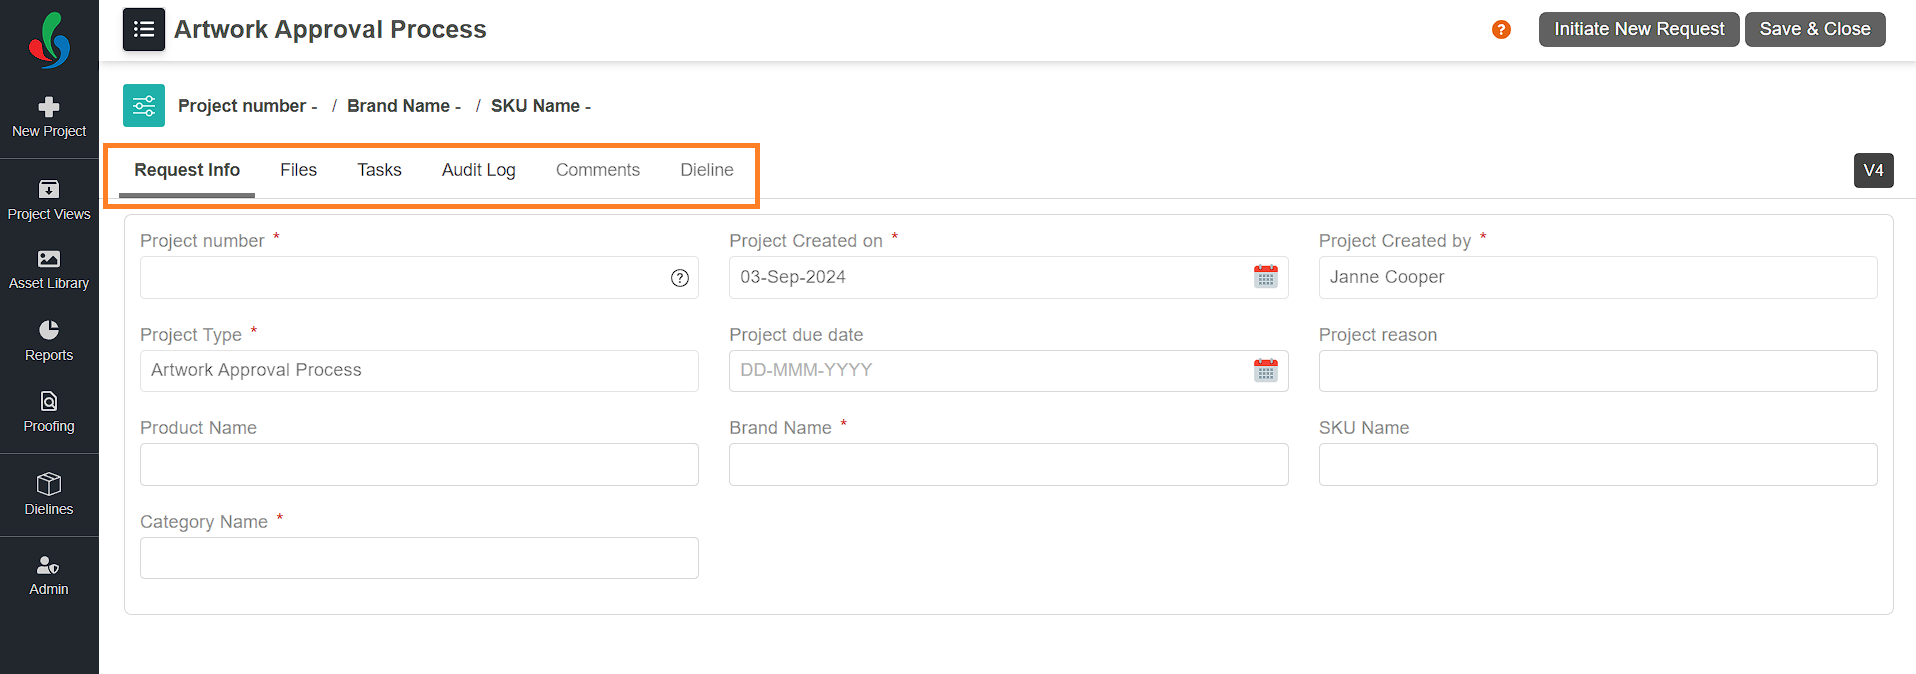
- Request Info Tab:
- Fill out the form fields specific to your chosen template.
- Mandatory fields are marked with a red star.
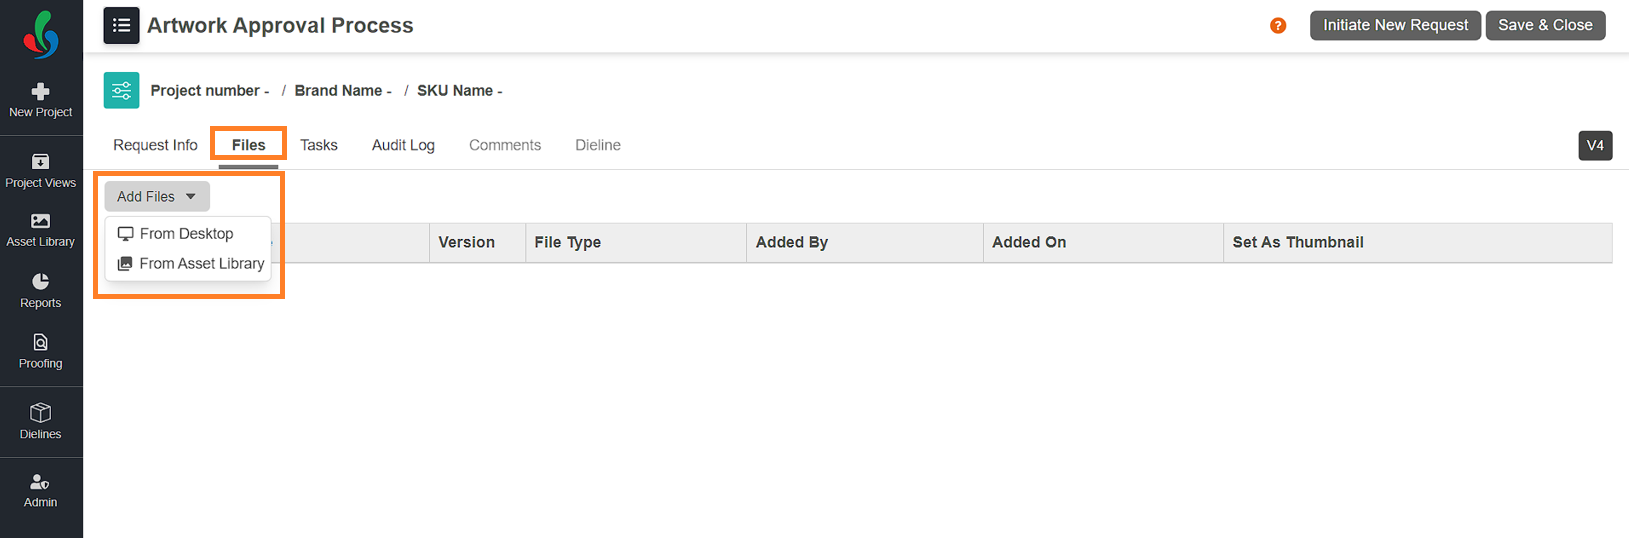
- Files Tab:
- Upload supporting or reference files for clarity, add files to the project using one of the following methods:
- Click the "Add Files" drop-down menu.
- From Desktop: Browse and select files from your desktop.
- Asset Library: Choose files from the asset library.
- Drag and drop files directly into the Files tab.
- Click the "Add Files" drop-down menu.
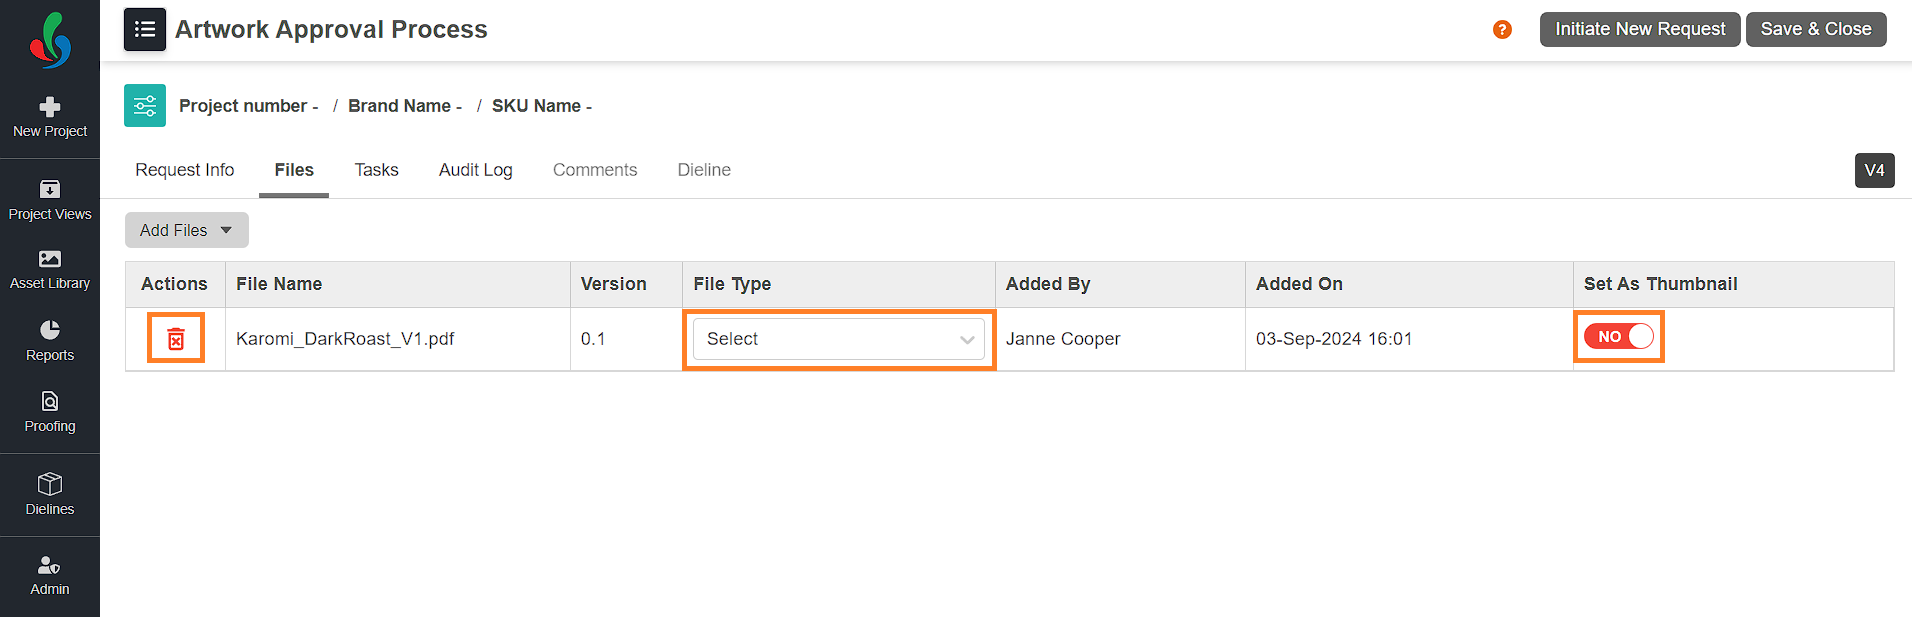
- Once files are added:
- Select the file type for each.
- Set a thumbnail for the workflow by clicking "YES" in the "Set As Thumbnail" column associated with the desired file.
- Delete files using the trash icon in the "Action" column.
- Upload supporting or reference files for clarity, add files to the project using one of the following methods:
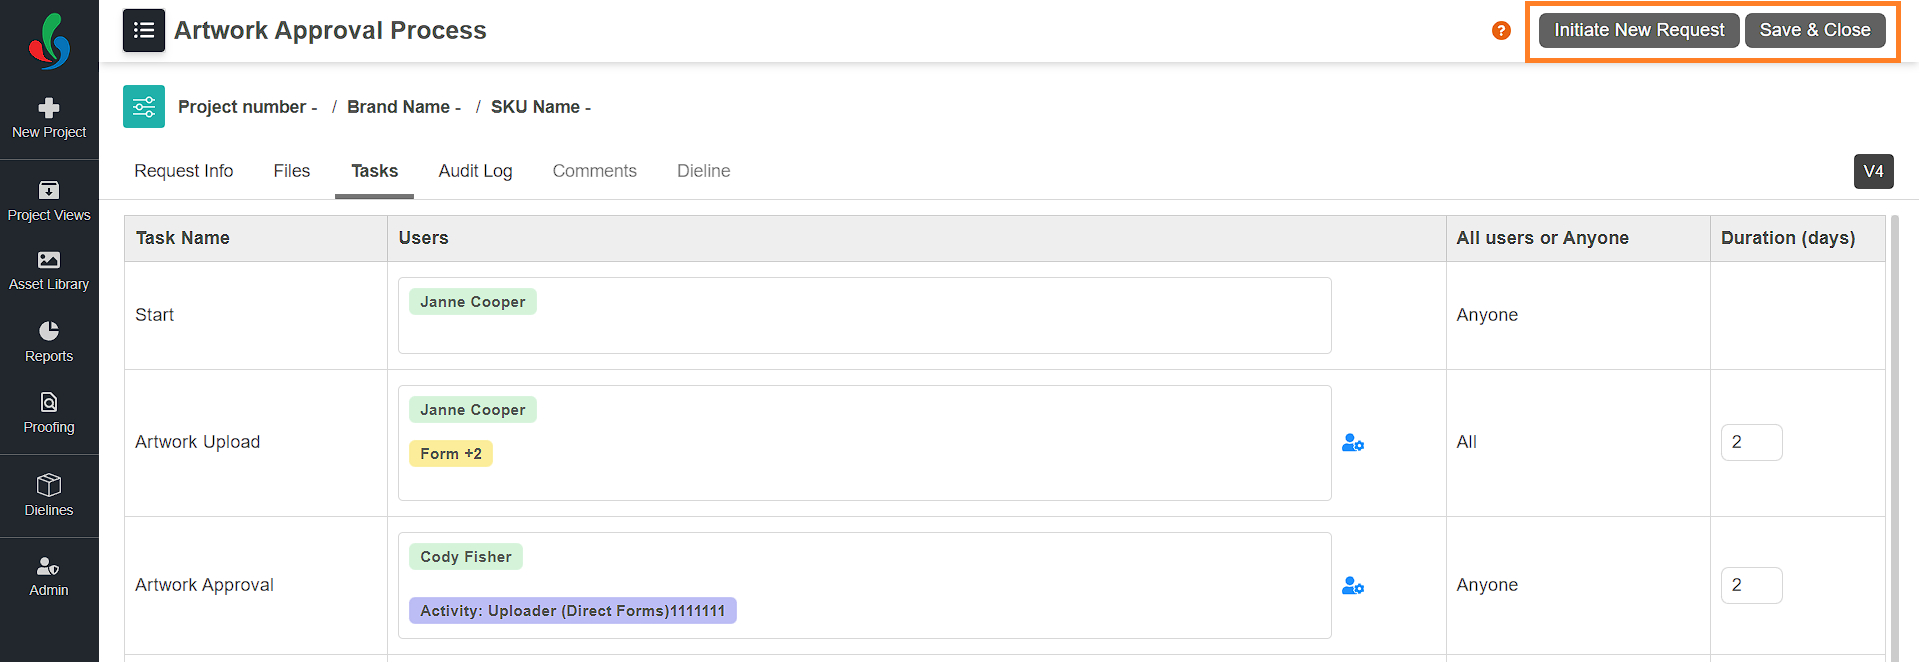
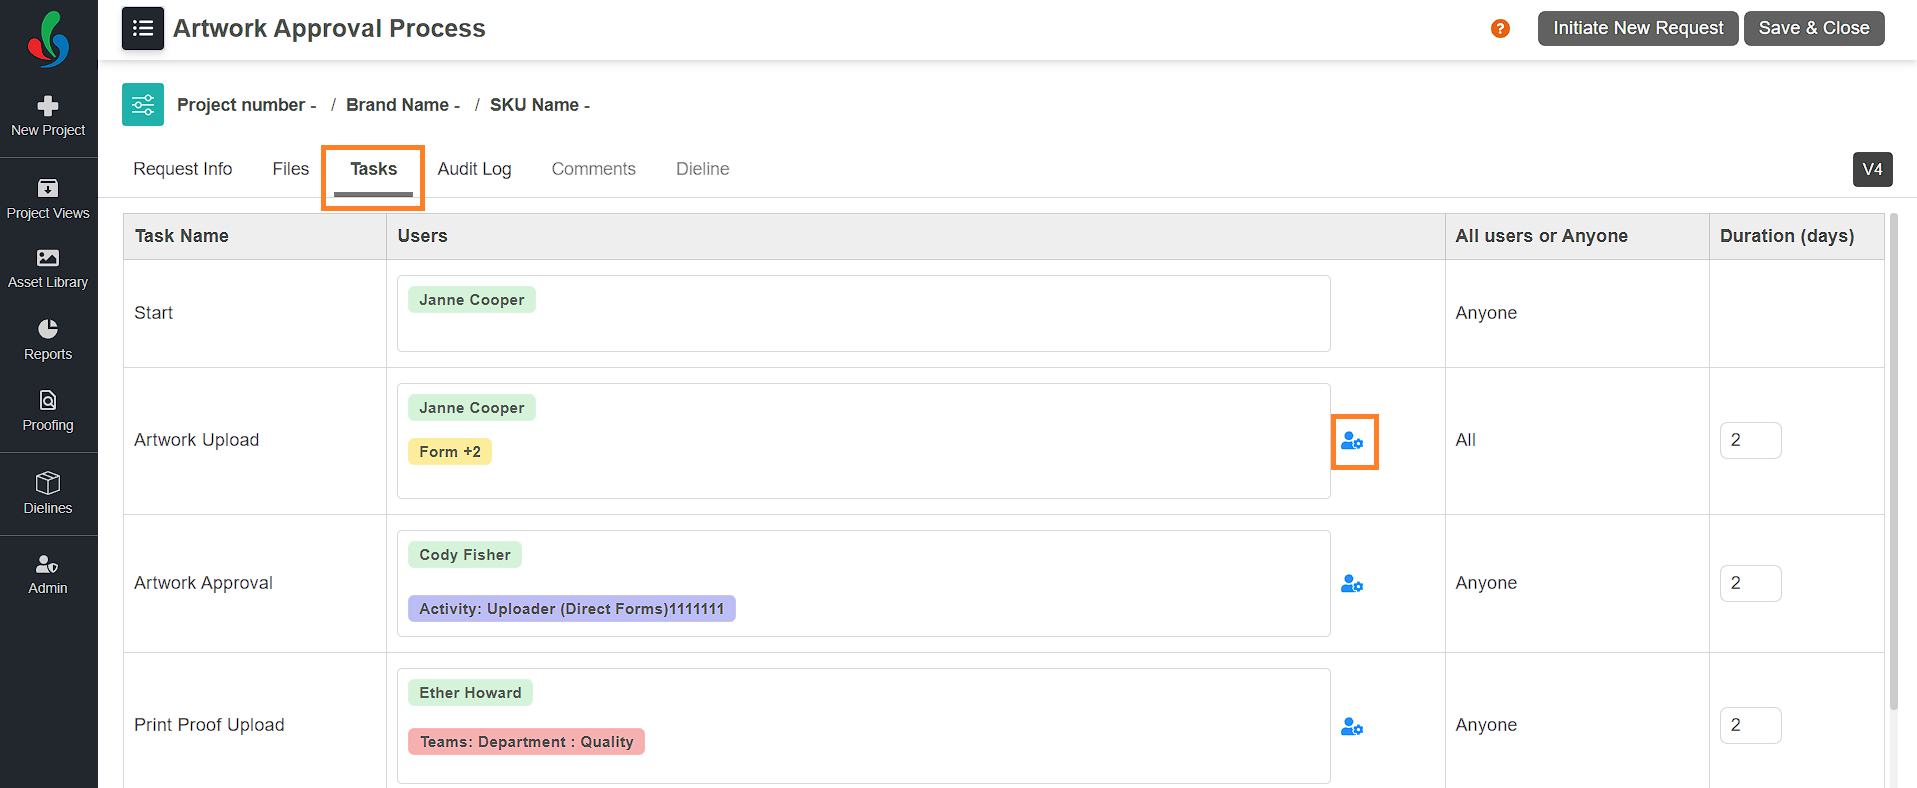
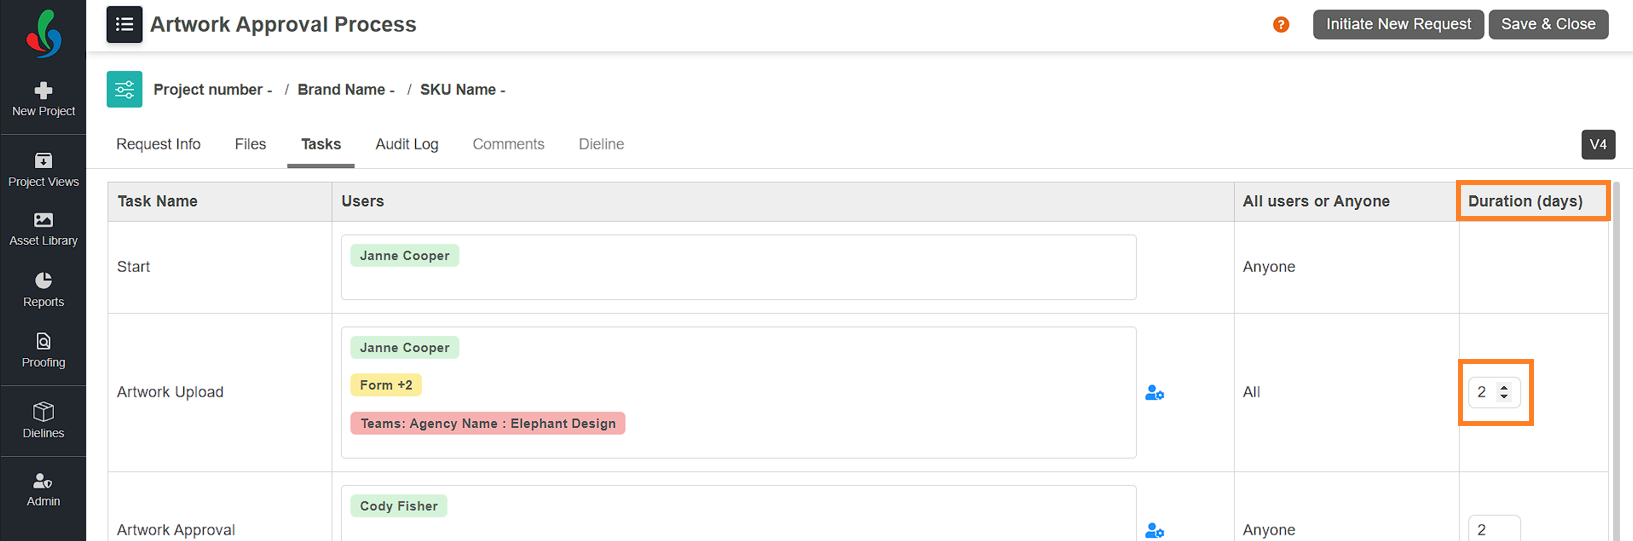
- Tasks Tab:
- Assign users to tasks and set deadlines. The default assignments and durations from the template can be modified (except for the start activity).
- To assign users to a task:
- Click the dropdown icon in the Users column for the desired task. If the dropdown option is not available, refer to step 03 for further instructions.
- Select users from the list or manually type in a username and choose from the auto-suggestions.
- If your system includes the task assignment add-on feature, you will see a User Settings icon instead of the drop-down:
- Click the User Settings icon.
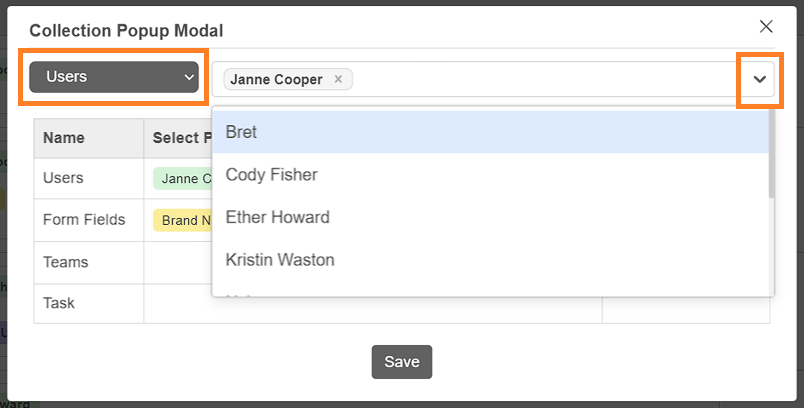
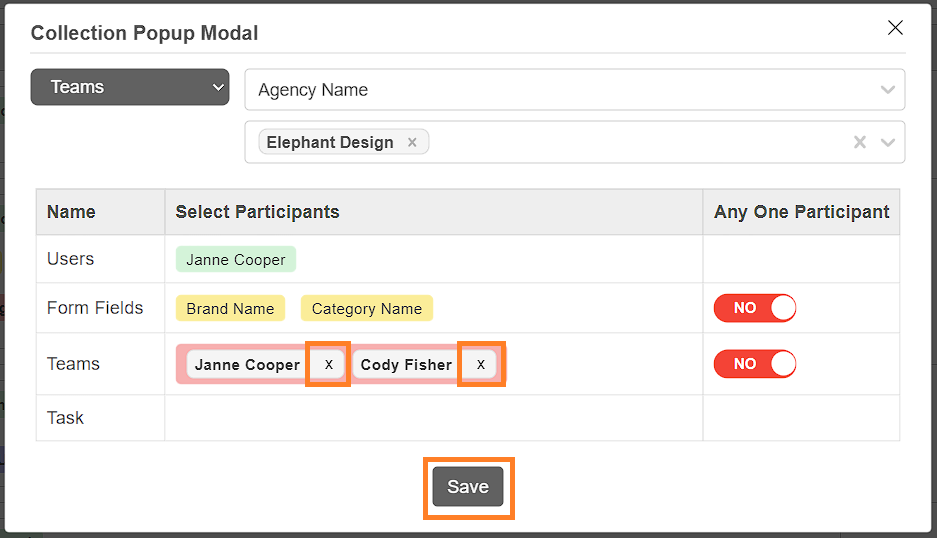
- A Collection Popup Modal will appear. Click the "Select the Option" drop-down menu to choose from the following assignment options:
- Users: Select specific users from the system.
- Teams: Assign tasks to teams (e.g., marketing, sales). For example, if you select both marketing and legal teams, the task will be assigned to all members of both teams.
Note: Task assignment options such as Form Fields and Task cannot be modified during project initiation. These can only be modified at the template level by an Admin.
- After selecting a task assignment option (e.g., Users), a drop-down will appear. Click the drop-down icon to see all available users, and select the desired user(s).
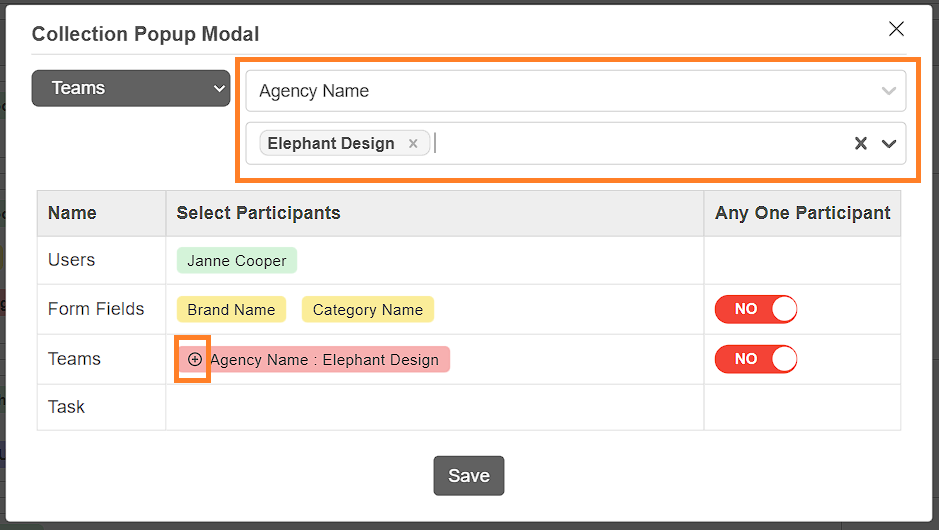
- When selecting the Teams option:
- Choose a Team Attribute (e.g., "Agency Name").
- Select the specific Collection (e.g., "Elephant Design").
- If needed, you can edit the teams during project initiation by removing users:
- Click the plus icon next to the team name.
- A list of users in that team will appear; remove users by clicking the Close icon next to their names.
Note: Removing users here only affects this project and does not remove them from the system or the original team list.
- Click the plus icon next to the team name.
- Click Save and confirm your selections.
- If no users are available in the selected teams or form fields, or if the workflow is stuck due to no user, the initiator will receive an email notification to fix the issue before proceeding.
- To specify the duration:
- Click the duration box in the Duration (days) column linked to the desired task.
- Enter or adjust the duration using the arrow buttons as needed.
Note: A minimum duration of 1 day is required.
- To assign users to a task:
- Assign users to tasks and set deadlines. The default assignments and durations from the template can be modified (except for the start activity).
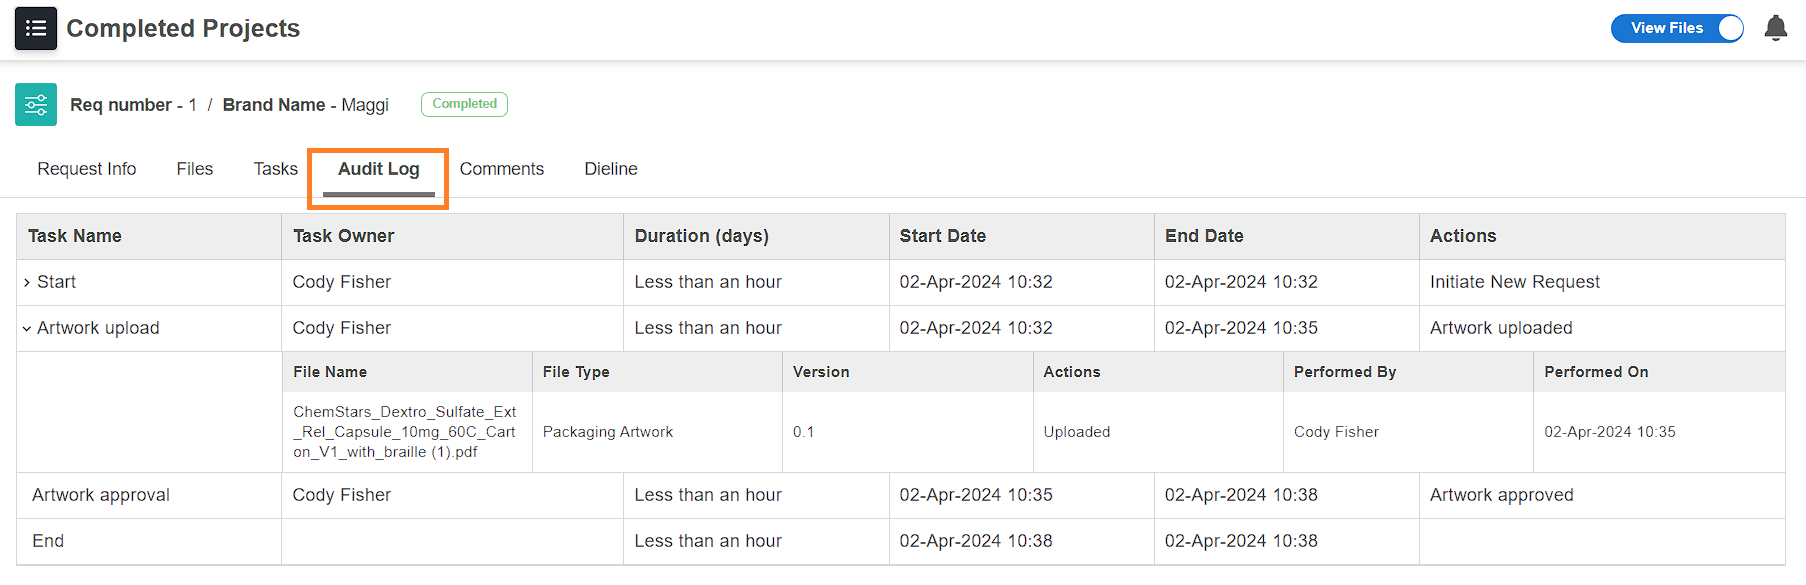
- Audit Log Tab:
- Track all project-related actions for transparency and accountability.
- View who initiated the project, made modifications, and when these actions occurred.
- Comments Tab:
- Once the project is initiated, assigned users can access comments tab and add comments and share insights.
- Dieline Tab:
- If the Dieline add-on feature is enabled, the Dieline tab will be visible. Once the project is initiated, users can access dieline tab and attach dieline to the project.
- For more information, refer to the Dieline and 3D Simulation and Dieline Workflow sections.

03. Initiate the Project
- After completing all required fields and desired configurations, click the "Initiate New Request" button in the upper right corner to launch your project.
- If you're not ready to proceed immediately, click Save & Close in the upper-right corner to save your progress and continue later.