Step 1: Create Form Template
Watch a quick video tutorial
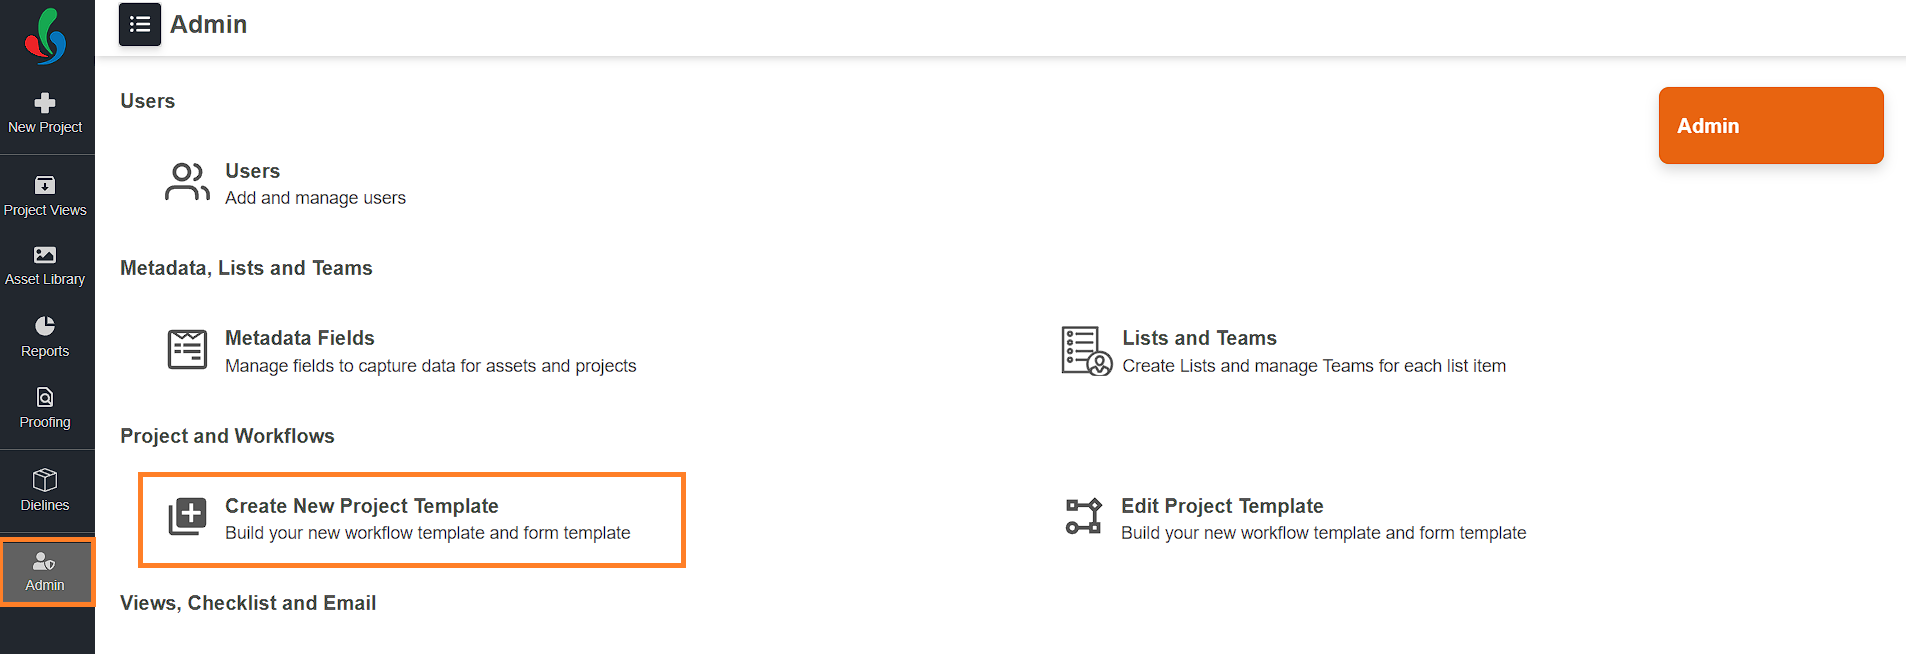
01. Access the Admin Module
- Log in to your ManageArtworks account.
- Navigate to the Admin module on the left-hand side of the interface.
- Click on the Create New Project Template tab.
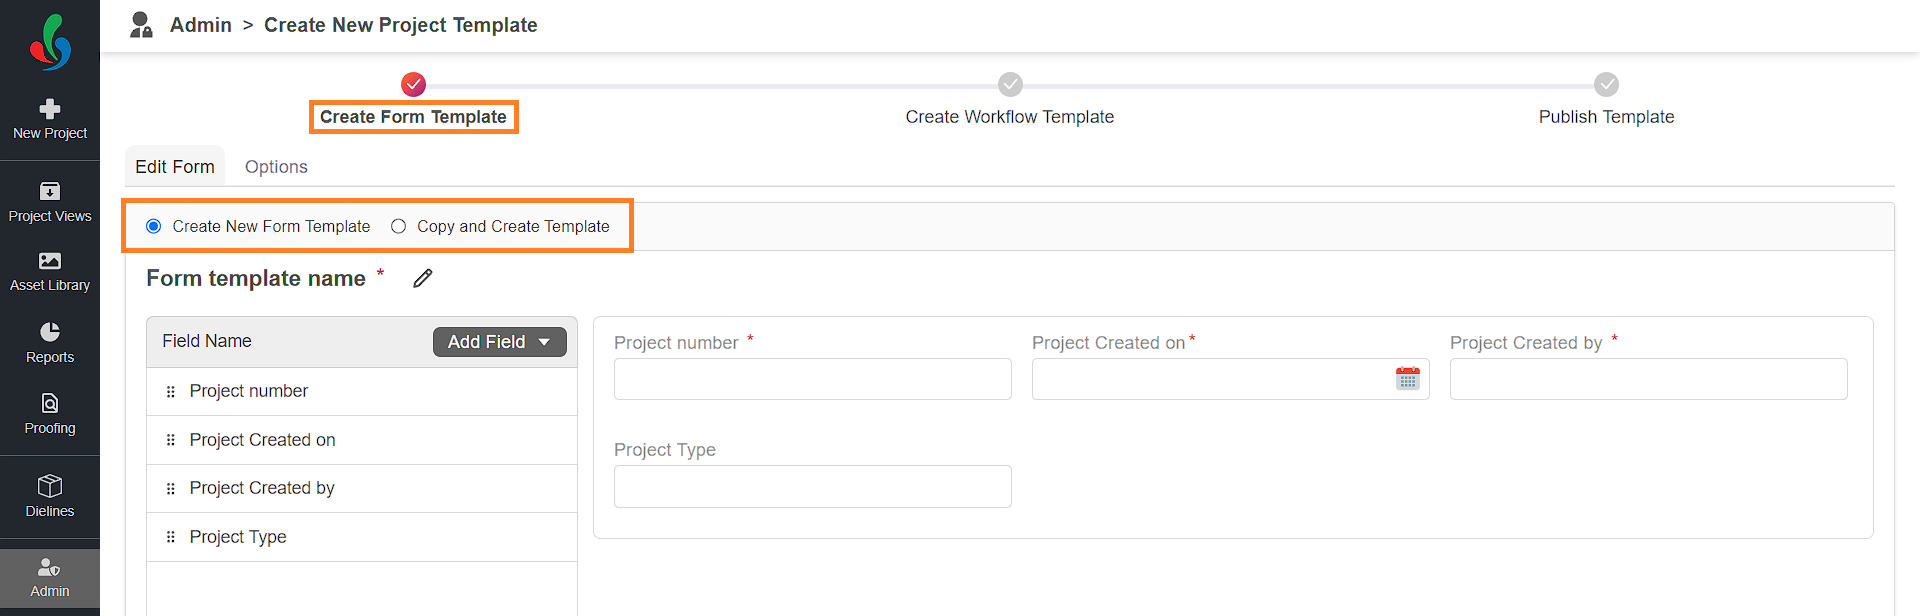
02. Form Template Selection - Choose Your Starting Point
ManageArtworks offers two convenient ways to build your form template:
- Create New Form Template: Ideal for unique project types, allowing you to design a form from scratch.
- Copy and Create Template: Save time by modifying an existing form, adapting familiar structures for similar processes.
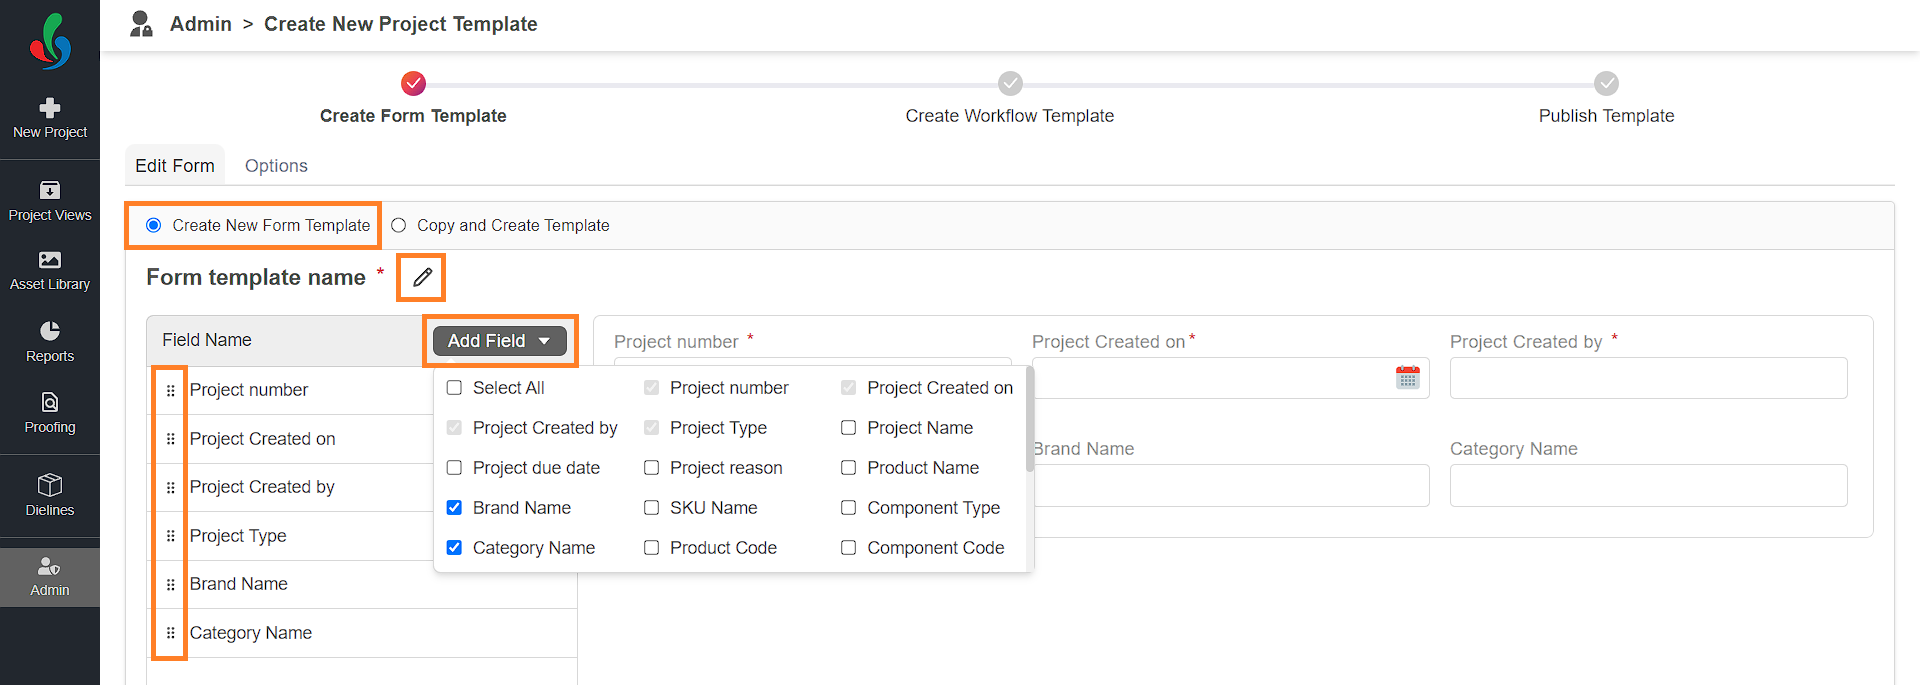
03. Build Your Form Template (Create New Form Template Method)
- Click Create New Form Template.
- Enter a descriptive name that reflects the template's purpose (e.g., Artwork Approval Form).
- Add Fields:
- Click Add Field.
- Select desired fields from the list by clicking the checkboxes.
- Selected fields will be included in your form.
- Uncheck any fields you want to remove from the form.
- Rearrange: Use the drag icon (⋮⋮) to adjust fields order.
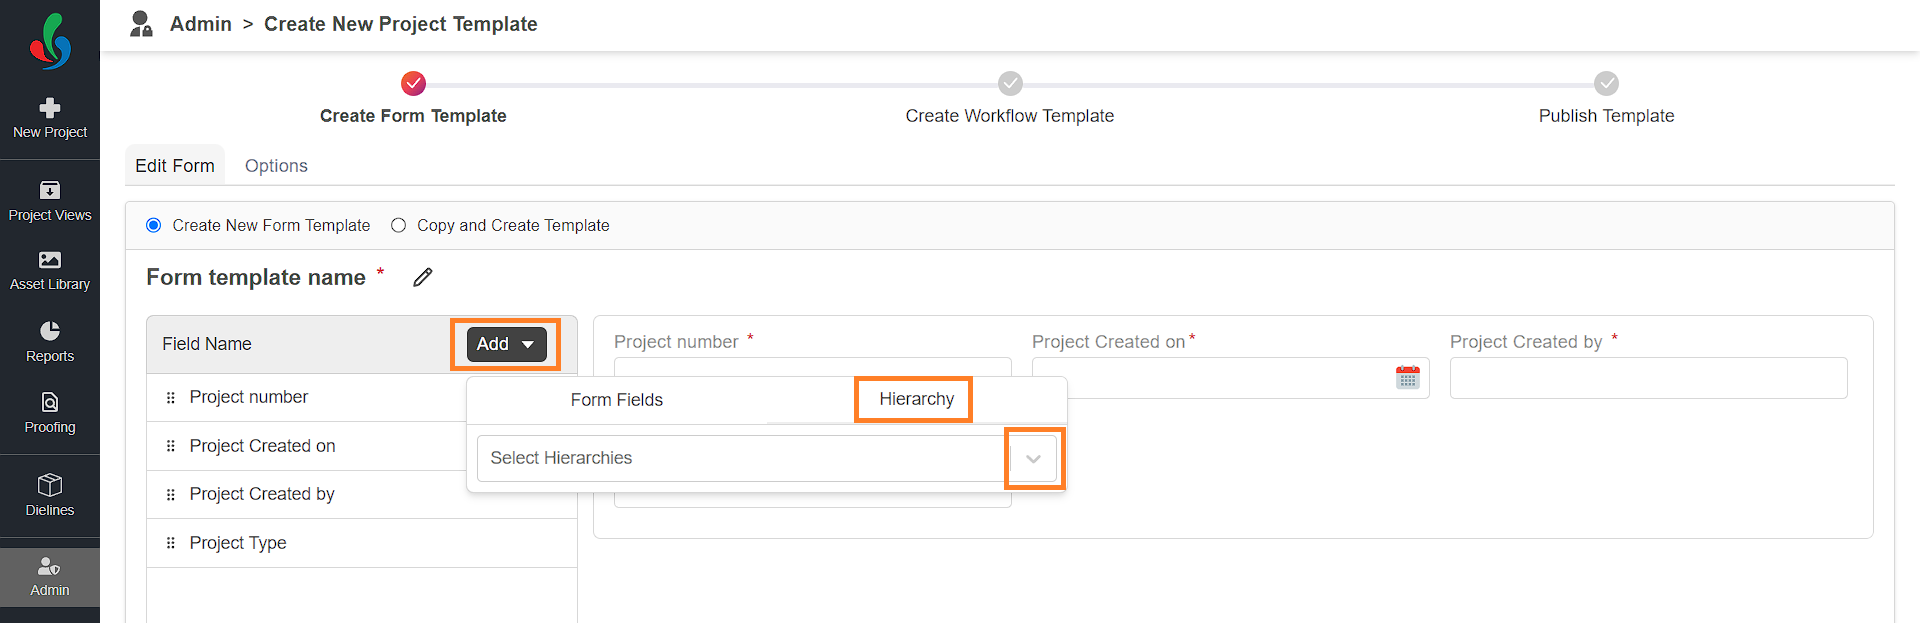
- Add Dependency Field:
- Click Add Field.
- Select Hierarchy from the list. To create new hierarchy, refer to Dependency Field.
- Click the drop-down icon and choose the desired hierarchy to add it to the form.
- The fields from the selected hierarchy will be dynamically inserted.
Note: If a field from the hierarchy already exists in the form, the hierarchy will be linked, but the duplicate field won't be added.
If a field linked to a hierarchy is removed from the form, the entire hierarchy will be removed.
- The fields from the selected hierarchy will be dynamically inserted.
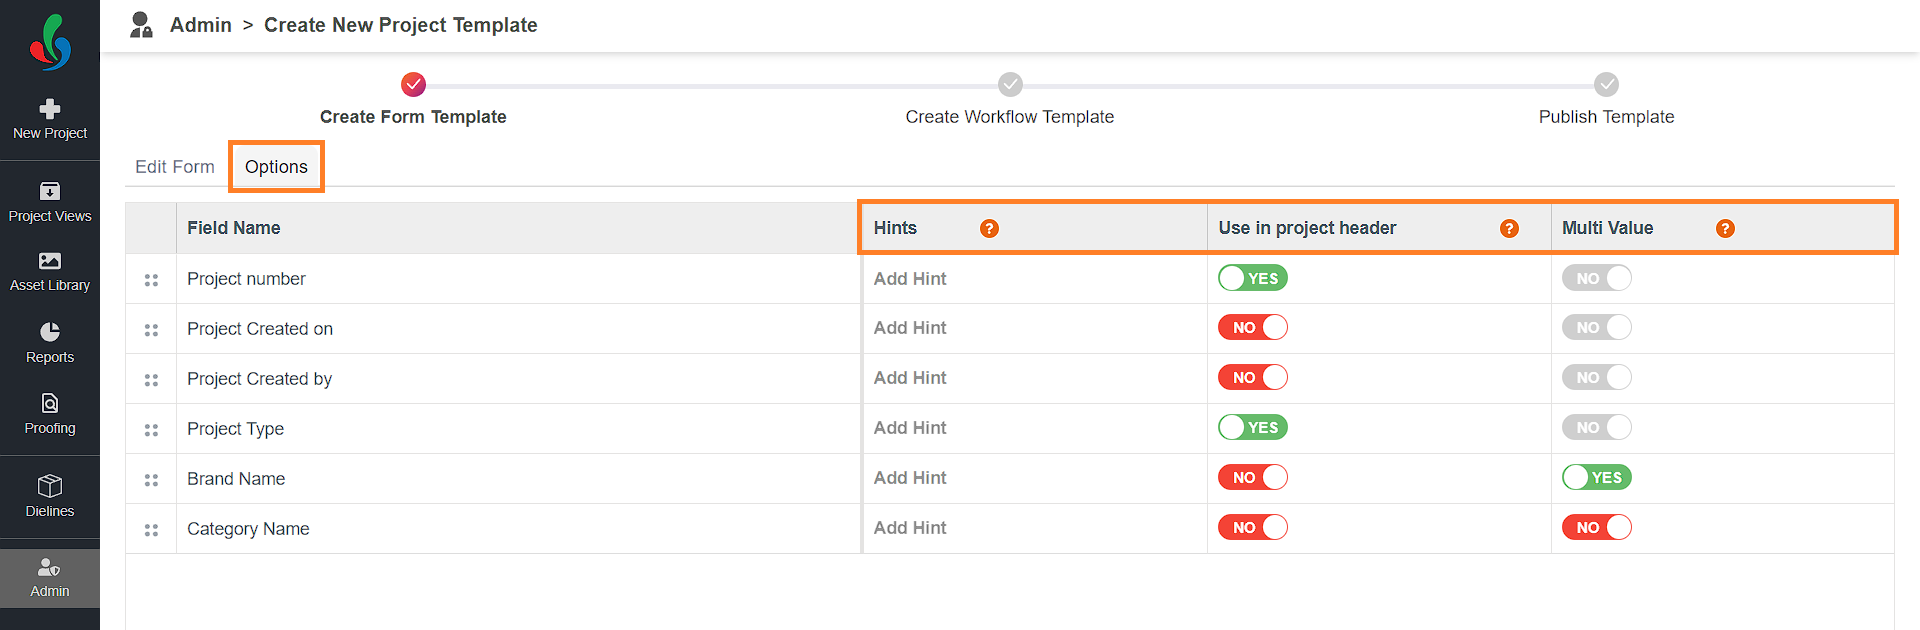
- Configure Fields:
- Click the Option tab.
- Set field properties:
- Multi Value: Allow selecting multiple options or tags (Yes/No toggle).
- Use In Project Header: Make the field visible in project header for easy access during project creation (Yes/No toggle).
- If required, add clear and concise hints directly within the form to guide users:
- Click Add Hint next to the desired field.
- Enter the helpful text you want to display.
- Click Save to store the hint.
04. Build Your Form Template (Copy and Create Template Method)
- Select an Existing Template:
- Choose Copy and Create Template.
- Click Select Workflow Template and select the template you'd like to modify.
- Customize the Form:
- Enter a descriptive name for the new template (e.g., Artwork Approval Form V2).
- Modify Form as needed:
- Delete Fields: Click the Add Field button and uncheck any fields you want to remove from the form.
- Add Fields: Click the Add Field button, select any additional fields you need from the list.
- Add Dependency Field: Click the Add Field button, select Hierarchy and choose the desired hierarchy to add it to the form.
- Configure Fields: Follow the same steps as in Step 02. 5. to configure fields.

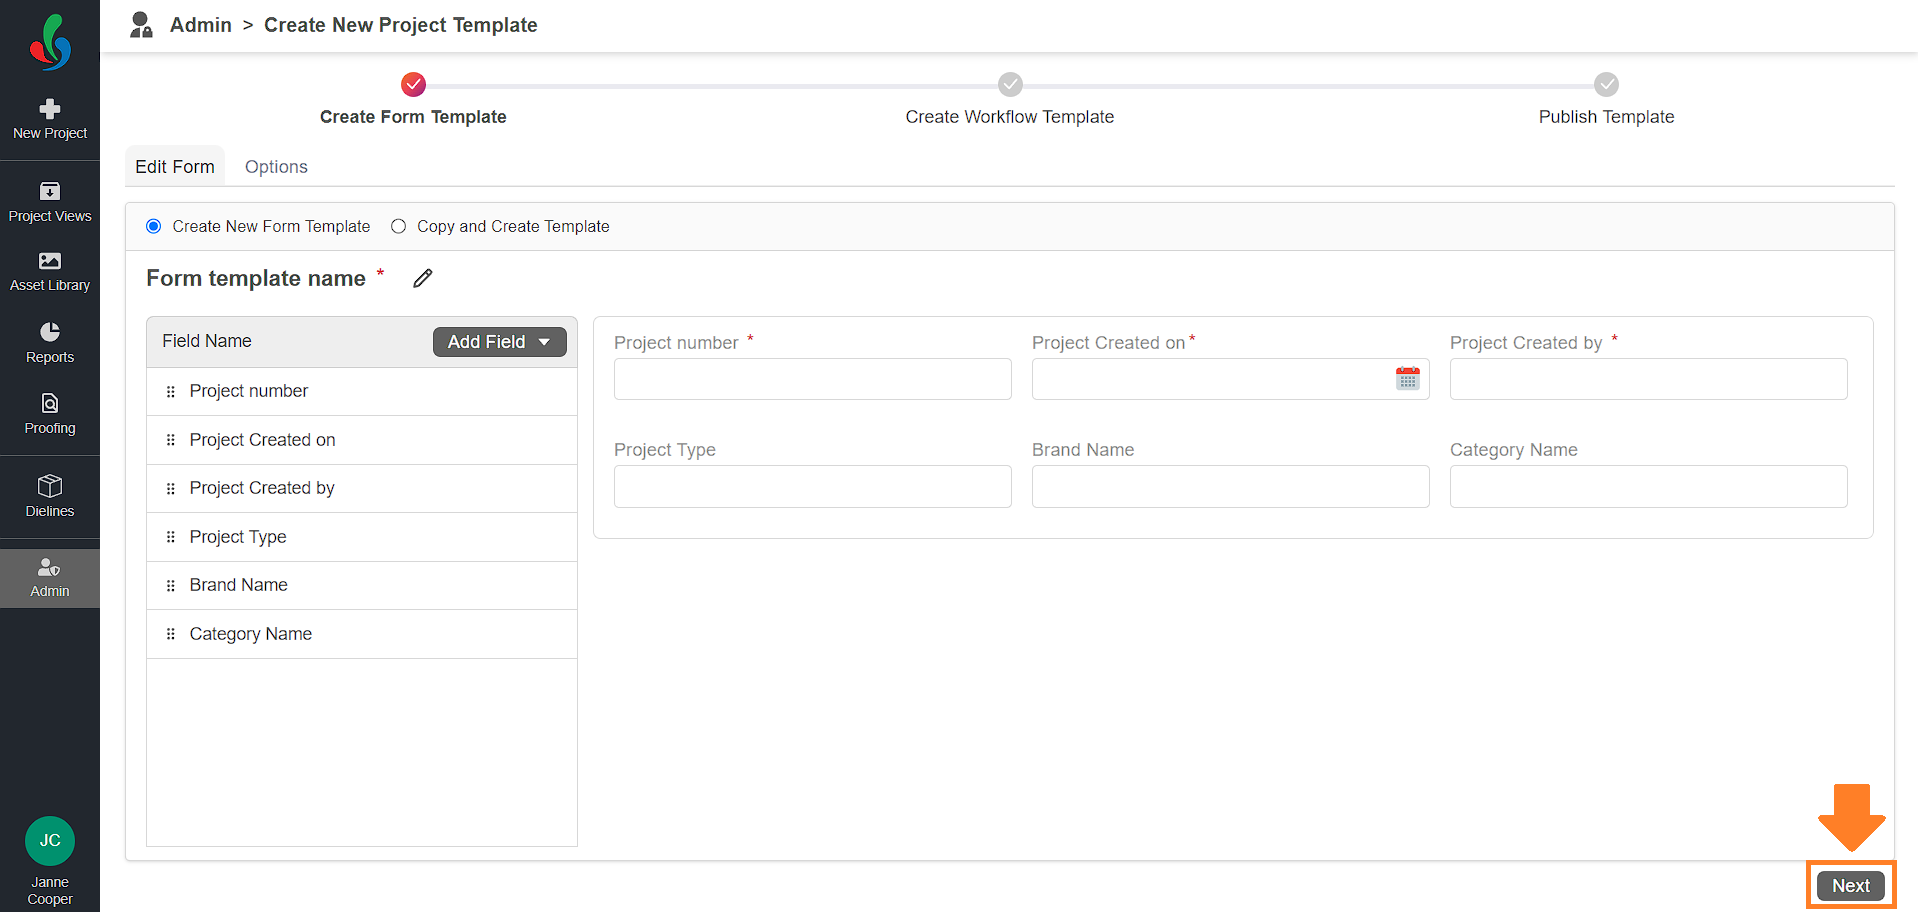
06. Proceed to Workflow Template
- Once your form is configured, click Next to move on to customizing the workflow template.