Edit Project Template
Edit Project Template
The Edit Project Template feature enables you to access a comprehensive list of available project templates within the system. This functionality empowers users to modify existing templates according to your preferences and easily replicate templates by cloning them, providing a streamlined process for editing and creating new templates.
How do I edit the existing project template?
Accessing and Editing Existing Templates:
- Navigate to the Project Templates:
- Log in to your ManageArtworks account.
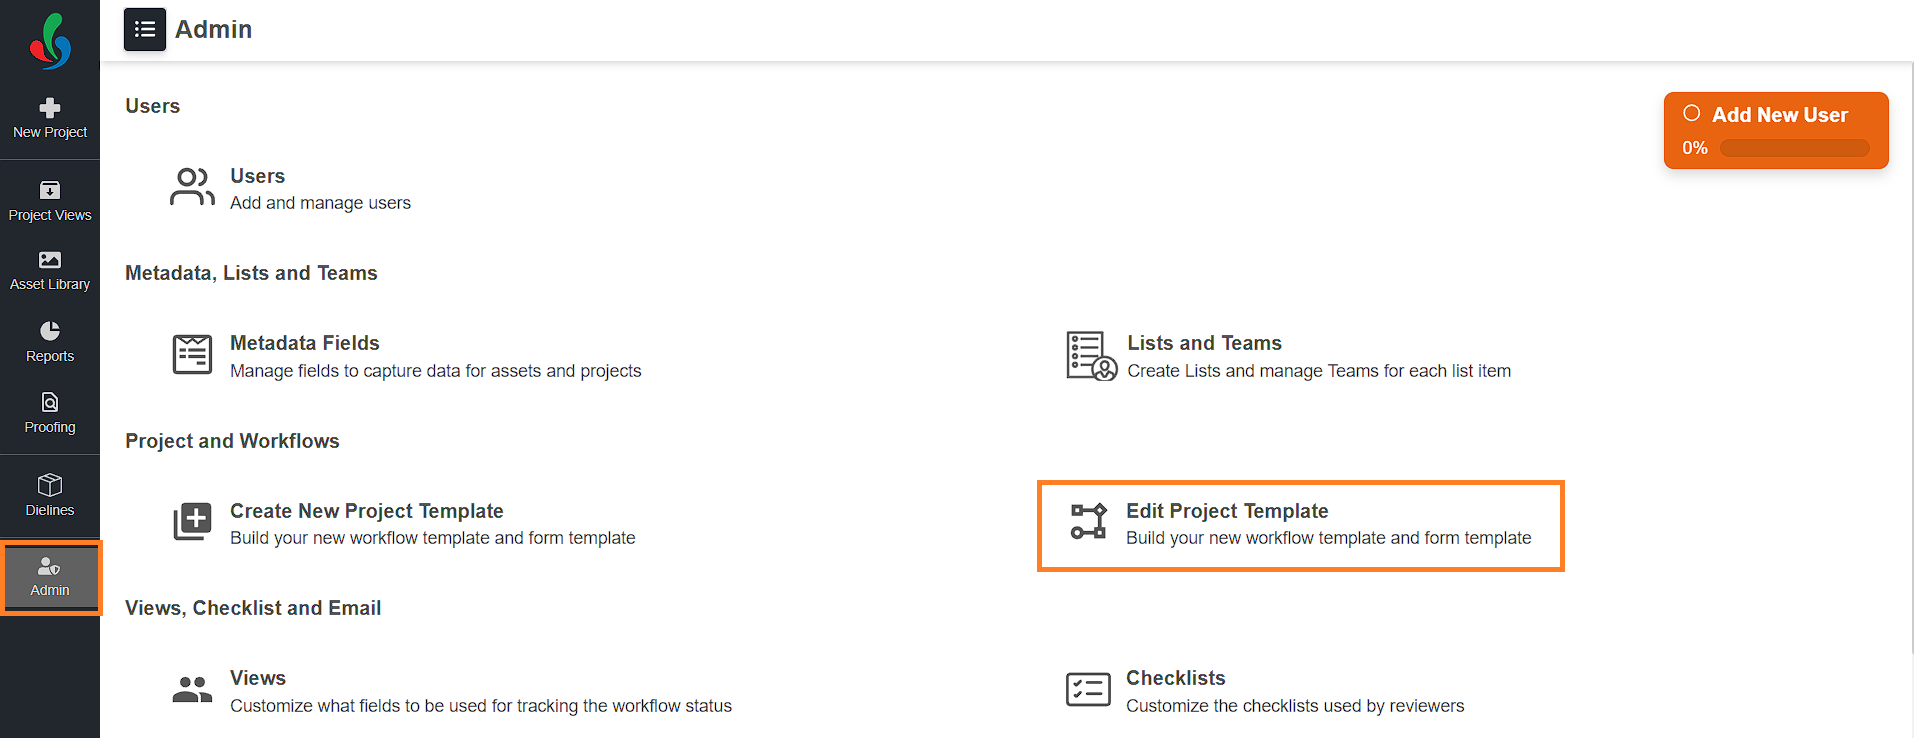
- Select the Admin module.
- Click the Edit Project Templates tab.
- Modify an Existing Template:
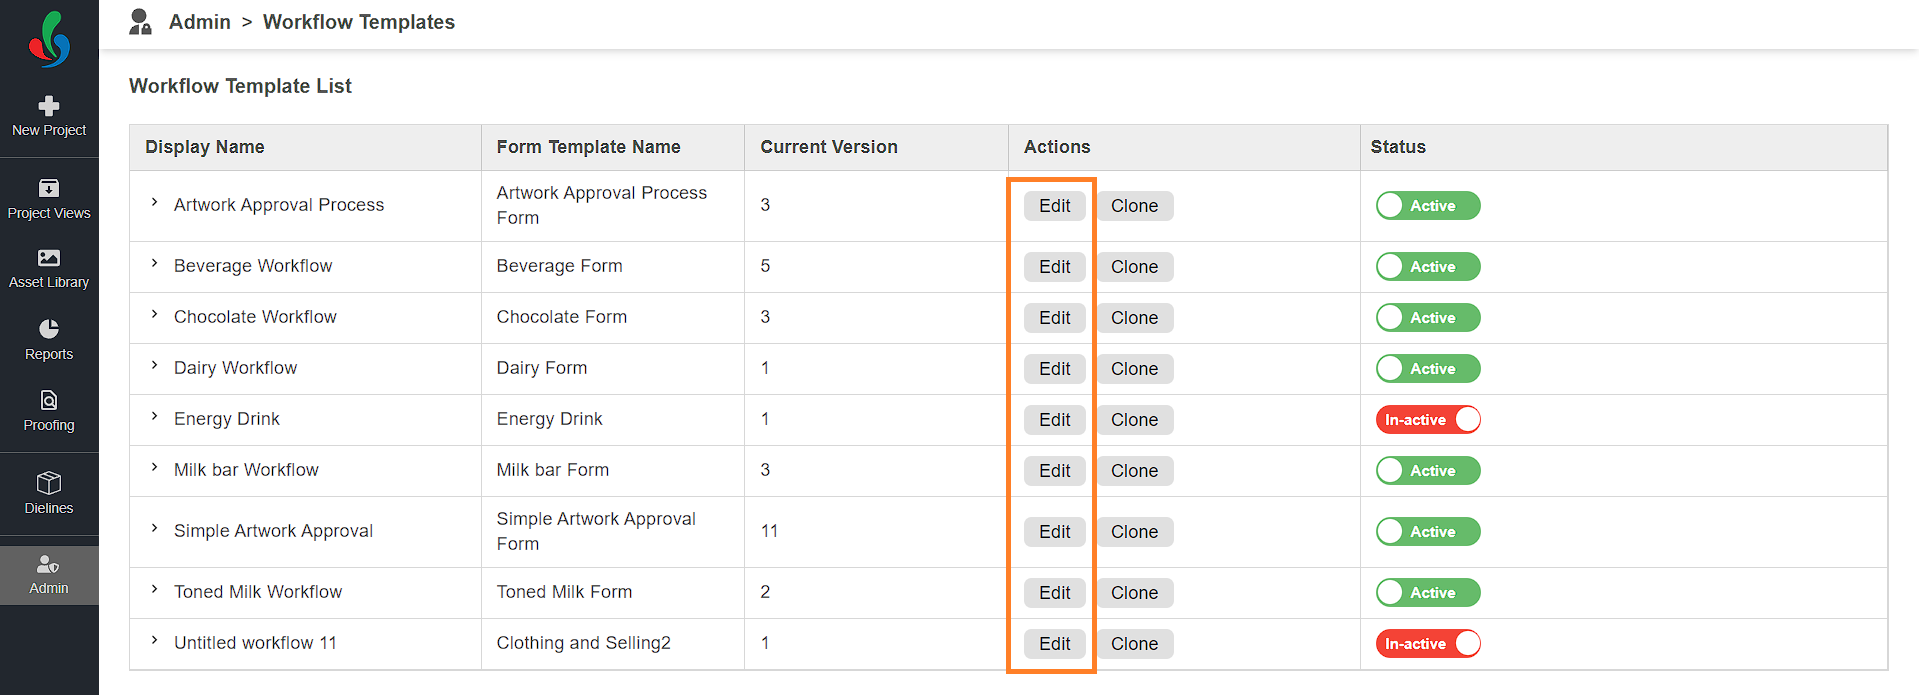
- Click the Edit button located in the Actions column associated with the desired template.
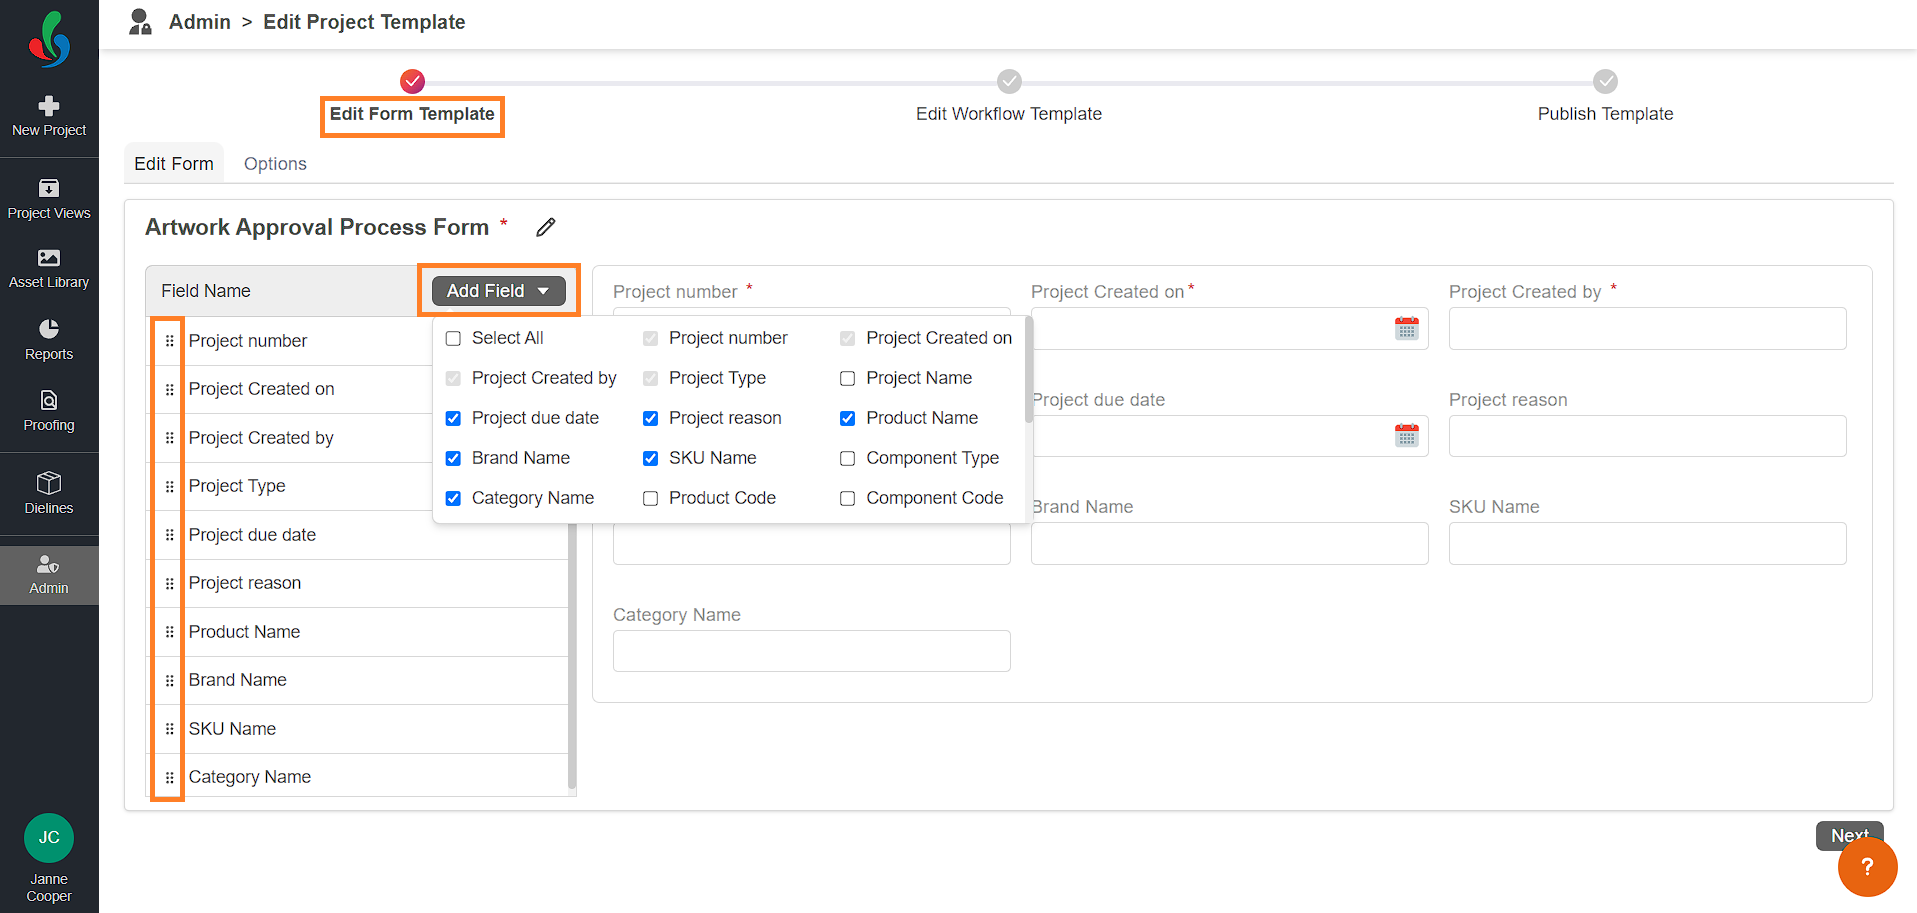
- Manage Fields:
Refer to Create Form Template, 02. Building Your Form Template (Create New Form Template Method) for detailed explanation.- Add Fields: Click Add Field and select desired fields from the list.
- Remove: Uncheck fields you no longer need.
- Rearrange: Use the drag icon (⋮⋮) to adjust fields order.
- Configure:
- Click the Option tab.
- Set field properties:
- Multi Value: Allow multiple selections or tags (Yes/No toggle).
- Use in Project Header: Prioritize visibility for easy access (Yes/No toggle).
- Add Hints: Provide clear guidance within the form by clicking Add Hint next to a field and enter helpful text.
- Once you have modified the form as desired, click the Next button located in the bottom right corner of the screen to move on to modifying the workflow.
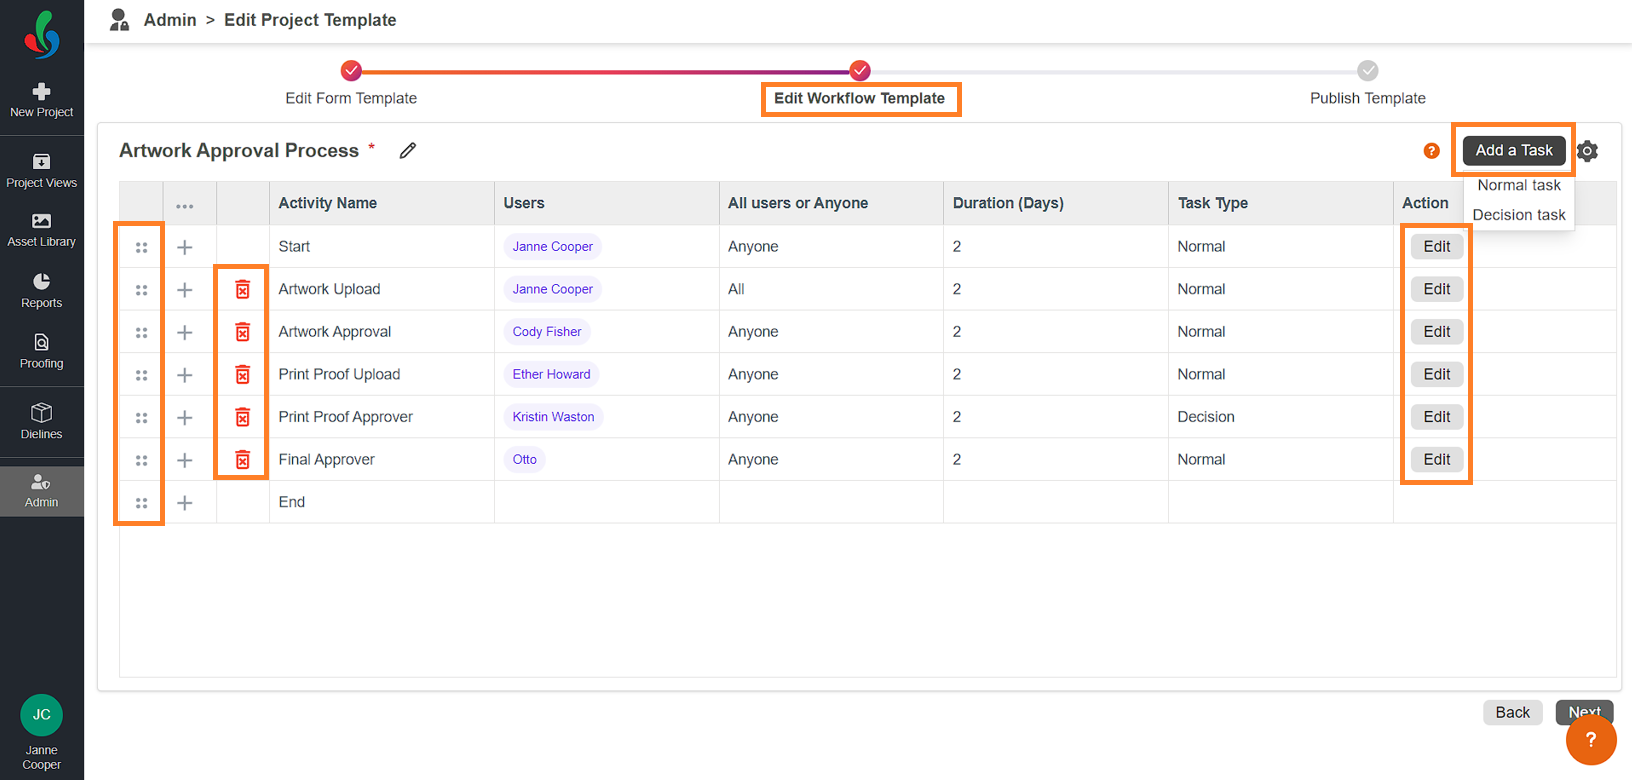
- Manage Tasks:
- Add: Click Add a Task and choose Normal Task for uploads or actions, or Decision Task for approvals/rejections.
Refer to Create Workflow Template, 03. Building Your Workflow (Create New Workflow Template Method) for detailed explanation about Normal task and Decision task. - Delete: Click the delete icon associated with the desired task and confirm.
- Edit: Click the Edit button associated with the desired task to modify the task.
- Rearrange: Use the drag icon (⋮⋮) to adjust task order.
- Add: Click Add a Task and choose Normal Task for uploads or actions, or Decision Task for approvals/rejections.
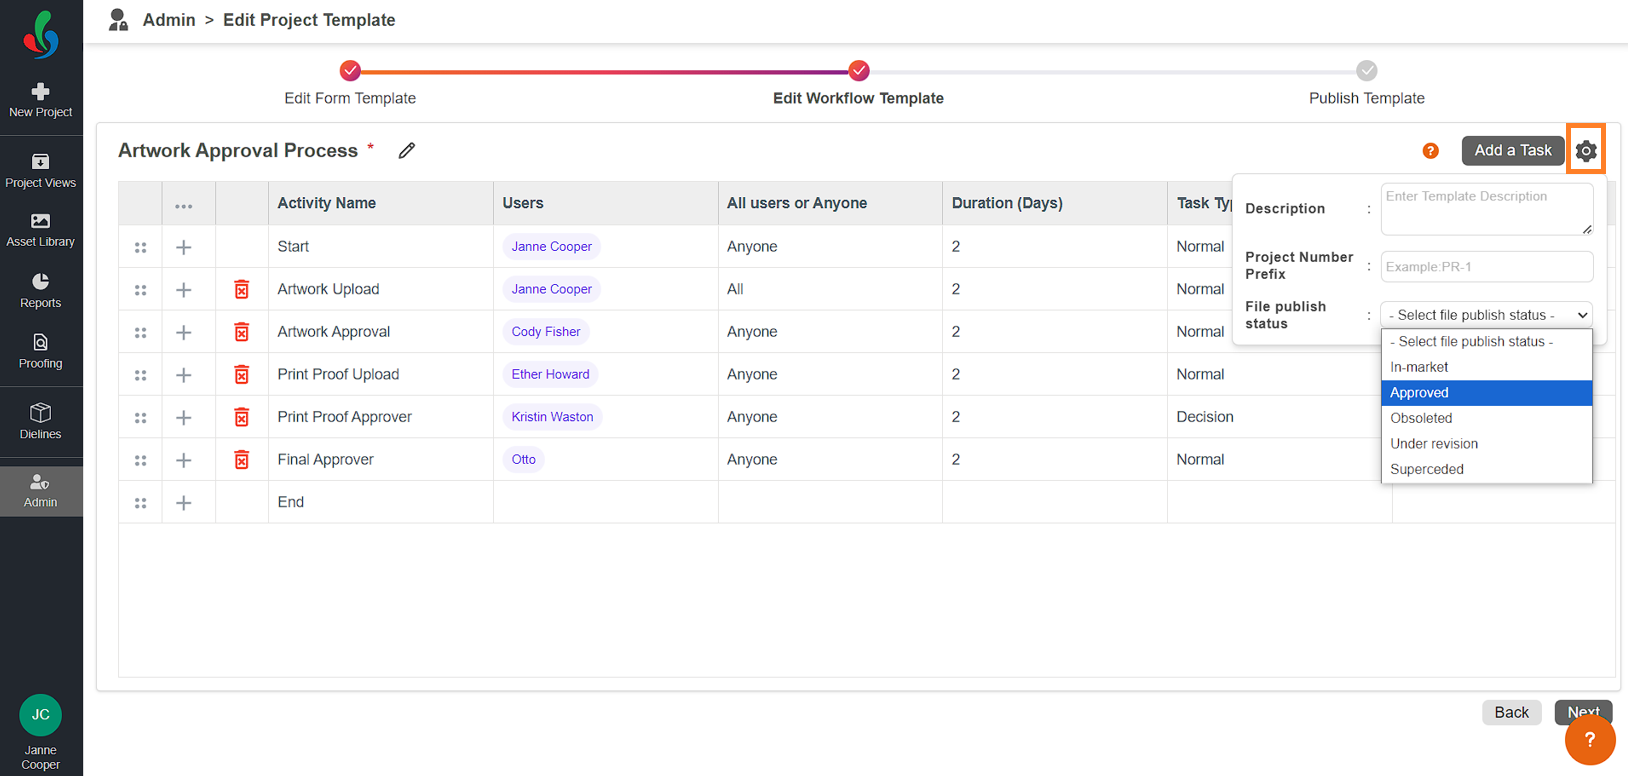
- Configure Settings (Optional):
- Template Description: Add/Edit the description of the template.
- Project Number Prefix: Add/Edit the unique prefixes.
- File Publish Status: Set the default status for completed files (e.g., Approved).
- Once you have modified the workflow as desired, click the Next button located in the bottom right corner of the screen to publish your modifications.
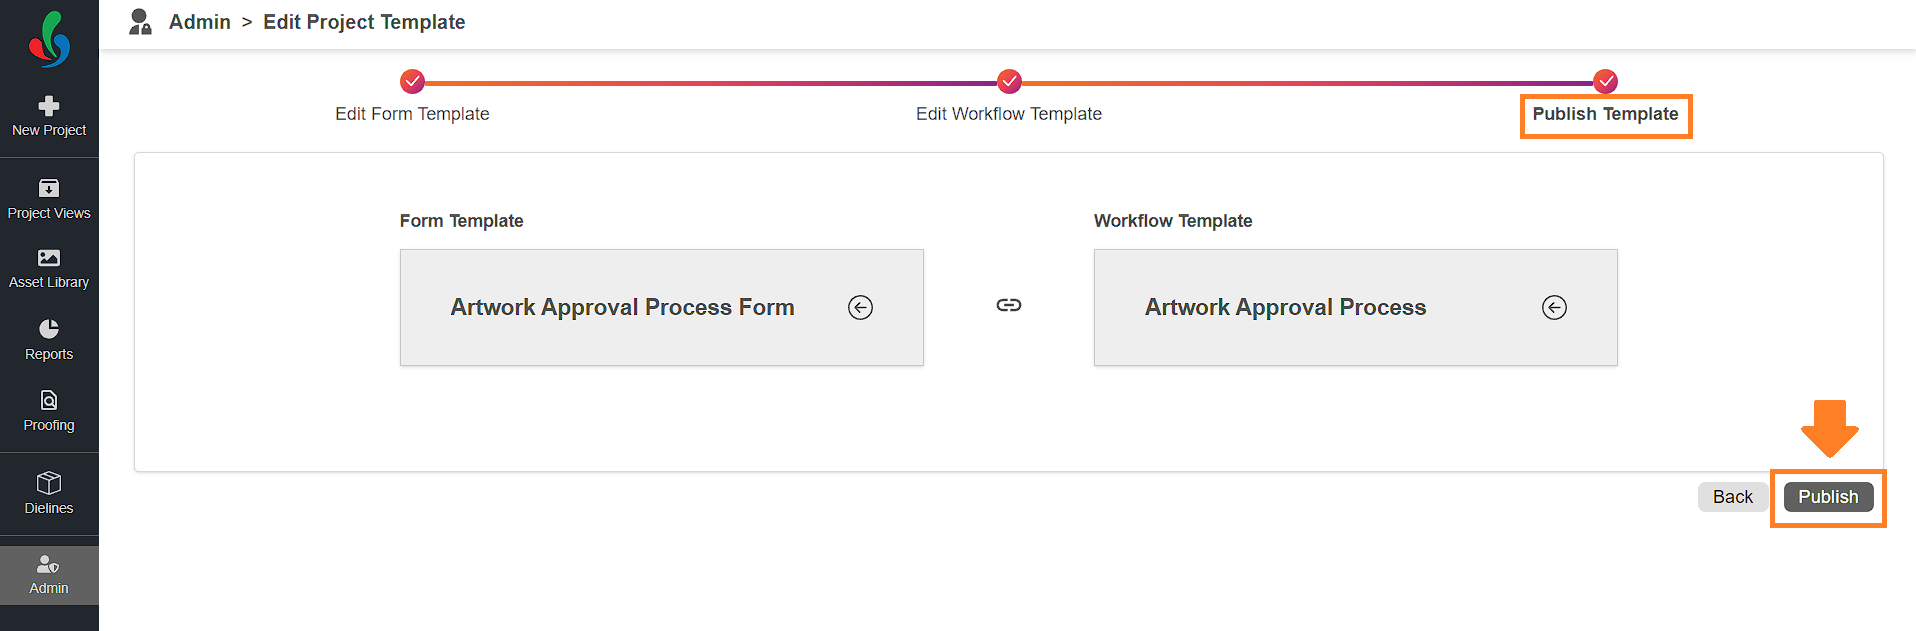
- Publish Your Modifications:
- Review Your Changes: Carefully review all modifications. If needed, use the Back button to make further adjustments to the workflow or form fields.
- Click "Publish": Once you’re satisfied with your changes, click Publish to apply them.
Note: The changes will be applied to new projects created with this template. Existing projects using the previous version of the template will remain unaffected.
- Click the Edit button located in the Actions column associated with the desired template.
How do I clone a project template?
Creating a New Template from an Existing One Using Clone Option:
- Clone a Template:
- Click the Clone button located in the Actions column associated with the desired template.
- Click the Clone button located in the Actions column associated with the desired template.
- Edit the Cloned Template:
- Click the Edit button located in the Actions column associated with the cloned template.
- Follow the same steps as in Modify an Existing Template to customize and publish it.

How do I preview the previous versions of a project template?
Viewing Previous Versions of a Project Template
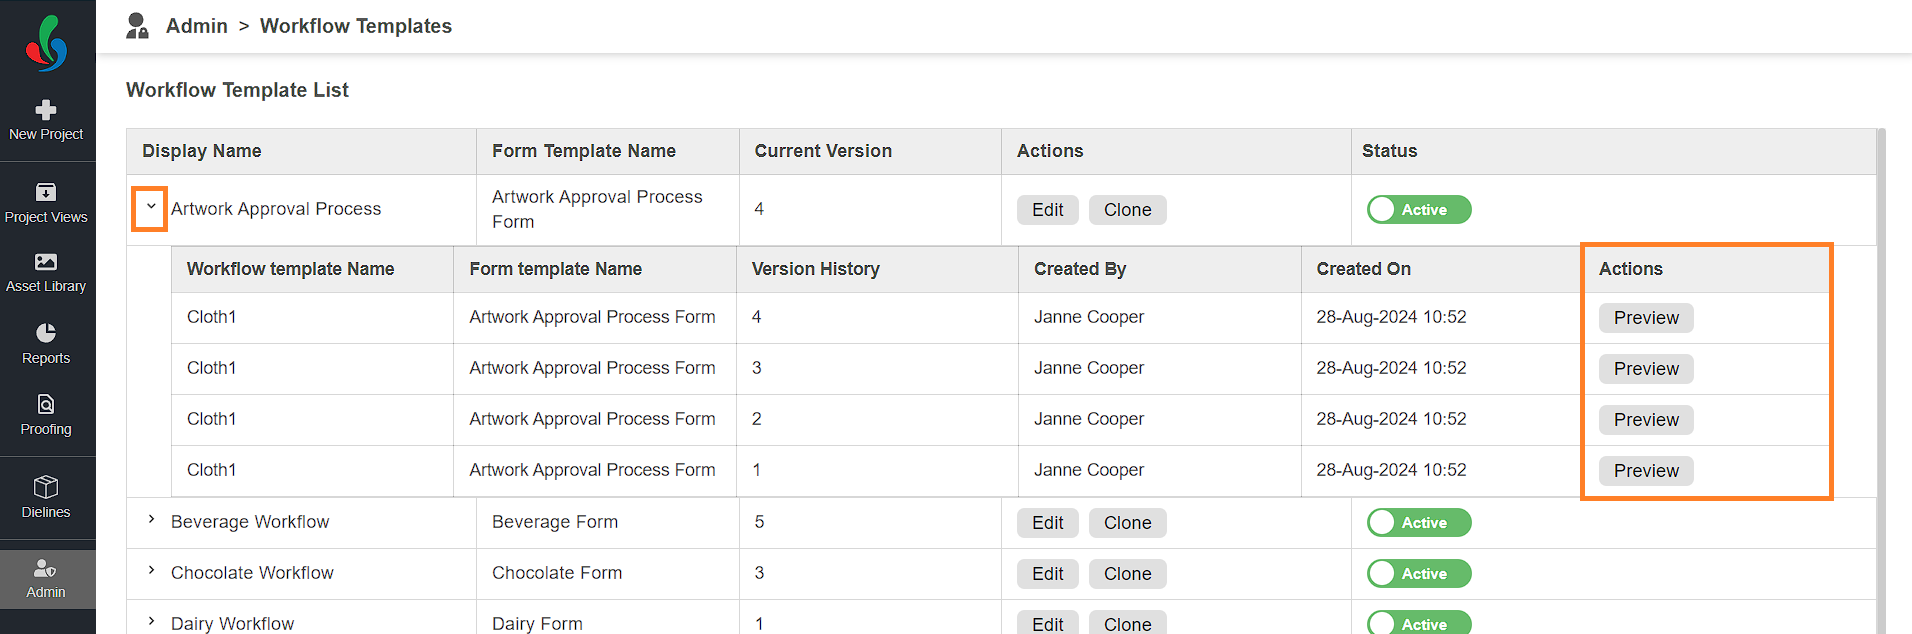
View Previous Versions:
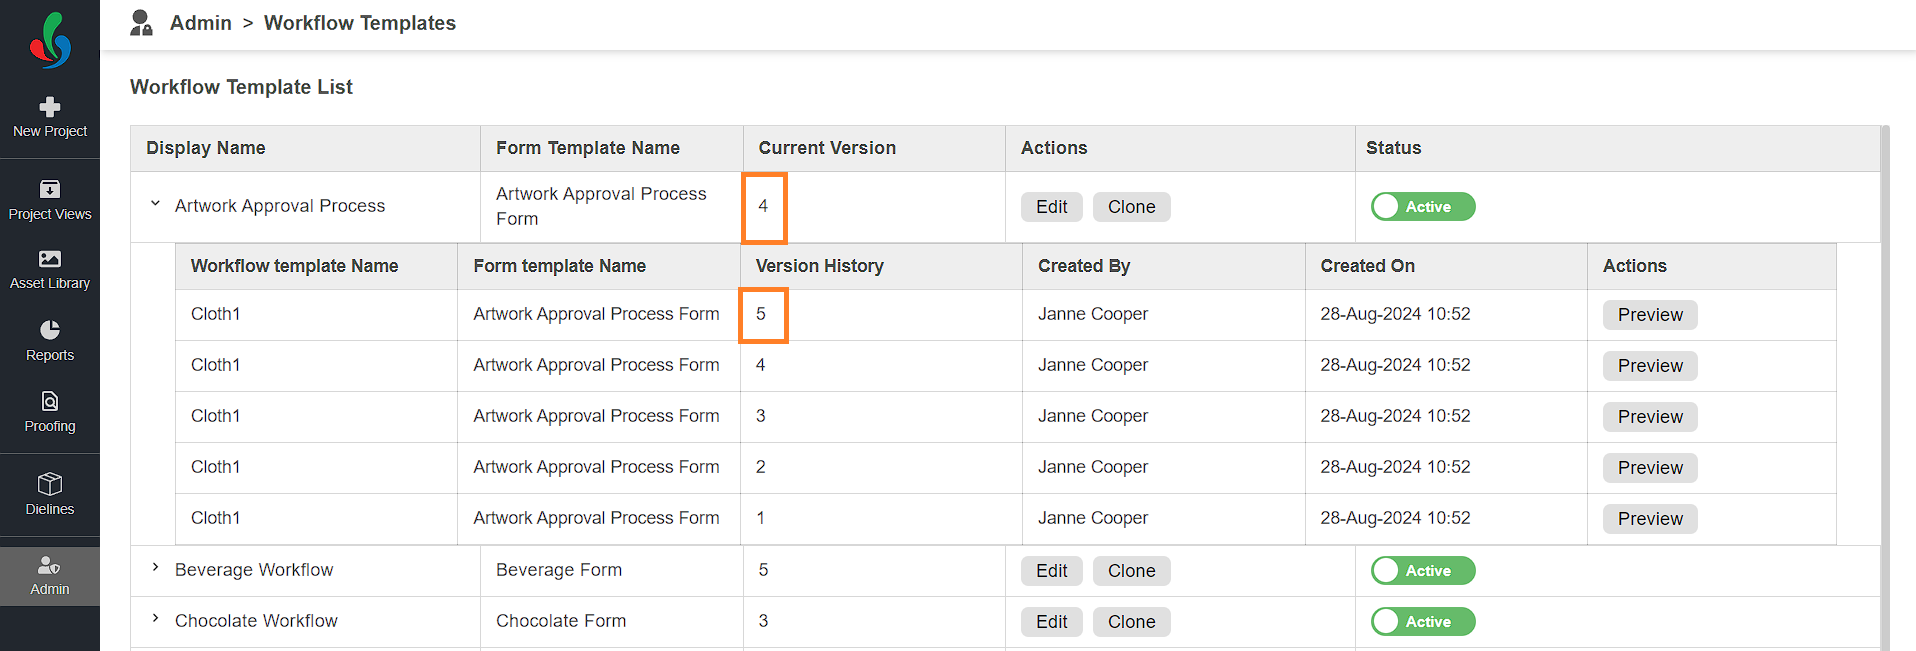
- To view previous versions of a specific project template, click the toggle button next to the desired template. All versions of the template will be listed, with the latest version at the top.
- The version number for each template is displayed in the Version column.
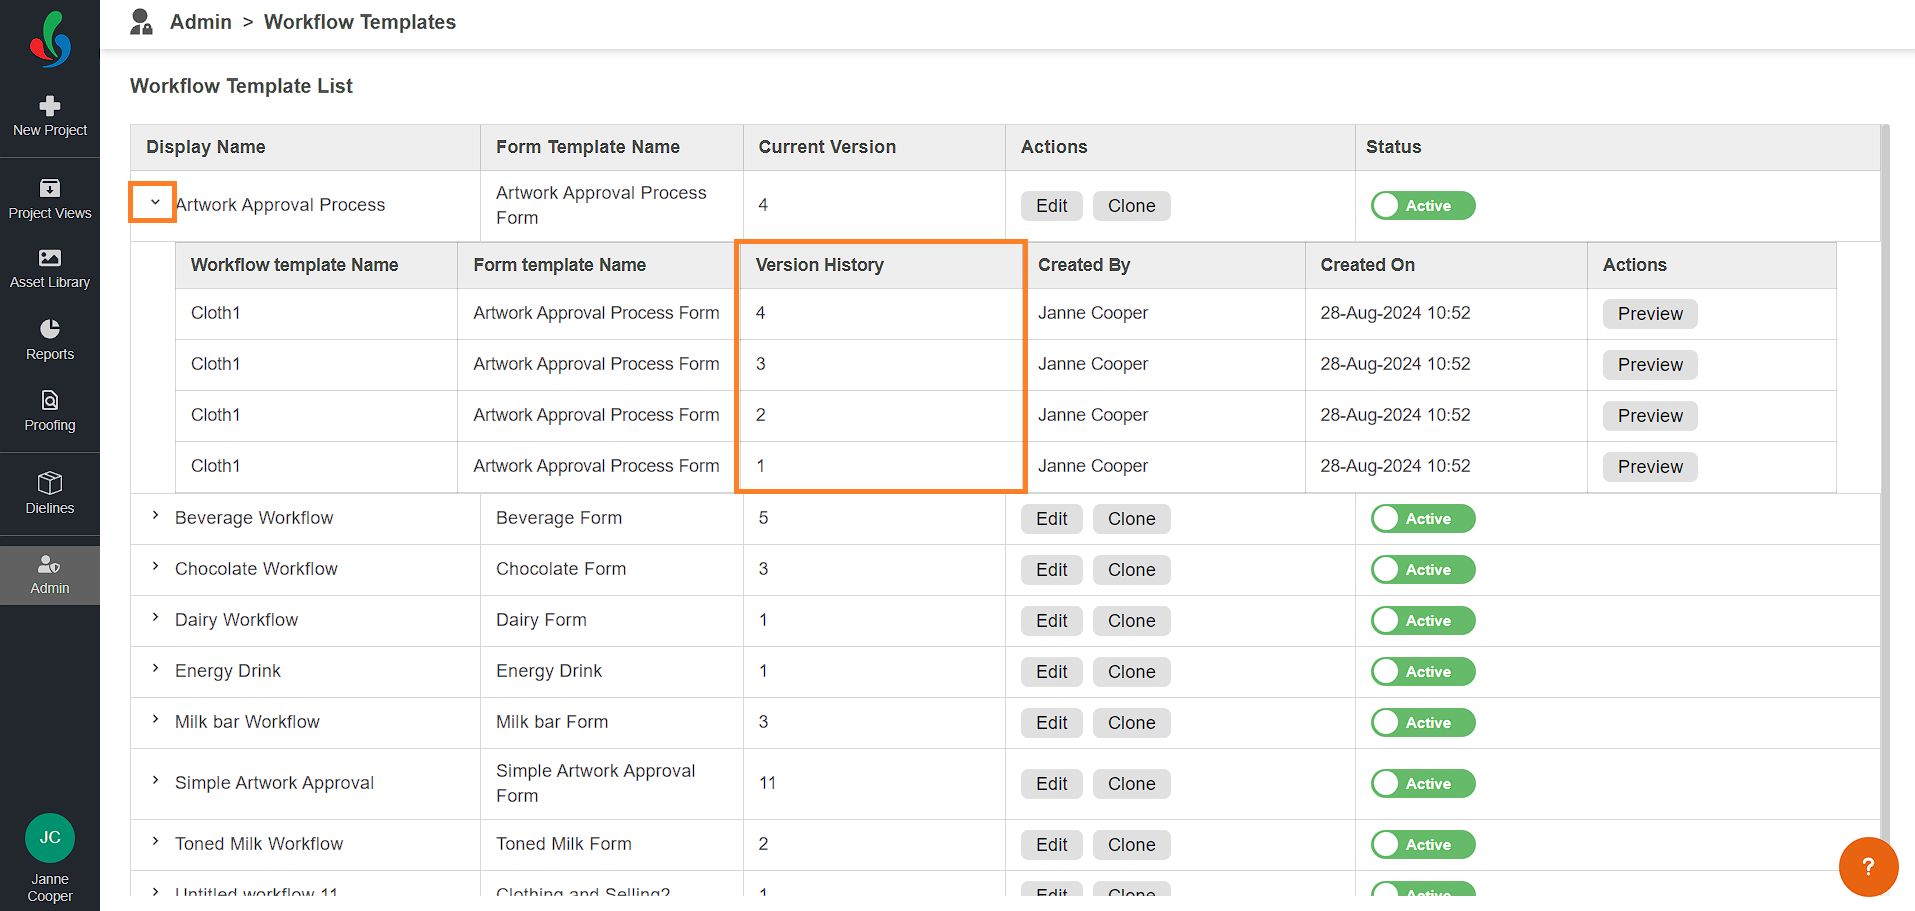
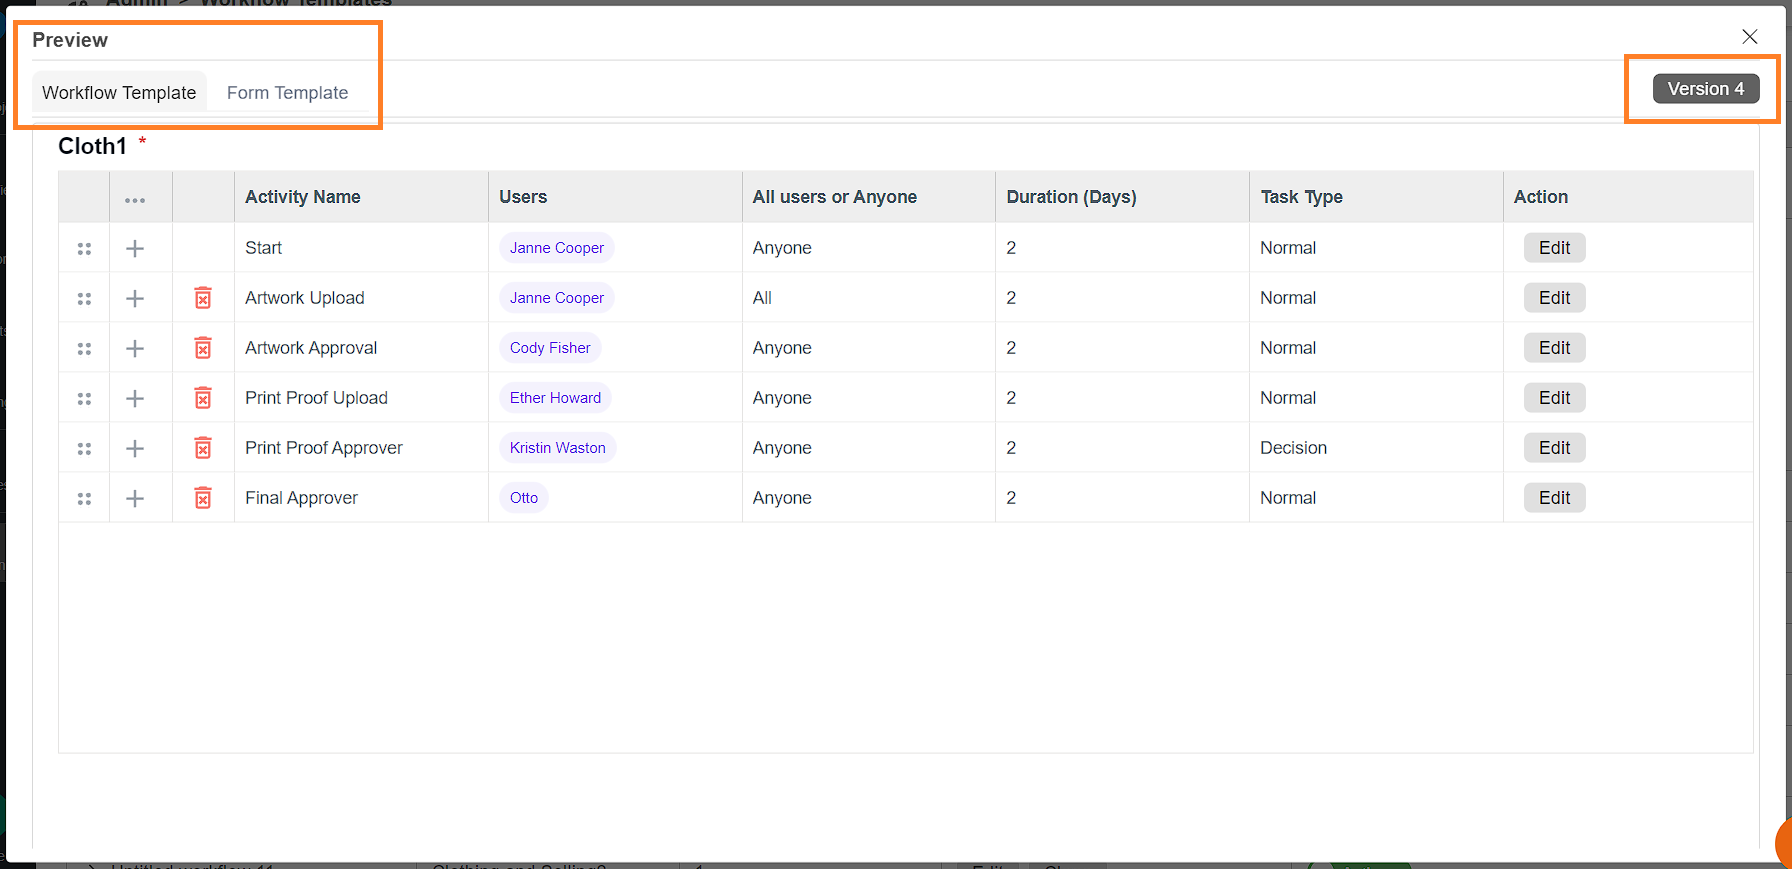
Previewing Template Versions:
- To get an overview of the form fields and tasks in a specific version, click the Preview button in the Actions column for that version. The preview feature allows you to see changes made across different versions of the template.
Template Versioning:
- When you modify a project template using the Edit option, a new version is automatically created. However, these changes will not be reflected when initiating a new project until the updated version is published.
- Once the new version is published, it becomes available for use in creating new projects.
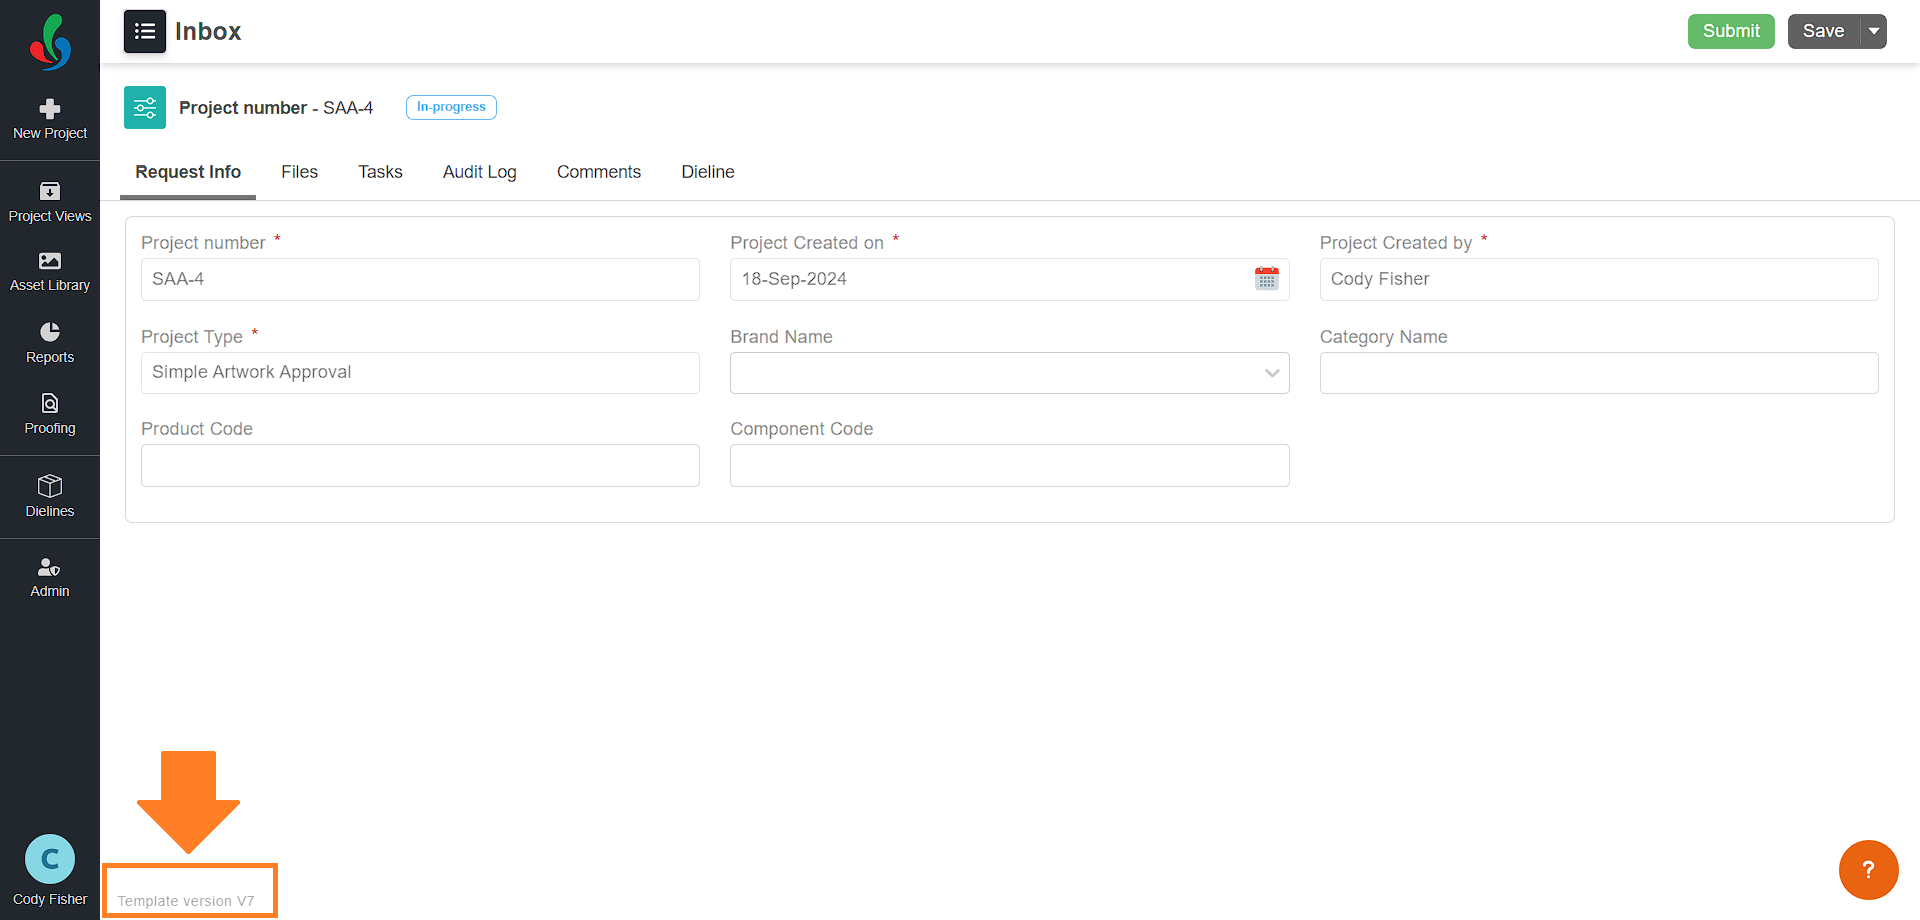
Identifying Template Versions in Projects:
- The version number of the template used for the project will be visible in the project detail page. This helps users to identify which version of the template the project is based on.