---
title: "File Revision (Enterprise Plan)"
url: "https://help.manageartworks.com/en/article/file-revision-enterprise-plan"
language: "en"
last_updated: "2025-07-23T04:55:03.672Z"
---
# File Revision (Enterprise Plan)
|  | **Note:** This article explains how to revise a file in the **Enterprise** plan. For more information on all ManageArtworks plans, click [here](https://www.manageartworks.com/pricing). |
| --- | --- |
File revision allows you to update an older file with a newer version while maintaining version history and metadata. This process can be initiated either through the **Asset Library** or via the **New Project** module.
|  | **Note**: File revisions are only supported for files stored in the **Asset Library**. Files uploaded directly from your desktop cannot be revised unless first stored in the Asset Library. |
| --- | --- |
## Revise a File from the New Project Module
> How to Revise a File from Workflow?
### 01\. Access Project Templates
1. Log in to your [ManageArtworks](https://app.manageartworks.com/karomi/global/build/login) account.
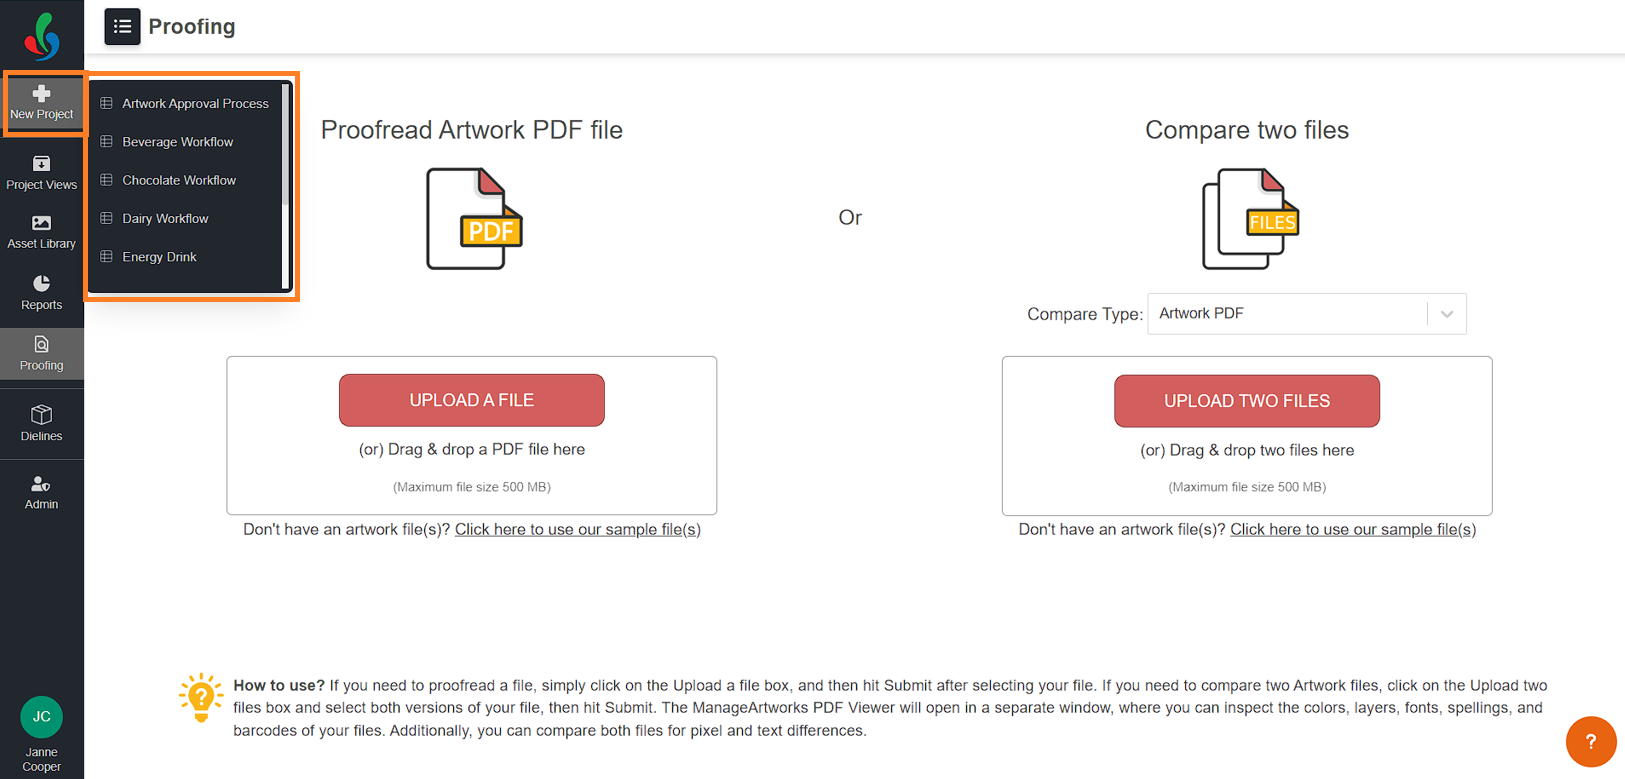
2. Hover over the **New Project** button on the left pane.
3. A menu will display available workflow templates.
**Note:** Only users assigned to the **Start Activity** can view and select templates.
4. Choose a workflow template that aligns with your project's requirements.
### 02\. Revise the File
You can revise files either:
- Before initiating the project, or
- After the project has started.
Files can be revised at the **Project level** or under individual **Component rows**.
|  | **Note**: The **Component rows** become visible only after components have been added under the **Components** tab. The number of rows depends on the number of components added.
If the selected template does **not include components**, only the **Project Files** row will appear. |
| --- | --- |
To revise a file:
1. Navigate to the **Files** tab.
2. Choose where you want to revise the file:
1. For general files, use the Project Files row.
2. For component-specific files, use the respective Component row.
3. Click the **Add Files** button corresponding to the desired section.
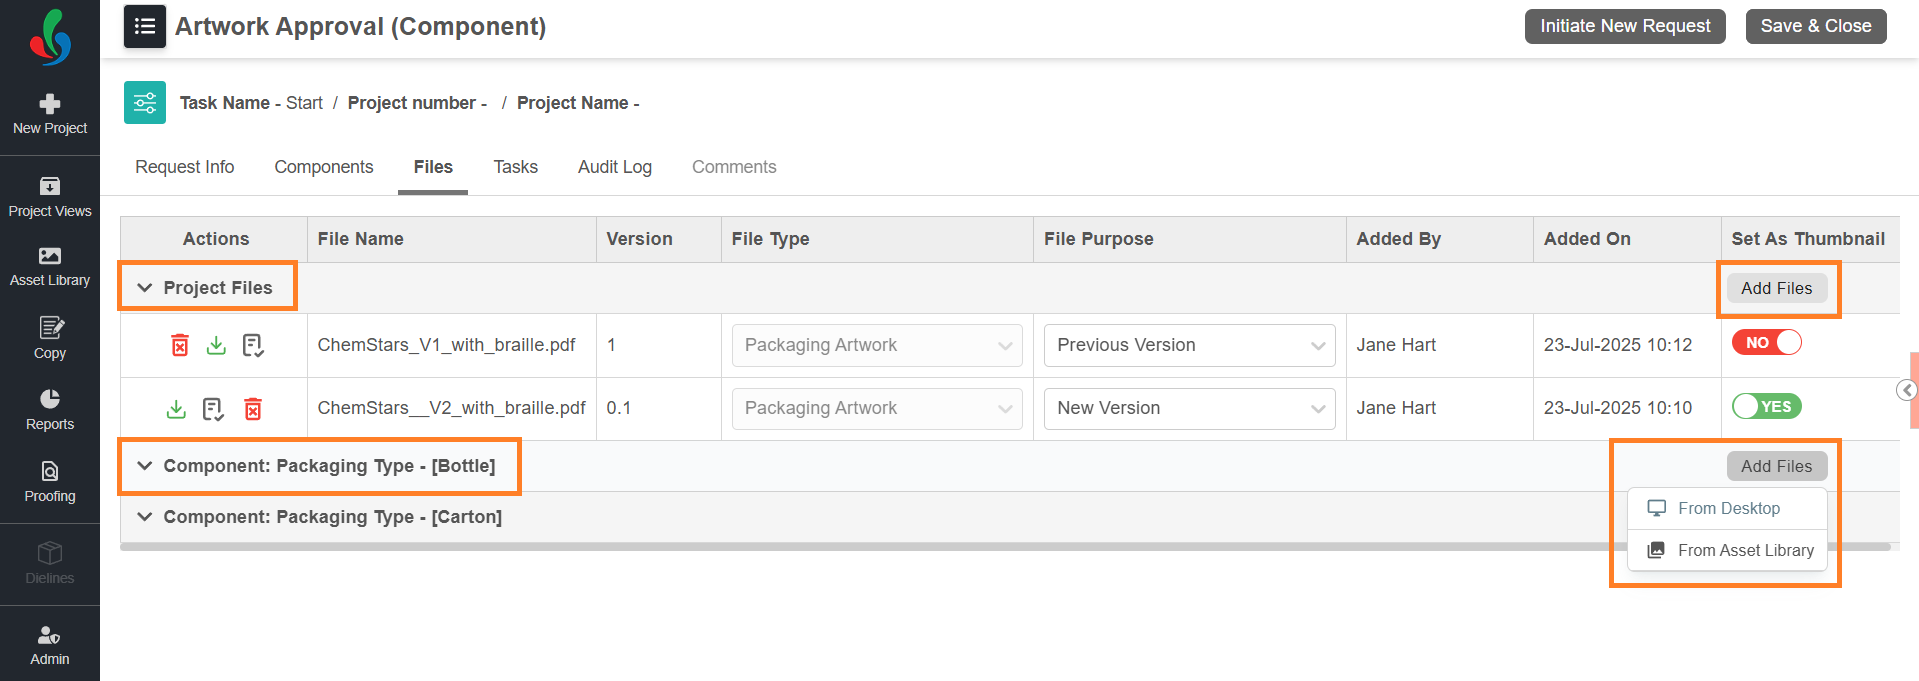
4. Select the files using one of the following method:
**Note:** Only files from asset library can be revised.
1. **From Desktop:** Allows you to browse and select files from your local system.
**Note:** Files uploaded from Desktop cannot be used for revision. Use this method only for new or reference files.
1. Select "**From Desktop**."
2. Locate and select your desired files.
3. Click "**Open**."
2. **Asset Library:** Select existing files from the Asset Library. (required for revision)
1. Select "**From Asset Library.**"
2. Choose the desired file(s) from the File Selection window.
3. Click "**Attach Files**" to add them to your project files.
### 03\. Configure File Revision Details
Once the files are added:
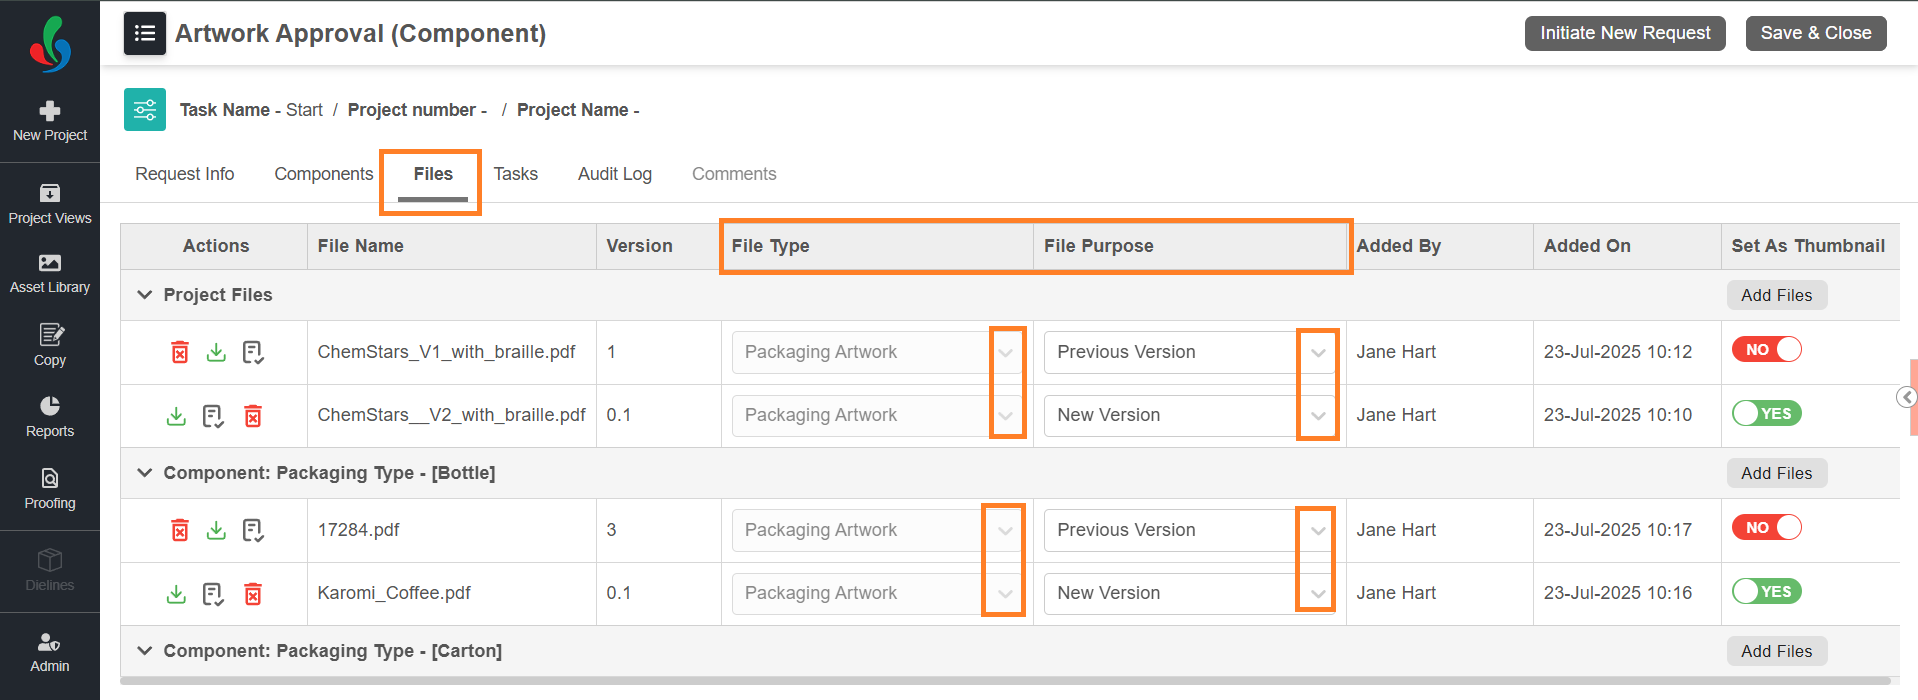
1. Assign File Type
1. Select the **File Type** for each from the drop-down menu.
**Note:** For files added from the Asset Library, the File Type is automatically assigned based on the Asset Library data and cannot be changed. Ensure that the **File Type** and **File Extension** of the new file matches the older file for proper revision.
1. Set **File Purpose:**
1. For the older file, set the **File Purpose** as **Previous Version**.
**Note:** This option is only available for files sourced from the **Asset Library**.
2. For the newer file, set the **File Purpose** as **New Version**.
**Note:** This option is only available for files sourced from **Desktop**.
|  | **Note**: In a project, only one file type can be revised at a time. However, in a component workflow, multiple revisions of the same file type are allowed. The same Asset Library file cannot be used across multiple components for revision. |
| --- | --- |
### 04\. Set Thumbnail
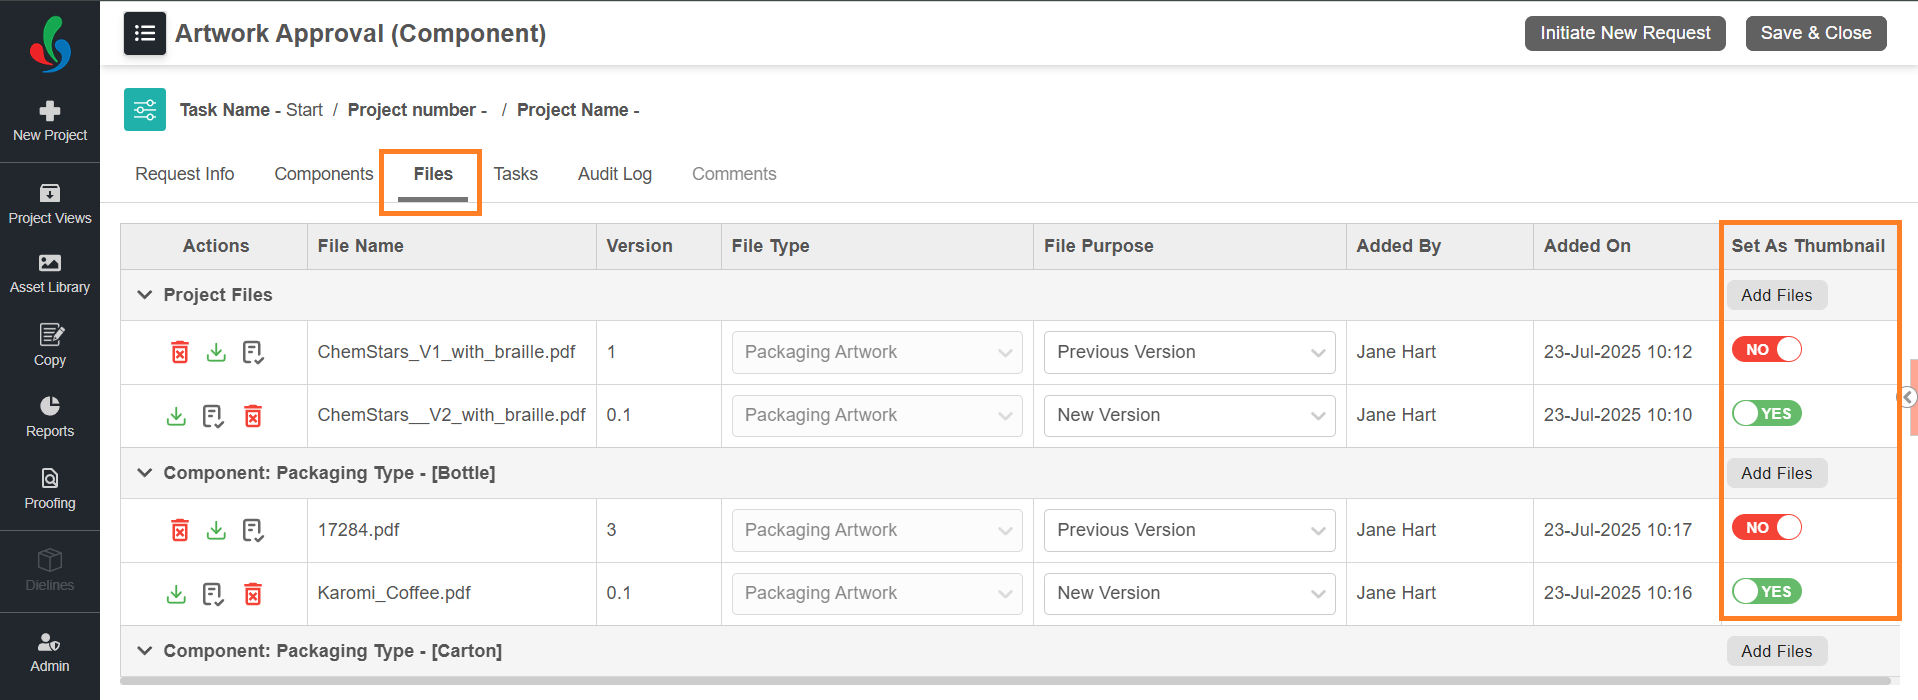
You can optionally mark one file per section (Project or Component) as a **thumbnail**.
1. Locate the file you want to mark as a thumbnail.
2. In the **Set As Thumbnail** column, toggle the switch from **NO** to **YES** next to the desired file.
**Note:** Only one file can be set as a thumbnail per section (Project or Component). Selecting a new thumbnail will automatically deselect the previously set file in that section.
3. Project-level thumbnails appears for the entire project, while component-level thumbnails apply only to the respective component.
### 05\. Delete Unwanted Files (Optional)
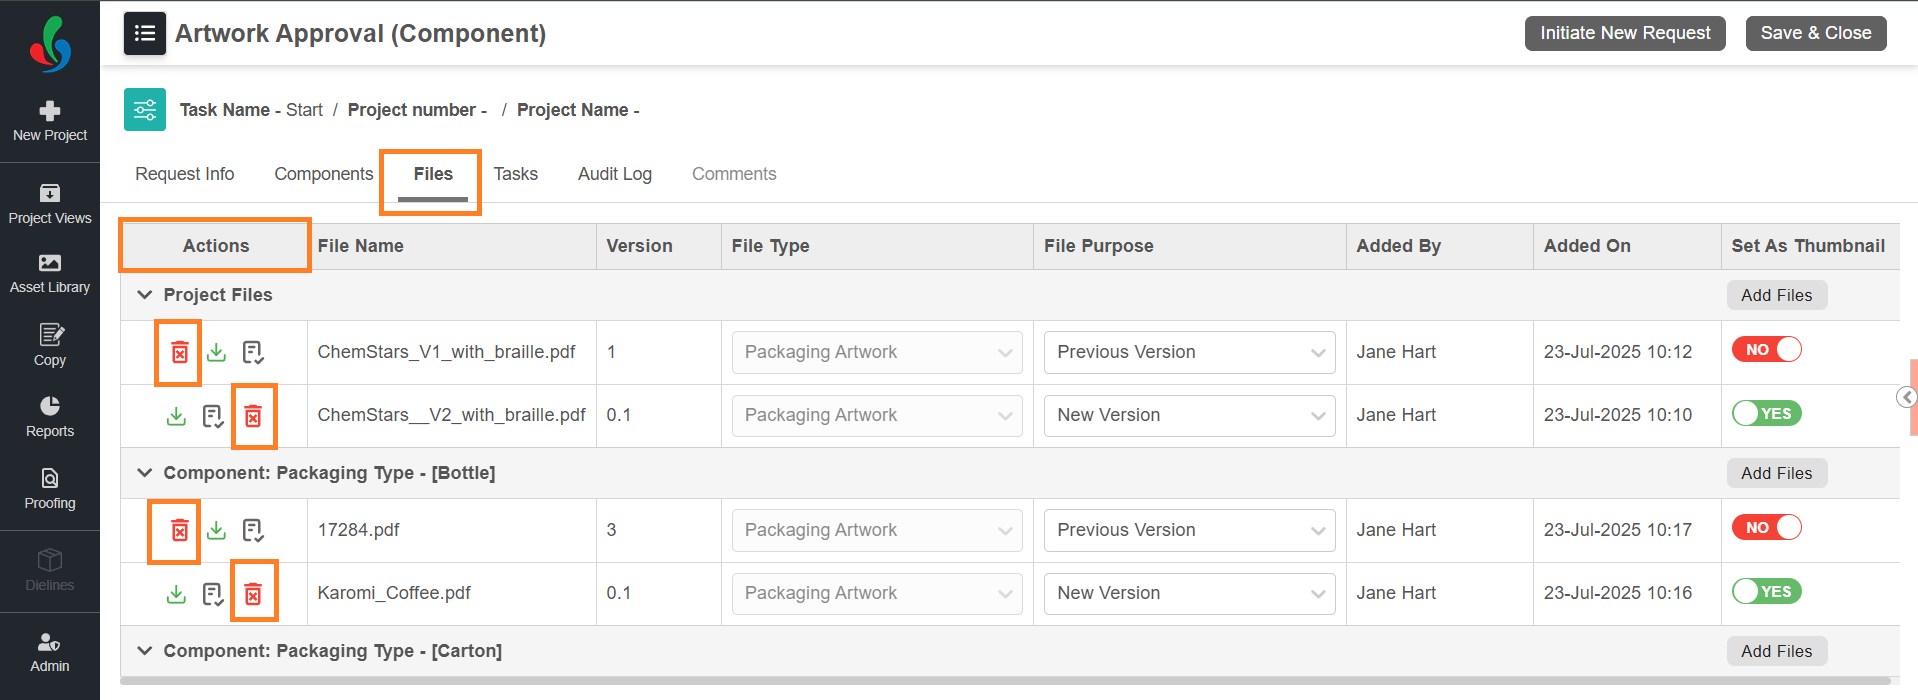
1. If necessary, click the trash icon in the Action column associated with the desired file to delete file.
**Note:** Files marked with the **File Purpose** as **Previous Version** cannot be deleted.
### 06\. Finalize Project Details
1. If you’re uploading files before initiating a project, ensure all other project details are configured. For more details, refer to the [**Configure Project Details**](https://help.manageartworks.com/en/article/start-a-new-project-enterprise-plan#02.-configure-project-details) section.
## File Publishing from Workflow
Once the workflow is complete, files marked as **New Version** will **replace** those marked as **Previous Version** in the Asset Library, depending on your organization’s configuration.
|  | **Note:** To configure specific file types or activity for publishing, please contact the **ManageArtworks Support Team**. |
| --- | --- |
|  | ### File Publishing Behavior
- Files from the **Asset Library** that are attached to a project will not be published again if their **File Purpose** is set to **Reference Only or left blank**.
- Only Asset Library files with the **File Purpose** set to **Previous Version** will be overwritten or reseeded in the Asset Library during publishing with files marked as **New Version**.
- Only one file type can be revised per project.
- In workflows involving multiple components, the same file type can be revised within each component. However, each component must link to a different file in the Asset Library.
- For desktop-uploaded files (excluding revision files):
- If no **File Purpose** is selected, the file will be published, but only if the corresponding asset type is configured in the backend for publishing.
- If the **File Purpose** is set to **Reference Only**, the file will not be published, even if the asset type is configured. |
| --- | --- |
## Revise a File from Asset Library
> How to Revise a File from the Asset Library?
1. Log in to your [ManageArtworks](https://app.manageartworks.com/karomi/global/build/login) account.
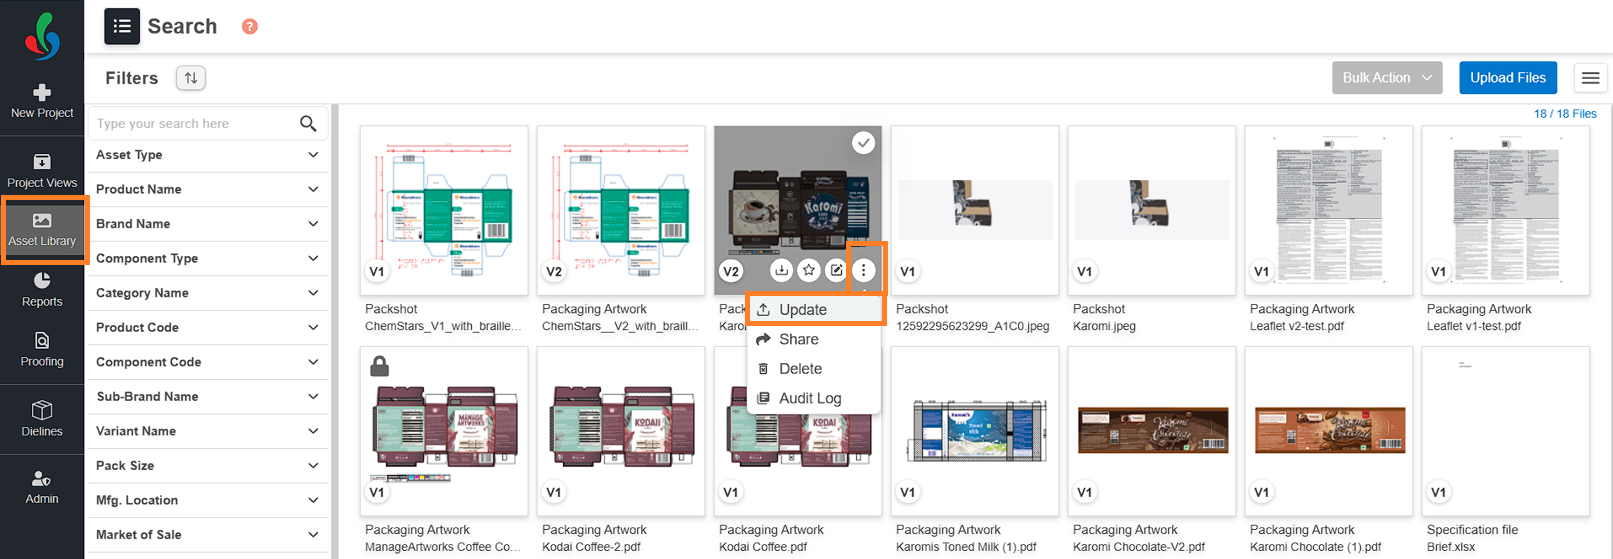
2. Navigate to the **Asset Library** module.
3. Locate the file you want to update.
4. Hover over the file and click the three-dot menu (⋮).
5. Select **Update**.
6. In the pop-up window, locate and select the new version of the file from your computer.
7. Click **Open** to upload the file.
8. The existing file will be **overwritten** with the newly uploaded version.