---
title: "Dieline Workflow"
url: "https://help.manageartworks.com/en/article/dieline-workflow"
language: "en"
last_updated: "2026-04-20T08:49:10.259Z"
---
# Dieline Workflow
|  | **Note:** The Dieline module is an **Enterprise Plan** feature but can be added as an **add-on for Growth Plan** users. For more information on all ManageArtworks plans, click [here](https://www.manageartworks.com/pricing). |
| --- | --- |
The Dieline module can be seamlessly integrated with workflows, making packaging development more efficient, flexible, and realistic.
- If you use the **standalone Dieline module**, you can create and preview dielines in 3D, but only as structural designs—without any artwork applied.
- To overlay artwork on a dieline and visualize how it looks in real life, you must link the dieline to the desired artwork through a **workflow**. Once the workflow is complete, the dieline with the applied artwork can be accessed from the **Asset Library**.
> How do I link a dieline to a workflow or project?
|  | **Note:** You can attach dieline only after project initiation. This article explains how to attach a dieline *after* project initiation. For details on creating a new project, see the [Start a New Project](https://help.manageartworks.com/en/article/start-a-new-project-enterprise-plan) section.
This article focuses specifically on how to attach and manage a dieline within a project, and how to link it with packaging artwork. It does not provide step-by-step instructions for completing a workflow or project using a dieline.
Before proceeding with the **Dieline Workflow**, it is recommended that you have a clear understanding of how workflows function in ManageArtworks. |
| --- | --- |
## 01\. Access Project
1. Sign in to your [**ManageArtworks**](https://app.manageartworks.com/karomi/global/build/login) account.
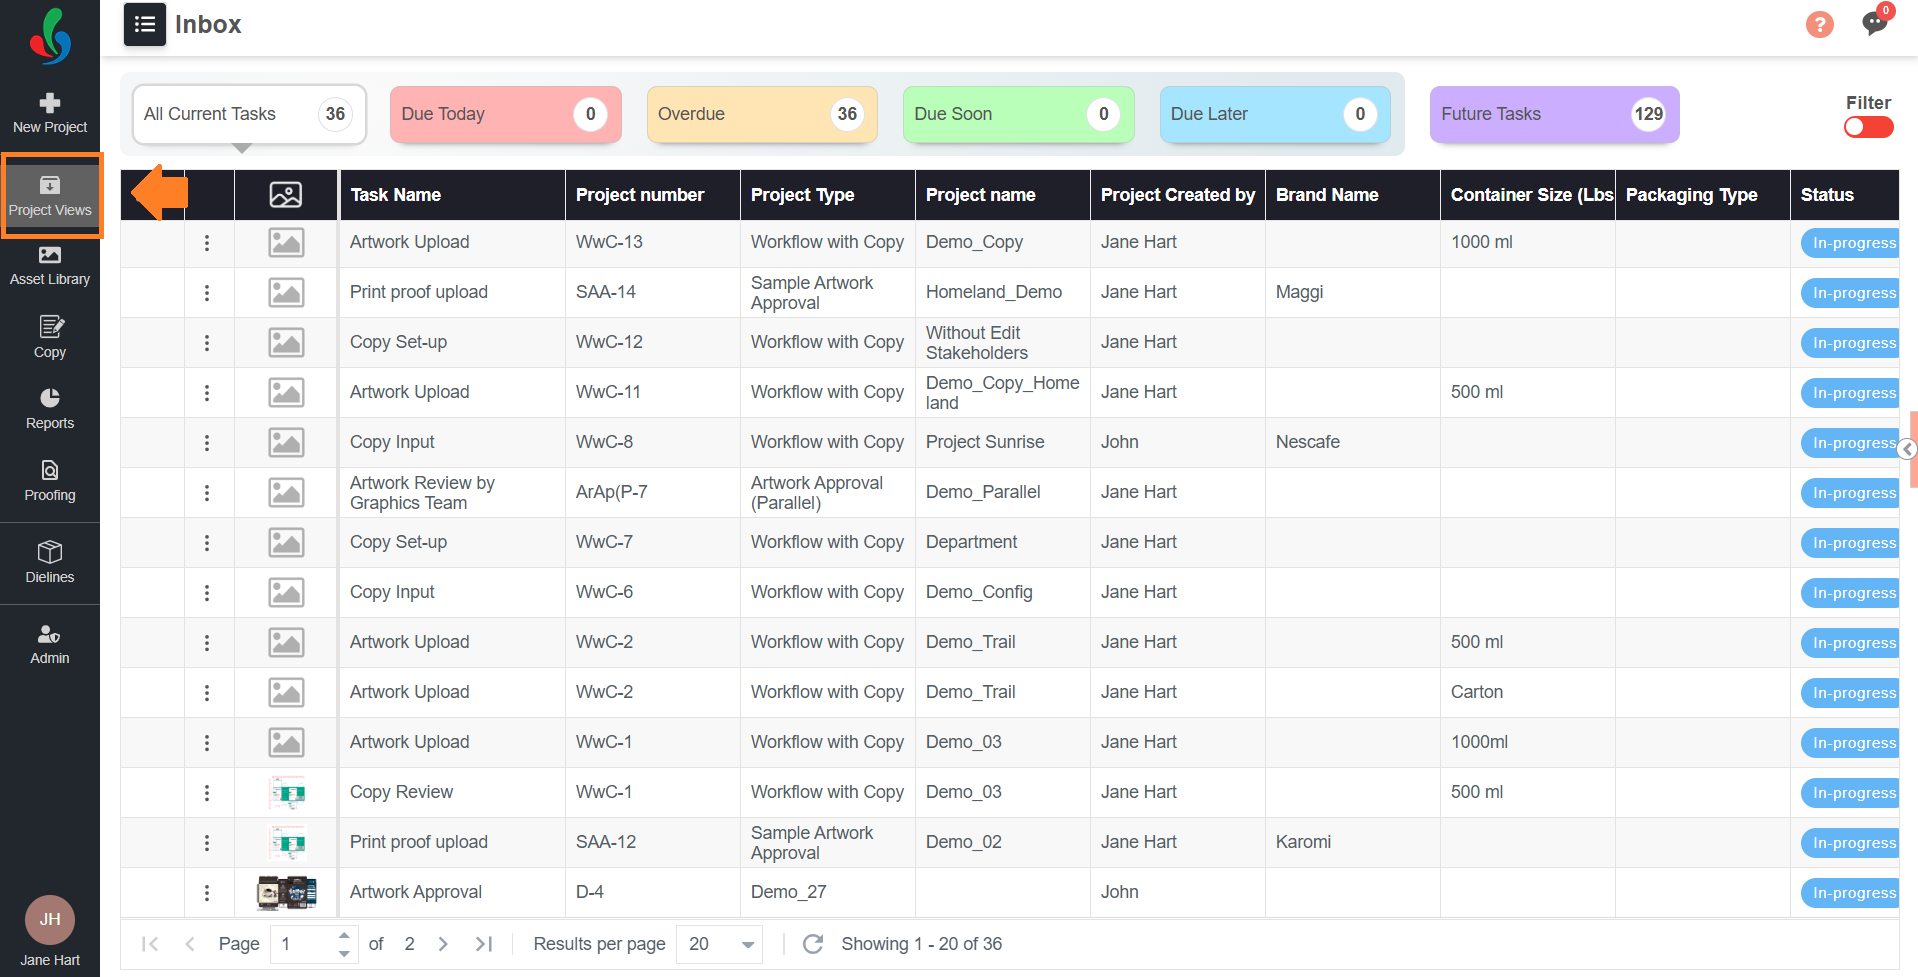
2. Select the **Project Views** module.
3. Select the target project/task.
## 02\. Attach the Desired Dieline
|  | **Note:** Only **one dieline** can be linked to each component in a project. |
| --- | --- |
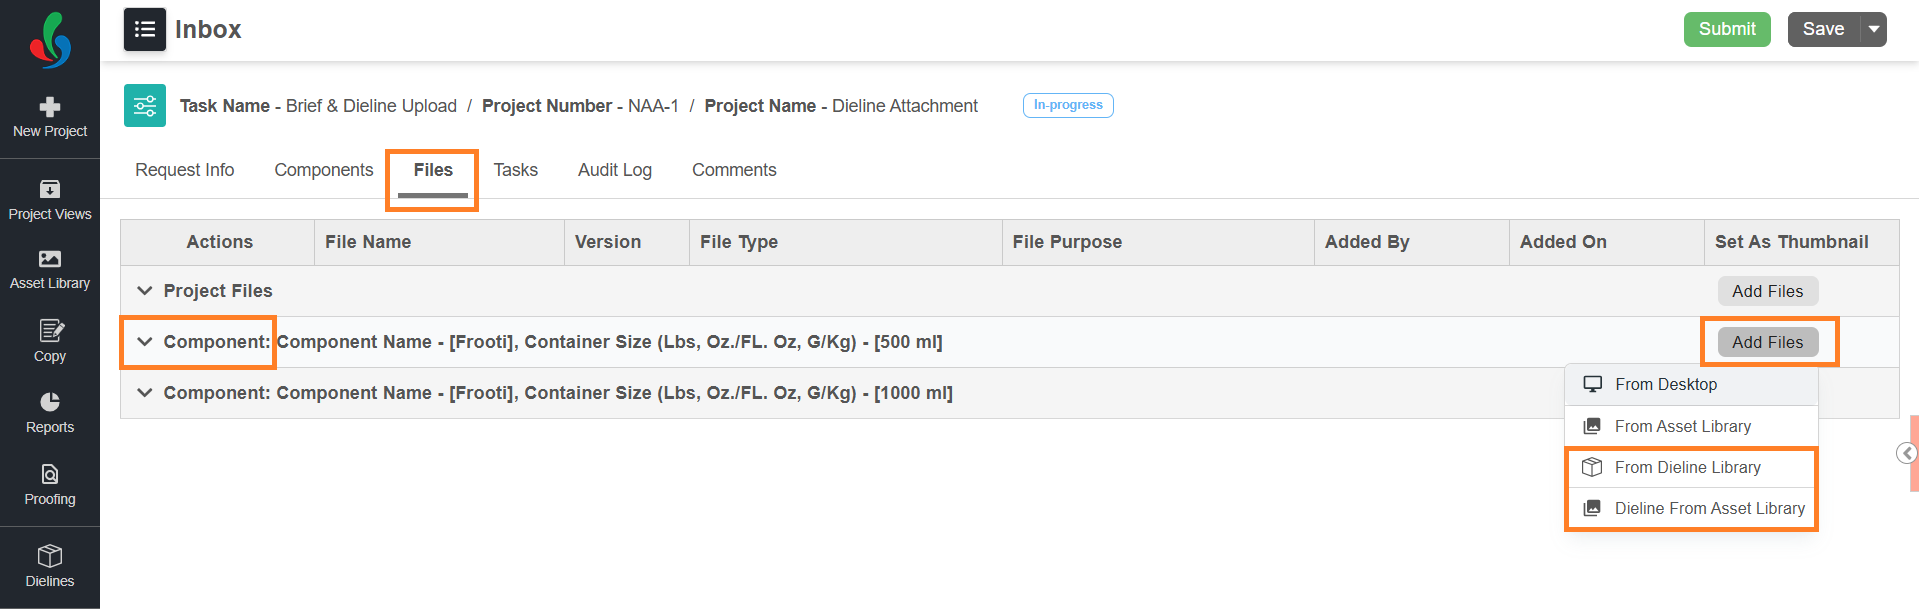
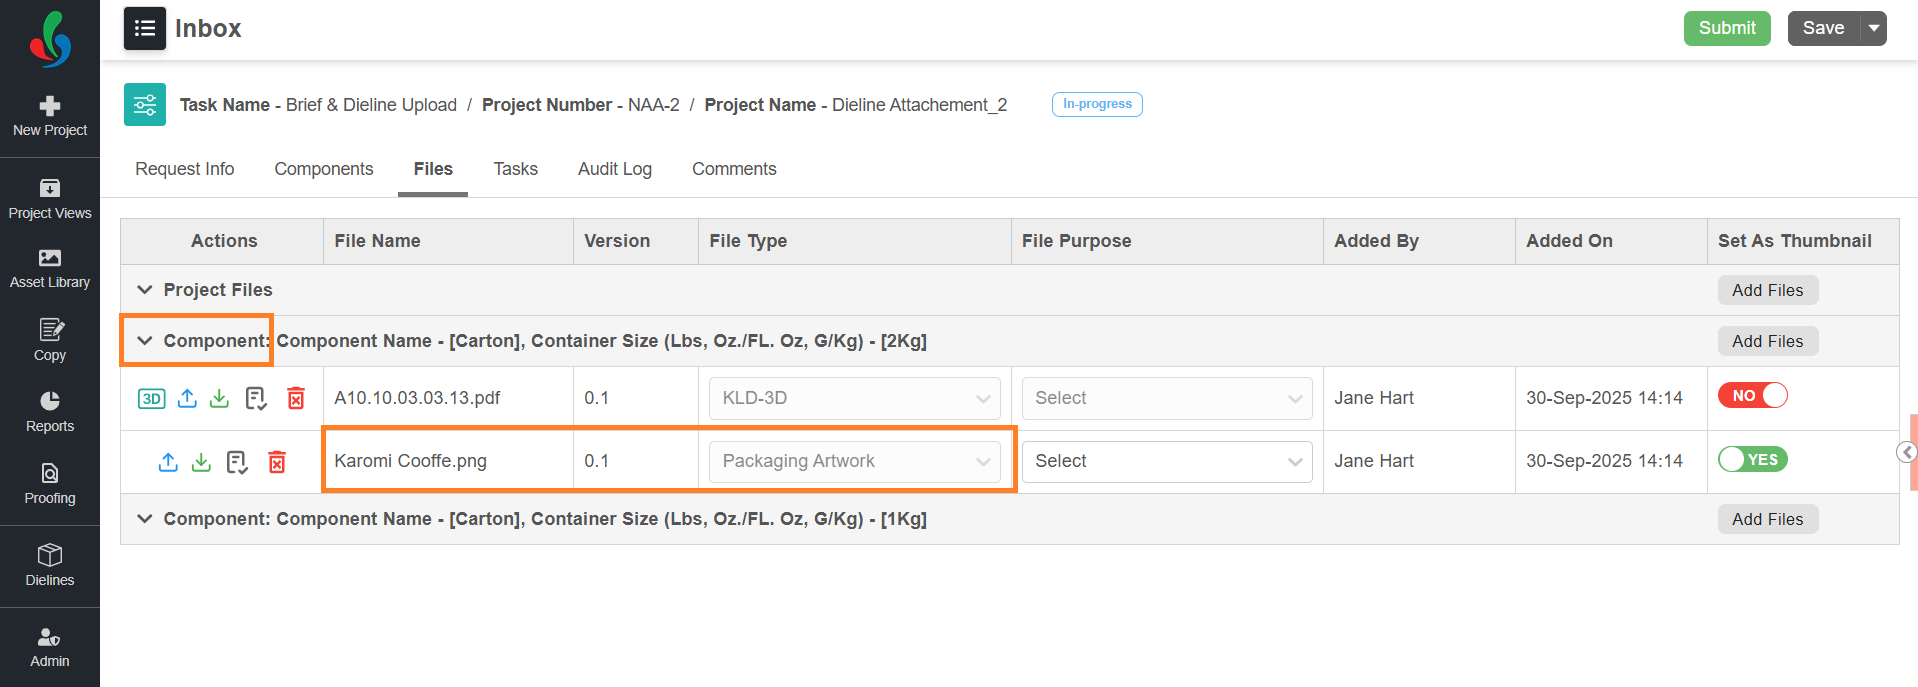
1. Go to the **Files** tab of the project.
2. Hover over the **Add Files** button next to the relevant component.
**Note:** A project must have at least one component to link a dieline.
3. Choose the source of the dieline: **From Dieline Library** or **From Asset Library**.
1. Linking from the Dieline Library
1. Select **From Dieline Library**.
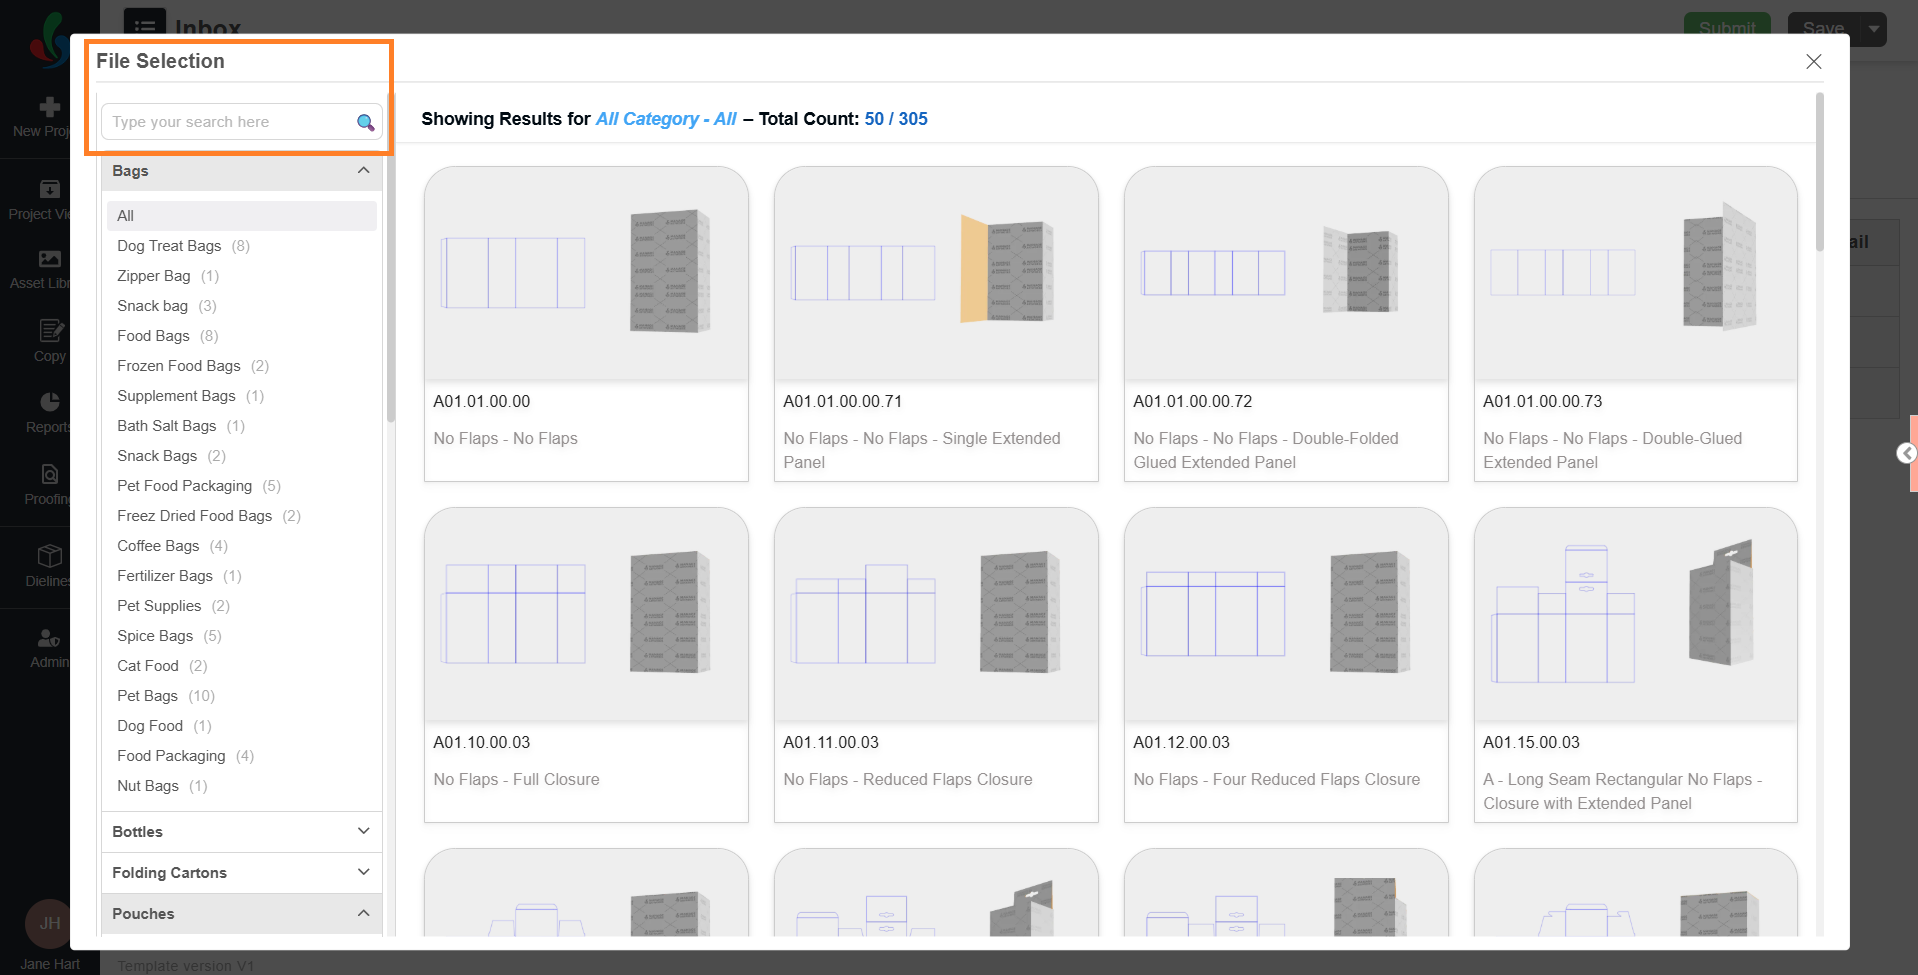
2. In the File Selection pop-up:
1. Browse through categories or use the search bar to locate a dieline template.
2. Select a dieline to open the customization interface.
3. In the customization screen:
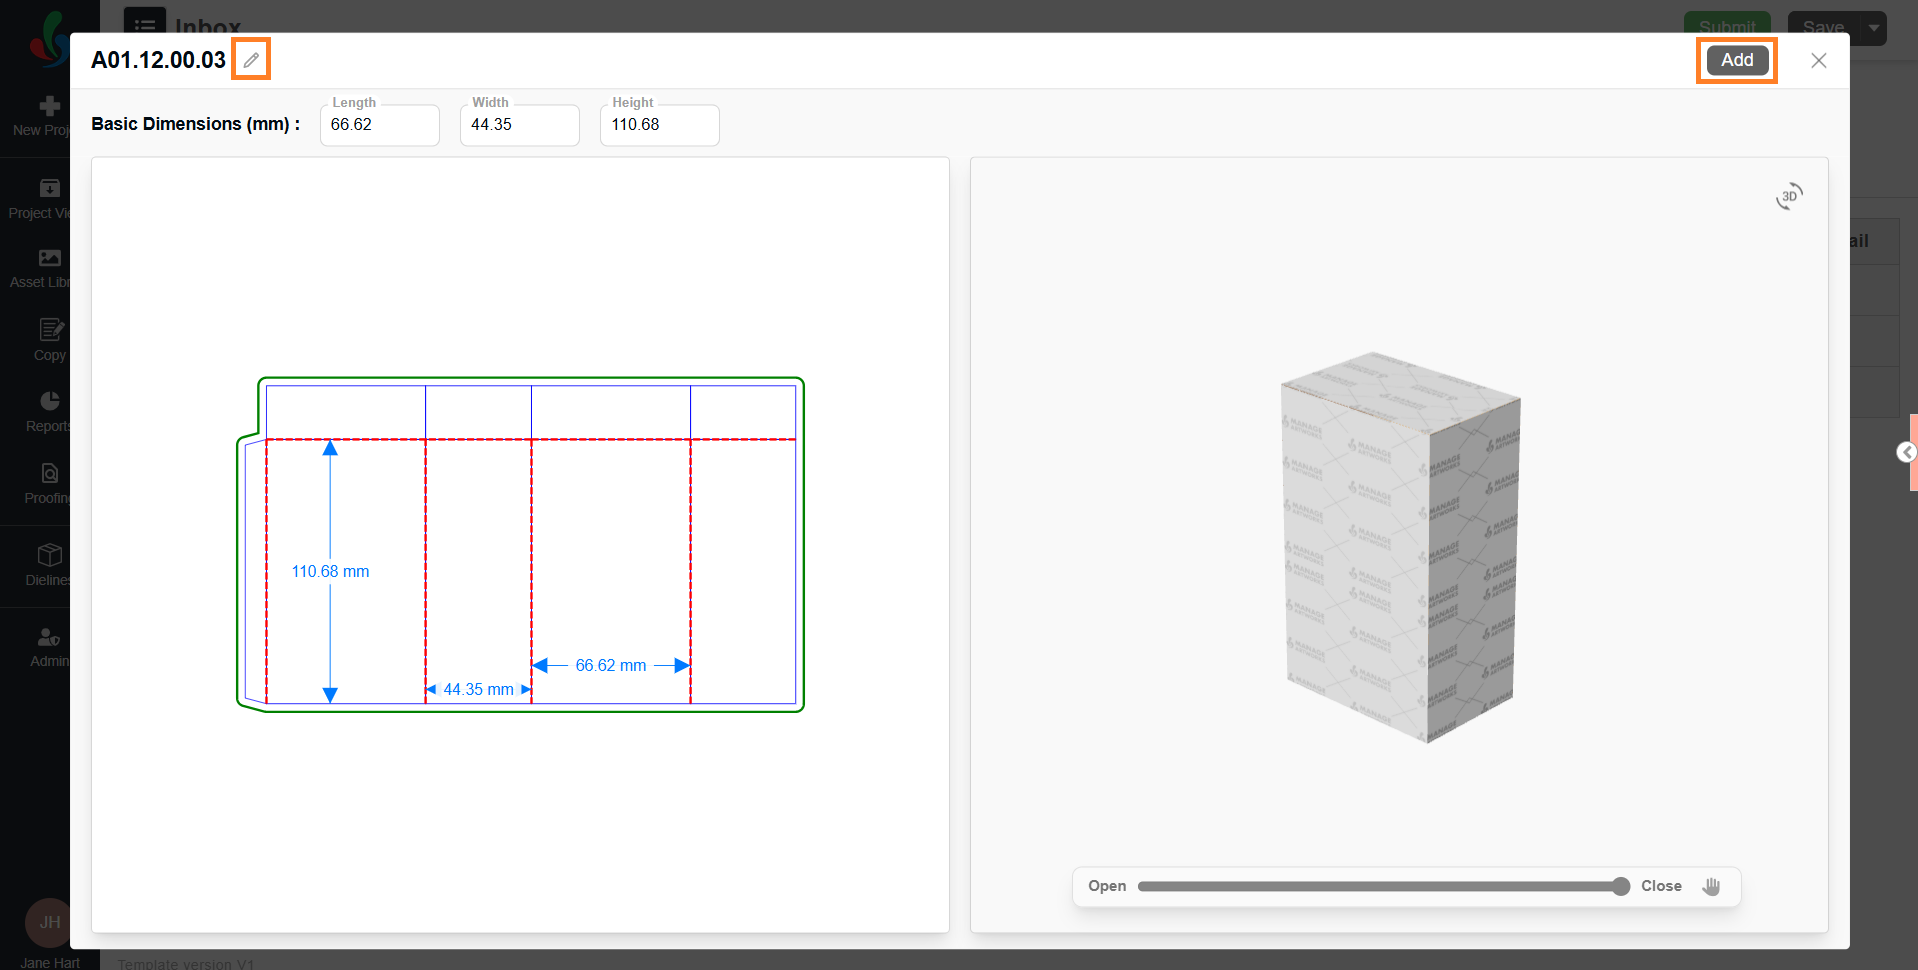
1. To rename the template, click the pencil (✏️) icon next to the current dieline title.
2. Enter the desired name in the input field and press **Enter** to confirm.
**Note:** The dieline will be added to the project with this custom name. If the dieline is later published to the Asset Library, the same custom name will be retained and reflected there.
3. Customization options differ based on the selected dieline type. For more details on customization, refer to the [Customization Options](https://help.manageartworks.com/en/article/dieline-and-3d-simulation#3.-customize-the-dimension-or-appearance).
4. Use the 3D preview and configuration tools to visualize and modify the dieline as desired.
5. Once customized, select **Add**.
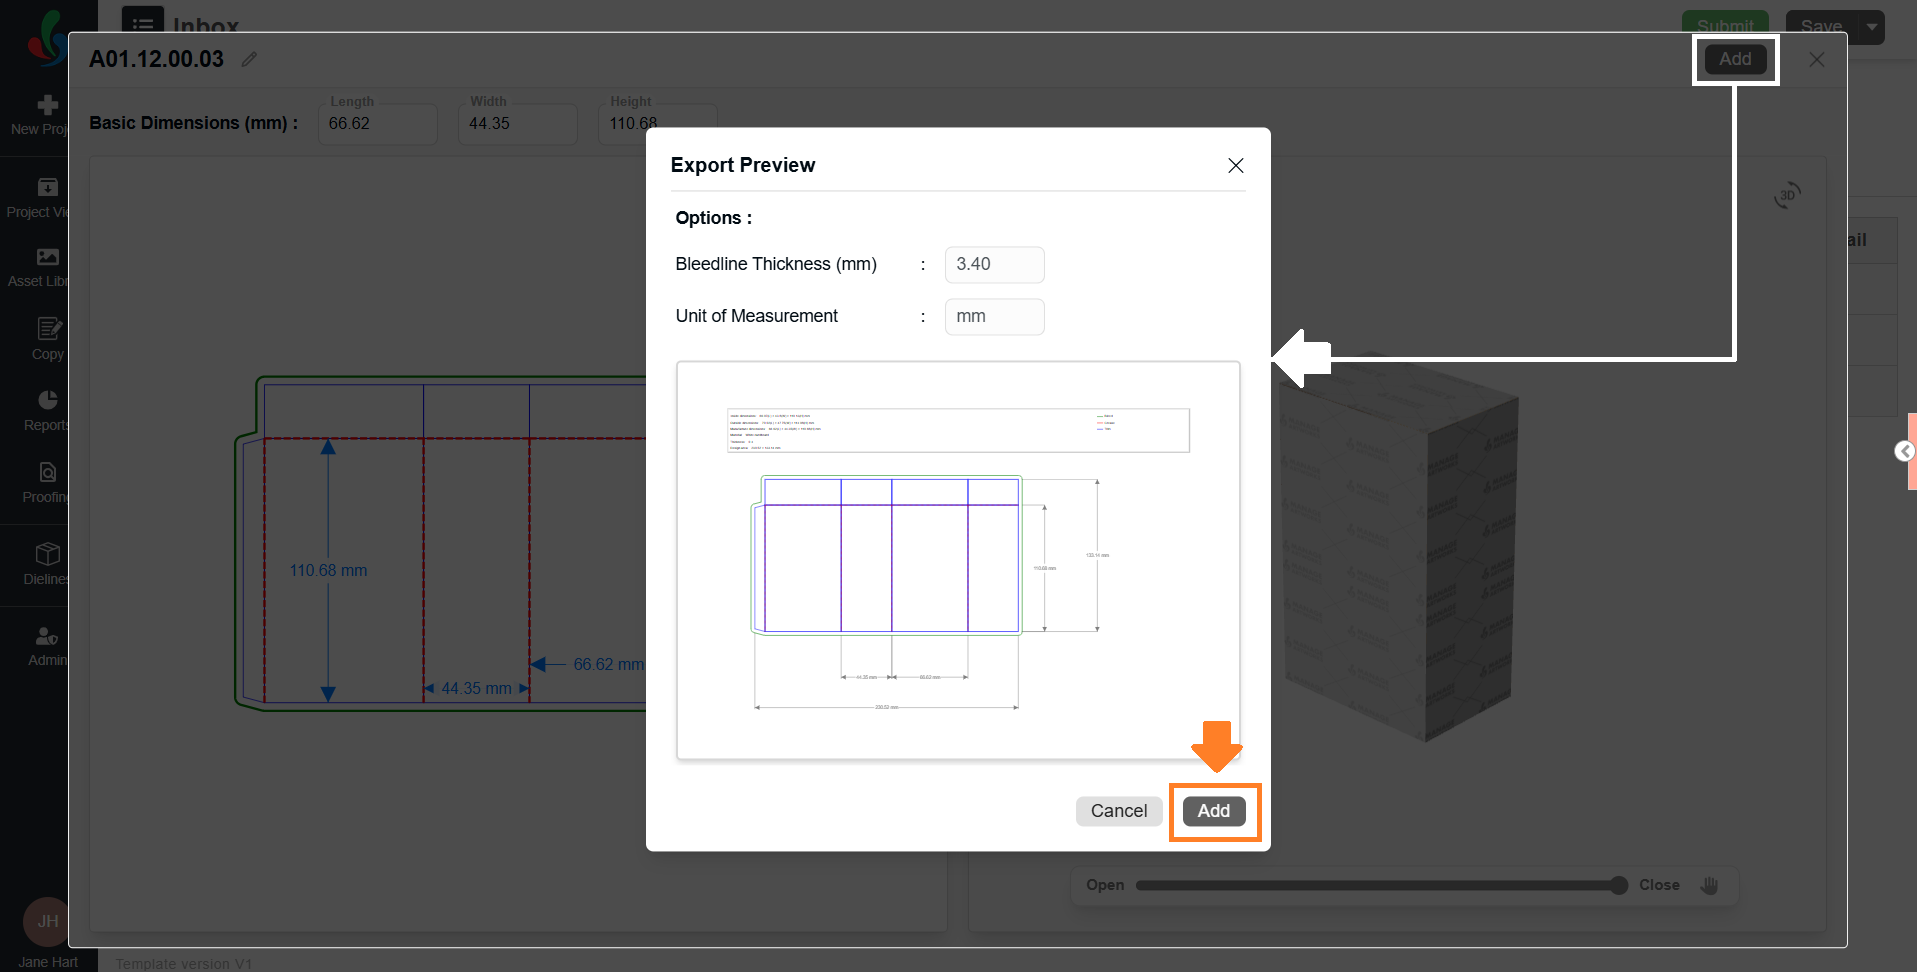
4. An **Add Preview** dialog will appear:
- **Bleed Measurement:** This value is pre-filled based on the Admin settings. You can modify it if required.
- **Measurement Scale (UOM):** Pulled from Admin settings; this field is read-only.
**Note:** To modify the default Bleed Measurement or Unit of Measurement (UOM), refer to [Dieline Parameter Configuration](https://help.manageartworks.com/en/article/dieline-parameter-configuration) in the Admin module.
5. Select **Add** to attach the customized dieline to the selected component.
**Note:** Only one dieline can be linked per component.
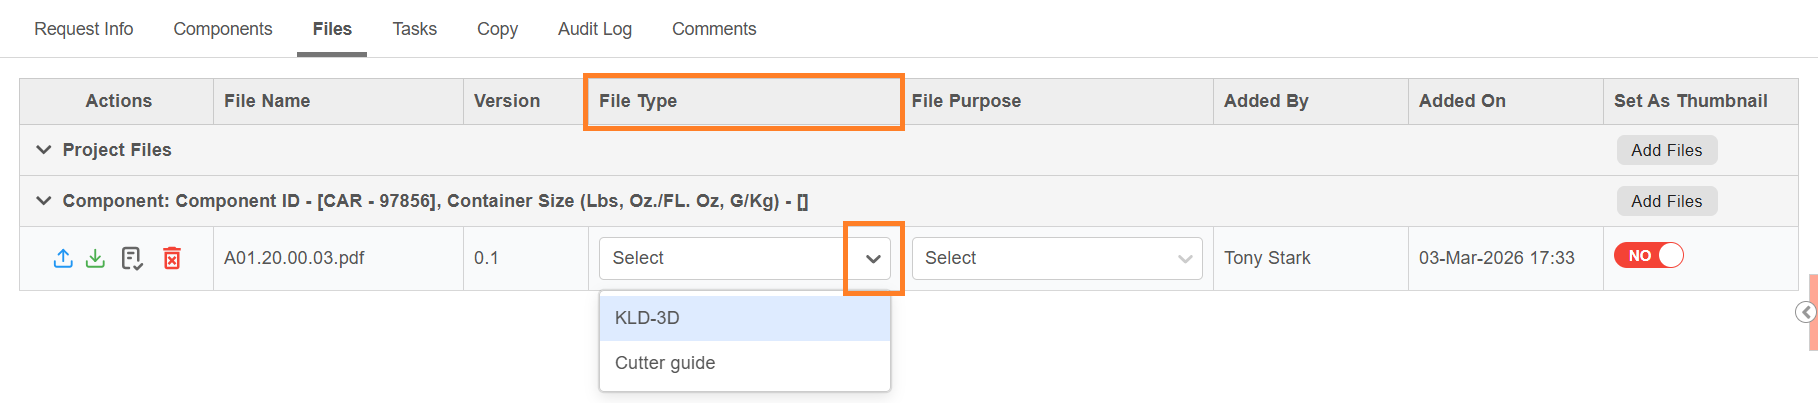
6. After attaching the dieline, select the **File Type** drop-down corresponding to the attached file and choose the required file type from the list.
7. The available file types are determined by the configuration in the Admin module. By default, only **KLD-3D** is set as an acceptable file type for dielines.
**Note:** To configure acceptable file or asset types for Dieline, refer to [Dieline Parameter Configuration](https://help.manageartworks.com/en/article/dieline-parameter-configuration) in the Admin module.
2. Link a Dieline from Asset Library
**Note:** Only **published** dielines from the Asset Library can be linked to a project. **Customization is not allowed** when using this method.
1. Select **From Asset Library** from the file source options.
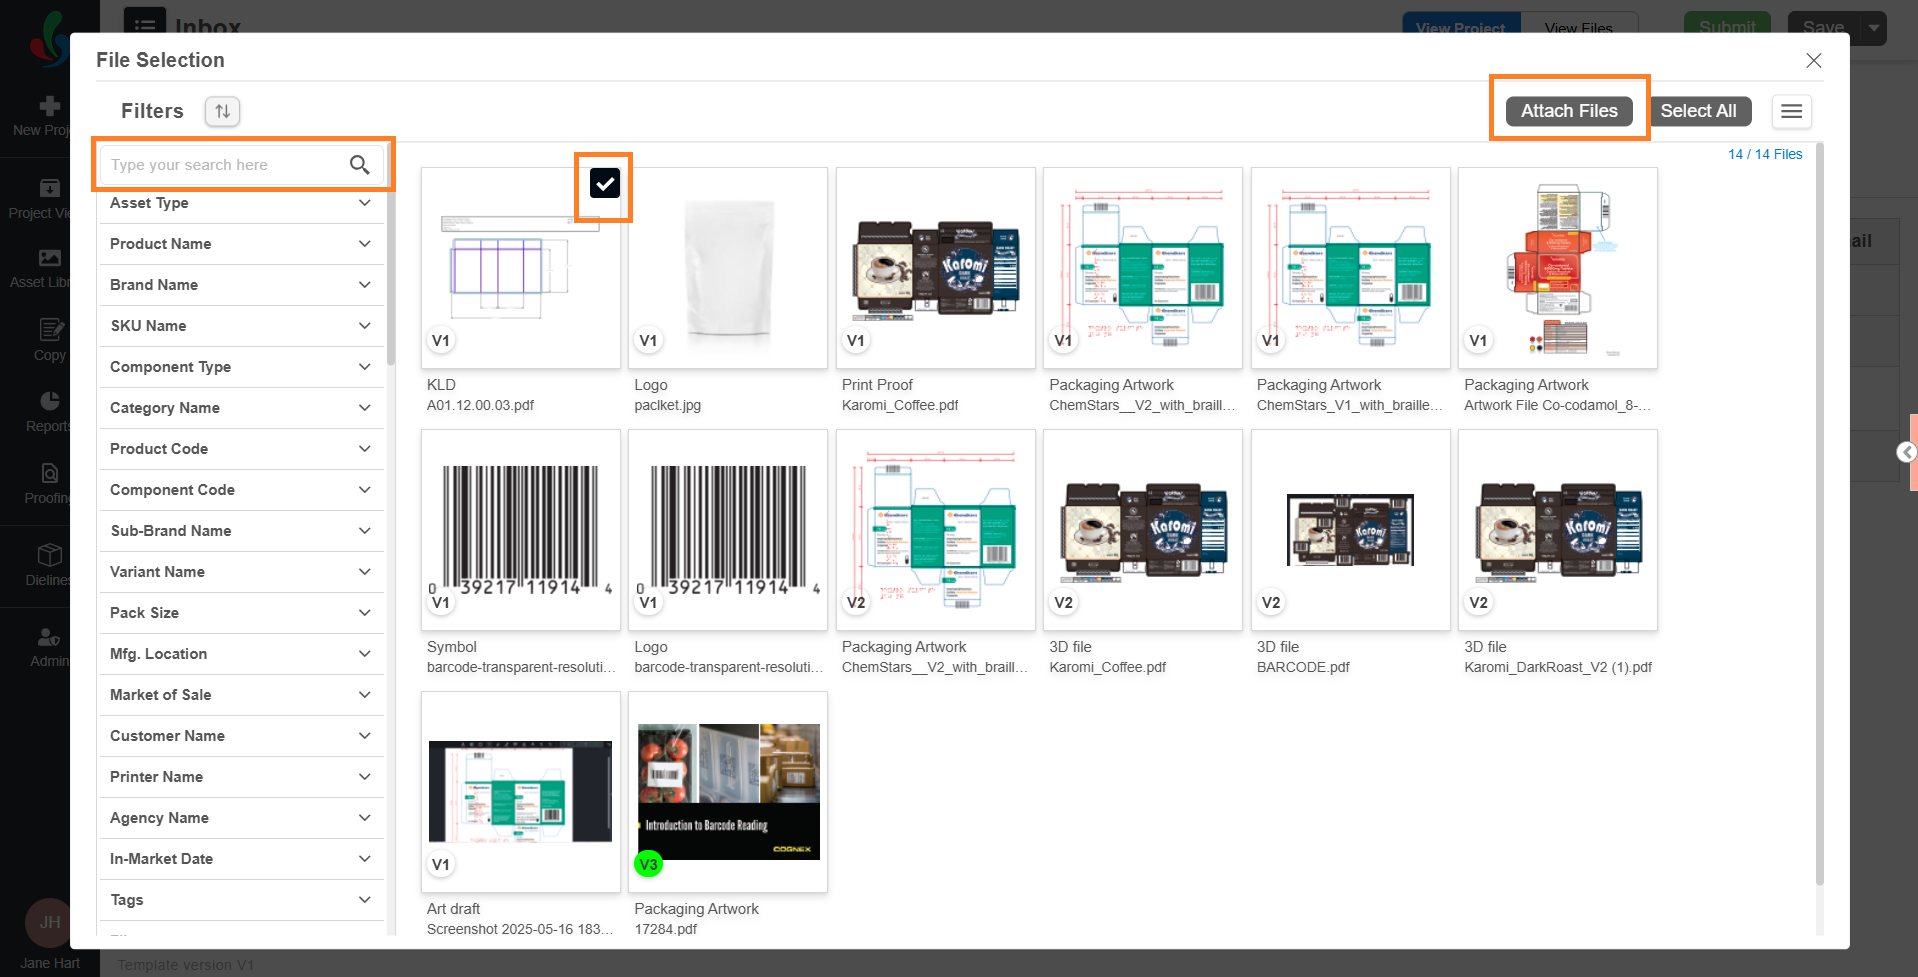
2. In the File Selection pop-up:
1. Browse through categories or use the search bar to locate the dieline file.
2. Select a **published dieline or KLD** to attach it to the selected component.
3. Select **Attach Files** to complete the linking.
**Note:** When a dieline is added from the Asset Library, its **file purpose** is automatically set to **Reference Only**.
## 03\. Attach Packaging Artwork to a Dieline-Linked Component
Once the dieline is ready, you can download it as a **PDF** and use it as the base for creating packaging artwork in external applications such as Adobe Illustrator or InDesign. (For instructions on downloading, see [Manage a Linked Dieline](https://help.manageartworks.com/en/article/dieline-workflow#download).)
When the artwork is ready, attach it to the same component as the dieline. This enables you to view and validate the packaging artwork in relation to the dieline.
|  | **Note:**
- Attaching packaging artwork immediately after linking a dieline is not mandatory. You can attach it at any point during the project, as long as it is done before completing the Publish task.
- Once artwork is attached, an [Overlay Check](https://help.manageartworks.com/en/article/dieline-workflow#04.-overlay-check) with the linked dieline is mandatory. Without completing this check, you cannot submit or proceed with the task. |
| --- | --- |
To attach the artwork to the component:
1. Navigate to the **Files** tab.
2. Hover over the **Add Files** button corresponding to the component.
3. Select the file(s) using one of the following method:
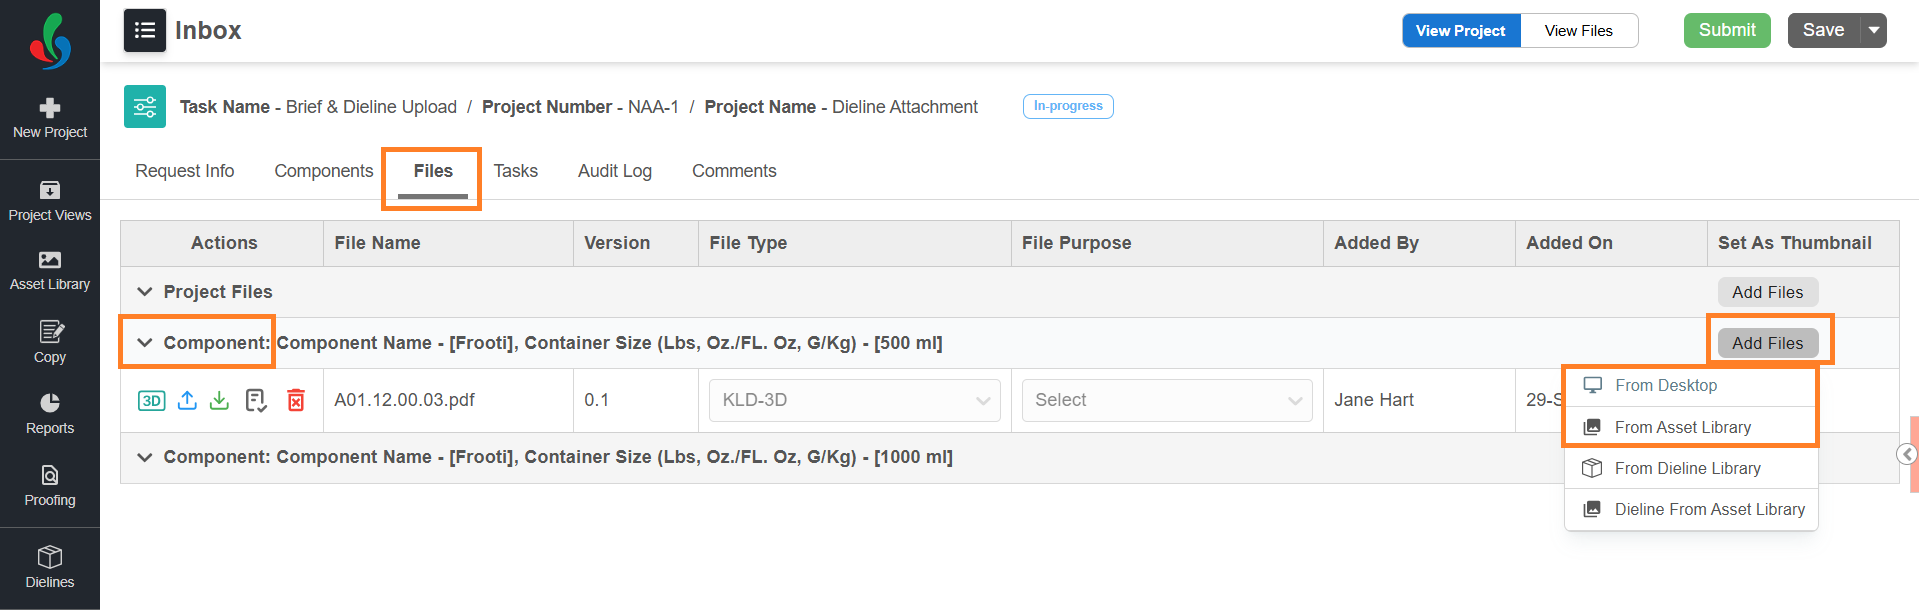
1. **From Desktop:** Allows you to browse and select files from your local system.
1. Select **From Desktop**.
2. Locate and select your artwork.
3. Select **Open**.
2. **Asset Library:** Select existing files from the Asset Library.
1. Select **From Asset Library.**
2. Choose the desired artwork from the File Selection window.
3. Select **Attach Files** to add it to your component.
4. After attaching the artwork file, select the **File Type** drop-down corresponding to the attached file and choose the required file type from the list.
**Note:** If the file is selected from the Asset Library, the File Type is auto-populated based on metadata and cannot be changed.
5. The available file types are determined by the configuration in the Admin module. By default, only **Packaging Artwork** is set as an acceptable file type for artworks.
**Note:** To configure acceptable file or asset types for Artwork, refer to [Dieline Parameter Configuration](https://help.manageartworks.com/en/article/dieline-parameter-configuration) in the Admin module.
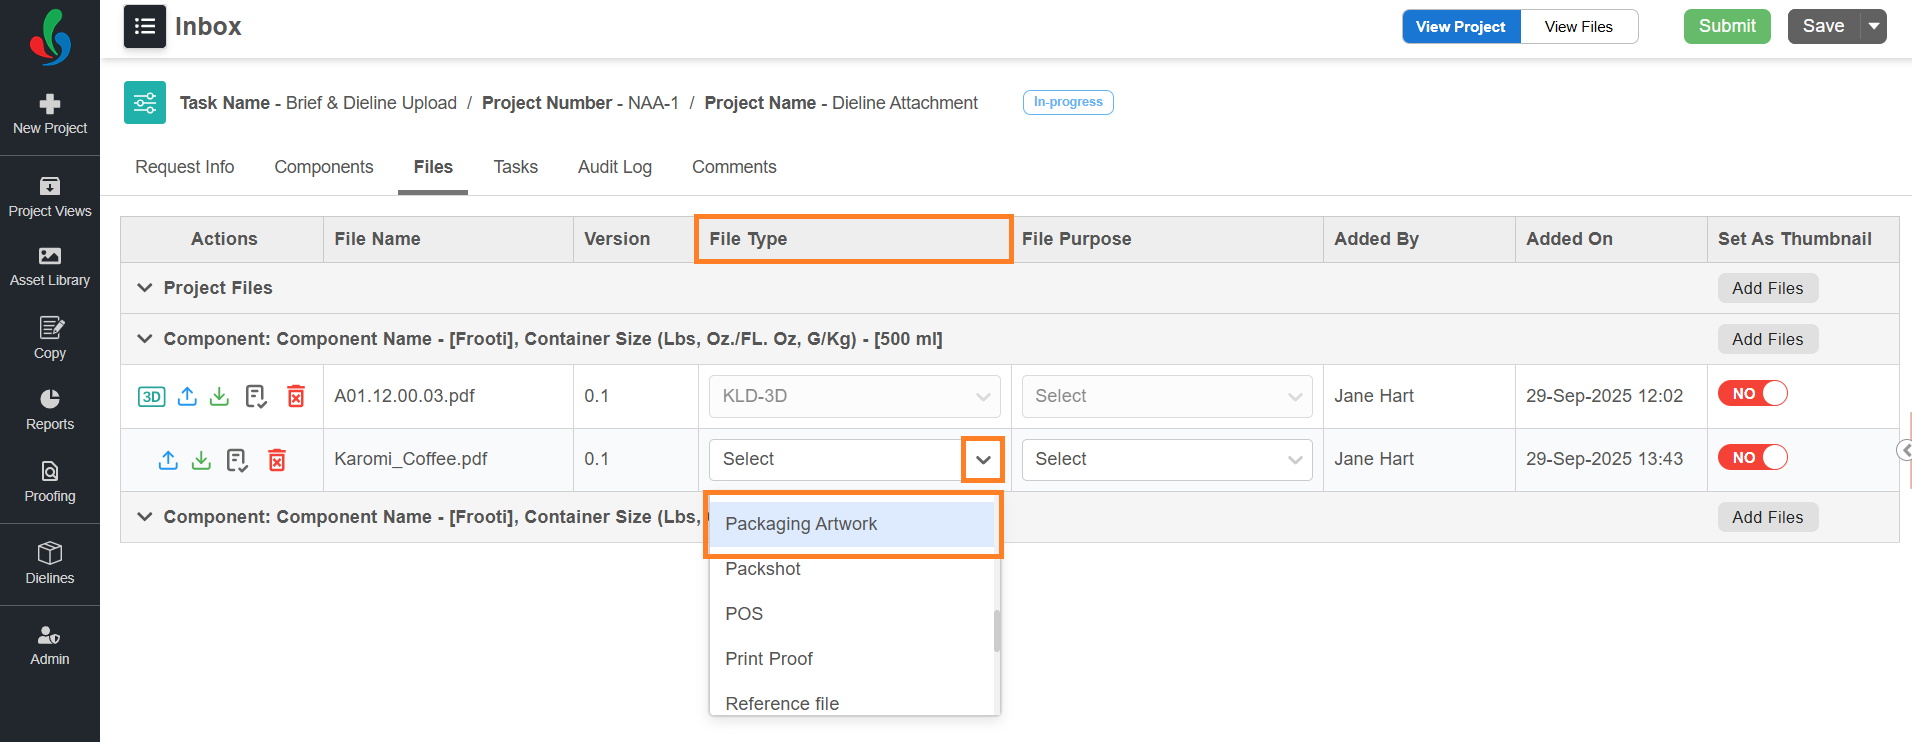
6. Once artwork is attached, proceed to **Overlay Check**.
## 04\. Overlay Check
Once artwork is attached to a dieline-linked component, you **cannot submit or proceed with the task until an Overlay Check is completed**. This ensures that the linked dieline and the attached artwork are properly aligned.
|  | Overlay Check is required only when **both** of the following are attached to the same component:
- A dieline file
- A packaging artwork file
The Overlay Check validation applies only to the file types that are configured as **Dieline** and **Artwork** in the [Dieline Parameter Configuration](https://help.manageartworks.com/en/article/dieline-parameter-configuration) section of the Admin module. |
| --- | --- |
|  | **Auto Crop** works only when the artwork is based on a ManageArtworks-generated dieline PDF with intact embedded metadata.
If the system detects that:
- The artwork is not based on a ManageArtworks-generated dieline, or
- The required metadata is missing
The following message is displayed:
**"Unsupported Dieline – Auto Crop may not work"**
In this case, Auto Crop will be disabled and you must use the **Mark Region** method.
For Auto Crop, it is recommended to retain the default dieline layer name as **“dieline”**. If the layer name is changed, Auto Crop will still work, but manual configuration is required. |
| --- | --- |
You can perform the Overlay Check using one of the following methods:
- **Auto Crop** (Recommended)
- **Mark Region** (Manual method)
### 1\. Perform Overlay Check Using Auto Crop
1. Go to the **Files** tab.
2. Select the artwork file attached to the dieline-linked component. The file opens in the Web Viewer.
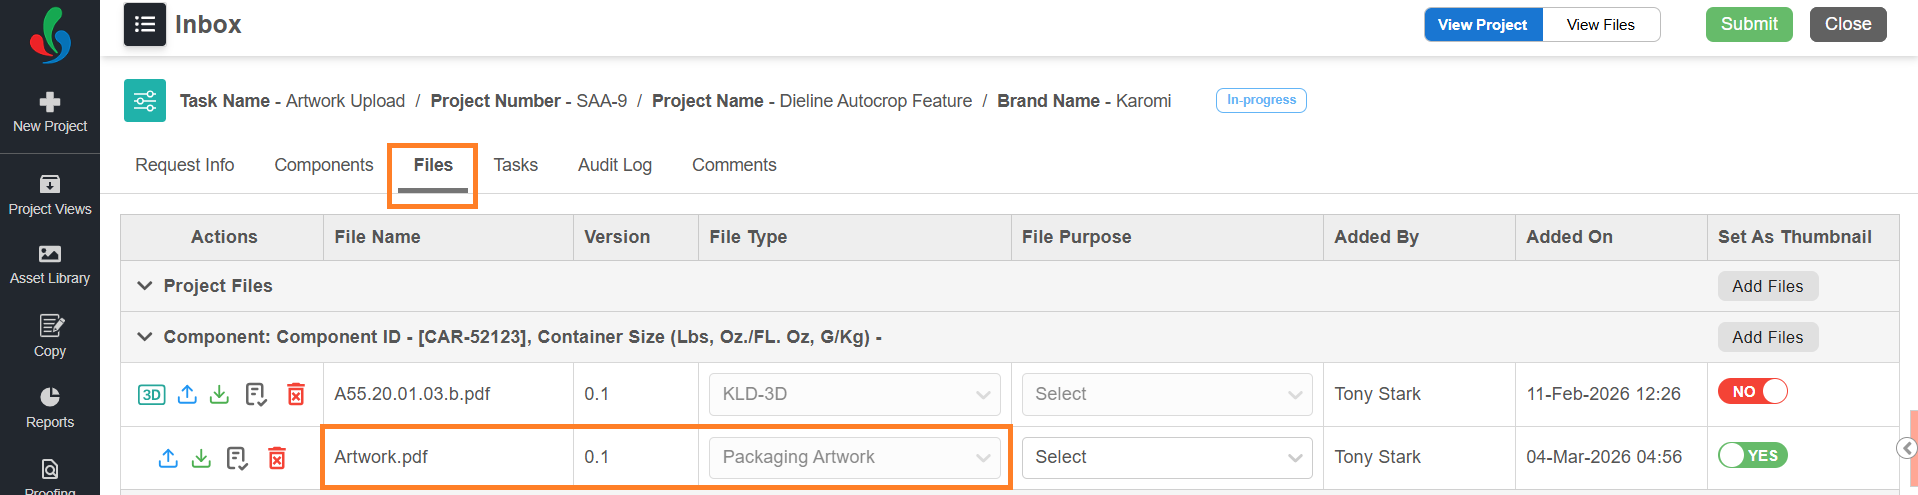
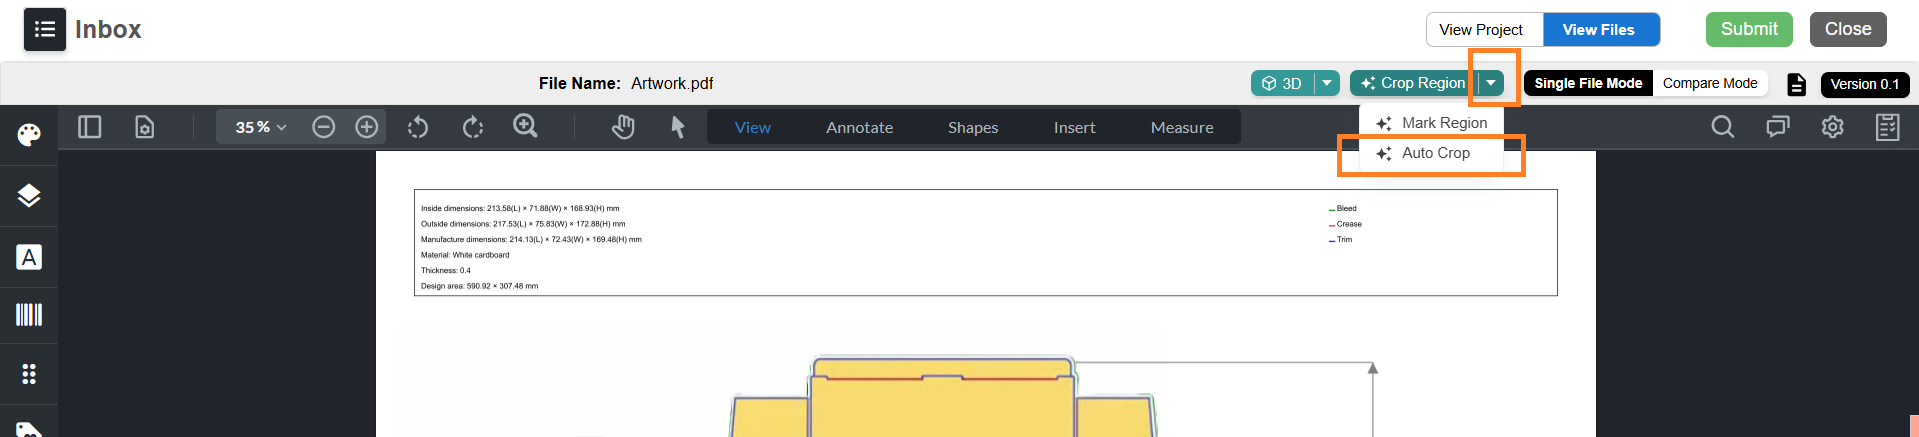
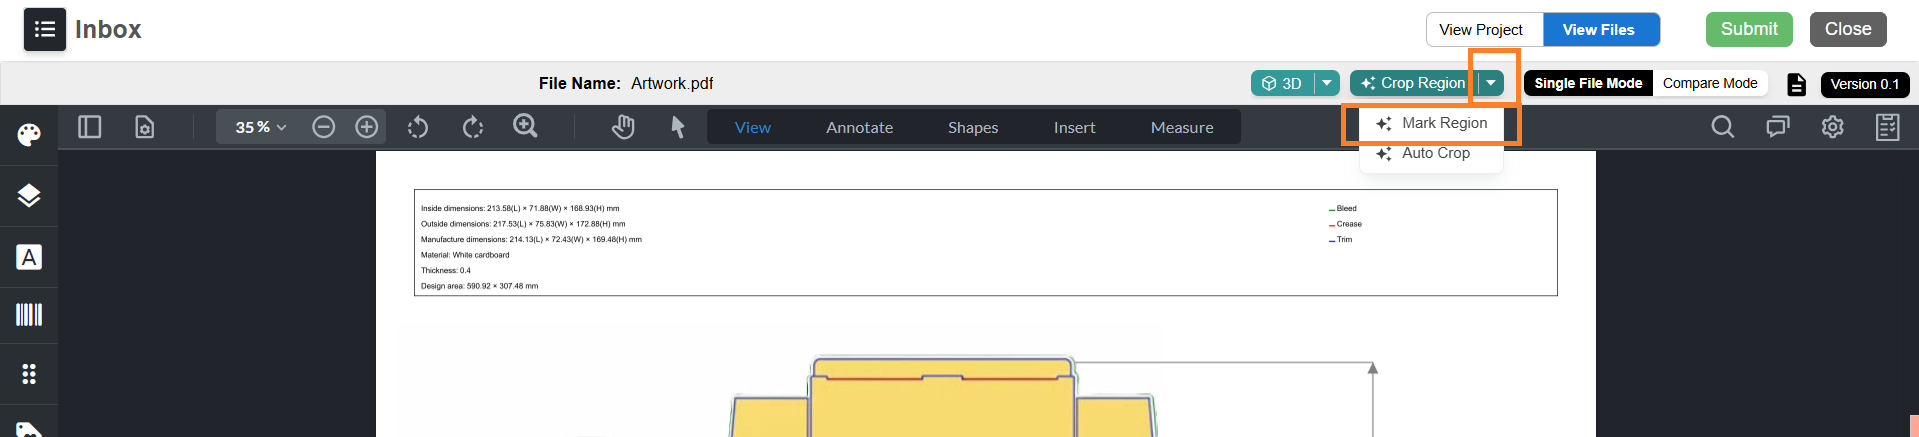
3. Select the **Crop Region** drop-down menu.
4. Select **Auto Crop**. The **Artwork Crop Settings** panel opens.
5. Auto Detection Behavior:
1. If the artwork is created using a ManageArtworks-generated dieline PDF and the embedded dieline metadata is intact:
1. Auto Crop settings are automatically loaded from the dieline metadata.
2. The following values are auto-selected:
- Target layer
- Dieline stroke color
- Dieline fill color
- Layers to remove (if applicable)
2. If the dieline layer name has been modified:
- Auto Crop will still works.
- You must manually configure the Auto Crop settings (target layer, stroke, fill, etc.). Refer to **Step f** (Configure Artwork Crop Settings).
3. If the artwork is based on a custom or third-party dieline, or if the ManageArtworks dieline metadata is missing:
- Auto Crop will not work.
- You must use the Mark Region option to perform Overlay check. Refer to [Perform Overlay Check Using Mark Region](https://help.manageartworks.com/en/article/dieline-workflow#2.-perform-overlay-check-using-mark-region).
6. **Configure Artwork Crop Settings**
The **Artwork Crop Settings** panel contains three sections:
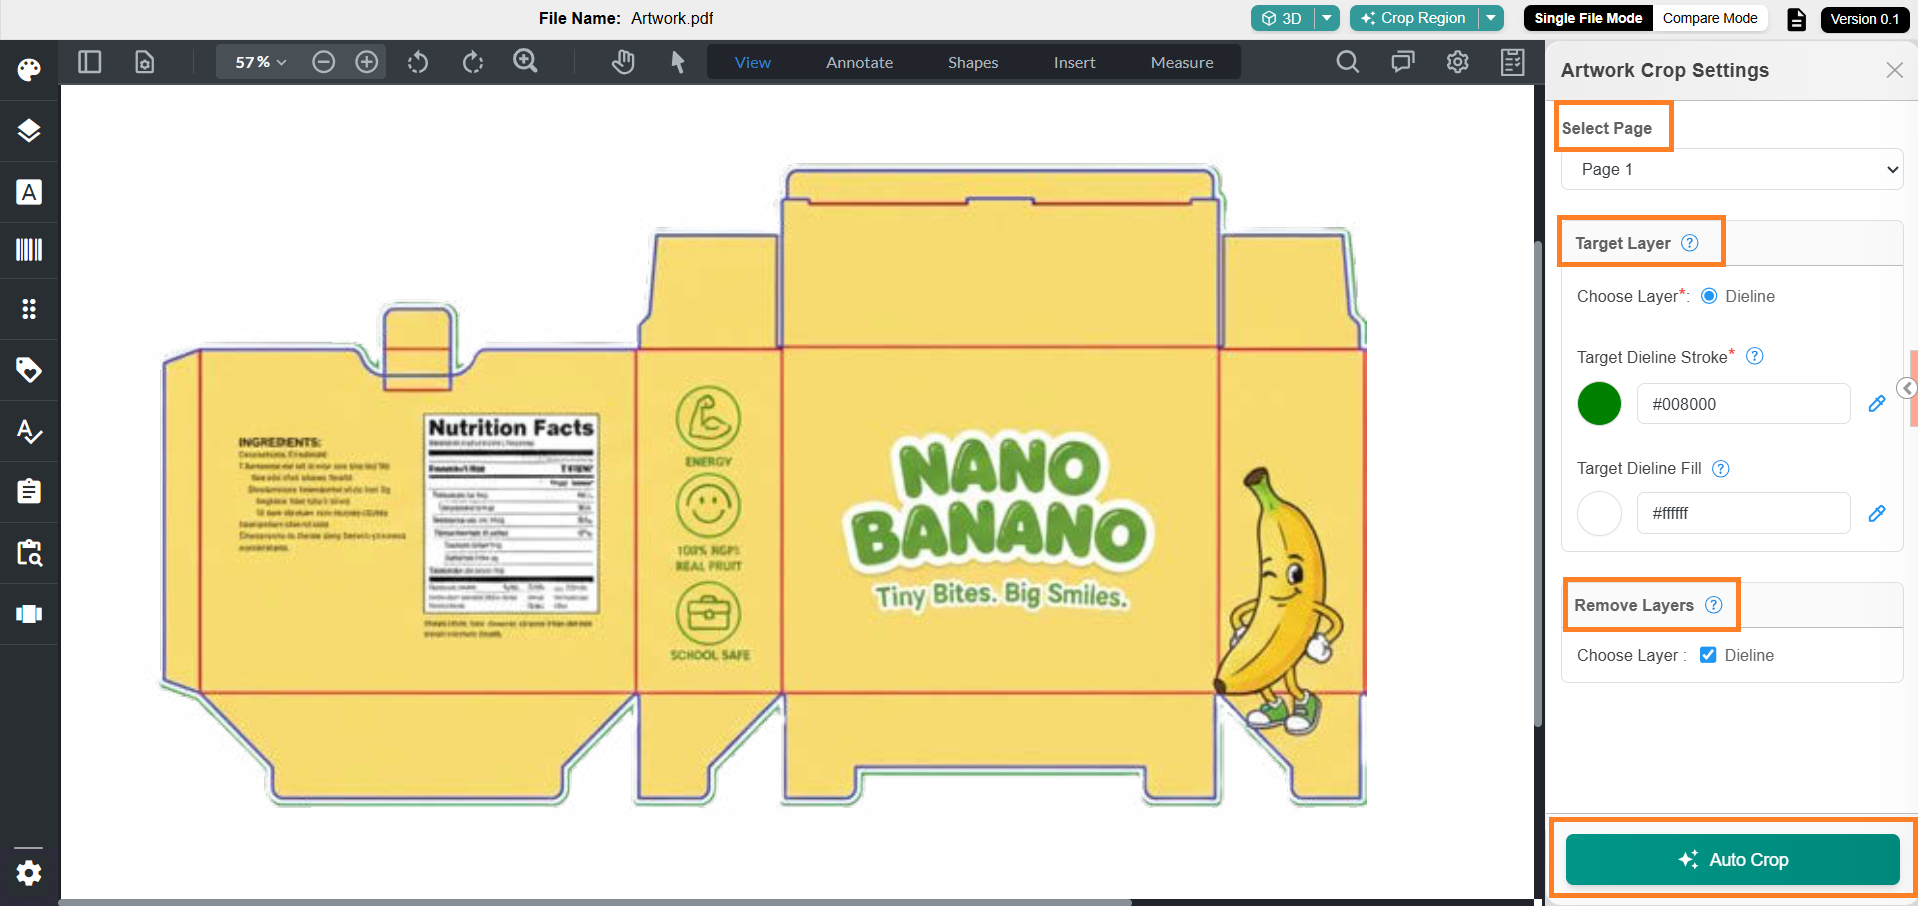
1. **Select Page**
Allows you to choose the page that contains the dieline to be cropped. For example, if the artwork file has 10 pages and the dieline is present on page 5, you can select Page 5 from the drop-down menu.
**Note:** When you select the dieline stroke, the corresponding page number is automatically selected by the system. Therefore, you do not need to manually choose the page.
2. **Target Layer**
Allows you to specify the layer containing the dieline. This section includes the following options:
1. **Choose Layer:** Lists all the layers associated with the artwork. Select the layer where the dieline is available.
**Note:** If the artwork has only one layer, only that layer will be available for selection. Select it. If the artwork does not contain any layers, no layers will be listed for selection.
2. **Target Dieline Stroke:** Enables you to select the stroke color of the dieline. This helps the system identify and crop the dieline accurately. You can either enter the hex code of the stroke color or use the color picker tool. You can select either the outer layer (Bleed Line) or the inner layer (Trim Line) of the dieline.
- If you select the outer layer (Bleed Line), you must also select the fill color when the dieline is system-generated.
- If the dieline is manually created or customized, selecting the fill depends on the creative setup — it is required only if the fill exists in the dieline layer.
**Note:** When using the color picker, zoom in closely to the dieline stroke for accurate selection.
3. **Target Dieline Fill:** Allows you to specify the dieline fill color. Similar to the stroke option, you can enter the hex code or use the color picker tool. If you have selected the outer Bleed Line from a system-generated dieline, you must select the fill color (typically white) for Auto Crop to function correctly.
- All system-generated dieline bleed lines contain a fill layer; without selecting this fill, the Auto Crop process will not execute properly.
- If you have selected the inner Trim Line, or if the bleed line does not have a fill, selecting a fill color is not required.
3. **Remove Layers**
Allows you to remove unwanted layers from the cropping process. For example, you can exclude non-artwork layers such as dieline, measurement, or annotation layers, keeping only the artwork layer for cropping.
**Note:** If the artwork has only one layer, that layer will be available for selection — however, it should not be selected for removal. If the artwork does not contain any layers, no layers will be listed for selection.
7. After configuring the settings (if required), select **Auto Crop**.
8. The system crops the dieline region and opens the cropped area in the **Upload & Design** window.
9. If required, adjust the overlay position using the bounding box controls.
10. The Overlay Check is completed once the artwork is successfully overlaid on the dieline.
11. You can now either proceed with task submission or explore the enhanced features available in the Web Viewer for artworks linked to a dieline. To explore the features, refer to [05\. Enhanced Web Viewer (Dieline + Artwork Attached)](https://help.manageartworks.com/en/article/dieline-workflow#05.-enhanced-web-viewer-(dieline-+-artwork-attached)) step. If not required, you can skip this step and proceed to [06\. Manage Linked Dieline or Packaging Artwork.](https://help.manageartworks.com/en/article/dieline-workflow#06.-manage-linked-dieline-or-packaging-artwork)
### 2\. Perform Overlay Check Using Mark Region
1. Go to the **Files** tab.
2. Select the artwork file attached to the dieline-linked component. The file opens in the Web Viewer.
3. Select the **Crop Region** drop-down menu.
4. Select **Mark Region**.
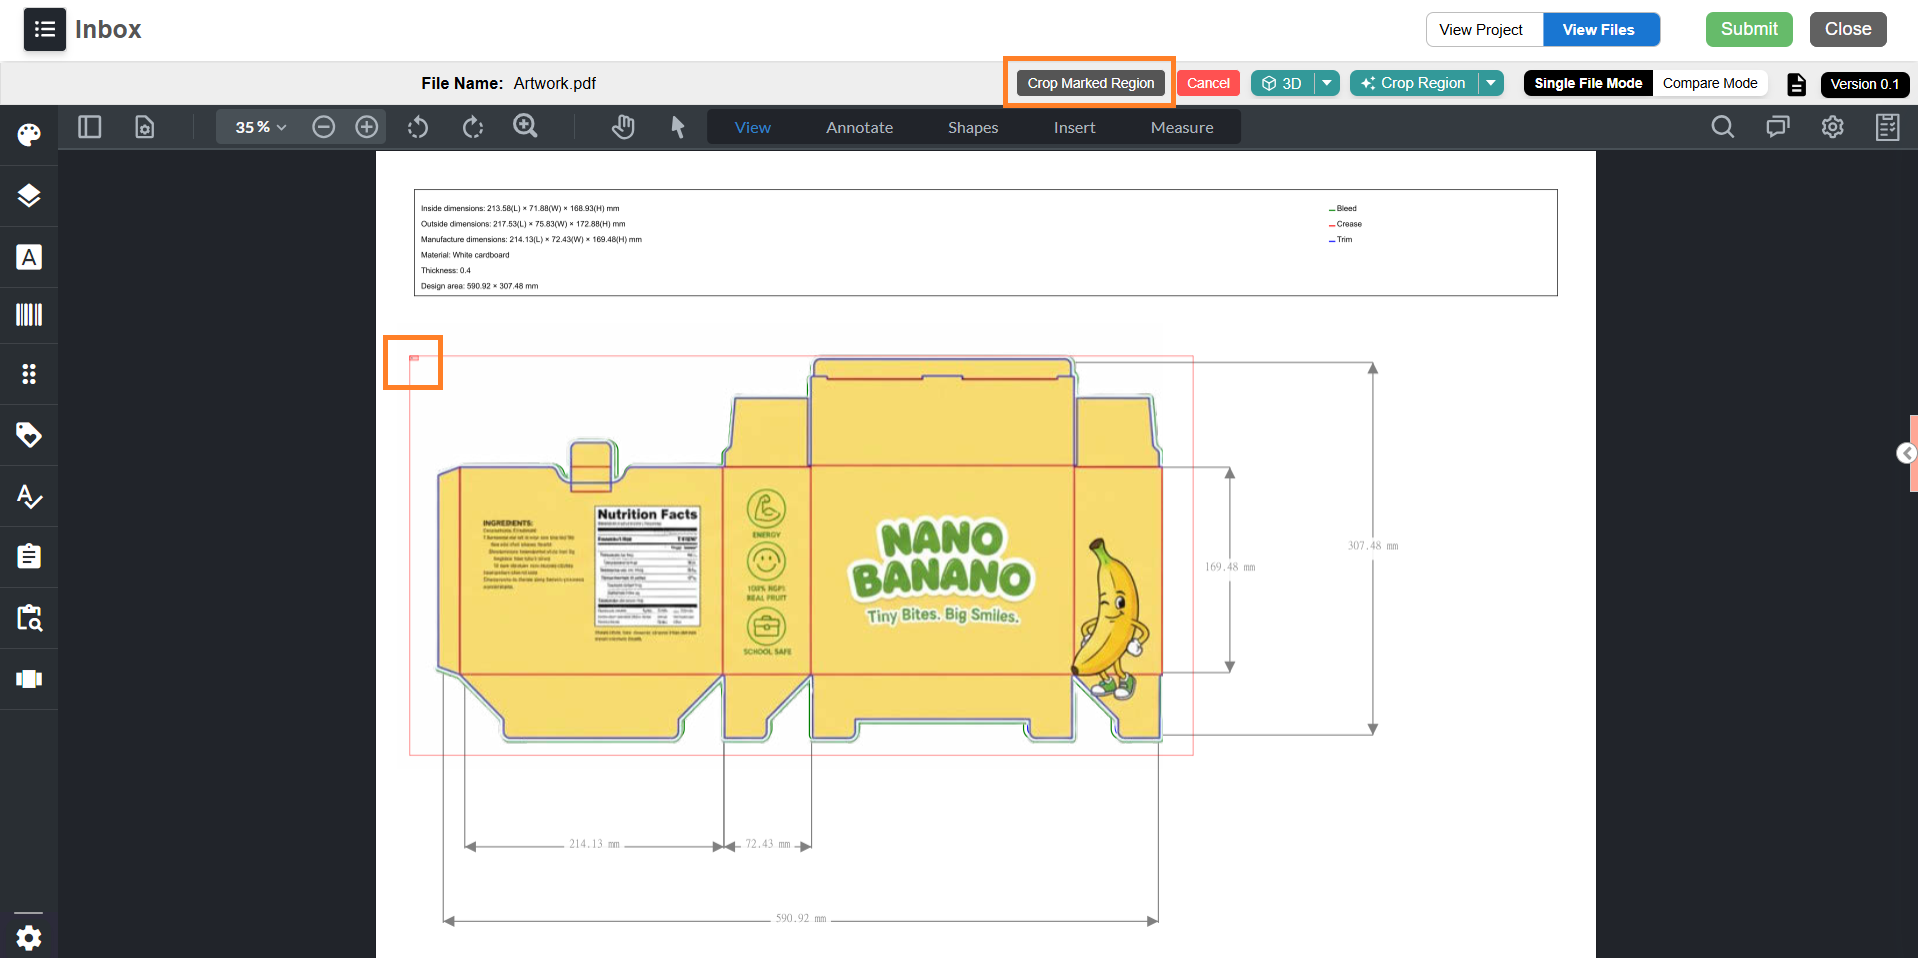
5. Draw a selection over the area of the artwork you want to overlay.
**Note:** Typically, users mark the entire artwork area for overlay. However, the system allows marking any specific region.
6. Select **Crop Marked Region**.
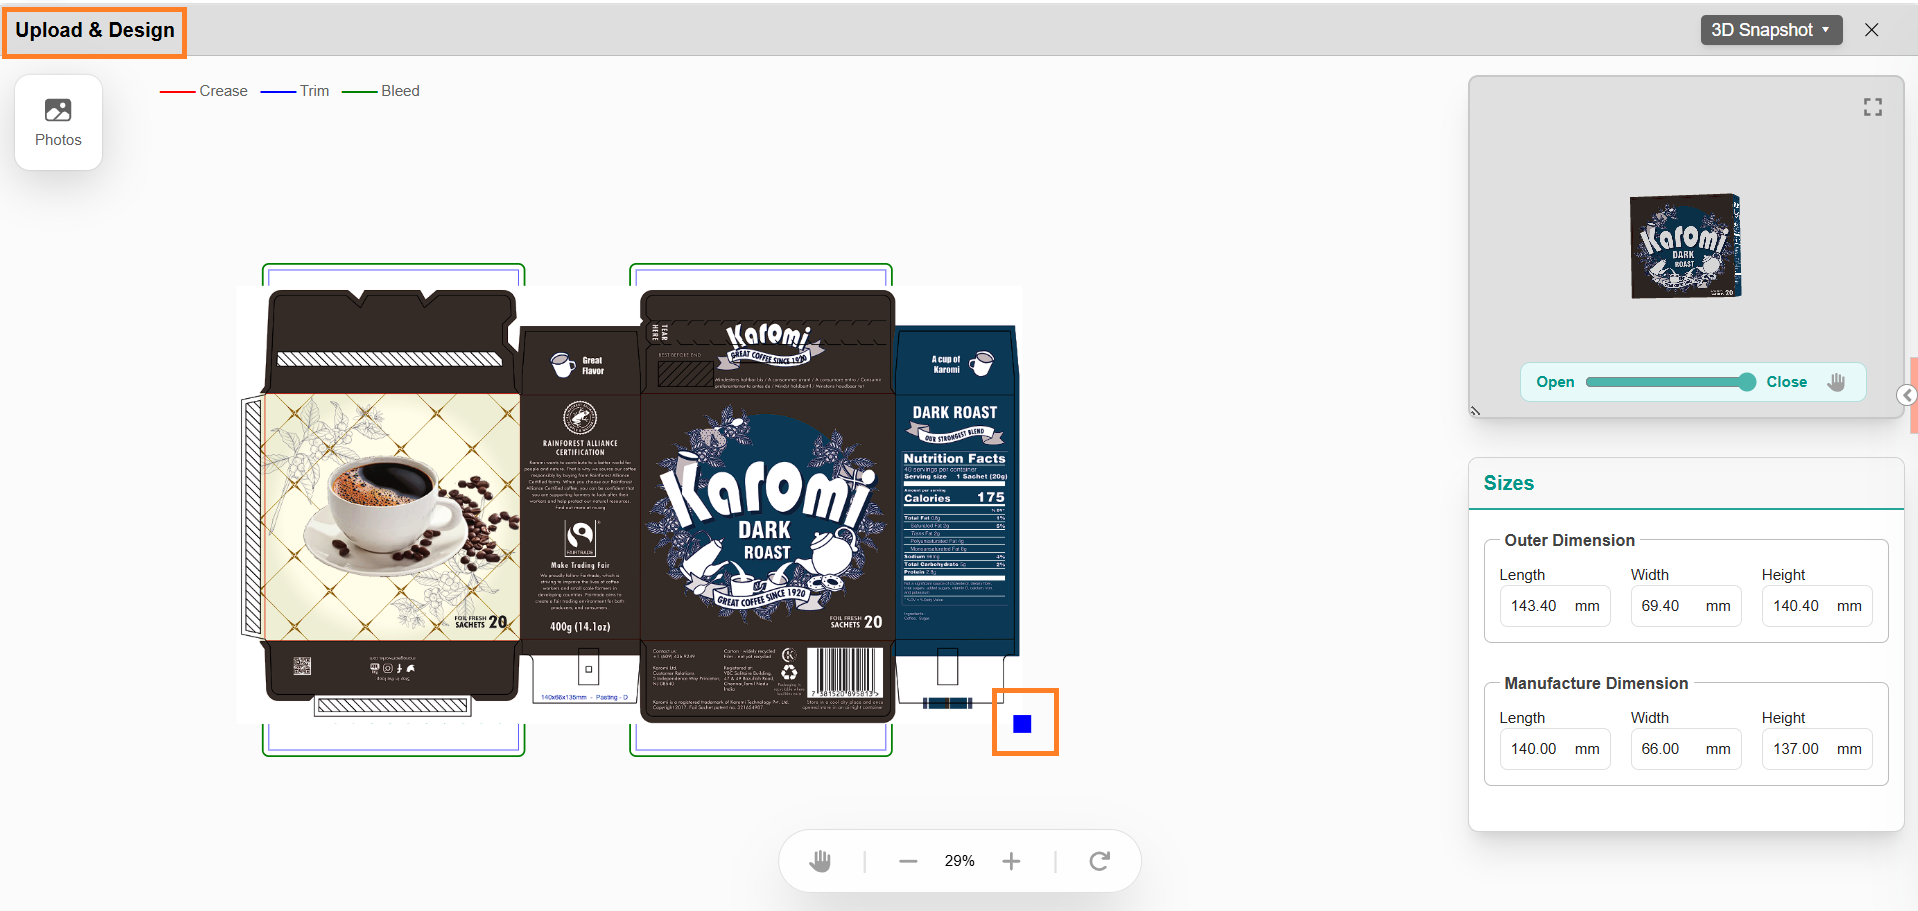
7. The selected area opens in the **Upload & Design** window overlaid on the dieline.
8. Adjust the size and position of the overlay using the bounding box controls.
9. Once the cropped region overlaid on the dieline, the validation is considered done.
10. You can now either proceed with task submission or explore the enhanced features available in the Web Viewer for artworks linked to a dieline. To explore the features, refer to [05\. Enhanced Web Viewer (Dieline + Artwork Attached)](https://help.manageartworks.com/en/article/dieline-workflow#05.-enhanced-web-viewer-(dieline-+-artwork-attached)) step. If not required, you can skip this step and proceed to [06\. Manage Linked Dieline or Packaging Artwork.](https://help.manageartworks.com/en/article/dieline-workflow#06.-manage-linked-dieline-or-packaging-artwork)
## 05\. Enhanced Web Viewer (Dieline + Artwork Attached)
When a packaging artwork is attached to a dieline-linked component, selecting the file opens it in the **Web Viewer** with enhanced capabilities.
The following features are available:
- **Mark Region** – Manually crop and extract a specific area of the artwork for overlay or simulation.
- **Auto Crop** – Automatically detect and crop the artwork based on the linked dieline.
- **3D View** – View the artwork applied to the 3D structure with an interactive open/close slider.
- **3D Simulation** – Open the Upload & Design window to customize and preview the dieline in 3D.
|  | **Note:** This is an optional step. You can explore these features for better visualization or skip this step and proceed with managing the linked dieline, artwork, or moving to the publish stage.
The enhanced features are available only when you open a file type that is configured in the [Dieline Parameter Configuration](https://help.manageartworks.com/en/article/dieline-parameter-configuration) section of the Admin module. |
| --- | --- |
### Mark Region Functionality
The **Mark Region** feature allows you to select specific areas of the artwork and overlay them on the dieline.
1. In the Web Viewer, select the **Crop Region** drop-down menu.
2. Select **Mark Region**.

3. Draw a selection over the area of the artwork you want to overlay.
4. Select **Crop Marked Region**.

5. The cropped area opens in the **Upload & Design** window, overlaid on the dieline.
6. Resize or reposition the overlay using the bounding box.
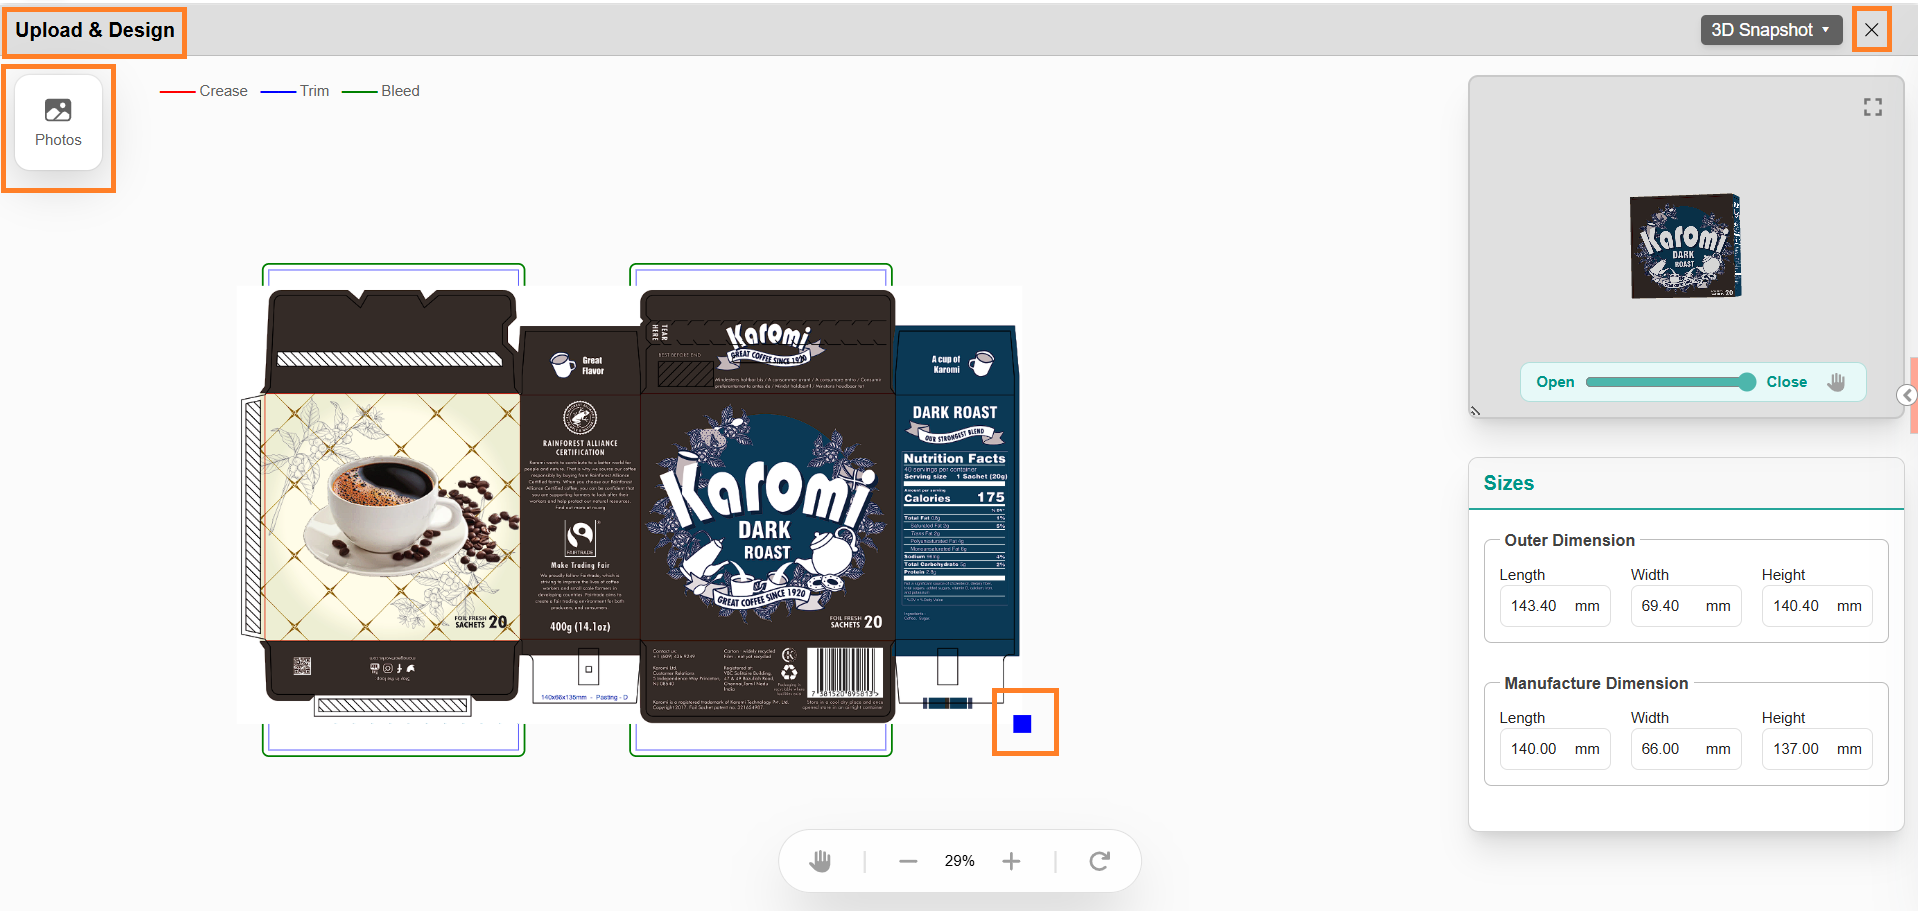
7. To overlay more regions:
1. Close the **Upload & Design** window.
2. Repeat steps 1–5.
8. To remove an overlaid image, select the ***Photos*** icon and clear the checkbox next to the image.
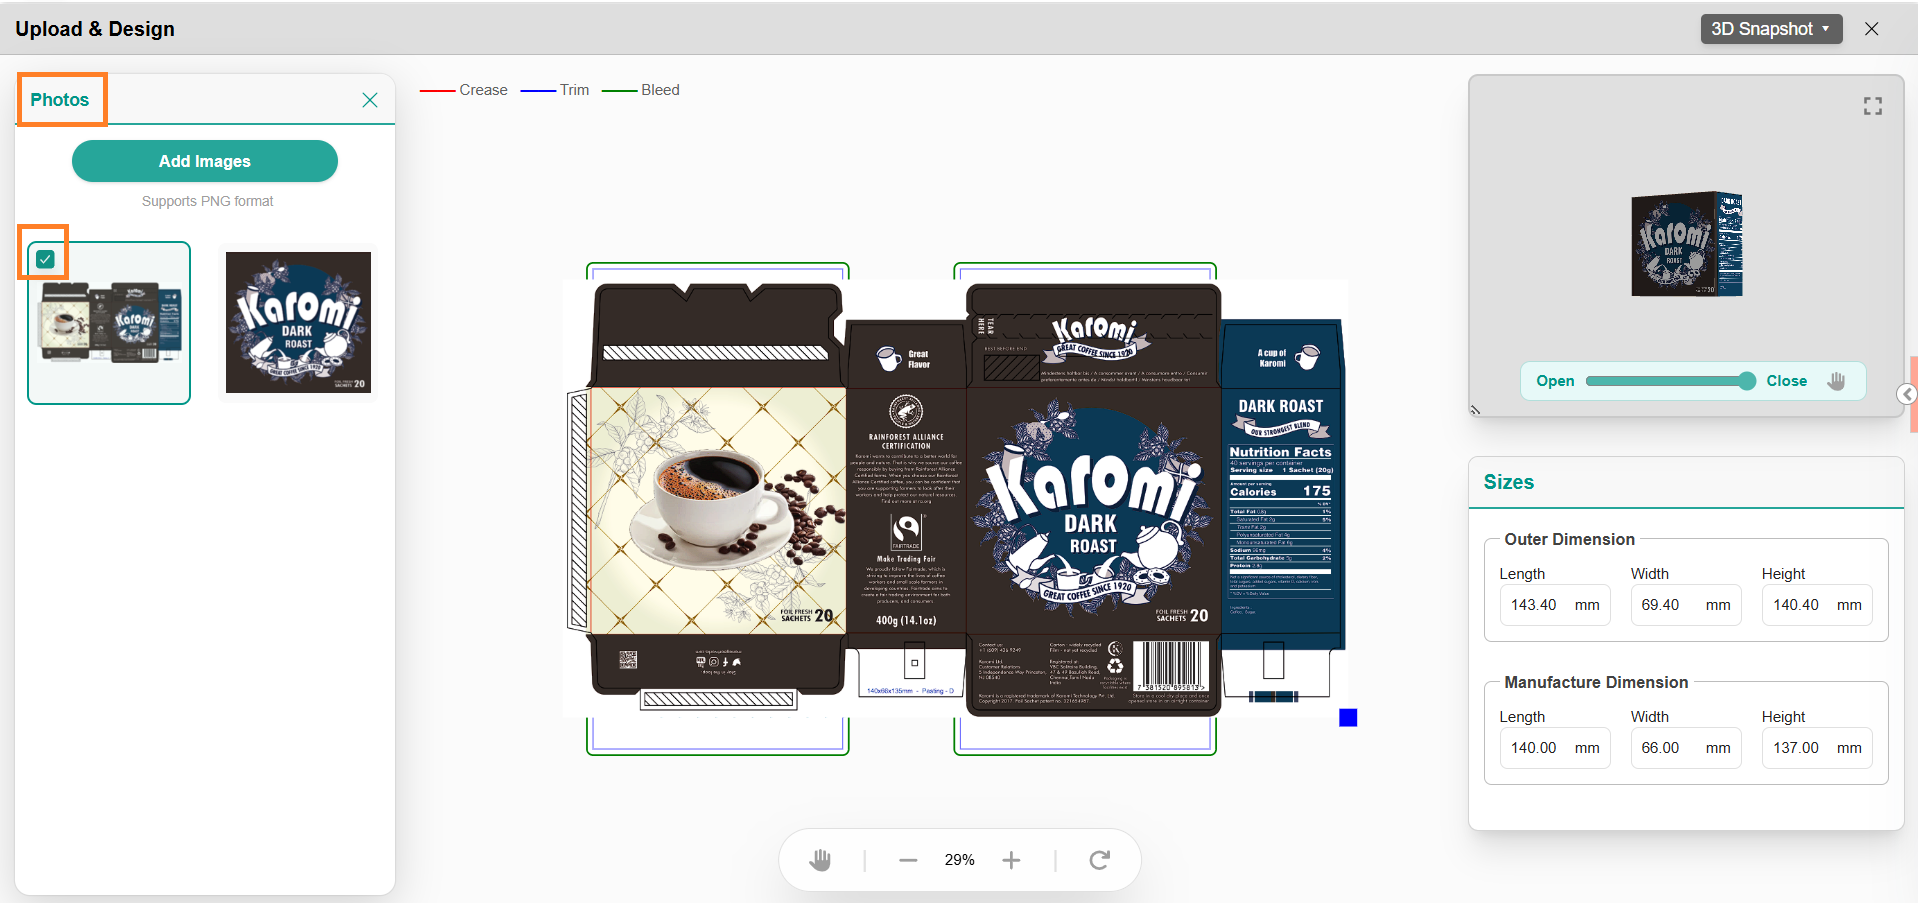
### Upload & Design Window
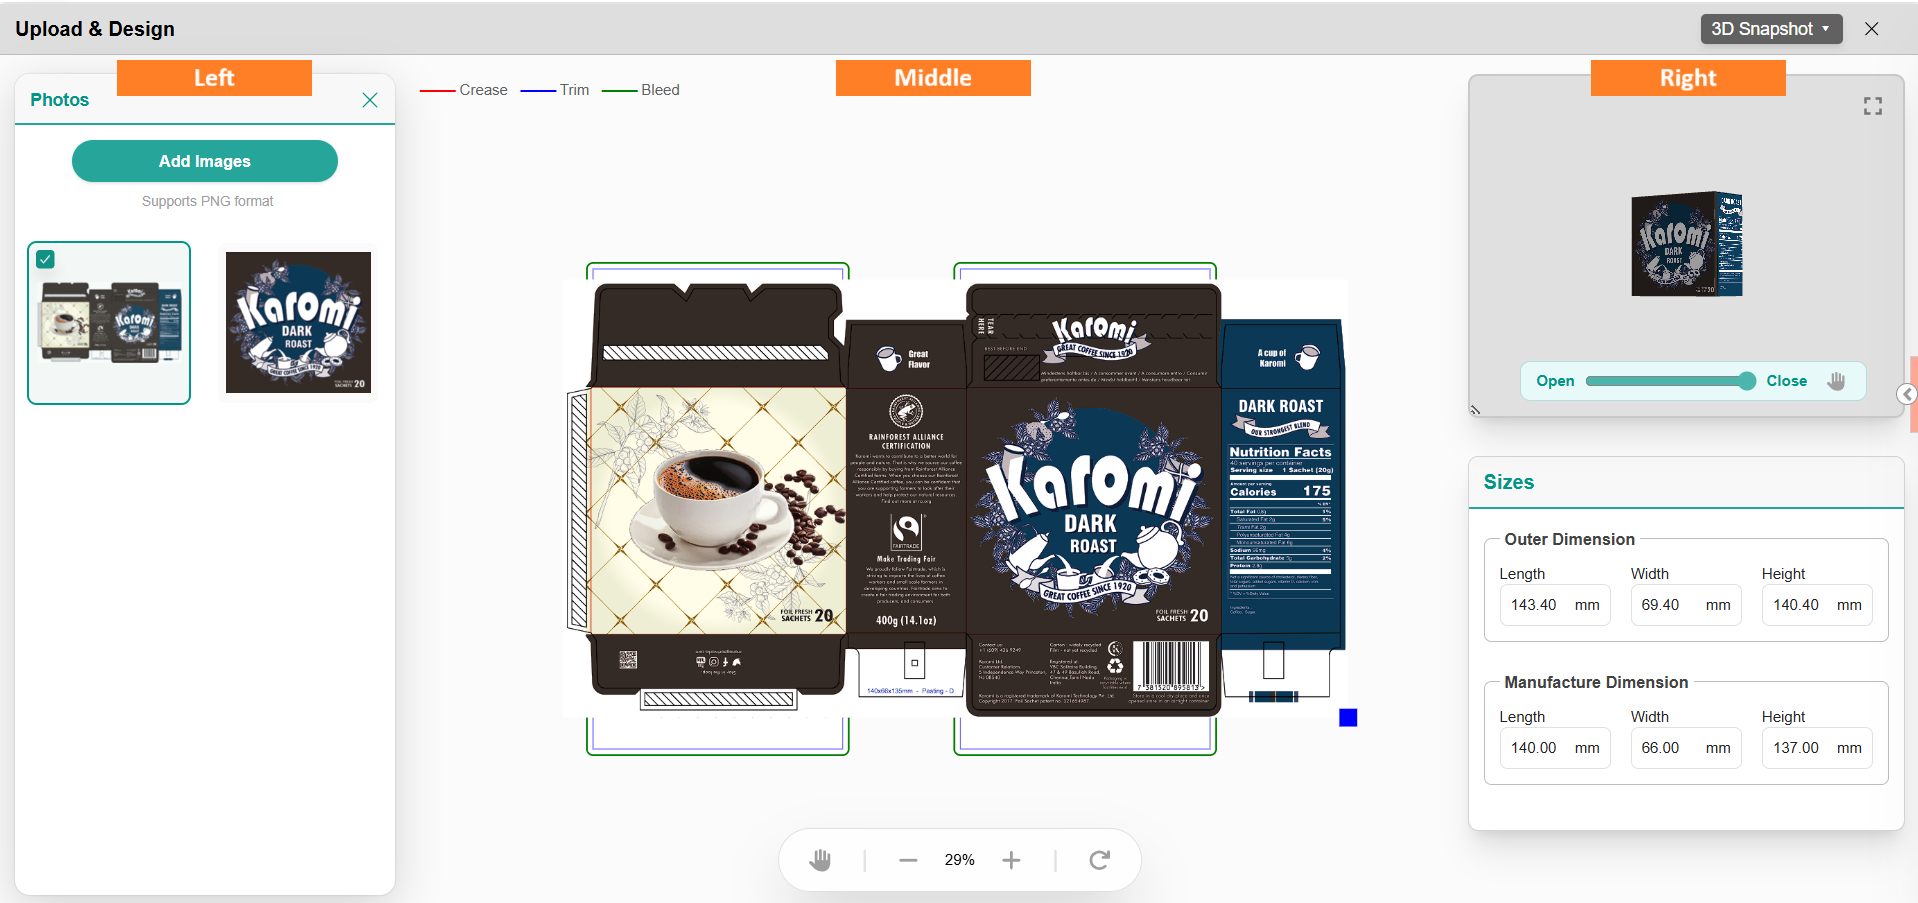
The **Upload & Design** interface is split into three main sections:
| **Section** | **Functionality** |
| --- | --- |
| **Left: Image Uploads** | Upload, manage, and select image files to overlay. |
| **Middle: Dieline Editor** | Position and align artwork or images over the dieline. |
| **Right: 3D Preview & Controls** | Visualize dieline in 3D with interaction features: - **Slider** for open/close simulation - **Customization options** only for appearance based on dieline type. Changing dimensions are not allowed |
#### **Overlay External Images**
You can also overlay external images (PNG format) that are not part of the packaging artwork.
**Steps:**
1. In the **Upload & Design** window, select **Photos**.
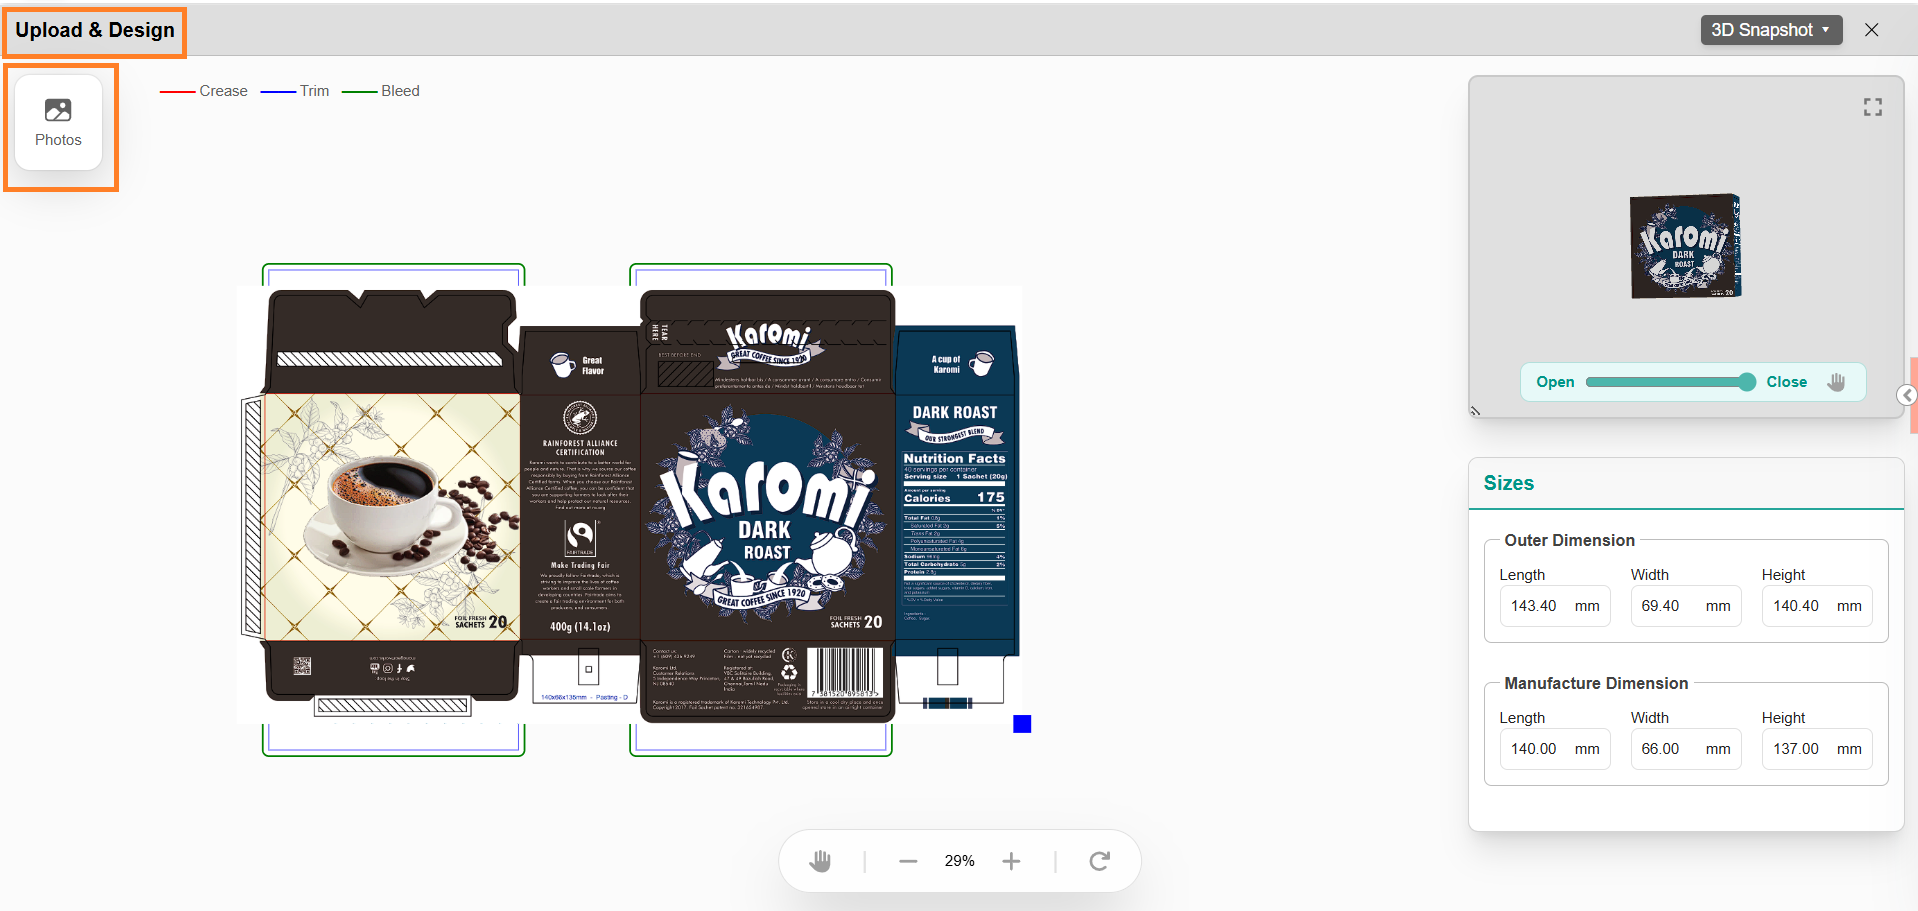
2. In the left panel, select **Add Images**.
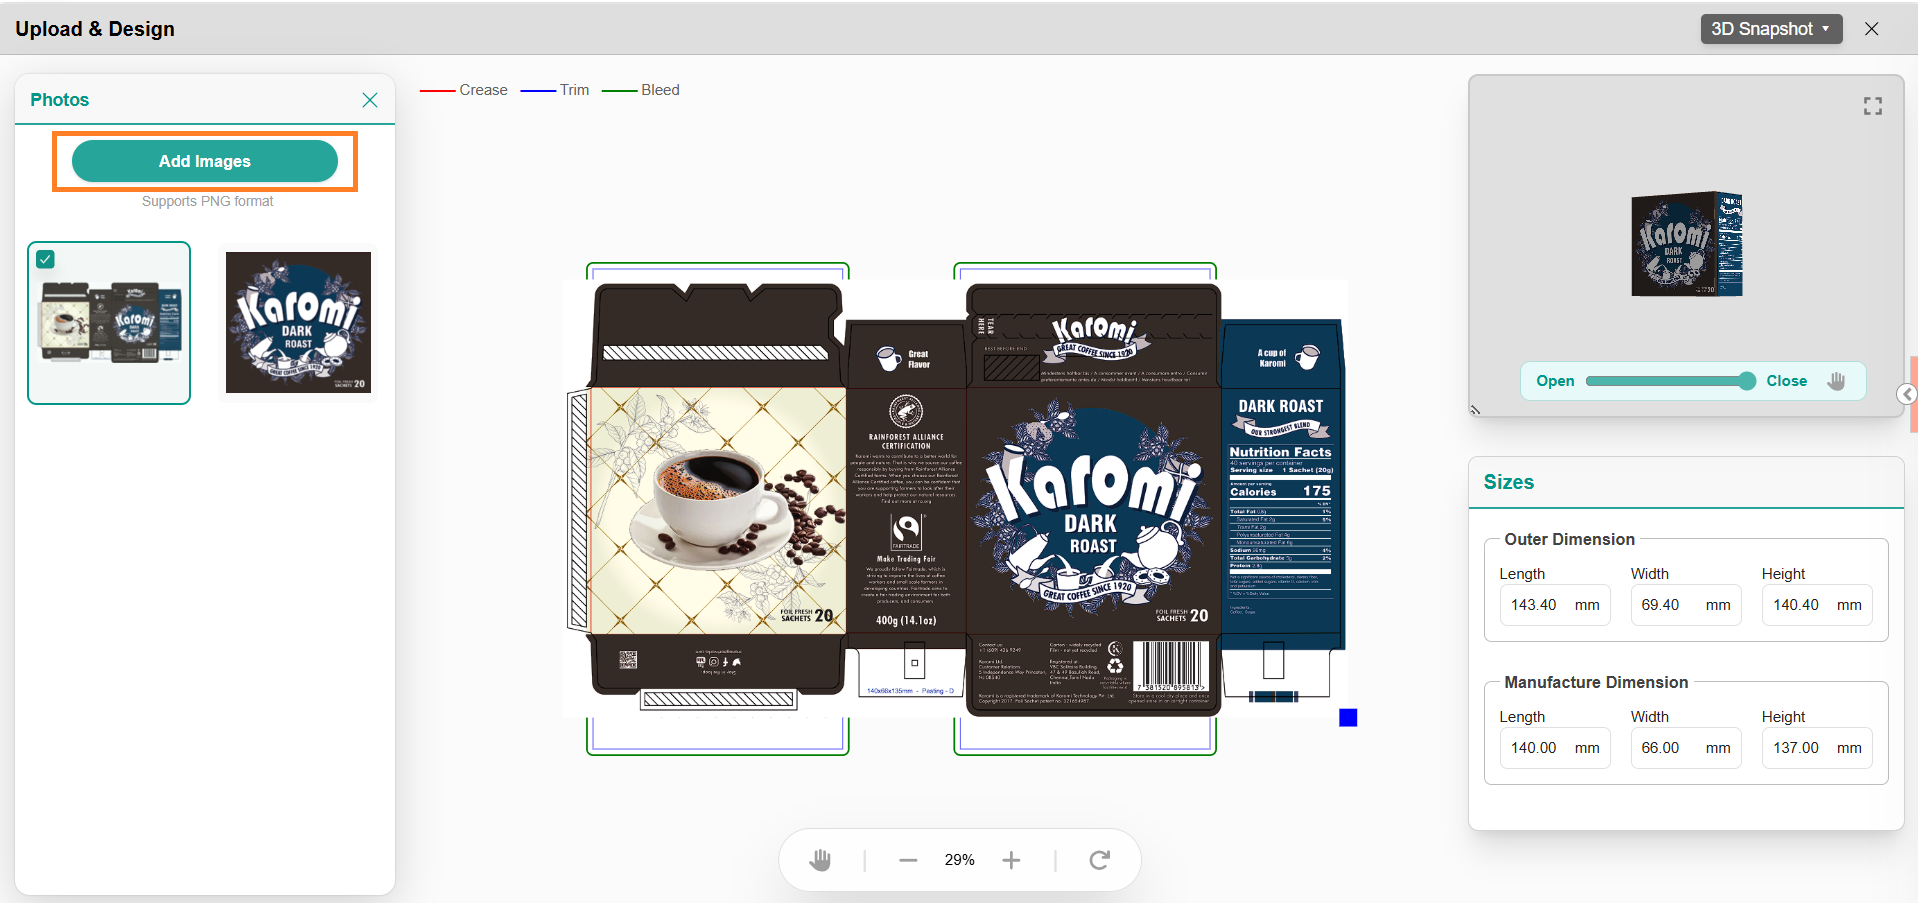
3. Browse and select PNG files from your local system.
4. Select **Open** to import.
5. Select the uploaded image from the **Photos** panel.
6. If required, drag, resize, and position the image on the dieline.
**Note:** Multiple external images can be overlaid if required.
#### **3D Simulation Controls**
The **3D Preview** panel provides a real-time visualization of dielines with applied overlays, allowing you to interactively explore the design.
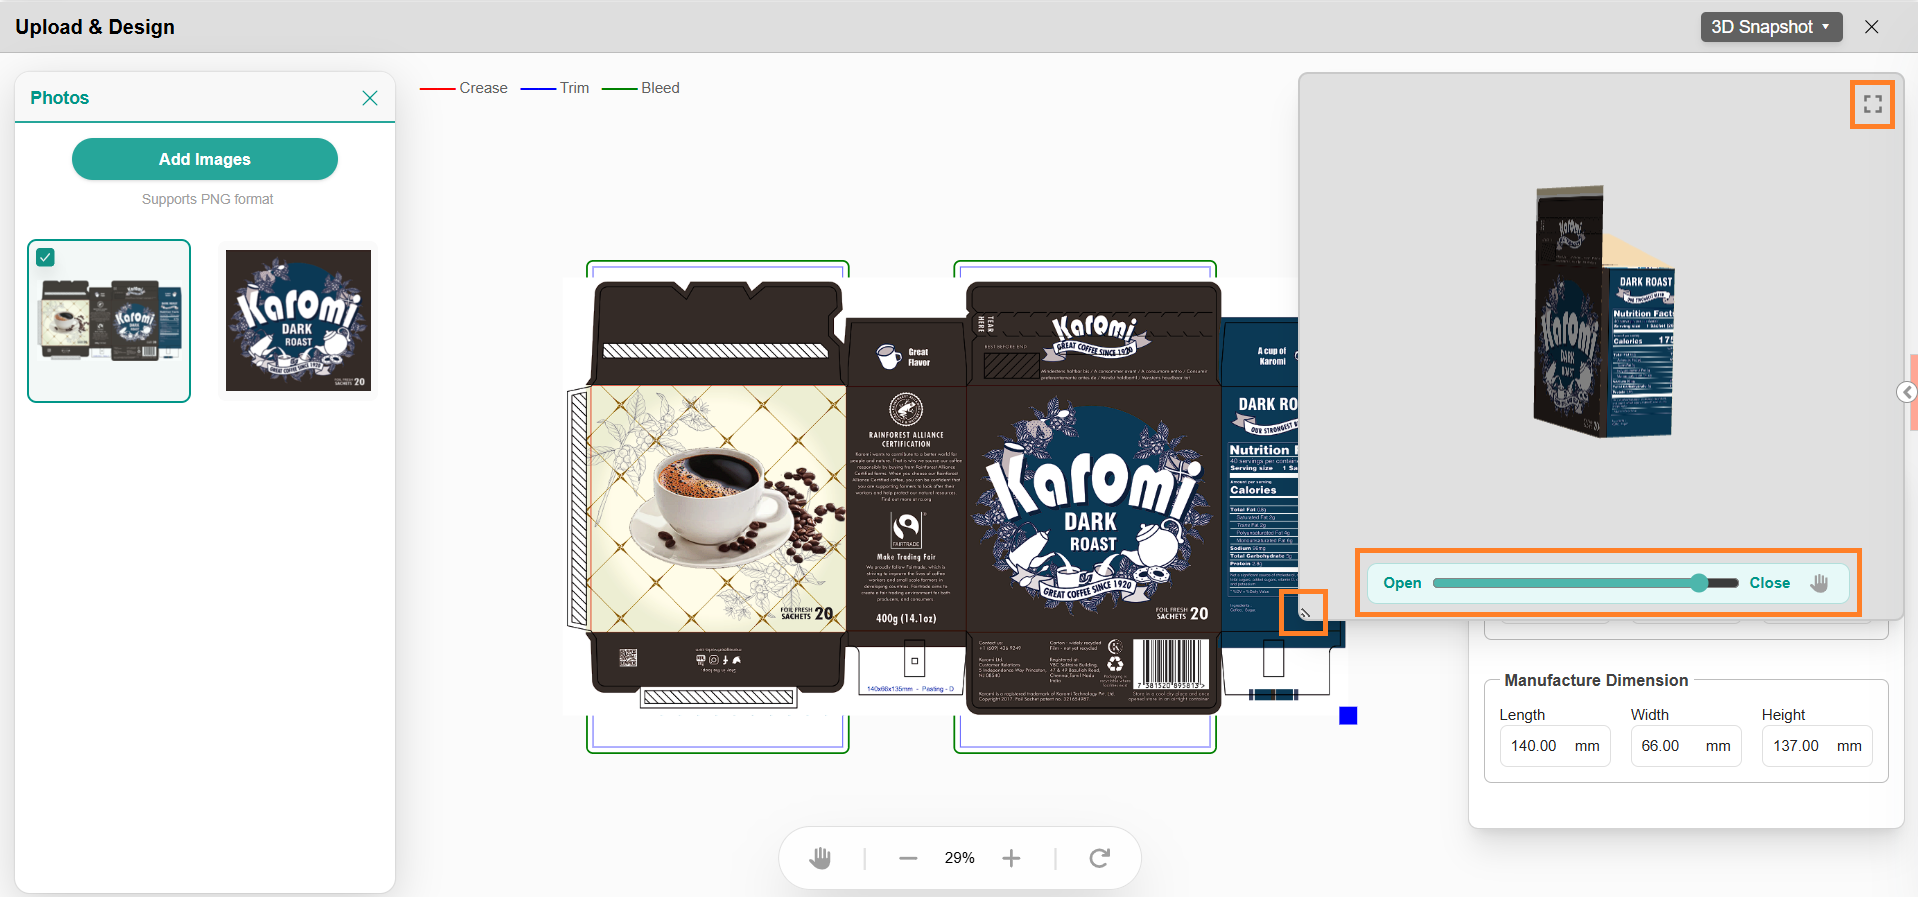
- **Resize the 3D View**: Drag the bottom-left corner of the 3D panel to adjust its size.
- **Simulate Opening and Closing**: Use the interactive slider to preview the dieline in different open/close positions.
- **Pan the View**: Click the **Pan** icon to move the 3D model within the panel.
- **Maximize the Panel**: Click the **Maximize** icon in the top-right corner to expand the 3D preview to full size.
#### **3D Snapshot**
Use the **3D Snapshot** option to capture images of the artwork applied to the 3D model.
To capture a snapshot:
1. Select the **3D Snapshot** button.
2. Hover over the button to view the available options:
- **Download Snapshot**
- **GS1 Profile Snapshot**

**Download Snapshot**
1. Select **Download Snapshot** to capture and save the current 3D view directly to your device.
2. The system generates the snapshot based on the current camera position and automatically downloads it to your local system.
**GS1 Profile Snapshot**
The **GS1 Profile Snapshot** option enables users to generate **GS1-compliant product images** using predefined configuration profiles.
This feature:
- Automatically generates product images from the 3D model
- Applies GS1 standards for naming, metadata, and orientation
- Reduces manual effort and minimizes configuration errors
Unlike the standard snapshot, GS1 Profile Snapshot uses **profile-based configuration** to ensure consistency and compliance.
For detailed instructions, refer to **GS1 Profile Snapshot**.
### Auto Crop Functionality
The **Auto Crop** feature automatically detects the dieline region and extracts the relevant artwork area for overlay or simulation. This functionality reduces manual effort and ensures accurate alignment between the artwork and the linked dieline.
Auto Crop is supported only when the artwork is created using a **ManageArtworks-generated dieline PDF** with intact embedded metadata.
If the required metadata is not available, Auto Crop will be disabled and you must use the **Mark Region** option instead.
To use Auto Crop:
1. In the Web Viewer, select the **Crop Region** drop-down menu.
2. Select **Auto Crop**.
3. Configure the settings if required.
**Note:** For detailed configuration steps and supported scenarios, refer to [Perform Overlay Check Using Auto Crop](https://help.manageartworks.com/en/article/dieline-workflow#1.-perform-overlay-check-using-auto-crop) in the previous section.
4. Select **Auto Crop** to generate the overlay.
5. Once the cropped region is overlaid successfully, the Overlay Check is considered complete.
### 3D Simulation Functionality
The **3D Simulation** option allows you to open the **Upload & Design** window, where you can:
- Add overlays
- Adjust positioning
- Preview the dieline in 3D
**To Access 3D Simulation**
1. In the Web Viewer, select the **3D** drop-down menu.
2. Select **3D Simulation**.

3. The **Upload & Design** window opens.
4. Refer to [Upload & Design Window](https://help.manageartworks.com/en/article/dieline-workflow#upload-&-design-window) for detailed instructions on how to use this feature.
### 3D View Functionality
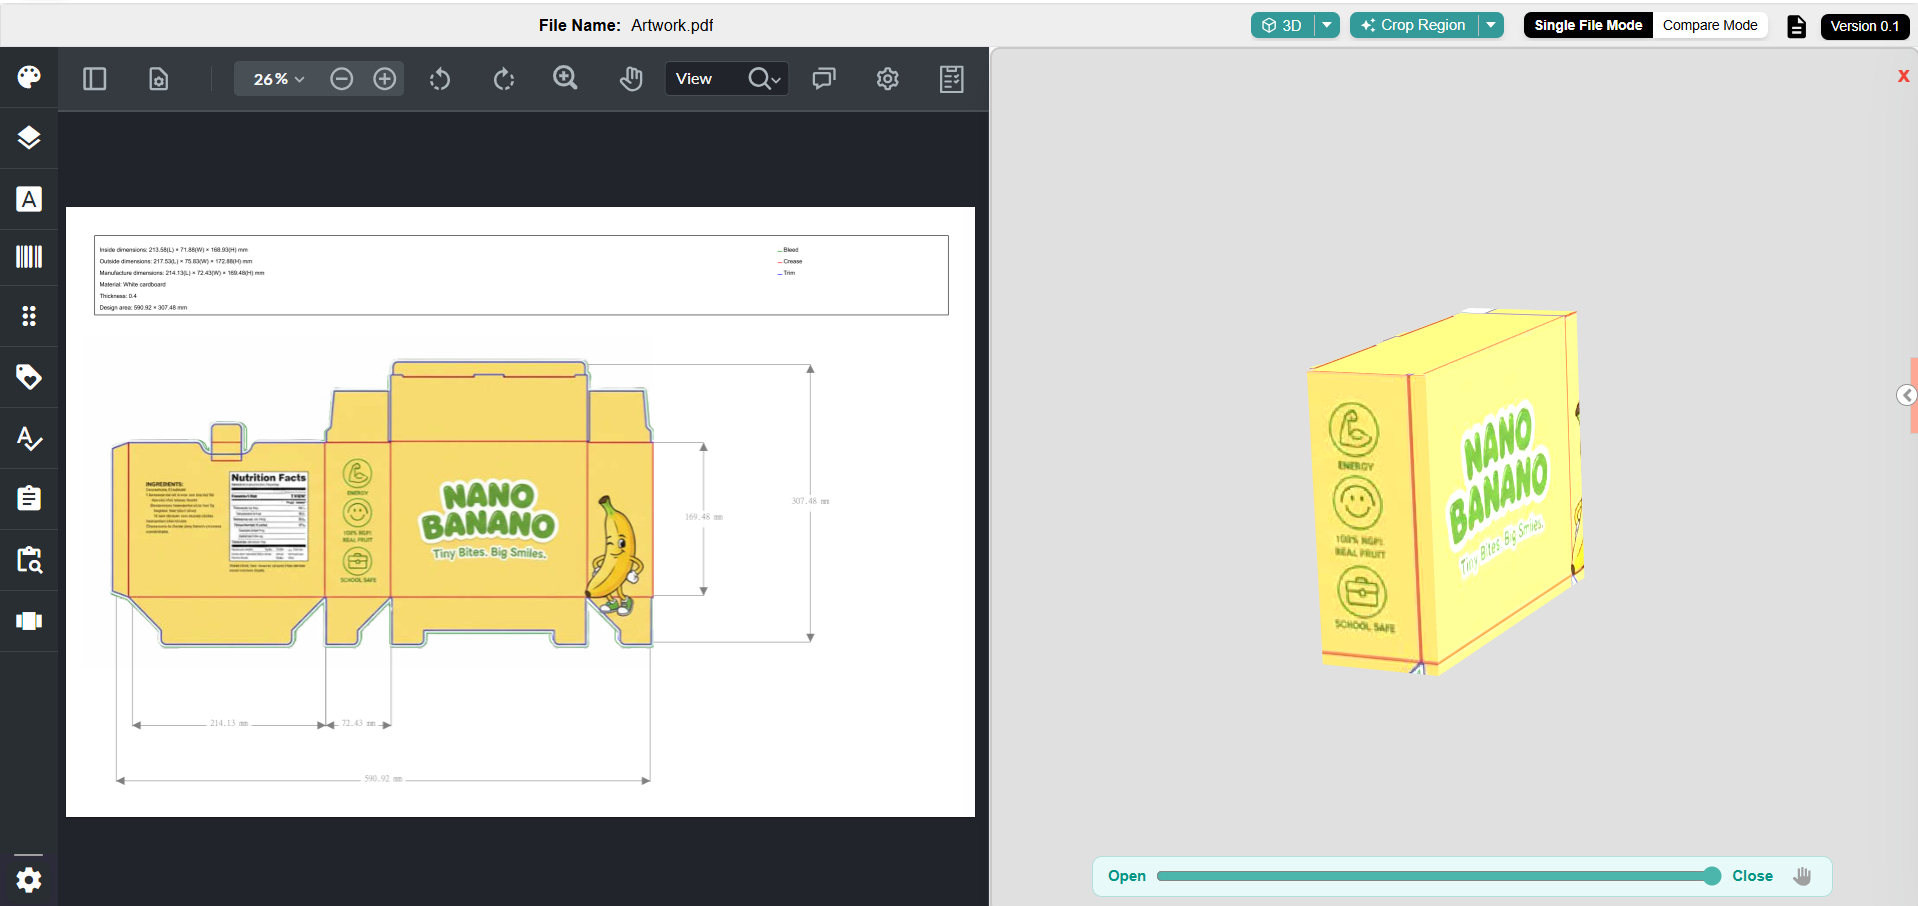
The **3D View** option allows you to preview the artwork applied to the 3D structure.
|  | **Note:** This option is available only after the artwork has been successfully overlaid onto the 3D object. |
| --- | --- |
**To Access 3D View:**
1. In the Web Viewer, select the **3D** drop-down menu.
2. Select **3D View**.

3. The 3D preview opens side-by-side within the viewer. Use the slider to simulate the structure from closed to open states.
## 06\. Manage Linked Dieline or Packaging Artwork
Once a dieline or packaging artwork is linked to a project component, several management actions become available. You can use these options as needed or continue progressing with your project.
### Download
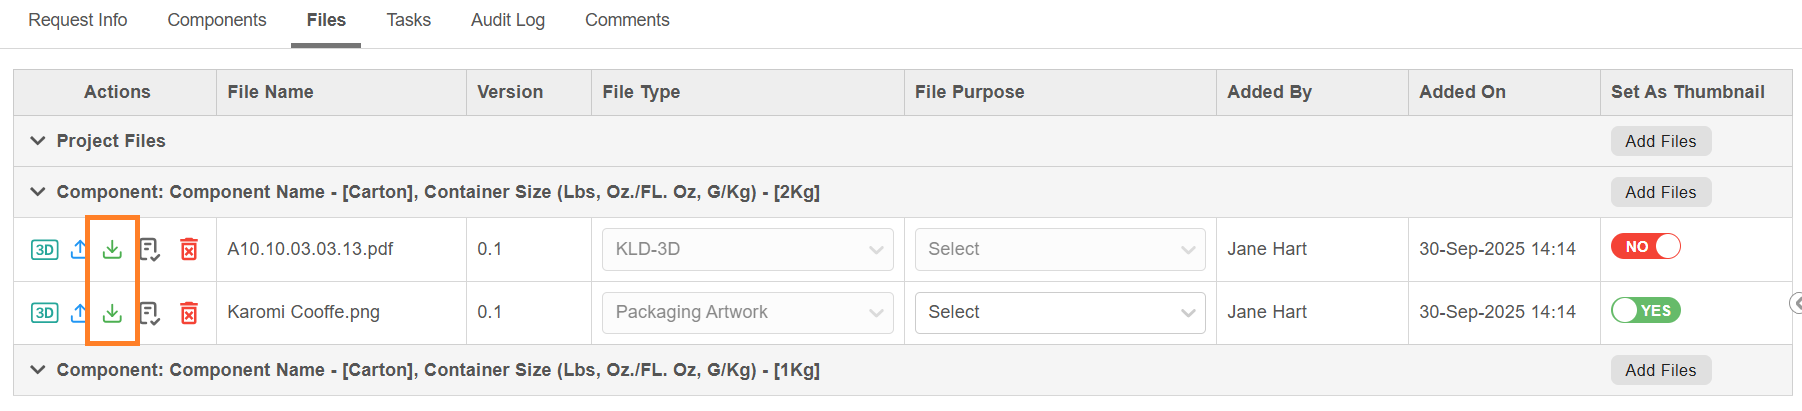
1. **For Dieline**: Select the download icon next to the dieline file to download it in PDF format.
2. **For Packaging Artwork**: Select the download icon next to the artwork file to download it directly to your device.
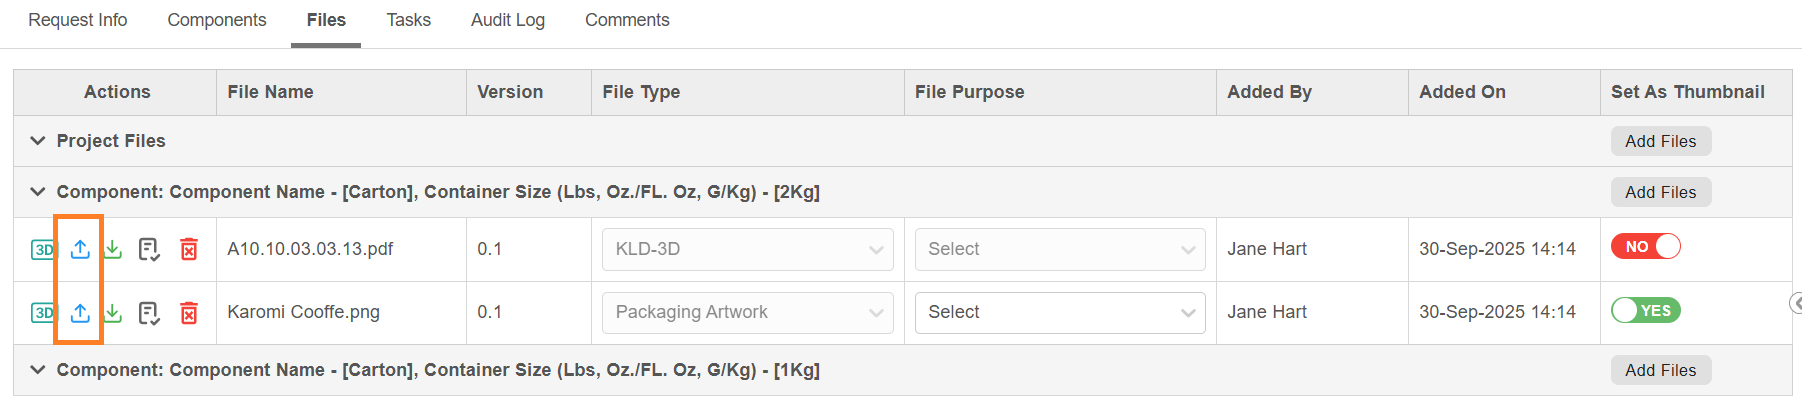
### Update
1. For Dieline:
1. You can modify the existing dieline customization by selecting the **Update** button next to the linked file.
2. This action opens the customization interface, where changes to dimensions or visual properties can be made based on the dieline type that you are working. For more details on customization, refer to the [Customization Options](https://help.manageartworks.com/en/article/dieline-and-3d-simulation#3.-customize-the-dimension-or-appearance).
3. After making the desired adjustments, select **Update**. An Update Preview dialog will be displayed with the following details:
- **Bleed Measurement:** This value is pre-filled based on the Admin settings. You can modify it if required.
- **Measurement Scale (UOM):** Pulled from Admin settings; this field is read-only.
**Note:** To modify the default Bleed Measurement or Unit of Measurement (UOM), refer to [Dieline Parameter Configuration](https://help.manageartworks.com/en/article/dieline-parameter-configuration) in the Admin module.
4. Select **Update** in the dialog to apply changes.
5. Upon a successful update, the dieline version number is incremented automatically.
2. For Packaging Artwork:
1. Select the **Update** button next to the linked artwork file.
2. Browse and select the updated file from your desktop (updates from Asset Library are not supported).
3. Select **Open** to confirm.
4. The file will be replaced with the new version, and the version number will increment automatically.
### **Delete**
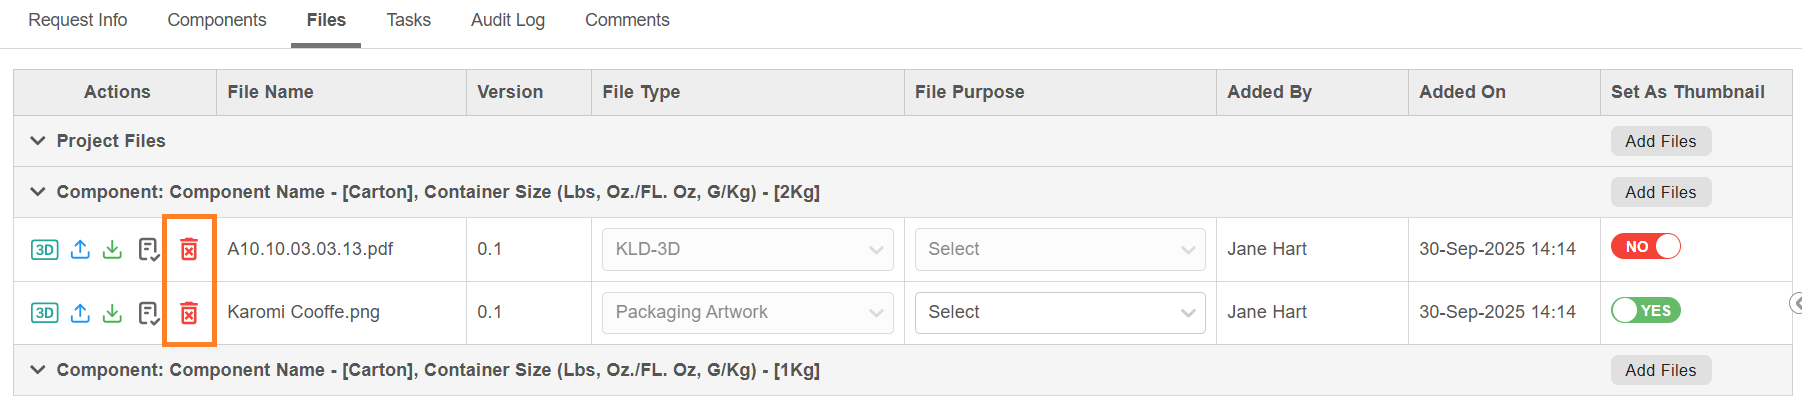
1. For Dieline:
1. A linked dieline cannot be deleted if it is already associated with an uploaded artwork (i.e., overlay check has been performed).
2. To delete the dieline, the linked artwork must be removed first. Only then can the dieline be deleted from the Files tab.
3. Select the **Delete** icon next to the dieline file, then confirm by selecting **OK** in the confirmation dialog.
2. For Packaging Artwork:
1. Select the **Delete** icon next to the artwork file.
2. Confirm deletion by selecting **OK** in the confirmation dialog.
### 3D Preview
1. For Dieline:
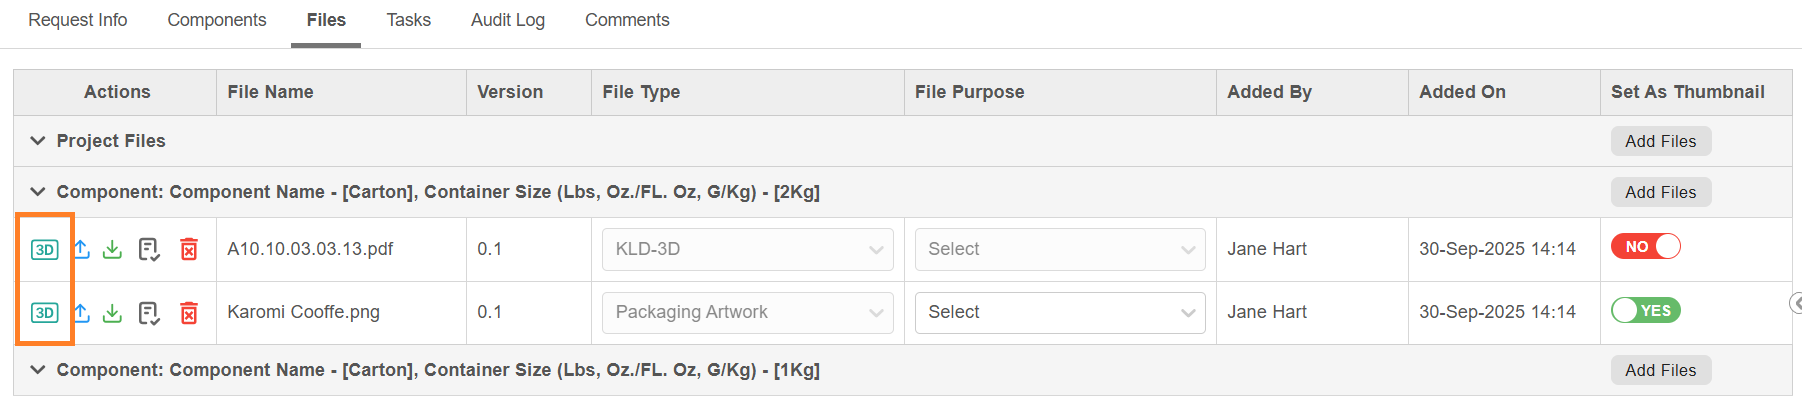
1. Once the dieline is attached, a 3D Preview icon appears next to the KLD file in the Files tab.
2. Selecting the dieline 3D icon opens an instant 2D and 3D preview of the dieline (without artwork overlay) directly within the **Files** tab—no need to open the full Web Viewer.
2. For Packaging Artwork:
1. Once the overlay is applied for an artwork, a 3D Preview icon appears next to the Packaging Artwork File in the Files tab.
2. Selecting the artwork 3D icon opens a 3D preview of the dieline with the artwork overlaid, within the **Files** tab—no need to open the full Web Viewer.
### Viewer Checklist
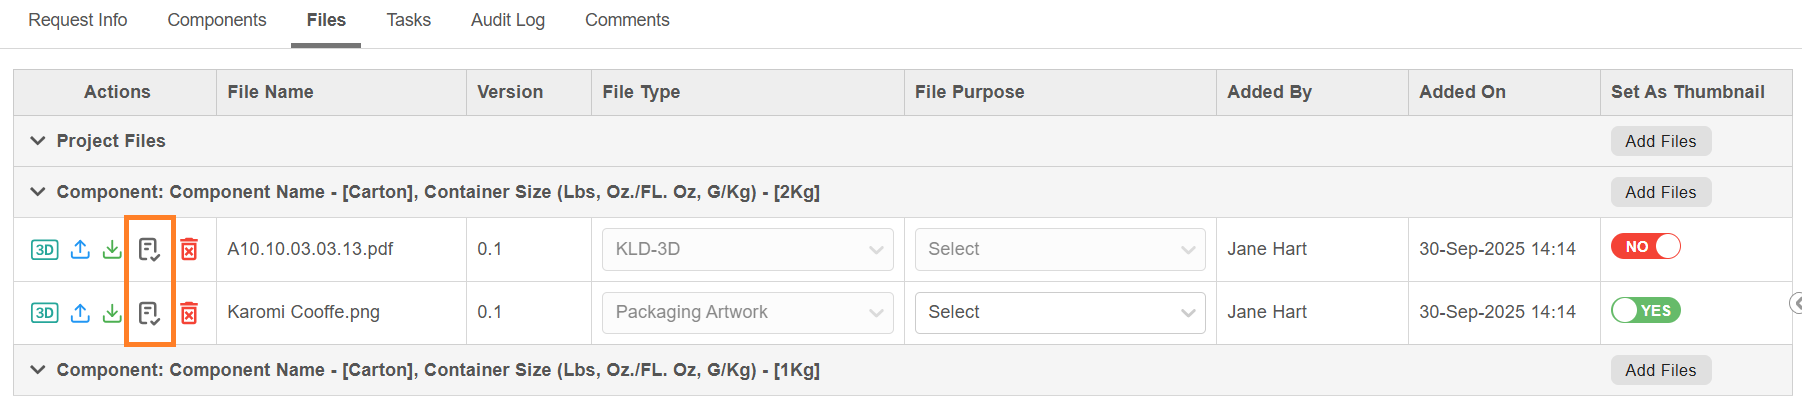
1. Select the **Viewer Checklist** icon to view checklist items associated with that file.
**Note:** The checklist items displayed depend on configuration parameters such as **Task** and **Asset Type**.
## 07\. Publishing
Once the workflow is completed, files such as **Dieline** and **Artwork** are automatically published to the **Asset Library**, depending on the publish configuration.
|  | **Note:** To customize when and which file types should be published—such as after the completion of a specific task or upon workflow completion—please contact the ManageArtworks Support Team for assistance in setting up the appropriate configuration. |
| --- | --- |
|  | **Note:** If the dieline was added **from** the Asset Library, it is treated as a reference-only file and **will not be re-published**. |
| --- | --- |
|  | ## Key Points for Linking Dielines in a Workflow
- **Feature Availability**
- The **Dieline** feature must be enabled in your system before it can be used within workflows.
- **When You Can Link a Dieline**
- A dieline can be linked only after the project is created.
- Dielines can be linked only at the **component level**.
- The project must contain at least one component before a dieline can be linked.
- **Sources for Linking a Dieline**
- You can link a dieline from the following sources:
- **Dieline Library**
- Link a dieline template directly.
- You can customize dimensions or appearance while adding it to the workflow.
- **Asset Library (Published Dielines only)**
- Link an existing published dieline.
- Customization is not available.
- **Limitations**
- Only **one dieline** can be linked to each component in a project.
- **Overlay Check Requirement**
- Once packaging artwork is attached to a component that already has a linked dieline, you must complete an **Overlay Check** before submitting or proceeding with the task.
- This ensures that the linked dieline (KLD file) and the attached artwork are properly aligned. |
| --- | --- |