---
title: "Change Colors in an Artwork"
url: "https://help.manageartworks.com/en/article/change-colors-in-an-artwork"
language: "en"
last_updated: "2026-10-15T04:43:45.979Z"
---
# Change Colors in an Artwork
Designers often need to change a color in an artwork: brand guidelines change, a regulation requires a different color for a warning, a printer asks for a print-safe color, or a designer used the wrong shade. Changing every object by hand is slow, and a subtle shade is easy to miss.
With **Color Map**, designers can replace a color in an artwork in Adobe Illustrator in one action. They choose a **source color** (a color used in the artwork) and a **destination color** (the color that replaces it). The pair is a mapping. The destination color can be a color already in the artwork, or a **custom swatch** that they create in **Color Map**.
When the mapping is applied, the source color is replaced everywhere in the artwork.
The plugin finds the colors in the artwork and groups them by type:
| Color type | What it is | Best for |
| --- | --- | --- |
| **Spot** | A single premixed ink, printed on its own plate. Includes special inks such as metallic, neon or varnish. | Brand colors and special colors that must match exactly. |
| **Pantone** | A spot color from the Pantone Matching System, identified by a code such as *Pantone 186 C* (C for coated paper, U for uncoated). | Brand colors that must match across designers, printers and manufacturers. |
| **Process** | A color made by layering cyan, magenta, yellow and black (CMYK) ink. | Photos and complex graphics. A process color cannot always match a vibrant brand color exactly. |
| ###  | **Note:**
- You do not need to be signed in to the plugin to use **Color Map**.
- **Color Map** replaces only colors that are used in the artwork.
- All Pantone colors are spot colors, but not all spot colors are Pantone colors. |
| --- | --- |
## 01\. Open Color Map
1. Make sure that the artwork you want to change is open and active in Illustrator. If several artworks are open, only the active one is changed.
**Note:** If you switch to another artwork while **Color Map** is open, the color lists do not refresh. Close **Color Map** and open it again to load the colors of the active artwork.
2. Open **Color Map**:
1. If you are not [signed in](https://help.manageartworks.com/en/article/sign-in-to-the-manageartworks-plugin) to the plugin:
1. On the welcome page, select the **Settings** icon in the upper-right corner of the panel. The **Settings** page opens.

2. Hover over the **Settings** icon again, then select **Color Map**.
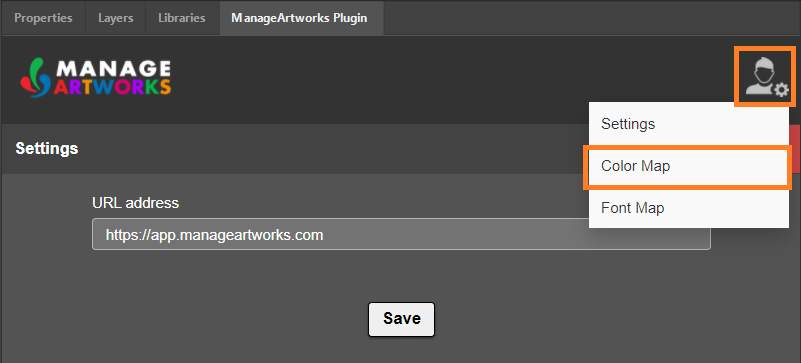
2. If you are [signed in](https://help.manageartworks.com/en/article/sign-in-to-the-manageartworks-plugin), hover over the **Settings** icon in the upper-right corner of the panel, then select **Color Map**.
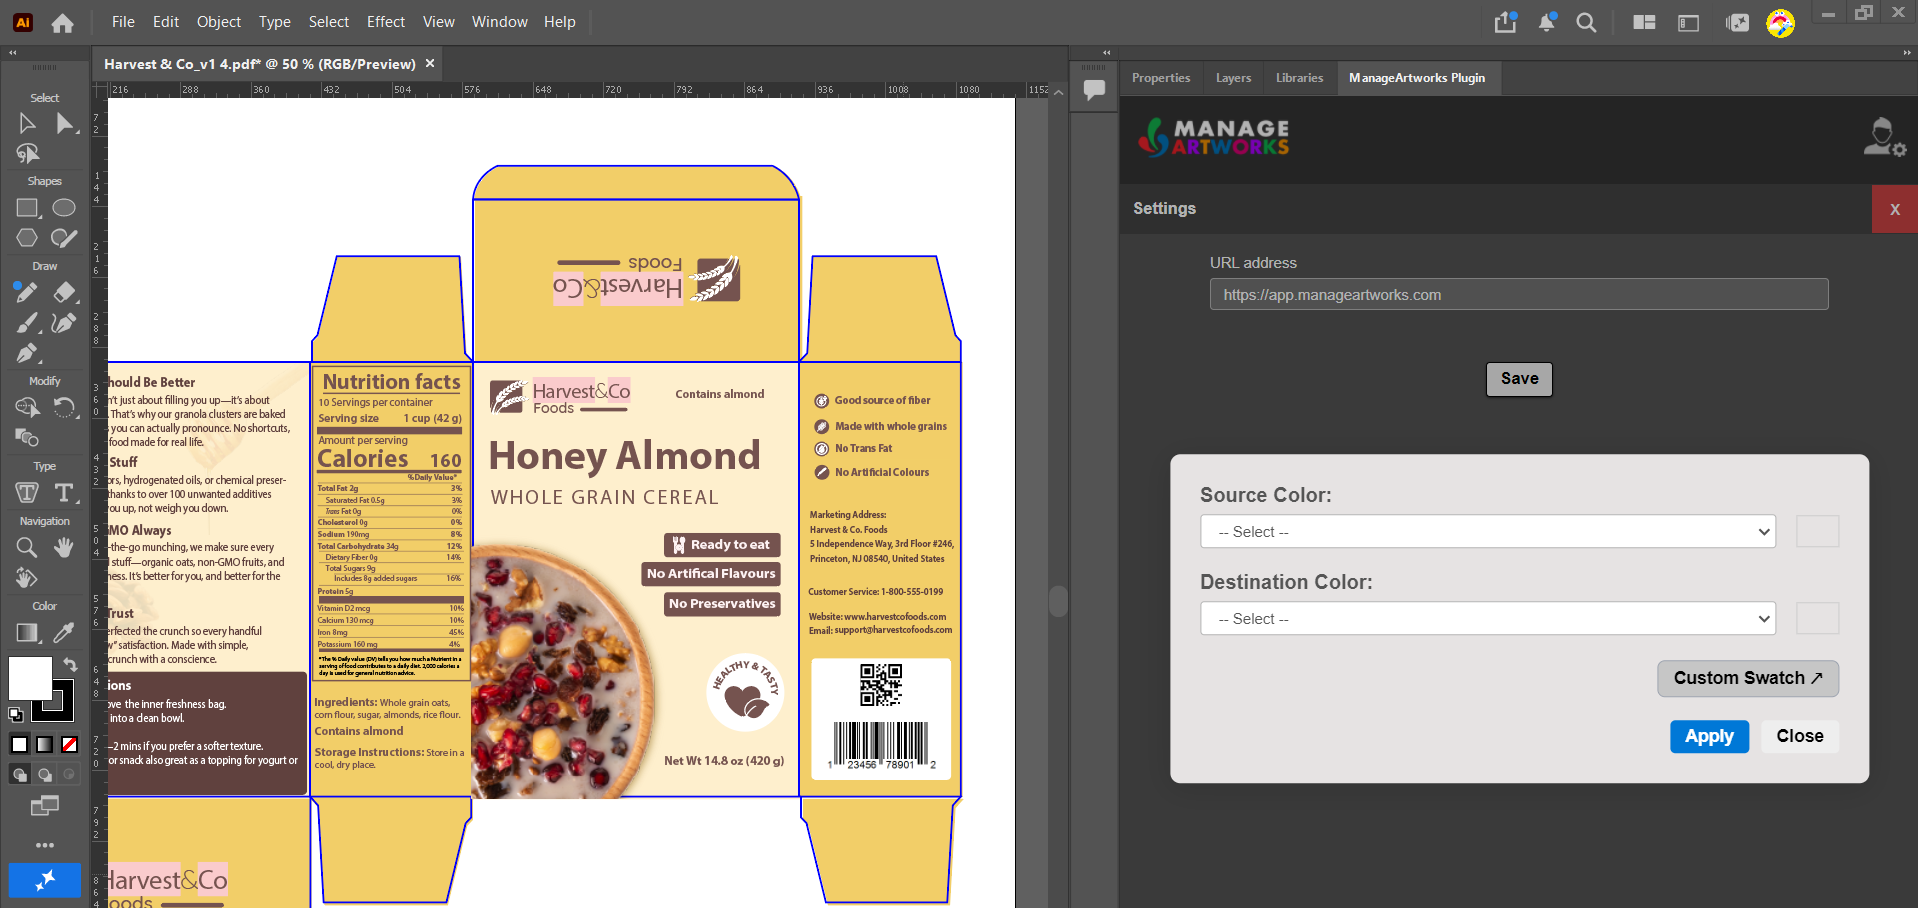
3. The **Color Map** dialog box opens over the **Settings** page.
## 02\. Choose the Colors
|  | **Note:** You can map one color at a time. To replace another color, apply this mapping first, then repeat stages 02 and 03. |
| --- | --- |
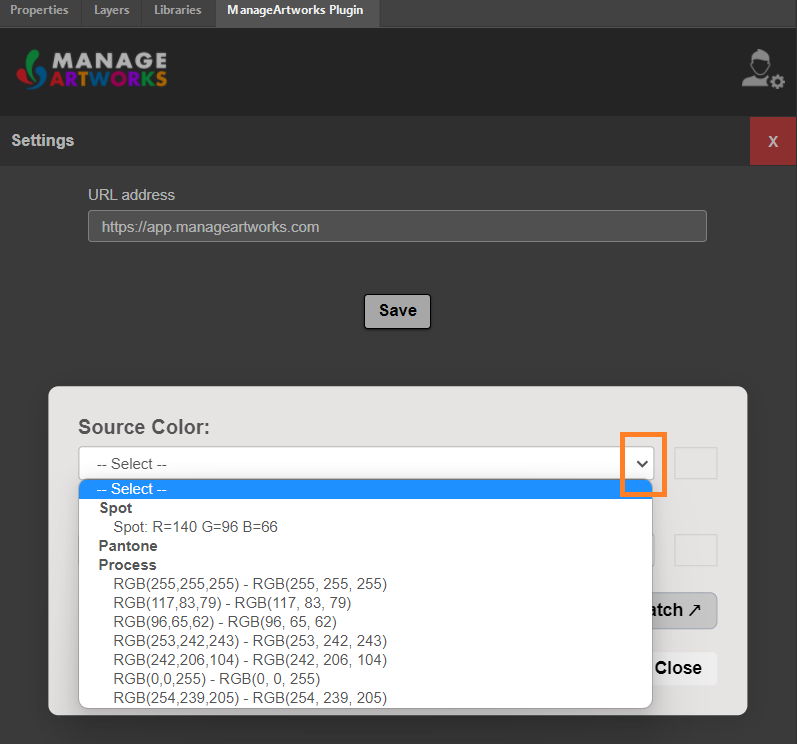
1. In the **Source Color** drop-down list, select the color you want to replace. The list shows the colors used in the artwork, under the **Spot**, **Pantone** and **Process** headings.
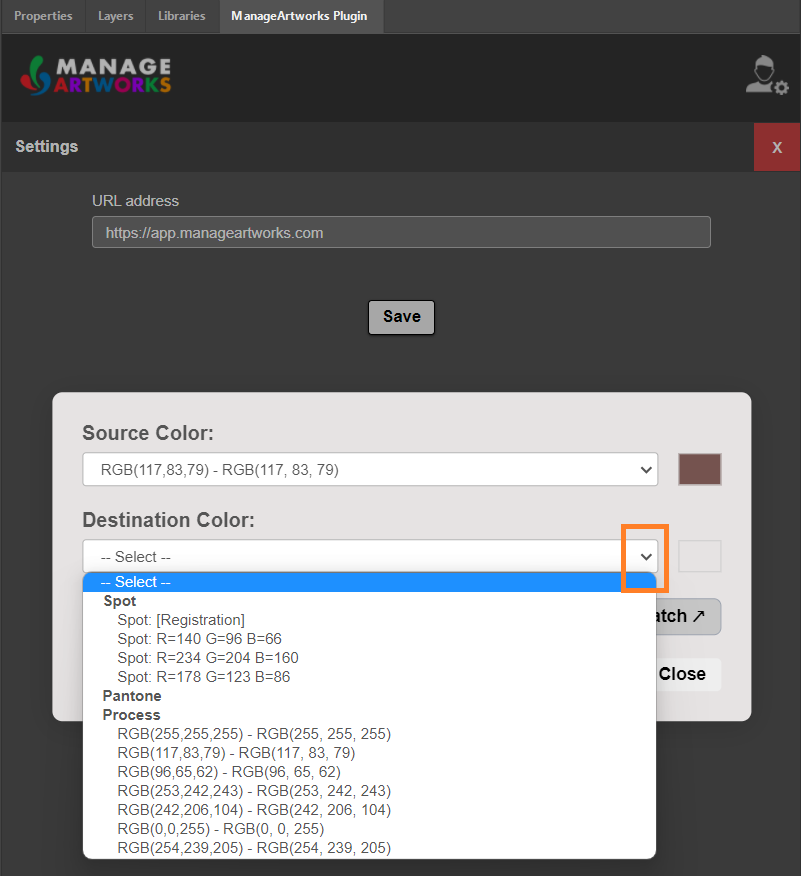
2. In the **Destination Color** drop-down list, select the replacement color. The list shows the colors already used in the artwork. If the color you need is not in the list, add it as a custom swatch, then select it in the **Destination Color** drop-down list. See Add a Custom Swatch *(If Required)* below.
### Add a Custom Swatch (If Required)
1. Select **Custom Swatch**. A dialog box opens for the new swatch.
2. In the **Swatch Type** drop-down list, select the type of color:
- **Process** – Defines CMYK process colors.
- **Spot** – Defines a premixed or special ink color.
**Note:** The method of selecting color values is the same for both swatch types. However, the swatch type determines how the color behaves during output and printing.
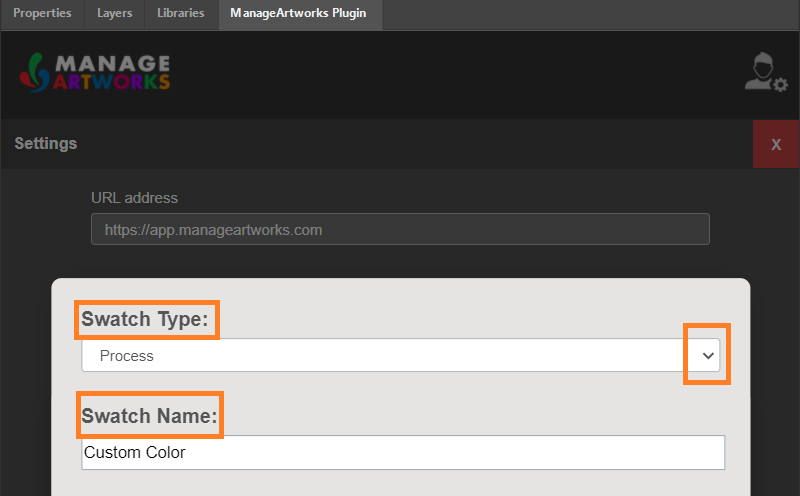
3. In the **Swatch Name** field, replace *Custom Color* with a name for the color.
4. In the **Color Mode** drop-down list, select **RGB** or **CMYK**, then choose the color:
1. If you select **RGB**:
1. Select the **Custom Color (RGB)** box. A color picker opens.
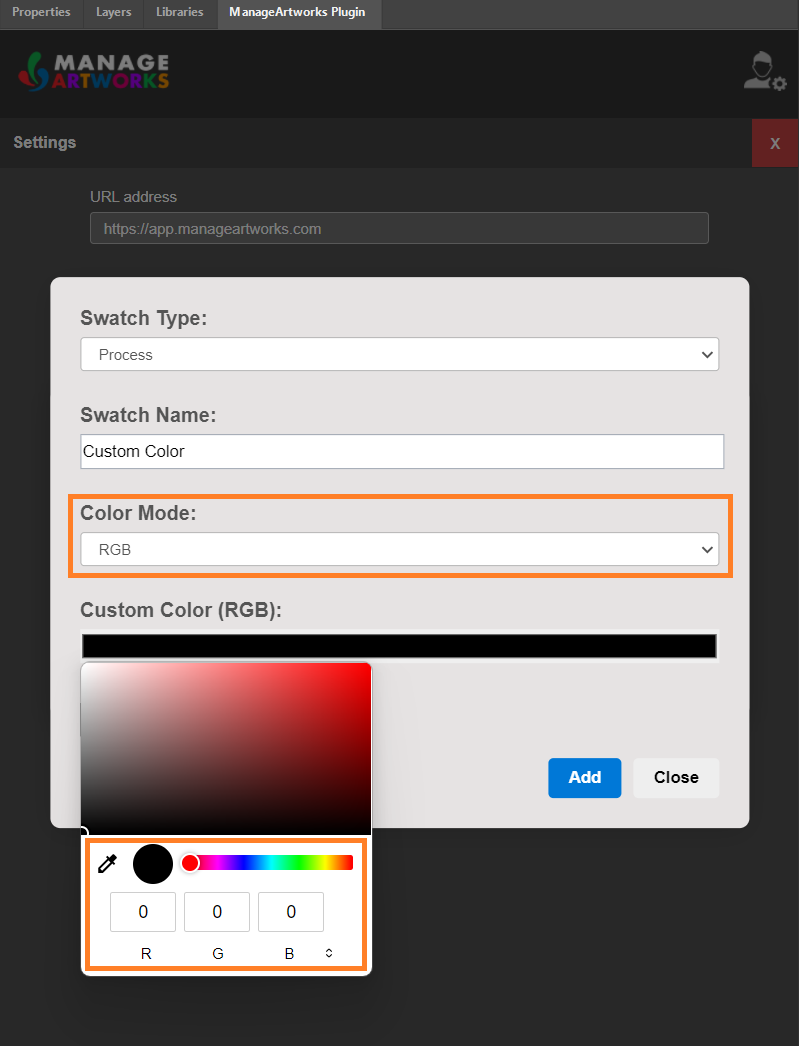
2. Choose the color in any of these ways:
- Select a shade in the color area or drag the hue slider.
- Enter the **R**, **G** and **B** values.
- Select the arrows beside the values to enter **HSL** or **HEX** values instead.
- Select the eyedropper icon, then select a color on the screen.
2. If you select **CMYK**, enter the **C**, **M**, **Y** and **K** values, or drag the sliders. The **Preview** area shows the color as you choose it.
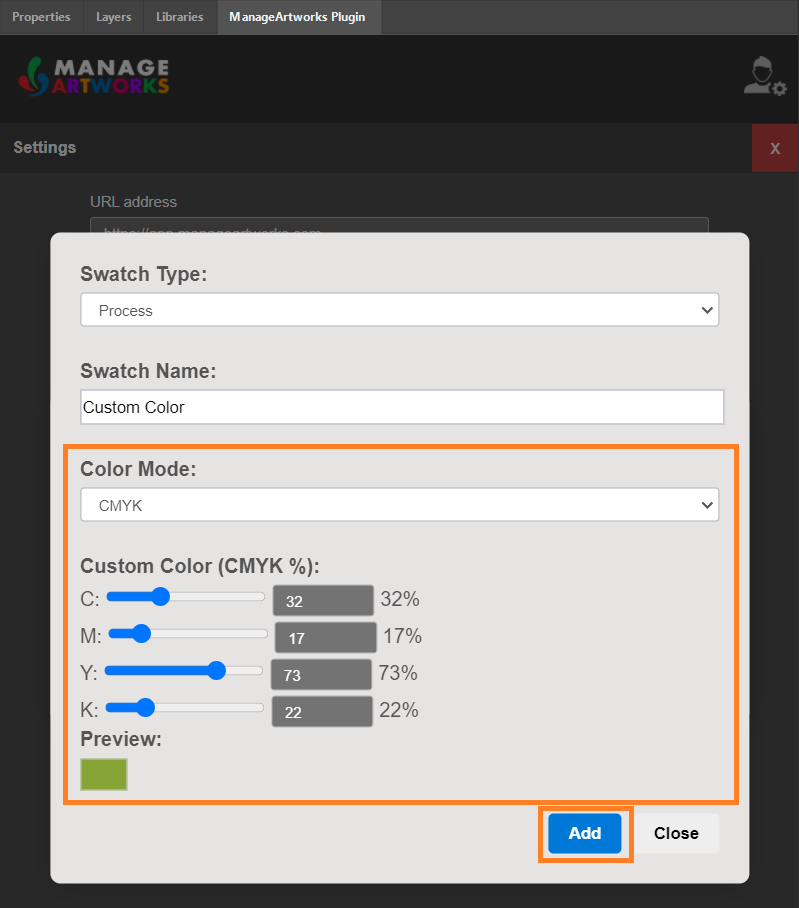
5. Review the color, then select **Add**. The swatch is added to the **Destination Color** drop-down list, under **Process** or **Spot**. It is also added to the Illustrator **Swatches** panel.
6. In the **Destination Color** drop-down list, select the newly added custom swatch color.

## 03\. Apply the Mapping
1. Make sure that a color is selected in both the **Source Color** and **Destination Color** drop-down lists.
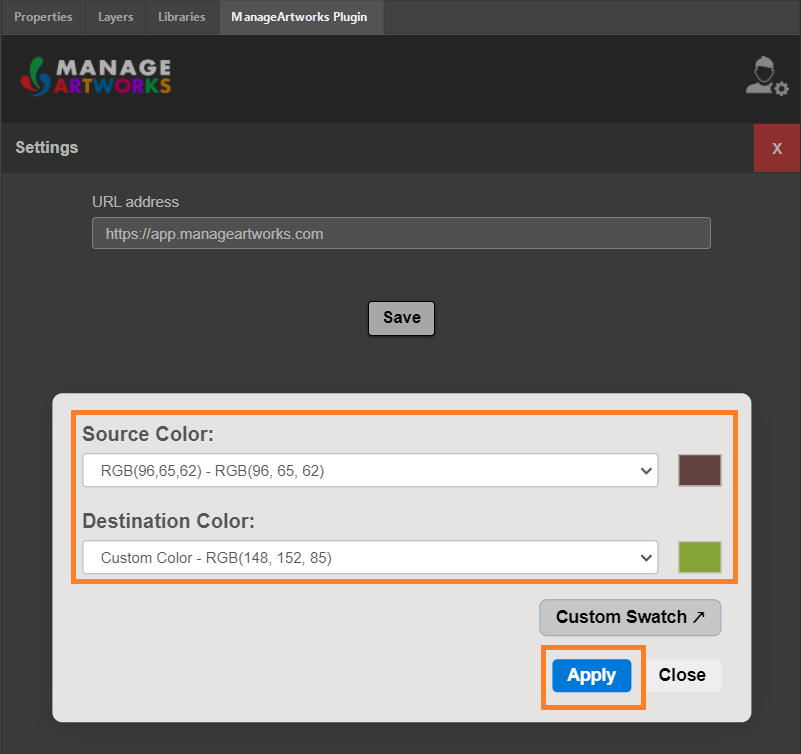
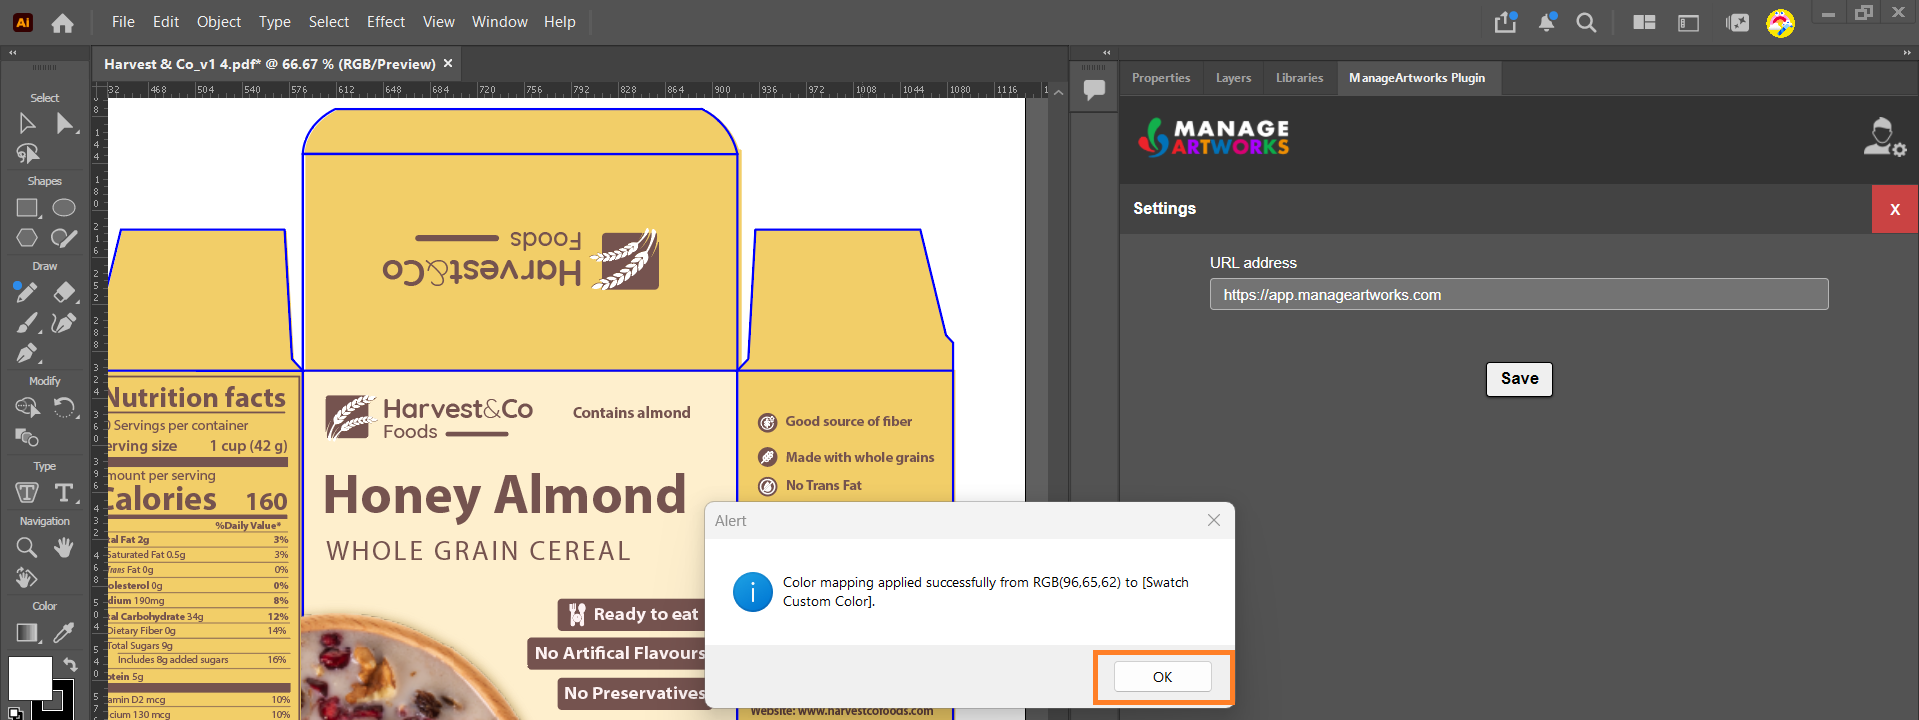
2. Select **Apply**. A confirmation message appears.
3. Select **OK**. The source color is replaced everywhere in the artwork.
**Note:** After the mapping is applied, the replaced color is no longer in the **Source Color** drop-down list, because the artwork no longer uses it. It stays in the **Destination Color** drop-down list for reference.
## Related Articles
- [Change Fonts in an Artwork](https://help.manageartworks.com/en/article/change-fonts-in-an-artwork)
- [About ManageArtworks Plugin](https://help.manageartworks.com/en/article/about-manageartworks-plugin)