---
title: "Add a New User (Enterprise plan)"
url: "https://help.manageartworks.com/en/article/add-a-new-user-enterprise-plan"
language: "en"
last_updated: "2026-08-06T05:47:57.026Z"
---
# Add a New User (Enterprise plan)
|  | **Note:** The options available when adding a new user differ between the Growth and Enterprise plans.This article covers adding a new user in the **Enterprise Plan**.
For information about adding a new user in the **Growth Plan**, see [Add a New User (Growth Plan)](https://help.manageartworks.com/en/article/add-a-new-user-growth-plan). |
| --- | --- |
If more than one person in your organisation works on artwork, set up a user for each person so everyone has their own sign-in, sees only the files and projects you allow, and receives their own workflow tasks.
|  | **Note:** The number of users you can add depends on the number of licences in your plan. To free a licence, deactivate a user you no longer need — their data is retained. To increase your licence count, contact the **ManageArtworks Support Team**. |
| --- | --- |
## 01\. Access the Admin Module
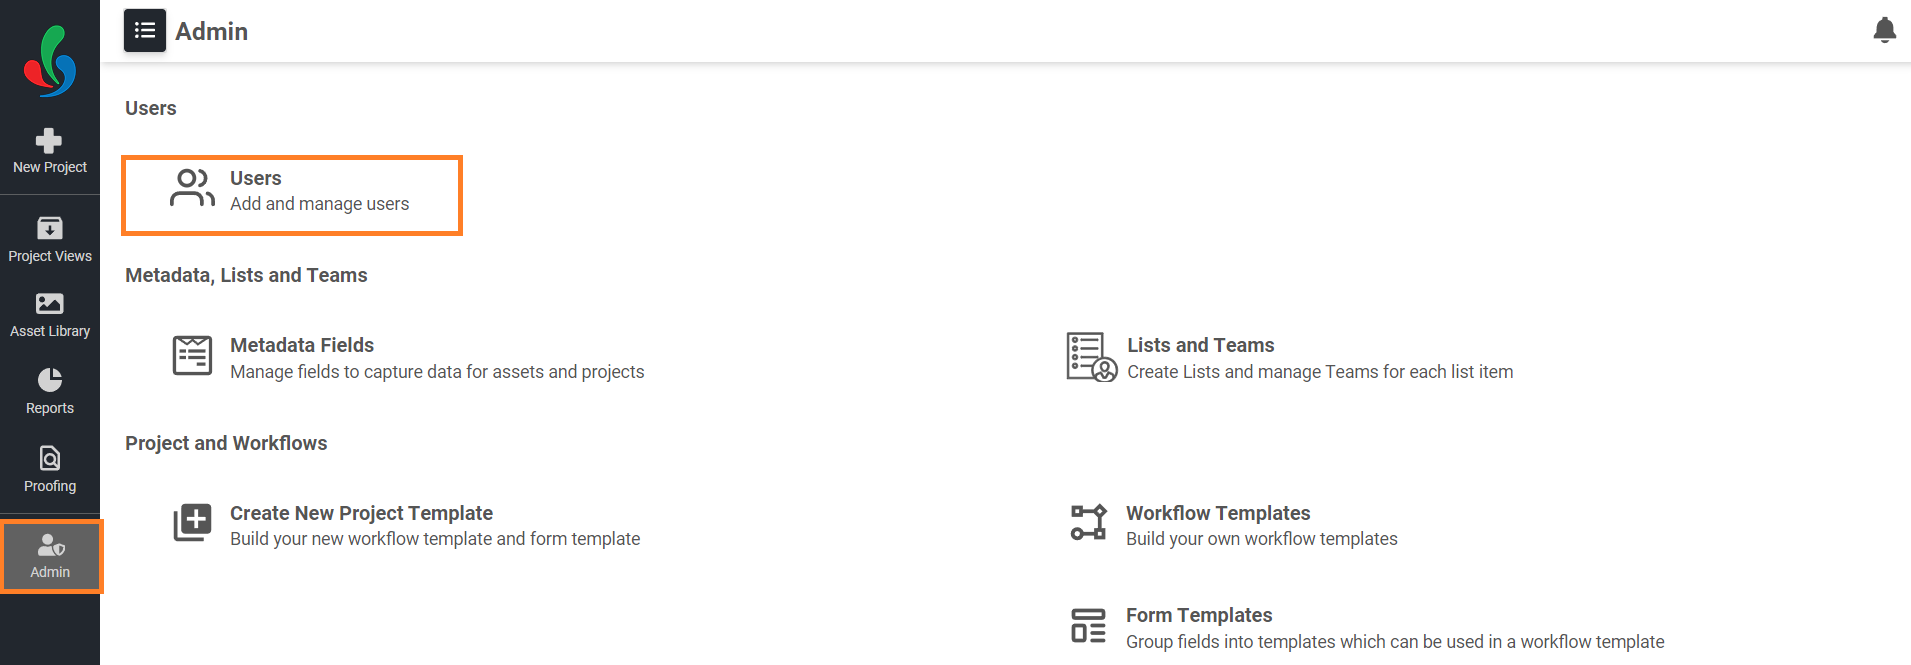
1. Sign in to your [ManageArtworks](https://app.manageartworks.com/karomi/global/build/login) account.
2. Navigate to the **Admin** module.
3. Select **Users**.
## 02\. Create a New User
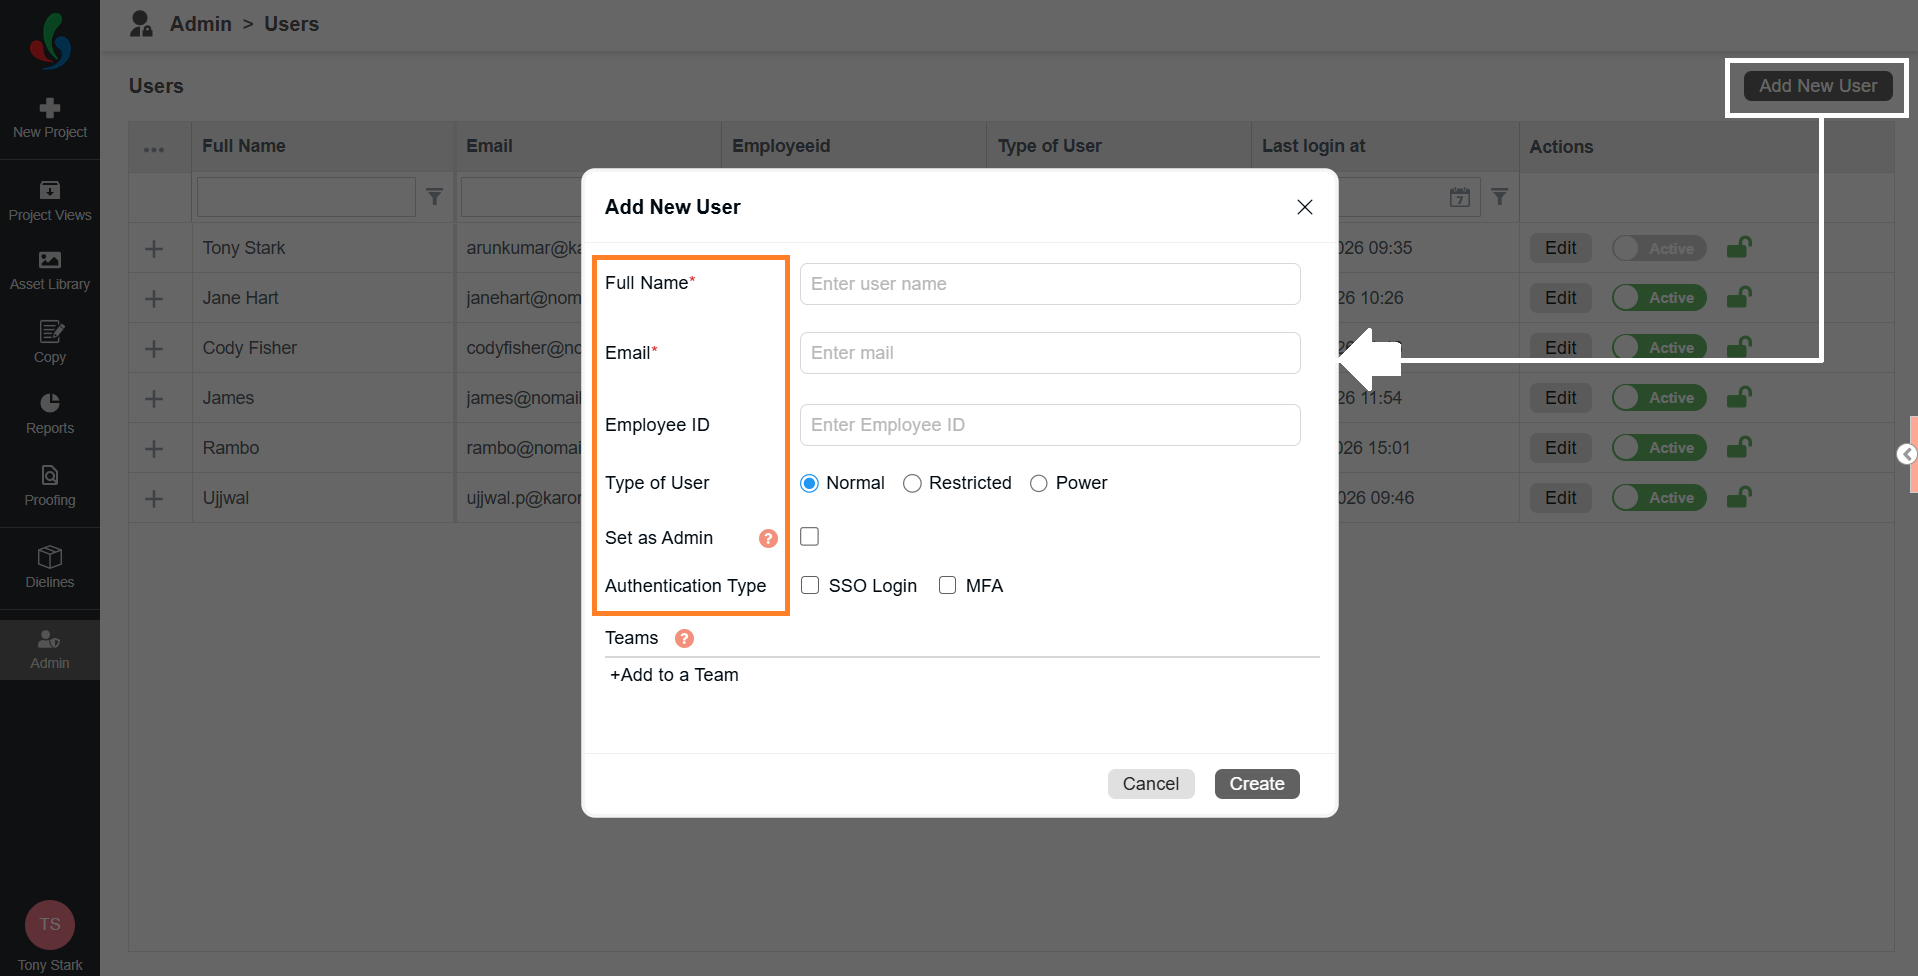
1. Select the **Add New User** button in the upper-right corner.
2. A pop-up form opens and prompts you to enter the following details:
- **Full Name:** Enter the user's full name.
**Note:** You can enter up to 50 characters, including letters, numbers, spaces, accented characters, and apostrophes — for example, O'Brien or Héloïse.
- **Email Address:** Enter a valid email address for the user.
**Note:** You must enter an email address that is not already used by another user in your account.
- **Employee ID (Optional):** Enter the user's employee ID.
**Note:** You can enter letters, numbers, hyphens (-), and underscores (\_). The employee ID must be unique in your account.
- **Type of User:** Choose the appropriate security level:
- **Normal:** For basic access to view, upload, download, share, and update files.
- **Power:** Includes all Normal permissions plus delete rights and eligibility for admin access.
- **Restricted:** For limited viewing and sharing permissions, with custom configurations.
- **Set as Admin (Optional):** Select this checkbox to grant administrative privileges. Users with admin rights can access the Admin module and use all administrative features.
**Note:** Only **Power** users can be set as Admins.
- **Authentication Type (Optional):** Select this checkbox to enable multifactor authentication (MFA) for the user.
When enabled, the user must verify their identity using a one-time password (OTP) sent to their registered email address each time they sign in.
- To learn more about MFA, see [Sign in using MFA](https://help.manageartworks.com/en/article/login-using-mfa).
|  | **Important – Applies Only To (Restricted Users Only)**
If **Restricted** is selected as the user type, the **Applies Only To** dropdown will appear. This lets you define where the user's access restrictions apply:
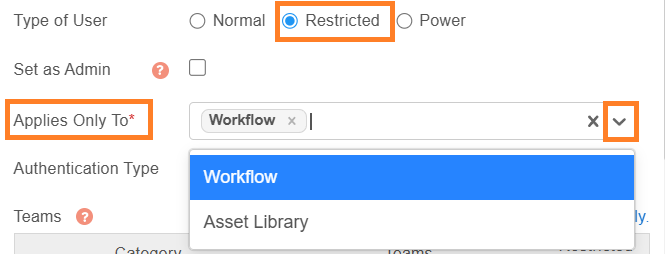
- **Workflow**: Restrictions apply only to workflows. The user will still have unrestricted access to the Asset Library.
- **Asset Library**: Restrictions apply only to the Asset Library. The user will have unrestricted access to workflows.
- You can select **both** to fully enforce access limitations across both modules.
**Example:**
If you assign an asset type or team to a restricted user and select only **Workflow**, the user can access only the configured files within workflows—but will have full access to the Asset Library. To enforce consistent restrictions across both areas, select both **Workflow and Asset Library**. |
| --- | --- |
## 03\. Assign Teams
|  | **Important – Applies Only To Restricted Users Type**
If you're creating a **Restricted** user, selecting an **Asset Type** is mandatory. This defines the type of assets the user can access. Select the Teams drop down menu and select desired asset type(s).
 |
| --- | --- |
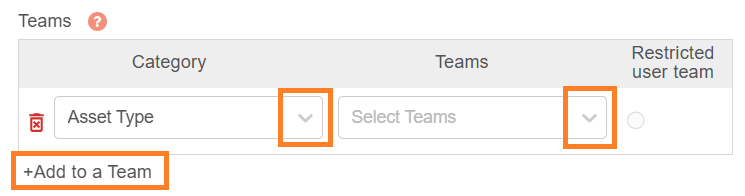
1. Select **+Add to a Team** to associate the user with specific teams and categories.
2. Select a category from the Category drop-down list.
3. Select one or more teams from the Teams drop-down list.
|  | **Note:** A **Restricted** user must be assigned to a team, and to only one team. **Normal** and **Power** users can be assigned to multiple teams. |
| --- | --- |
## 04\. Finalize and Create
1. Once you've entered all necessary information, select the **Create** button to add the new user.
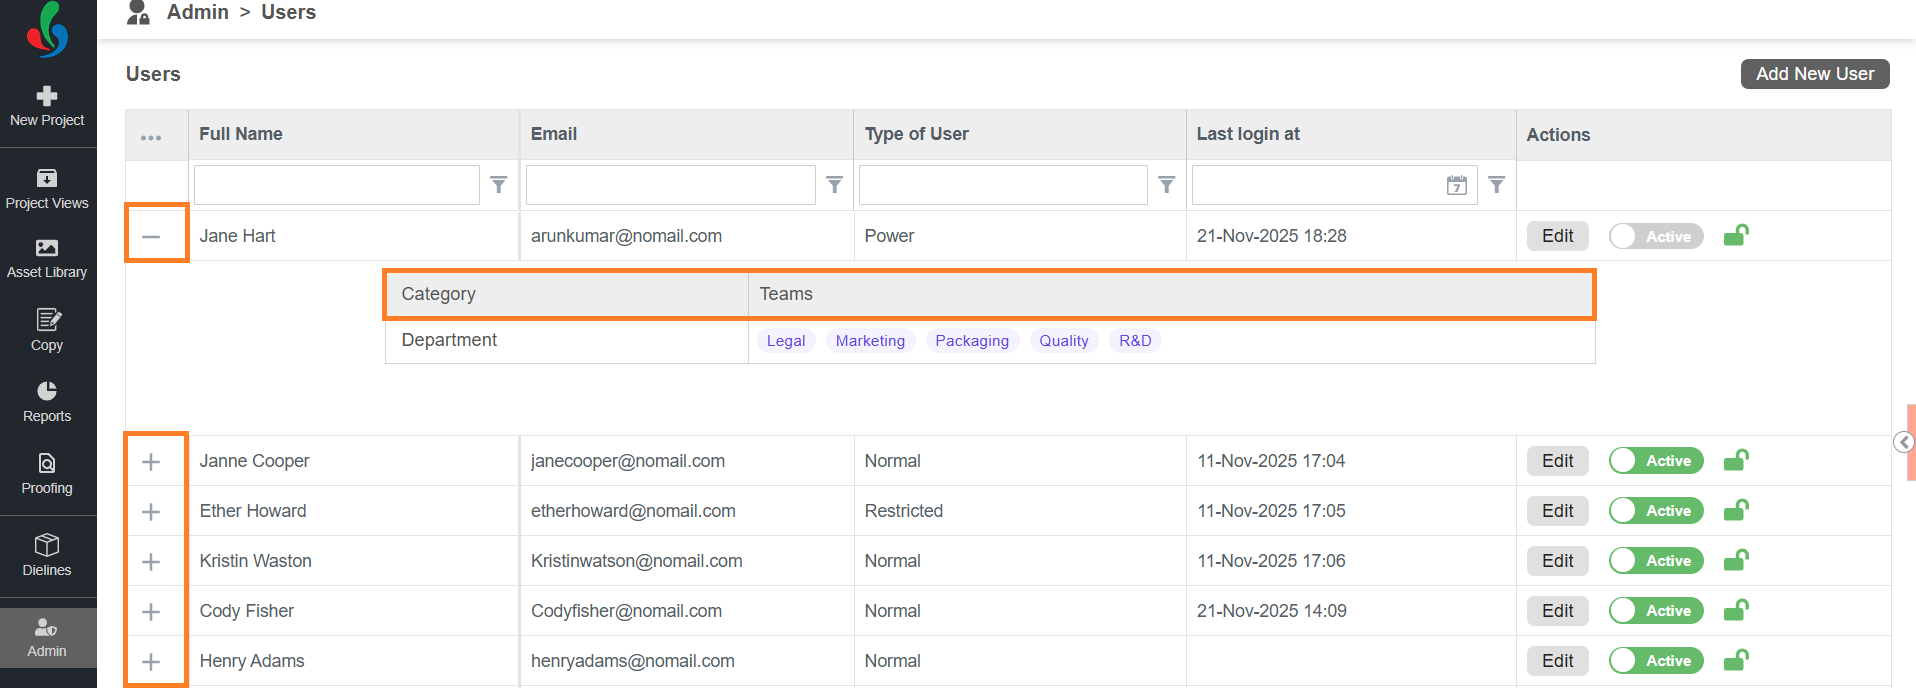
- To view the users associated teams and categories, select the **plus icon** to expand a user's profile.
[Manage User(s)](https://help.manageartworks.com/en/article/manage-users)